Introduction
There is a moment in pottery when you finish a piece you love and immediately wish you had five more. Maybe it is a mug that fits your hand exactly, or a small dish that finally holds the keys by the door.
Slip casting is the method that makes those repeats possible. You build one plaster mold, pour liquid clay into it, and lift out the same form again and again.
It sounds industrial, and in a way it is. Factories have used slip casting for two centuries to make plates, pitchers, and figurines. The same process fits comfortably on a kitchen table.
This guide walks the whole arc: what casting slip is, how to build a simple mold, how to pour and unmold, and how to dry and finish pieces that survive the kiln.
You do not need a wheel or a studio. You need plaster, a bucket, a kitchen scale, and some patience with drying times.
Why Repeat Forms Are Worth the Mold
Hand-building and throwing on the wheel are the other two routes into pottery, and both reward practice. Slip casting solves a different problem: repetition.
If you want four matching mugs for a shelf, one mold does the work of four careful sessions. The forms come out identical in a way hand-building rarely manages.
A mold also makes shapes that are awkward on the wheel: oval trays, square vases, pieces with fine relief and texture pressed into the plaster.
And because the mold does the shaping, your hands are free for the parts that show — the seam, the rim, the glaze.
There is a trade-off worth naming. A mold commits you to one shape. If you love variety more than repeats, hand-building will suit you better.
The cost of entry is modest, too. Plaster, a cottle you can make from cardstock, and a gallon of ready-mixed slip will carry you through your first several molds.
What Casting Slip Actually Is
Casting slip is not clay thinned with water. That distinction is the whole method, and it trips up almost every beginner once.
Slip is clay mixed with water and a small amount of deflocculant, usually sodium silicate or soda ash. The deflocculant makes the clay particles repel one another.
Because the particles no longer clump, the mixture flows like heavy cream while holding only about 30 to 35 percent water. Ordinary watered clay needs far more.
Too much water causes real trouble. The cast shrinks more, dries weaker, slumps in the mold, and settles into a hard layer at the bottom of your bucket.
The number potters use is specific gravity, roughly 1.7 to 1.8 for casting slip. A liter of it weighs about 1.7 to 1.8 kilograms.
You can check yours with a small cup and a kitchen scale. Weigh 100 ml of well-stirred slip; it should read about 170 to 180 grams.
Buy casting slip ready-mixed for your first mold. Mixing your own from dry clay and deflocculant works, but it takes testing to get the water right.
Signs that your slip is ready to pour:
- It coats a finger evenly and drips slowly, not in a thin stream.
- It leaves a ring on the bucket wall that fades within a few seconds.
- It smells earthy, not sour. A sour smell means it has sat too long.
Making Your First Simple One-Piece Mold
Start with a form that has no undercuts: no bulge wider than its base, no handle, no inward curve. A plain tumbler, a shallow dish, or a small bud vase is ideal.
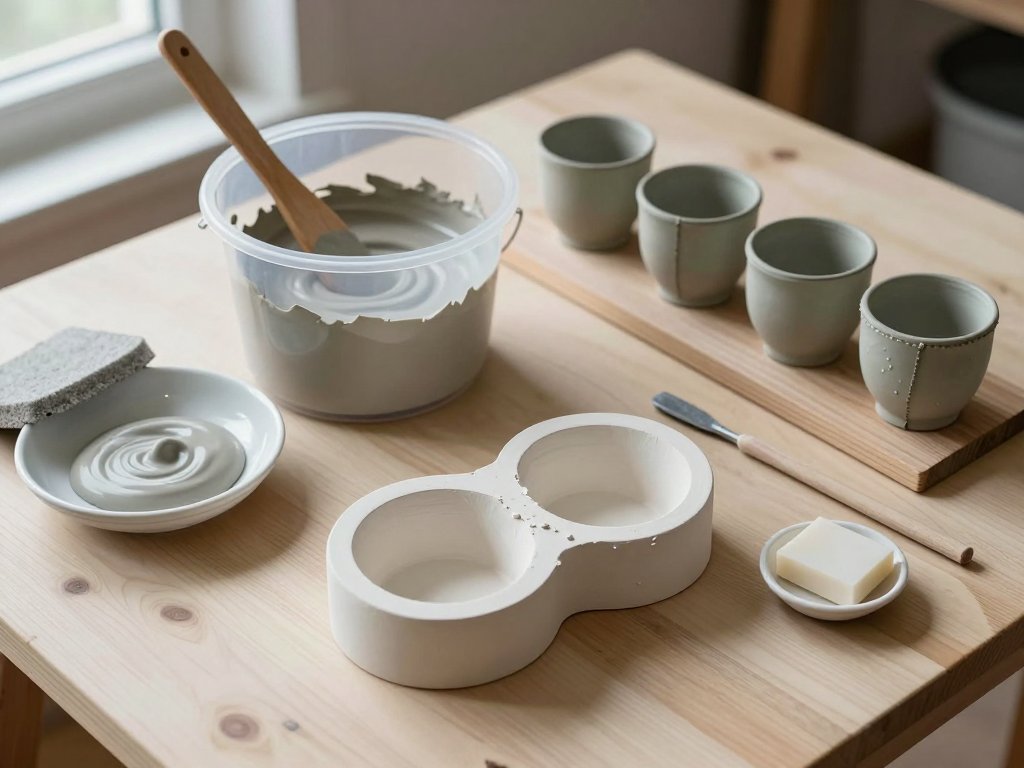
You also need a cottle, the wall that holds plaster around your model. Heavy cardstock taped and sealed with hot glue is enough for a first mold.
Set the model upside down on a flat, sealed board. The open rim rests on the board, and plaster will surround the outside only.
Seal the model before you pour. Porous clay and wood drink plaster; a coat of soft soap or a commercial mold release prevents that.
- Build the cottle around the model, leaving at least 2 cm of plaster on every side and 3 cm above the highest point.
- Seal every seam with hot glue or a coil of clay so plaster cannot leak out overnight.
- Weigh plaster and water at 100 parts plaster to 70 parts water by weight — for example, 1 kg plaster to 700 g water.
- Sprinkle plaster into the water and let it slake for two minutes, then stir gently for two more.
- Tap the bucket, then pour slowly from one corner and let the plaster rise around the model.
- Tap the outside of the cottle to release bubbles, then leave it completely undisturbed.
- Wait until the plaster is firm and cool to the touch, about 30 to 45 minutes, before removing the cottle.
Trim the top edge with a rasp while the plaster is still slightly green, then set the mold somewhere airy to dry.
Do not pull the model out early. Green plaster is fragile, and a torn mold will leak at the rim for the rest of its life.
Let the mold dry for several days before its first pour. A damp mold cannot absorb water, so the wall will build slowly or not at all.
A Two-Part Mold, Step by Step
A two-part mold is what you need the moment your form has a bulge, a handle, or any shape that would lock into a one-piece block.
The idea is simple: cast the top half, then the bottom half, with the model itself acting as the divider between them.
- Bed the model in clay up to its widest line — the parting line — on a flat board. Pack the clay smooth and level.
- Press three or four rounded hollows into the clay around the model with the back of a spoon. These become keys that lock the halves together.
- Build the cottle and seal it. Paint the exposed model and clay with soft soap, two thin coats, letting the first dry.
- Pour the first half, tap out the bubbles, and let it set fully.
- Remove the cottle, flip the whole assembly, and take away the bedding clay. The model's other half is now exposed.
- Soap the plaster face of the first half thoroughly. Beginners rush this step, and it decides whether the mold ever opens.
- Rebuild the cottle and pour the second half over the exposed model and the soaped face.
- Once set, separate the halves, ease the model out, and cut a pouring hole at the top.
Cut the pour hole wide enough for a funnel or a steady hand, roughly 2 to 3 cm across for a mug. A narrow hole makes every pour a mess.
Let both halves dry completely, then test-fit them. They should seat with a soft click and no rocking at all.
If the halves do not meet flush, look for a chip of plaster or a smear of clay on the keys before you blame the mold.
Caring for a Plaster Mold
Plaster molds are consumable. Expect roughly 40 to 60 casts from a well-treated mold before the detail softens and the walls build more slowly.
The plaster is slightly soluble. Each pour draws water in and each drying cycle pulls it back out, and the face slowly erodes.
Clay is mildly acidic, too, so it etches the surface a little with every cast. Nothing stops this; careful handling only slows it down.
Care is mostly about dryness and gentleness. Dry molds between casts, never scrape them with metal, and store them face to face with paper between.
A mold that stays damp grows bloom and stops absorbing. We will come back to that in troubleshooting.
Pouring a Hollow Cast With Real Timings
Hollow casting is how a mold makes a vessel rather than a solid block. The plaster pulls water out of the slip, building a wall against its face.
The wall grows from the outside in, so time is your thickness control. Everything else is consistency.
- Stir the slip well, then pour in a steady stream down the side of the pour hole, not into the middle.
- Fill to the top and start a timer. The level will begin dropping within a minute or two.
- Top up the mold as it drinks. Do this gently, without stirring or jiggling.
- Choose your wall by time: about 5 minutes gives a delicate cup, 10 to 15 minutes a sturdy mug.
- When the time is up, pour the excess slip back into your bucket in one smooth motion.
- Invert the mold over the bucket and let the last of it drain for a minute or two.
- Set the mold upright and let the cast firm up inside it.
Watch the rim as the slip drains away. A good wall looks even and matte at the edge, not glassy or slumping inward.
If one side is noticeably thicker, that part of the mold was probably cooler or damper. Note it, and dry that mold longer next time.
Solid Casting for Small Pieces
Small, chunky items — buttons, beads, tiny figures, handles — can be cast solid. Fill the mold and leave it; there is nothing to drain.
Solid casting only works when the piece is small. A thick solid mass shrinks unevenly as it dries and will crack or warp.
Keep solid casts under roughly 2 cm through the body. Anything thicker should be hollow, or made in a mold that lets you pour the excess away.
Demolding and Fettling
The cast comes out at the leather-hard stage: firm enough to hold its shape, cool and slightly damp, denting under a fingernail.
That window is narrow, often 20 to 40 minutes after draining. Too early and the piece slumps; too late and it is brittle at the seam.
- Run a thin wooden tool around the pour hole to free the rim.
- Open the mold halves slowly and evenly, holding the cast with a flat hand.
- Set the piece on a board and support its base fully. Never let a soft cast hang over an edge.
- Trim the seam with a wooden tool, scraping in one direction rather than sawing back and forth.
- Blend the seam with a damp sponge, then finish with a finger or a soft sponge.
Fettling is where a cast stops looking like a cast. Work the seam while the clay is still damp, and go lightly.
Over-sponging rounds edges and drags clay across the surface. A few firm passes beat twenty gentle ones.
Soften the rim while you are there, and check the base for a flat foot that will sit without rocking on the shelf.
Drying Without Cracks
Fresh casts are fragile in a way that surprises people. They are damp, and damp clay shrinks as it dries — unevenly if you rush it.
Dry pieces slowly and evenly. A plastic bag with a few holes, a damp box, or a closed cupboard all work; a sunny windowsill does not.
Turn each piece every day or two so the base and rim lose water at the same rate. Keep them off cold floors and out of drafts.
Thin cast cups may be dry enough to handle in two or three days. Thicker or solid pieces need one to two weeks.
A piece is bone dry when it feels room-temperature and looks lighter in color all over. It also stops losing weight.
- Cracks at the seam usually mean one side dried faster than the other.
- A warped rim often means the piece was moved while still soft.
- White bloom on the surface is salt drawn out by fast drying; sponge it off and slow the process down.
A First Bisque and a First Glaze
Bisque firing turns dry cast work into a porous, durable object you can glaze. Most mid-fire stoneware clays bisque to cone 04, around 1,060°C.
Leave space between pieces in the kiln, and keep thick and thin work on separate shelves so they heat at similar rates.
After bisque, wax the foot ring, dip or brush on glaze, and wipe the base clean before the glaze fire.
Two practical habits: never fire damp work, and keep a kiln log with the cone, the time, and what was inside.
When Something Goes Wrong
Most slip casting problems trace back to three things: slip consistency, mold condition, and timing. Here are the ones you will actually meet.
- Bubbles in the wall. Pour down the side and slower, tap the mold, and let freshly stirred slip rest an hour.
- Walls too thick or too thin. Adjust drain time first, then check specific gravity — heavy slip builds fast.
- A cast that will not release. Usually an undercut, or a mold poured without enough soap. Tap the outside, then try gentle air through the pour hole.
- White mold bloom. Salts pushed out of the plaster. Scrub with a vinegar-and-water solution, rinse, and dry fully.
- Seams that will not close. Clean the keys, check for plaster chips, and make sure no clay shim is stuck in the registration.
- Soft, crumbly casts. The mold is too damp to absorb, or the slip is over-watered. Dry the mold and reweigh 100 ml.
Change one variable at a time and write down what you changed. Slip casting rewards records more than intuition.
Keep a small notebook with drain time, slip weight, and result for each pour. After ten casts you will have your own reliable numbers.
Small-Batch Production for Gifts or a Stall
Once a mold is behaving, small batches become calm work. One mold, one bucket of slip, and a free morning can produce a set of six.
Pour in the morning and again in the afternoon, letting the mold dry in between. Two pours a day is a comfortable pace.
Keep a board for each stage: poured, draining, leather-hard, drying. Moving pieces through in groups prevents the "which one is ready?" scramble.
For gifts, four matching cups in one glaze read as intentional and generous. For a craft stall, the repetition is what makes the work affordable to sell.
Count real costs before pricing: slip per piece, plaster spread across the mold's life, glaze, and firing. Guessing usually underprices the firing.
A Warm Closing
Slip casting asks something different of you than the wheel does. Less spontaneity, more setup, and a willingness to let plaster set without prodding it.
In return it gives you something quietly satisfying: a shelf of forms that match, made by your own hands from a mold you built.
Your first mold will probably have a rough edge and a seam that needs extra fettling. That is normal, and it does not matter.
Make one, cast it four times, and see what you learn. The second mold will be better, and the tenth will feel almost easy.