Introduction
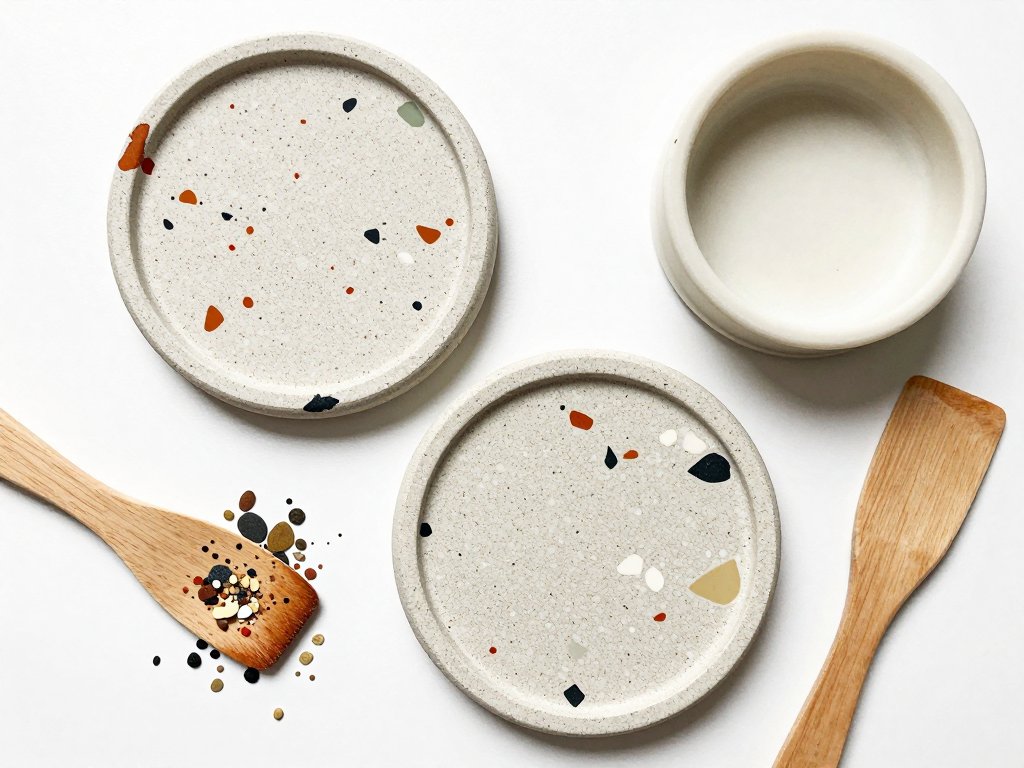
Terrazzo looks expensive and behaves like a leftovers project. Small chips of colour sit suspended in a solid base, then the whole surface is sanded flat so the flecks read as part of the stone.
That is the whole trick. You are not painting speckles on top of anything. You are burying chips and grinding back down to them.
This guide covers both routes — clay and resin — with the chip sizes, ratios, and sanding sequence that make the difference between terrazzo and confetti.
What Terrazzo Is and Why Crafters Copy It
Venetian terrazzo began as a flooring trade built on waste. Marble offcuts from stair and threshold work were set into a lime or cement bed, then ground flat with abrasive stones and polished.
The earliest surviving examples date to fifteenth-century Italy, and the logic has not changed in six hundred years. Cheap aggregate plus a binder plus abrasion equals a surface that looks quarried rather than assembled.
What sells the look is the flatness. A mosaic has grout lines and a lumpy profile. Terrazzo has none — the chips and the matrix sit in one continuous plane.
Crafters borrow the idea for three reasons. Scrap becomes the feature instead of the guilt. The palette is easy to control. And a coaster-sized piece takes an afternoon, not a season.
The look also suits modern rooms: charcoal, sand, rust, sage, and off-white chips in a pale or dark base, with no pattern to match and no repeat to align.
Two Routes to the Same Speckle
You can build terrazzo in clay or in resin. Both work. They fail in different ways, cost differently, and suit different objects, so pick by project rather than by preference.
The Clay Route
Here the matrix is polymer clay or air-dry clay, and the chips are pressed into a rolled slab before curing. Polymer clay bakes in a home oven; air-dry clay sets on the counter over a day or two.
Clay is forgiving in the way beginners need. You can lift a chip out with a blade, re-roll a lumpy slab, or trim a rim that went crooked. Nothing is permanent until it bakes.
It suits coasters, shallow trinket dishes, drawer pulls, and jewellery blanks. The surface is warm and slightly matte, which reads as ceramic rather than stone.
Cost is small: a few dollars of polymer clay and a handful of scrap covers several pieces, and most of us already own the knife and the rolling pin.
The Resin Route
Resin gives you depth and gloss that clay cannot. Epoxy pours clear, so chips appear suspended rather than embedded, and the finished surface takes a glassy polish.
It suits thin glossy coasters, small trays, and jewellery where you want to see through the matrix. It also handles very fine aggregate that would vanish in clay.
The outlay is higher. A starter resin kit costs noticeably more than a clay block, though the resin used per coaster is only a few dollars' worth.
Choose UV resin for pieces under about six millimetres thick — it cures in minutes under a lamp. Choose two-part epoxy for anything deeper, and plan on a full day before demoulding.
Clay or Resin at a Glance
- Base: polymer or air-dry clay versus UV or two-part epoxy resin.
- Cure: 30 minutes in the oven or 24 hours on the counter, versus minutes under UV or 24 to 72 hours.
- Finish: warm matte to satin, versus glassy and deep.
- Best for: dishes, pulls, and chunky jewellery versus thin coasters, trays, and translucent pieces.
- Forgiveness: high — you can rework before curing, versus low — a bad mix stays bad.
- Budget: a few dollars per piece either way, but the resin kit costs more up front.
Making Your Own Chips
Buying aggregate is fast, but the cheapest and most personal chips come from what is already in your scrap bin. Three sources work well.
Crushing Scrap Clay
Roll leftover polymer clay into a slab about four millimetres thick and bake it hard. Once cool, it snaps like a biscuit instead of smearing like putty.
Break it with flat-nose pliers or a mortar and pestle, then sieve. Chilling the baked slab for ten minutes first gives cleaner breaks and less dust.
Air-dry clay works the same way once fully dry, though it crumbles more and produces softer-edged chips. Bake or dry your scraps the same day you tidy your workspace and you will always have a jar on hand.
If you would rather build pattern into the clay than break it apart, nerikomi pottery is the related technique — coloured clay layered and sliced so the pattern runs through the body.
Breaking Ceramic Offcuts Safely
Glazed ceramic shards make the crispest chips, but they are sharp and the dust is a real hazard. Put safety glasses on before anything else.
Bag the offcuts in a thick zip bag, then wrap that bag in an old towel. Set it on concrete outside, not on a kitchen counter, and strike with a hammer in short, controlled taps.
Sieve the result through a stack of kitchen sieves or a set of soil sieves. Keep three grades — fine, medium, and coarse — in separate jars with lids.
Wear an N95 mask while sieving, work outdoors or near an open window, and wipe surfaces with a damp cloth rather than brushing. Silica dust is the one part of this craft worth being fussy about.
Buying Frit and Stone Chips
Glass frit sold for fusing comes in labelled mesh sizes and gives bright, translucent flecks. Crushed granite and marble chips sold for plant topping or terrazzo repair are cheaper by volume.
Rinse bought aggregate in a sieve and dry it fully before use. Dust on the chips clouds resin and stops clay from gripping them.
One small bag of stone chips lasts many projects. Buy two colours plus a neutral, and you have a palette that will not fight itself.
Chip Size and Density: The Ratio That Reads Terrazzo
This is where most first attempts go wrong. Too few chips and the piece looks dusty. Too many and it looks like a mosaic with the grout left out.
Aim for roughly 20 to 30 percent visible chip coverage. That is enough to read as flecked stone and still leaves the matrix doing visible work between the chips.
Mix the sizes rather than using one grade. A workable split by volume is about half small chips of one to two millimetres, a third medium at three to four millimetres, and the rest large at five to eight millimetres.
Small chips fill the gaps and create texture; large chips give the eye something to land on. Use only large chips and the surface looks like gravel. Use only fine and it looks like pepper.
Limit yourself to two or three chip colours against the base. Four or more turns the surface busy and the modern calm disappears.
Keeping Edges Clean at the Mould Wall
Chips pressed hard against the mould wall leave a ragged silhouette and often break away when you demould. Keep them two or three millimetres back from the edge.
Run a fingertip of base clay around the rim before curing, or wipe the wall with a straight edge so the matrix forms a clean border. A crisp edge is what makes the piece look made rather than improvised.
Also keep chips below the surface by at least a millimetre of base. Anything proud of the surface will catch on the sandpaper and tear out, leaving a crater.
Project: A Terrazzo Coaster in Clay
This is the version I recommend for a first attempt. It uses one mould, one base colour, and three chip colours, and it takes about ninety minutes plus baking.
What You Need
- One block of polymer clay in charcoal, ecru, or sand for the base.
- Scrap polymer clay in three contrasting colours for chips.
- A silicone coaster mould, or a smooth ceramic tile as a flat form.
- An acrylic roller or a straight glass, plus baking paper.
- A craft knife, a small silicone tool, and a little cornflour.
- Wet-and-dry paper in 400, 800, 1200, and 2000 grit.
Step by Step
- Condition the base. Knead the block until it is soft and even, then roll a slab five to six millimetres thick on baking paper. Work on paper so you can move the slab without distorting it.
- Make and grade the chips. Bake a thin scrap slab, crush it, and sieve into three jars. Set them in a row within reach so you can sprinkle without stopping to hunt.
- Chill the slab. Ten minutes in the fridge firms the surface so chips sit where you put them instead of sinking. This one step fixes most float-and-sink problems before they start.
- Sprinkle and press. Scatter the three grades to about a quarter coverage, then press each chip flush with a fingertip or silicone tool. Do not push them under — flush is the goal.
- Roll level. Lay baking paper over the slab and roll lightly once along the length, then once across. Light pressure beds the chips and closes the air they trapped.
- Trim the rim while soft. Run the knife around the mould wall at a slight outward angle and pare away the overflow. A damp fingertip smooths the cut edge before it firms.
- Smooth the back. Flip the slab onto fresh paper and press it flat with the tile. Check with a fingertip for any chip poking through, and press it back in if you find one.
- Bake and cool. Follow the clay package — usually about thirty minutes at 130°C for a slab this thick. Cool it fully in the mould so it does not warp as it stiffens.
The Resin Route: Pouring a Flecked Coaster or Tray
Resin rewards discipline more than touch. Measure properly, pour thin, and resist the urge to demould early.
Mixing Ratio Discipline
Measure by weight on a digital scale, not by eye and not in cups. Follow your kit exactly — many epoxies are two to one by volume but closer to two to one by weight only if the label says so.
Scrape the sides and bottom of the cup while stirring, slowly, for a full three minutes. Fast stirring whips in bubbles; lazy stirring leaves unmixed resin that stays tacky in patches.
Pouring in Thin Layers
Pour a base layer of about three millimetres, then let it sit twenty minutes until it thickens. Place the chips into that tacky layer with tweezers, keeping them back from the walls.
Cover with a second pour, again around three millimetres. Two thin layers release bubbles far better than one deep pour, and they stop the chips from drifting to the bottom.
For UV resin, work in shade and build in two-millimetre increments, curing each under the lamp for two to four minutes before adding the next.
Bubbles, Demoulding, and Cure
Run a heat gun about fifteen centimetres above the surface in slow passes, or breathe warm air across it. A spritz of isopropyl alcohol also breaks surface tension.
Cover the mould with a box lid while it cures; dust settling into wet resin is the most common reason a first pour looks cloudy. Demould epoxy at twenty-four hours and leave it to reach full hardness for another two days before sanding.
Finishing: Sanding Flat and Sealing
Finishing is where terrazzo becomes terrazzo. Sanding reveals the chips at full width and flattens everything into one plane.
The Grit Progression
Work through 400, then 800, then 1200, then 2000. Each grit removes the scratches of the one before it; skipping a step means the coarse scratches stay visible under the polish.
Use a flat surface — a glass sheet or a floor tile — and move the piece in a figure-eight rather than back and forth. That prevents a dip from forming in the middle.
Wipe the piece and change the water between grits. Spend roughly twice as long on the first grit as the last.
Why Water Matters
Wet sanding does three jobs. It keeps silica and resin dust out of the air, it lubricates so the abrasive cuts instead of gouging, and it stops the paper clogging.
Clogged paper is what leaves those grey scratch marks that will not buff out. Dry sanding clay also smears the surface and drags colour across the chips.
Add a drop of dish soap to the water and keep a shallow tray beside you. Never rinse resin dust down a sink without a trap.
Matte or Gloss
For a matte finish, stop at 800 and seal with two thin coats of matte polyurethane, letting each dry fully. The surface stays stone-like and hides small scratches.
For gloss, take it to 2000 and then polish — resin with a plastic polishing compound, clay with a thin glaze or a hard wax buffed in circles.
Seal clay coasters regardless of finish. Polymer clay is porous enough that a wet glass will leave a ring, and the sealer is what makes the piece usable rather than decorative.
Troubleshooting
Chips That Float or Sink
In clay, the base was too warm and soft. Chill the slab before pressing, and use chips no larger than the slab is thick.
In resin, the pour was too deep. Set chips in a thickened three-millimetre layer, or wait until the resin reaches a honey consistency before placing them.
Cloudy Resin
Cloudiness usually means moisture, cold, or over-stirring. Work in a room at about 22 to 24°C, warm the bottles in a water bath, and stir slowly for the full time.
Amine blush — a waxy film on cured epoxy — also reads as cloud. Wipe it with warm soapy water before sanding, or it will clog the paper instantly.
Air Pockets at the Chip Edge
Air hides where a chip meets the matrix. Press chips in firmly, tap the mould on the bench to raise bubbles, and stipple around each chip with a toothpick.
Sealing chips with a thin coat of resin before the main pour also helps — the chip stops acting like a tiny wall that traps air.
Crumbling Rims
Air-dry clay crumbles at thin edges, especially if chips sit too close to the border. Trim at leather-hard rather than bone dry, and leave a matrix border of at least three millimetres.
If a rim has already cracked, wet it slightly, press fresh base clay into the gap, and re-sand once dry.
Sanding Marks
Scratches that survive polishing mean a skipped grit or too much pressure. Drop back one grade and sand the whole surface again, not just the mark.
Swirl marks come from circular motion with a worn disc. Switch to a figure-eight by hand and use fresh paper.
Styling and Scaling Up
Terrazzo pieces earn their place because they look calm next to almost anything. A set of four coasters in charcoal and sand sits easily on a wooden table or a white one.
A shallow trinket dish is the same process pressed into a bowl mould — drape the slab over the outside of an oven-safe bowl and bake it there for a curved profile.
Drawer pulls take a resin pour in a small silicone mould, with a threaded insert set in before curing. Plant saucers work in either material, though resin handles damp soil better over time.
To scale up to a small tray, keep the ratio and change the pour. A tray of about 20 by 30 centimetres needs two layers of eight millimetres each, with chips only in the lower layer.
Multiply length by width by depth in centimetres to get millilitres of resin, add ten percent for waste, and pour on a level surface. Deep pours heat up, so never exceed the maximum depth your resin specifies.
Conclusion
Terrazzo is one of the few techniques where the cheapest materials give the best result. Your scrap bin supplies the flecks; the base is one block or one small pour.
Start with the coaster. Get the density right, sand it wet through the grits, and seal it properly, and you will have learned everything the tray asks for.
Then make a second one in a different palette and see how differently the same method reads. That is the quiet pleasure of this craft — the recipe stays fixed and the surface keeps changing.