Introduction
Some pots look as though they were dug out of a riverbank. The rim is pale, the carved lines are dark, and a soft brown haze sits across the belly where a hand has rested. It reads as age.
That look is not age. It is an oxide wash: a thin, watery stain of metal oxide brushed onto a bisque-fired pot, then wiped back from the high points.
The colour stays where your cloth cannot reach — inside the carving, along the throwing rings, in the pressed texture of a leaf.
If your glazed pots have started to feel a little too even, a wash is the correction. It is inexpensive, forgiving, and it works with the pot's own surface instead of sealing it away.
What follows is less a recipe than an explanation of behaviour: what each oxide does, how to apply it, and what the kiln will quietly change.
What an Oxide Wash Actually Is
A glaze is glass. It melts, flows, and forms a sealed surface, and its colour usually comes from oxides held inside that glass. An oxide wash is not glass at all.
It is oxide powder suspended in water — a stain rather than a coating. Brush it on and the water sinks into the porous bisque, carrying the colour a fraction of a millimetre into the clay.
Because there is no glass former in the wash, it does not seal the pot. Fired on its own, it leaves a matte, slightly dry surface that looks like stained stone.
A few drops of gum arabic, or a pinch of frit, help the powder cling to the bisque and stop it rubbing off on your hands while you work.
It is not the same as an engobe or slip, either. Those are liquid clay — thicker, more opaque, and capable of hiding the body beneath them. A wash has no clay in it at all, which is why it never quite covers.
Underglaze is the nearest neighbour, and the difference matters. Underglaze painting uses a prepared opaque colour that sits on the surface and lets you draw. A wash is transparent; it tints the clay rather than covering it.
The Oxides and the Colours They Give
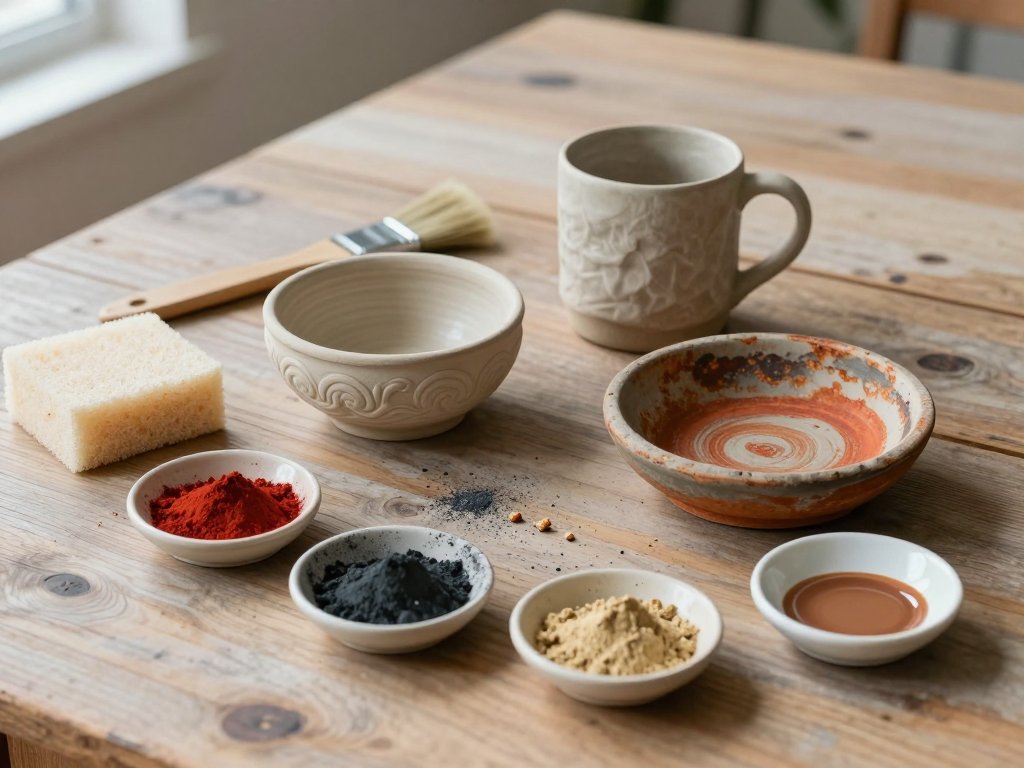
Five oxides do most of the work in a beginner's cupboard. All of them are strong. A wash that looks like weak tea going on can fire to a deep, saturated colour.
- Iron oxide — rusty orange-brown in a thin coat, deepening to chocolate and then near-black where it pools. The workhorse of the group, and the most forgiving.
- Copper oxide — green in an oxidation firing, and a deep blood red in reduction, where the kiln is starved of oxygen. Unpredictable, and worth the gamble.
- Cobalt oxide — an intense, staining blue. A pinch in a jam jar is plenty; too much fires to a flat, inky black.
- Manganese dioxide — aubergine, purple-brown, near-black when thick. Beautiful, and the one to handle most carefully.
- Rutile — a titanium ore with iron in it. Creamy tan, warm buff, and a fine speckle that softens whatever it touches.
They mix well, too. Iron with a little cobalt gives a soft black. Cobalt under rutile turns a hard blue grey-green at the edges. Iron and rutile together make a toasty amber that looks like old honey.
A Word About Safety
Oxide powders are fine, light, and easy to breathe in without noticing. Treat them the way you would treat any fine dust in a house with children in it.
- Wear a dust mask when you weigh or mix powder, and gloves when you brush it on.
- No food or drink at the worktable, and wash your hands before you leave it.
- Keep jars closed and out of reach of children and pets. Manganese deserves particular respect.
- Label every container with the oxide name and the date you mixed it. Unlabelled brown sludge is useless within a month.
- Never pour wash down the sink. Let the jar settle, pour off the clear water, and let the sludge dry before binning it.
Mixing a Wash
Start with one part oxide to three parts water by volume, and thin from there. The target is the consistency of thin milk — it should run off the brush in a quick, even stream.
Some oxides need more water than others. Cobalt is dense and settles fast; iron hangs in suspension more willingly. Judge by how the wash looks on the pot, not by the ratio on paper.
Add a drop or two of gum arabic, or a pinch of clear frit, and stir. Both help the powder adhere to the bisque, and the frit gives the wash the faintest sheen at high fire.
Mix it in a lidded jar and shake rather than stirring with a stick. The powder is fine enough to float, and shaking keeps it out of the air.
If the wash looks grainy on the tile, pour it through a fine kitchen sieve. A few seconds of sieving removes the small lumps that later read as dark specks or cause a crust.
Wash settles overnight into a jar of clear water over a layer of sludge. Add water, shake, and it is ready again. Label it and it will keep for months.
Then test it. A wash on a scrap tile tells you more in ten minutes than any instruction can.
Preparing the Bisque Surface
A wash needs a bisque-fired pot. Raw clay is too soft; the water in the wash would lift the surface and blur whatever texture you had built into it.
Bisque firing to cone 06 or 04 leaves the clay porous and thirsty, which is exactly what you want. The wash should sink in quickly and dry to a matte film.
Before you brush, wipe the pot with a damp sponge to lift dust and loose clay. Do not soak it. A pot that is wet through will take the wash unevenly and dry patchy.
Texture is where a wash earns its keep. Carving, slip trailing, ribbed throwing lines, a pressed leaf, the seam of a slab — every ridge holds colour after the wipe.
Brushing It On
Use a soft, wide brush: a hake, a mop, or a large flat synthetic. Something that carries water well and lays it down in a single pass.
Load the brush and paint one loose coat, working it into the texture with the flat of the bristles. Cover the area quickly and let it be uneven.
Do not scrub. Scrubbing lifts clay dust and pushes the wash around, and it leaves streaks that survive the firing.
Let the coat dry to the touch — a few minutes on a warm day — before adding a second. Two thin coats give more depth than one thick one, and far fewer surprises.
Wiping Back: The Move That Makes It
This is the step that creates the look. Once the wash is matte but still slightly cool to the touch, take a damp sponge or a damp cloth and pass it lightly over the surface.
Work in one direction, with light pressure, and pause over the high points. The colour lifts from the ridges and stays in the hollows.
Rinse the sponge often. A loaded sponge simply redeposits the oxide you have just removed and muddies the whole pot.
For fine detail, wrap the cloth around a fingertip. For a softer, more weathered result, wipe twice with a barely damp sponge and let some of the haze remain.
What you are really deciding is how much history the pot has. Wipe firmly for a clean, graphic contrast; wipe gently for something that looks dug from the ground.
Remember that the colour will look paler now than it will after firing. Dry wash on bisque is dull and chalky; the kiln deepens it, and glaze over the top deepens it again.
Under, Over, or In Between
There are two places for a wash, and they behave quite differently.
Under a glaze, the wash is sealed in. Apply it, wipe it back, let it dry, then glaze over it. A clear or transparent glaze deepens the colour and gives it glassy depth, but a wash applied too thickly beneath glaze can cause crawling or pinholes.
Over a glaze, the wash sits on top. Brush it over an unfired glaze and it will smear; brush it over a fired glaze and refire, and it softens, breaks, and runs in ways you cannot fully control. The results are often beautiful and rarely repeatable.
Many potters do both: wash on the outside, transparent glaze on the inside, and a thin line of glaze over the rim to catch the light.
One small trick: wax resist painted on the high points before the wash, then wiped, gives a crisper edge than a sponge alone.
What the Kiln Does to the Colour
The kiln is the third collaborator, and the one that changes the colour most.
At low fire — cone 06 to 04, around 1,000°C or 1,830°F — the colours stay close to what you mixed. Iron is rusty orange-brown, copper is a clear green, cobalt is a bright blue, manganese is purple-brown, rutile is creamy tan.
At mid fire, cone 6, roughly 1,220°C, the same wash deepens. Iron goes amber and then chocolate. Copper greens darken and can turn grey or faintly metallic. Cobalt intensifies. Manganese darkens and may blister where it is thick.
Cone 6 is the useful middle ground for a beginner: hot enough to give a durable glaze, cool enough that copper and manganese still show up for work.
At cone 9 to 10 in reduction, iron breaks toward tenmoku black where it pools, and copper can flash red. This is where a wash becomes genuinely dramatic, and also where it becomes hard to predict.
Some colours simply leave. Copper begins to volatilise above cone 8, and manganese can burn away in a long high firing. Cobalt, stubborn and stable, stays.
One more thing: oxides fume. A copper-heavy piece can put a pink blush on a white glazed pot sitting beside it in the kiln. It is not damage, but it is worth knowing before you blame your glaze.
Why the Same Wash Looks Different on Different Clay
One wash on two clay bodies can look like two different materials entirely.
On a white stoneware or a porcelain, the colour sits clean and bright. Iron reads as warm rust, cobalt reads as a true saturated blue, and the contrast between wiped high points and dark recesses is almost graphic.
On a dark, speckled, iron-bearing clay, everything muddies toward the body colour. Iron wash nearly disappears into the clay; cobalt dulls to a deep grey-blue. The result is quieter, older, more subtle.
Neither is better. But if you have a particular colour in mind, the clay body is half the decision, and it is the half you can no longer change once the pot is thrown.
Test Tiles: The Habit That Makes It Repeatable
Make a row of small tiles from the clay you actually throw with, roughly the size of a biscuit. Press a number into each one while it is soft, or scratch a letter in the corner.
Then vary one thing at a time: a wash at 1:3, 1:4, 1:5; one coat, two coats, three; wiped and unwiped; under glaze and over it.
Fire them together in a single load and line them up when they come out. Keep them in a shoebox with a page of notes — which ratio, which clay, which cone, which shelf of the kiln.
This is the one habit that turns a lucky pot into a repeatable result. Ten tiles will teach you more than a year of guessing.
When It Goes Wrong
Patchy, blotchy results
Usually the bisque is dusty, or the pot was still damp when you brushed it. Wipe with a damp sponge, let it dry fully, then apply two thin coats instead of one heavy one.
Wash too thick and crusty
Too little water, too many coats, or no wipe at all. A crusty layer sits on the surface rather than soaking in, and it feels rough under the fingers. Dilute it and wipe back harder than you think you need to.
Wash flaking off in the kiln
Thick application, dusty bisque, or oily fingerprints are the usual culprits. Sieve the wash, dust the pot, handle it with a cloth, and thin the mix. A pinch of frit also helps it grip.
Colour disappearing at high fire
Copper and manganese both fade or volatilise at cone 9 and above. Either fire lower, apply more oxide, or seal the wash under a glaze that matures at your working temperature.
Wash staining hands and workspace
Oxides stain skin, grout, and untreated wood, and the stains are stubborn. Wear gloves, work on paper, and wipe spills while they are still wet. Dried oxide dust is far harder to remove.
Three Small Projects to Try
Three projects, in ascending order of patience. Each uses one oxide and one surface treatment, so you can see clearly what the wash is doing.
A textured mug
Throw or hand-build a simple cylinder, then texture the outside with a rib, a fork, or a scrap of burlap. Bisque fire it. Brush iron wash over the whole outside, wipe the high points, and glaze only the inside and the rim. Fire to cone 6.
A carved bowl
Carve a pattern into a leather-hard bowl — a simple repeat of short gouges is enough. After the bisque, brush manganese wash into the carving, wipe the surface clean, and glaze the inside with a clear. The pattern will read as dark lines beneath a pool of glass.
A small hand-built dish
Press a pinch pot, or drape a slab over a hump mould. When it is bone dry, brush two coats of rutile wash, wipe only the rim, and fire to cone 06 with no glaze at all. The result is matte, warm, and unexpectedly tactile.
Conclusion
An oxide wash rewards a light hand. The pot does most of the work; your job is to put colour where the texture already is, and then to take most of it away again.
Expect your first few to be uneven. That is not failure — a wash that pools and fades and drifts is doing exactly what the material does, and the pots that look handmade rather than printed are usually the ones with a little inconsistency left in them.
If you find yourself wanting to control colour more precisely, that is the moment to look at mixing your own pottery glazes. Until then, a jar of iron, a sponge, and a bisque-fired pot are enough to begin.