Introduction
The studio smelled of linseed oil and old radiators. I was nineteen, and I had signed up for a Saturday drawing class because I wanted to learn to draw a pear.
My teacher was a quiet man named Mr. Ellery. He wore the same gray cardigan every week and rarely said more than a sentence at a time.
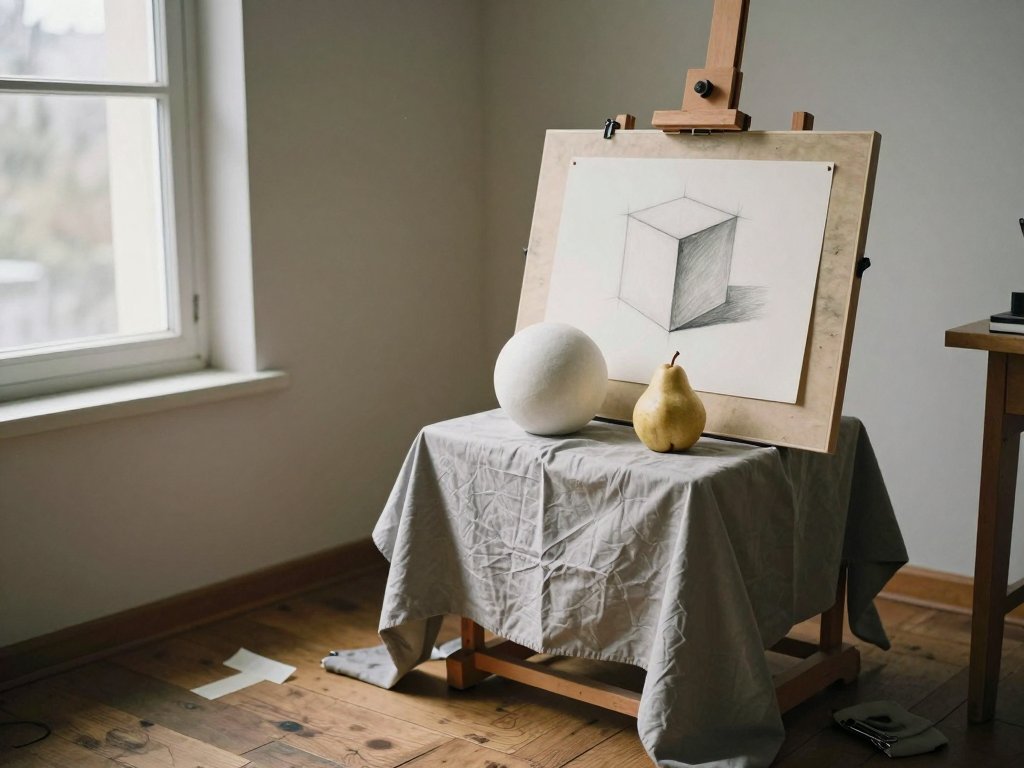
On the first morning he set a plaster cube on a stand, put my easel beside it, and told me to stand on a strip of masking tape he had pressed to the floor.
Then he said the thing I have never forgotten. "Draw it the size it looks from there. Not bigger. Not smaller. Just what your eye receives."
I drew a cube that was far too big. It spilled off the paper, and the proportions were wrong in a way I could feel but could not name.
Mr. Ellery looked at it, then at the block, then back at me. "You drew what you think a cube is," he said. "Next week, draw what is actually in front of you."
That was my introduction to sight-size drawing — the oldest measuring habit in the studio, and the one that finally taught my eye to slow down.
What Sight-Size Drawing Actually Is
Sight-size is a method of drawing an object at exactly the size it appears to your eye from one fixed place in the room.
You do not scale it up. You do not scale it down. You do not fit it to the page and hope the proportions follow along.
Instead, you set your paper beside the subject, stand at a marked spot, and draw the subject at the size it lands on your eye from that spot.
If a pear looks four inches tall from where you stand, you draw a four-inch pear. If a plaster sphere looks three inches wide, it is three inches wide on your paper.
That is the whole idea, and it sounds almost too simple to matter. But it changes everything about how you measure.
Because once the drawing and the subject occupy the same apparent size, you can compare them directly. You can hold out your arm, line up a length, and carry it straight to the paper without translating anything.
No arithmetic. No dividing a photograph into squares. No guessing that the handle is "about a third" of the cup.
Just your eye, one length, and the quiet question of whether two things match.
Setting Up: The Easel Beside the Subject
The setup matters more than beginners expect. Most of us are taught to put the easel in front of us and the subject somewhere off to the side, then glance back and forth.
Sight-size asks for something different. The easel sits beside the subject, as close to the same plane as you can manage, so both are in one field of view.
In practice, that means the subject goes on a stand, the easel goes to its left or right, and you stand back far enough to see both without turning your head much.
If you can see the subject and the paper at the same time, even at the edge of your vision, you are in the right position.
Then you mark your spot. A strip of tape on the floor, a chalk line, a small rug you always stand on. Something that does not move.
Finally, you close one eye. Pick the eye you would use to sight down a ruler, and keep it consistent — switching eyes shifts everything slightly.
And you keep your head still. Not rigid, not uncomfortable, but still. Your head is part of the measuring instrument.
Why the Fixed Viewpoint Is the Entire Method
Here is the part that took me years to really believe: if you move, every measurement you have taken is void.
Shift six inches to the left and the apparent width of the cube changes. Lean forward and the top plane opens up. Sit down and the whole silhouette settles differently.
Sight-size is not measuring the object. It is measuring the object from a place. Change the place and you are drawing a different subject.
This is why the tape on the floor is not a fussy detail. It is the method.
In Mr. Ellery's studio, students who wandered were gently sent back to their mark. He would point at the tape without a word, and we would step back onto it, sheepish.
I still do this in my own kitchen studio. There is a worn patch on the linoleum where my left heel goes.
When a drawing starts to feel wrong and I cannot say why, the answer is almost always that my feet have drifted.
Reading Apparent Size
At a fixed distance, the apparent size of the object in front of you and the apparent size of your drawing on the paper are measured on the same scale.
That is the quiet magic of it. Your visual field does not care whether a shape is a real pear on a stand or a graphite pear eight inches to the right.
Both subtend the same angle at your eye. So if you match the angle, you have matched the size.
This is why sight-size is so exact for a still life and so impractical for a mountain.
A pear can sit next to your paper. A mountain cannot. You cannot bring the Alps into the studio at the same distance from your eye.
The method depends on the subject being placeable — close, still, and available to compare against all afternoon.
The Tools: A Dowel, Your Thumb, and a Straight Arm
You need almost nothing. A plain wooden dowel, a long brush handle, or a knitting needle will do. Something straight, thin, and light.
Hold it vertically in your drawing hand. Then straighten your arm fully and lock your elbow.
Locked elbow is not a suggestion. A bent arm means a variable distance from your eye, which means a variable measurement.
Close one eye. Line the top of the dowel up with one edge of the shape you want, and slide your thumb along the dowel until it sits at the other edge.
Your thumbnail is now holding a length. Keep it there.
Then — and this is the step beginners rush — carry that length to the paper without moving your arm or your head.
Rotate from the shoulder, not the wrist. Keep the elbow locked. Bring the thumb mark to the paper and see where it lands.
You are not writing down a number. You are physically transporting a length from one place to another.
And you never measure with the object itself. Not the pear, not the block, not your finger pressed against the plaster. The dowel stays constant; the object is the thing being observed.
The Plumb Line
For verticals, the dowel becomes a plumb line. Hold it straight up and down in front of you and let it cut through the subject.
Ask a simple question: what does this line pass through? The left edge of the cube, then the gap beside the pear, then the shadow at the base.
That tells you what sits directly above or below what — information no width measurement can give you.
The plumb is how you catch a block that is leaning, a sphere that has drifted right, a pear stem that no longer sits over its own body.
You can also use a real plumb line: a thread with a small weight, hung from a stand near your setup. Some studios keep one by the window permanently.
Either way, the principle is the same. Gravity gives you a true vertical, and your eye compares the subject against it.
Marking the Envelope First
Before any detail, you mark the envelope — the total height and the total width of the whole subject.
Measure the full height with the dowel, carry it to the paper, and make a light mark at the top and the bottom.
Then measure the full width the same way and mark the left and right extremes.
You now have four faint dots and an implied rectangle. That rectangle is the outside edge of everything you are about to draw.
Check it before you go further. Step back, look at the subject, look at your marks. Does the rectangle feel tall enough? Too wide?
Only when the envelope is right do you begin the block-in — the light, searching lines that describe the shape inside those limits.
And you check the block-in against the marks before you touch a single detail. If the block-in spills past the envelope, the envelope was right and the block-in is wrong.
This order feels slow. It saves hours.
The Big Landmarks
Inside the envelope, you place the big landmarks next: top, bottom, the widest point, and the gaps between the forms.
If you are drawing a cube, a sphere, and a pear together, the gaps matter as much as the objects.
The space between the cube and the sphere is a shape. So is the space between the sphere and the pear, and the strip of table visible under all three.
Measure those gaps with the same dowel and the same locked arm. They are not background. They are measurements.
Beginners tend to measure objects and estimate gaps. Do the opposite for a week and see what happens.
The widest point deserves finding early, too. It is often not where you expect — sometimes a shadow, sometimes the flare of a pear's base, sometimes the corner of a block turned toward you.
Comparing, Not Calculating
Sight-size is a comparison habit, not arithmetic. This is the distinction that separates it from almost every other measuring system.
You are not dividing the height by the width. You are not calculating that the sphere is two-thirds the cube. You are not converting anything into numbers.
You hold up a length. You look at another length. You ask: is this gap bigger or smaller than that one?
Bigger. Smaller. Same. That is the entire vocabulary.
Ask it enough times and the drawing resolves. Each answer is a small correction, and the corrections accumulate into accuracy.
There is another way to establish proportion, of course — the grid method — and it works beautifully from a photograph. Sight-size simply begins with your eye instead of an image.
The comparison habit is what stays with you. Long after you stop taping the floor, you will still be asking whether this is bigger than that.
Using a Viewfinder
A viewfinder is a simple rectangle cut from card — a window with the same proportions as your paper.
Hold it at arm's length and frame the subject through it. What you see inside the window is exactly what belongs on your paper.
The viewfinder answers a question the dowel cannot: what is the composition?
It also catches the drawing that has quietly grown. If your subject fills the viewfinder but your paper feels crowded, something has slipped.
You can make one in five minutes with a craft knife and a piece of mat board. Cut the opening to match your paper's ratio, not to any standard size.
Some people draw crosshairs on theirs. I never have. The rectangle alone does enough.
Checking the Drawing Against the Subject
Every twenty minutes or so, step back to your mark and simply look.
Not at the paper. At the subject, then at the paper, then back again. Let your eye do the comparing without your hand involved.
This is where sight-size pays you back. Because the drawing is the same size as the subject, your eye can compare them almost as if they were two copies of the same thing.
Then hold the dowel at arm's length and check one length you already know. The total height is a good one. The width of the widest form is another.
If those still match, the drawing is holding. If they have drifted, you have found the error early, while it is still a light line and not a committed shadow.
Mr. Ellery used to say a drawing is checked, not finished. I did not understand him for years.
When Sight-Size Is the Right Tool
Sight-size shines on anything you can place beside your easel and keep still.
Still life is the classic case — a bowl, a jug, three pears on a cloth.
Cast drawing, the old studio exercise of rendering a plaster form, was built almost entirely on it.
Portrait from a fixed seated pose works too, as long as the sitter stays at a consistent distance and does not shift around.
Botanical study is another natural fit. A single stem in a jar, drawn at the size it appears, teaches observation faster than any other exercise I know.
The common thread is stillness and proximity. If the subject can live next to your paper for an hour, sight-size will reward you.
When It Is Not
Landscapes are out. You cannot put a hillside beside your easel, and the distance changes the moment you walk toward it.
Moving subjects are out. A child, a cat, a branch in the wind — by the time you have carried a length to the paper, the length has changed.
Anything you cannot place beside the easel is out, which rules out most of the world.
And anything you want to draw larger or smaller than life is out, unless you accept that you are no longer doing sight-size.
That is not a failure of the method. It is simply its shape. A tool is only useful when you know its edges.
For those subjects, you fall back on comparative measuring and your eye's growing memory — the habits sight-size built in you.
Common Beginner Mistakes
The first mistake is shifting your feet mid-drawing. It feels like nothing. It invalidates everything.
The second is measuring on a tilted head. Tilting changes the apparent angle of every edge, so your verticals lean and your horizontals slope.
Keep your head level. If you need to see underneath something, walk to a new place and start a new drawing from there.
The third is tilting the paper. A drawing surface that leans back changes how the marks look to you, and your lengths stop matching.
Keep the paper as close to vertical as your easel allows, and as close to the subject's plane as you can.
The fourth is measuring with the object instead of the dowel. Holding the pear up against the paper feels intuitive and is worse in every way.
The fifth is starting detail before the envelope is right. An eye drawn beautifully inside a wrong-sized shape is still wrong.
The sixth, and the one I still fight, is drawing what you know instead of what you see.
You know a cube has square faces. So you draw square faces, even when the face in front of you is a narrow sliver. Trust the sliver.
A Slow First Exercise: One Pear, Twice
Here is an exercise I give to anyone who asks me how to start. It takes two short sessions, a week apart.
Set a single pear on a plain surface. A plaster block or a sphere works just as well, and a sphere is honestly the better teacher.
Set up your easel beside it. Tape your mark on the floor. Close one eye. Mark the envelope.
Then draw it slowly, at sight-size. Give yourself forty minutes and stop when the time is up, finished or not.
Put the drawing away where you cannot see it. Wait a week.
Then set up again, in the same place, with the same light, and draw the same object at sight-size a second time.
The second drawing is almost always better, and not because your hand improved. Your eye did.
You will find the envelope lands faster. You will catch the widest point sooner. You will notice that the shadow was never part of the silhouette, which is a thing the first drawing probably got wrong.
Then put the two drawings side by side. The difference is not talent. It is attention.
The Patience Is the Point
Sight-size is slow by design, and that is not a flaw to work around.
Every measurement asks you to stop, look, hold, and carry. That pause is where observation happens.
Most of drawing is interpretation — the brain naming a pear and handing you a symbol of a pear instead of the thing itself.
Sight-size interrupts that. It gives your hands something tedious and precise to do while your eye quietly begins actually seeing.
After a few weeks, something shifts. You notice the exact curve where a pear's body meets its neck. You notice the shadow is cooler than you remembered.
You are not drawing better because you learned a trick. You are drawing better because you stopped guessing.
Conclusion
I still have that first cube somewhere, in a portfolio that smells faintly of the old studio.
It is too big for the paper and wrong in every proportion. I keep it because it is honest about what I was doing: drawing an idea instead of a thing.
Mr. Ellery never told me I was talented. He told me to stand on the tape and look again. That was better.
If you try sight-size this week, start with one pear and one piece of tape on the floor. Expect the first drawing to be slow and a little clumsy.
Then do it again next week, from the same spot, and let the second drawing show you what your eye has been learning.
The method is old, quiet, and stubbornly exact. It will not make you fast. It will make you see.