Introduction
The drawing that taught me about foreshortening was a jug of milk, and it was genuinely terrible.
I was nineteen, home for the summer, sitting at my grandmother's kitchen table with a spiral sketchbook and a mug of tea going cold beside me.
On the table sat a stoneware jug, the kind with a thick lip, angled so its handle pointed away and its mouth aimed somewhere near my left shoulder.
I drew it for forty minutes. When I finished, the jug looked like a keyhole with a handle attached. The mouth was a thin slot. The body was a rectangle. Nothing in that drawing suggested a heavy ceramic object sitting three feet from my elbow.
My grandmother looked at it over her glasses and said, kindly, "That's the jug from the front." Then she went back to her crossword.
She was right, and she had found the whole problem in six words.
I had drawn the jug as though I were standing squarely in front of it, in the one position where its length runs flat across the page. It wasn't. It was tipped toward me, and a tipped object is a different drawing entirely.
This article is about that difference. One form. Its axis angled at you. Nothing in the room behind it.
What Foreshortening Actually Is
Foreshortening is what happens to a single object when its long axis tilts toward your eye instead of lying flat across your view.
A rolling pin held sideways shows its full length. Point one end at your nose and the same rolling pin becomes a circle with a stub of handle behind it. The object has not changed. Your angle on it has.
Three things happen at once, and they always happen together.
- The apparent length compresses. The distance from near end to far end, measured on the page, gets shorter as the tilt increases.
- The near plane enlarges. Whatever faces you grows, because it is closer, and closeness wins.
- The far portion shrinks and gets hidden. The near end starts covering the far end, and whichever edge is in front wins the outline.
That third one is the quiet hero. Overlap and occlusion — one surface blocking another — do more for the illusion of depth than any amount of careful shading. A drawing can have perfect proportions and still look flat if nothing overlaps anything.
So the skill is not "make it look three-dimensional." The skill is: notice the tilt, measure the compression honestly, and let the near end block the far end.
What This Article Is Not About
Worth saying plainly, because these get bundled together and they are not the same job.
Foreshortening has no vanishing point. There is no horizon, no grid across the page, no lines converging toward a spot on the wall. You are drawing one object from one viewing position, and everything you need is inside that object's own outline.
If you want architecture and rooms — walls that recede, buildings that lean — that is a different job, and a good one. One-Point Perspective Drawing for Beginners is where that lives, and Two-Point Perspective for Beginners takes it round the corner.
Come back here when the subject is a mug, a forearm, a cat's paw, or a shoe pointed at your chest.
The Envelope Habit: Block the Whole Thing First
Before you draw a single rim or knuckle, draw the container the object would ship in.
This is the envelope, and it is the habit that saves more foreshortened drawings than any other. You are not drawing the mug yet. You are drawing a box — or an oval — that the mug must fit inside, no matter what.
Here is the procedure, and it takes about ninety seconds.
- Look at the whole form and find its widest point and its tallest point, in the tilted position you actually see.
- Mark those four extremes lightly with dots: top, bottom, left, right.
- Join the dots with straight lines. You now have a box, and it will look wrong — too squat, or oddly tilted.
- Ignore that feeling. The box is a fact. Your feeling is a memory.
- Only now subdivide: find the halfway point of the long axis, then halves of halves.
For round forms, use an oval instead of a box. A tilted cylinder's envelope is an oval whose long axis follows the tilt, not the edge of the page.
Why this works: your eye is reliable about extremes and unreliable about middles. Asking "how tall is this?" gets an honest answer. Asking "where does the handle attach?" gets a guess based on what a handle usually does.
The envelope also gives you somewhere cheap to be wrong. If your box is thirty percent too tall, you find out in four pencil dots rather than in a fully shaded mug you now have to erase.
Measuring With a Pencil at Arm's Length
Your arm is a ruler that never leaves the house. Used properly, it settles arguments your eye cannot.
Hold the pencil upright at full arm's length, elbow locked, and close one eye. Touch the tip to the top of the form and slide your thumb up until it meets the bottom.
That span — tip to thumb — is your unit. Do not move your hand. Do not bend your elbow.
Now turn the pencil horizontal, keeping your thumb exactly where it is, and compare that same span against the form's width.
On a mug tipped toward you, the honest answer is often surprising: the width is nearly the full height, sometimes more. On a mug sitting square to you, height beats width comfortably. That number is the tilt, stated as a ratio.
Write the ratio down in the corner of the page. "This one is one to one and a bit." A written number survives the twenty minutes in which your memory of the object quietly rewrites itself.
The Clock-Face Check
For the tilt itself, there is a second measurement. Hold the pencil along the object's long axis and note where it points, as though the page were a clock face.
A mug standing upright points to twelve. A mug tipped toward you points to eleven or one, depending on which way it leans. If your pencil says eleven and your drawing's axis says twelve, you have flattened the tilt without noticing — the most common failure in this whole skill.
Vertical and Horizontal Plumb Lines
Sight a true vertical with the pencil and compare it to the object's near edge. The gap between them — the lean — is the angle you must reproduce.
Then do the same with a horizontal. Two sightings, one vertical and one horizontal, triangulate any tilt in about fifteen seconds. It is not glamorous. It is the difference between a drawing that sits in space and one that lies on the page like a sticker.
Three Shapes That Teach This Fastest
You could practise on anything. These three teach the lesson with the least wasted effort, because each one punishes a specific mistake.
A Cylinder Pointing at You
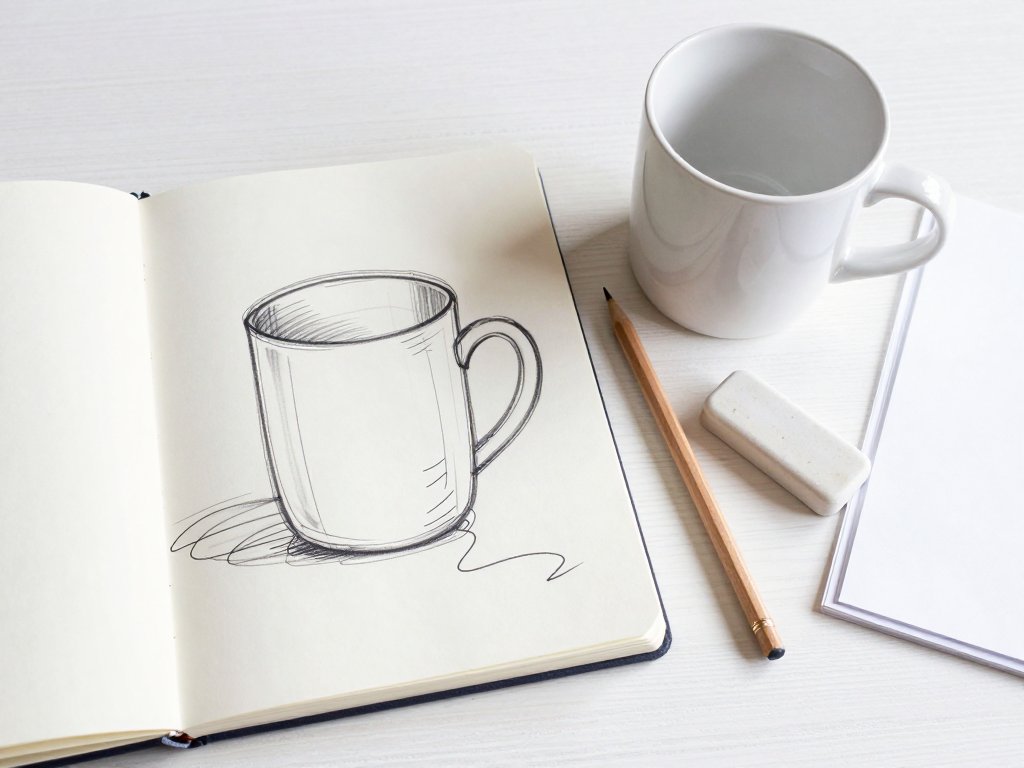
A mug seen from above is the gentlest introduction. The body compresses into a short barrel, the rim opens into a wide ellipse, and the handle — if it sits on the far side — nearly disappears behind the body.
Draw it five times from five angles, tilting the mug a little more each time. Nothing else in drawing gives you this much feedback this quickly.
A Limb Reaching Out
Your own forearm, extended toward a mirror or toward your own face, compresses the way no static object can. The wrist grows. The elbow shrinks and hides. The whole arm becomes a cone with a hand on the wide end.
A Paw or Hand Coming Toward You
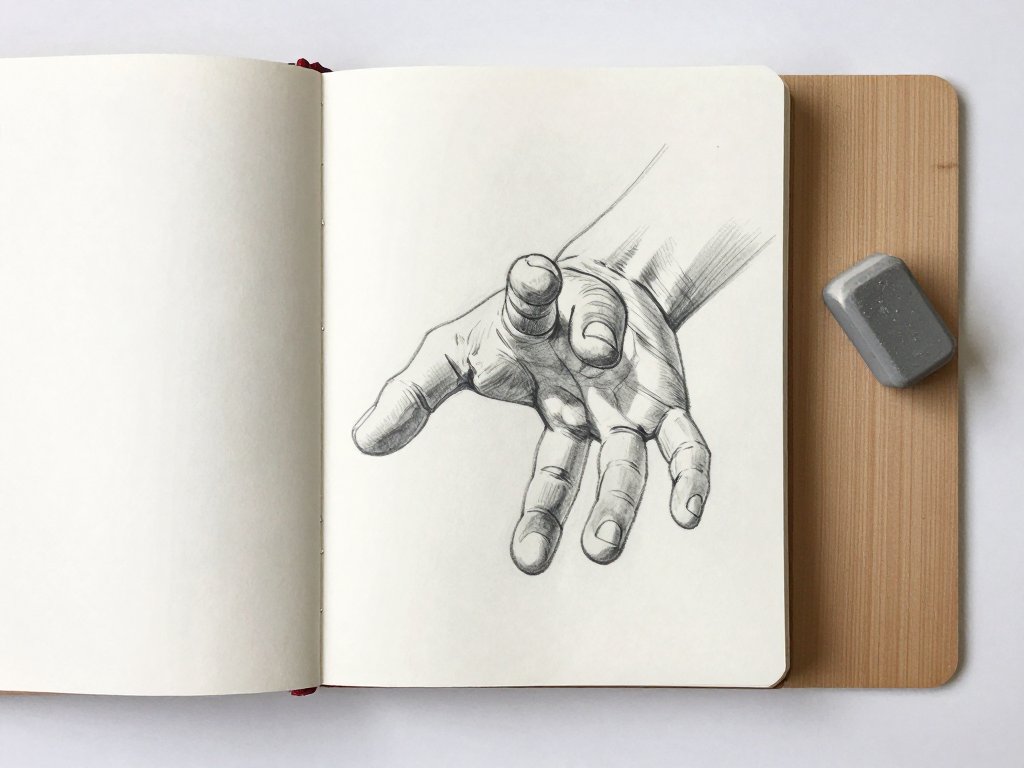
Hardest of the three, and the most rewarding. A hand aimed at your eye is mostly fingertips, with the palm and wrist stacked behind them like plates in a cupboard. Once you can draw that, you can draw almost any form with an axis.
Ellipses: Why the Mouth of a Cup Opens Up
Here is the thing beginners get wrong most often, and it is not a subtle error. They draw the rim of a tilted cup too flat.
An ellipse is a circle seen at an angle. Look straight down into a mug and the rim is a true circle.
Tip the mug away from you and the circle narrows into a shallow ellipse. Tip it toward you, so you are looking into its mouth, and the ellipse opens wide — nearly a circle again, but lower and wider than the body.
The rule: the more you can see into a cup, the rounder the ellipse of its rim.
If your drawing shows a thin slot for a rim while the cup is clearly pointed at your face, the ellipse is lying, and the whole form collapses with it.
Two mechanical details keep ellipses honest.
First, an ellipse has no corners. It is a smooth closed curve, widest at its major axis and narrowest at its minor. If your rim has two pointy ends, you have drawn a lens, not a circle in perspective.
Second, the ellipse's minor axis runs along the cylinder's axis. On a tilted mug that means the ellipse tilts too. Its long axis sits perpendicular to the direction the mug is pointing, which is almost never horizontal on the page.
Beginners flatten the ellipse for the same reason they flatten everything: a wide-open ellipse looks wrong to a brain that expects a cup rim to be a tidy narrow oval seen from normal sitting height. Trust the measurement, not the expectation.
Negative Space, Outer Contour, and Occlusion
When a form points at you, the internal detail lies to you. Ignore most of it.
The outside contour is the honest edge — the silhouette where the object stops and the table begins. Draw that first, and draw it as one continuous shape rather than a set of features joined together.
Negative space is the helper. Look at the gap between the mug's near side and its handle, or the wedge of table visible under a reaching forearm. Those gaps are easier to judge than the object itself, because you have no stored idea of what a gap should look like.
If the gap under the arm is a long thin triangle, draw a long thin triangle. The arm will then come out right as a side effect.
Occlusion: What Sits in Front Hides What Sits Behind
Occlusion is the simplest depth cue in existence and the one most often skipped. The near end of the form covers the far end. The far end does not peek around it politely.
This matters because beginners draw through the object. They draw the full far rim, then the full near rim, and end up with a transparent cup.
Two habits fix it. First, decide the layering order before you draw anything: near rim, then body, then far rim, then handle. Second, when you cover something up, still understand it.
Trace a fingertip over the hidden far edge in the air before you commit. That way, when the near end crosses in front, the far end stops in the right place — and the curve you never draw still shapes the curve you do.
Worked Example: A Mug Tipped Toward You
Set a plain mug on the table. Sit so you look slightly down into it, and tip it back about twenty degrees so the rim faces you.
- Find the axis. Sight along the mug's centre with your pencil. Note the clock direction — probably eleven or one, not twelve.
- Measure the ratio. Tip-to-thumb for height, then the same span across the rim. Write the ratio down.
- Block the envelope. Four dots at the extremes, joined into a tilted oval. Squat and odd is correct.
- Place the near rim ellipse. It is the biggest shape on the page, because it is closest. Wide, smooth, tilted, no corners.
- Place the far rim ellipse. Same shape, smaller, shifted along the axis toward the far end. Part of it is hidden.
- Join the two rims with two short side curves. This is the body — short, and narrowing slightly toward the far end.
- Add the base. A shallow ellipse tucked under the near rim, mostly hidden. Draw only the sliver you can actually see.
- Add the handle last, and check whether the body hides part of it. It usually does.
- Check the ratio again against your written number before you shade anything.
That is nine steps and about fifteen minutes. The likeliest stumble is step five: the far rim gets drawn at the same size as the near rim out of a sense of fairness. It should not be fair. It should be smaller.
Worked Example: A Hand Pointing at You
Now the harder one, and the one that will make you feel like a beginner again — briefly.
Hold your non-drawing hand up, palm toward your face, fingers spread and pointing at your nose. Look at it honestly. The middle finger may be four inches long. On the page it will be about an inch.
Fingers get shorter but thicker. That is the rule. Each finger compresses along its length and widens across its width. Two inches of finger become three-quarters of an inch of drawing that looks like a fat pad.
Knuckles disappear. Not entirely, but the ridges you rely on to count fingers vanish into a stack of overlapping pads. What is left is a silhouette of four rounded ends and one thumb swinging out to the side.
Draw it in this order.
- Envelope first. A rough oval, wider than tall, covering all five digits.
- Middle finger pad as the biggest rounded shape, slightly above centre.
- Index and ring as smaller pads overlapping it on either side, each partly hidden.
- Pinky as the smallest, tucked at the outer edge and often mostly occluded.
- Thumb as an oval swinging low and outward, with a clear triangle of negative space between it and the palm.
- Wrist last, and small — much smaller than your memory insists.
Shade the gaps between the pads, not the pads themselves. That is what makes fingers read as separate cylinders instead of a mitten.
A Forearm Variant
Extend your arm toward a mirror and draw what you see. The elbow is nearly gone, the forearm is a short cone, and the wrist has become the widest thing in the picture.
Do it three times at three distances. The change you are looking for is not in the arm — it is in your willingness to draw a short fat cone instead of a long thin one.
A Cat's-Paw Variant
A cat's paw reaching for a toy is the same problem in fur. Four toes stack into a rounded mass, the wrist narrows behind it, and the pads underneath are mostly hidden.
Draw the outer contour first and treat the toes as overlapping ovals. Resist drawing all four claws. The two you can actually see are the only ones doing any work.
Common Failures, and Why a Mirror Helps
Five failures account for almost every collapsed foreshortened drawing.
The far end is the same size as the near end. Symmetry feels safe and reads as flat. The far end must be visibly smaller, and often visibly duller.
The tilt gets flattened. The drawing quietly reverts to a front view. Check your clock direction against the pencil.
The ellipse is ignored. A slit rim on a cup pointed at your face. Re-measure how much of the interior you can see.
The front face is drawn as a flat outline. A circle where an ellipse belongs, a palm where a stack of pads belongs. If the shape has no thickness or tilt, it has no depth.
The reference photo is tilted at the wrong angle. Photographs are usually taken from chest height or above, often with a wide lens that exaggerates the near end. Copy a photo taken from a different height than your own eye and you will draw a tilt you cannot see.
Why the Mirror Works
Turn your drawing around and hold it up to a mirror. Or hold it to a window and look at it reversed.
Your brain stops reading the drawing as a mug and starts reading it as a shape.
Mistakes you have been blind to for twenty minutes become obvious in about two seconds — a far rim too large, a lean that isn't there, a handle on the wrong side of the body.
This works because you have been looking at your drawing through the idea of the object. The mirror breaks the idea and hands the picture back.
An Evening Drill, a Five-Minute Warm-Up, and Some Honest Reassurance
Here is a single evening's practice, about forty minutes, no special materials.
- Five minutes: three quick ellipses on scrap paper, tilted at three different angles, no object involved.
- Ten minutes: the mug, tipped toward you, using the nine steps above.
- Ten minutes: the same mug from a different tilt. Do not improve the first drawing. Start a new one.
- Ten minutes: your hand pointing at your face, once. It will look like a bunch of grapes.
- Five minutes: mirror check on all three, and one written note about what went wrong.
The five-minute warm-up, for a busy morning, is simpler. Draw three ellipses and one short cone. That is it. It wakes up the measuring part of your eye without asking anything of your patience.
Now the reassurance, and I mean it.
Foreshortening looks wrong for the first twenty minutes. Not slightly wrong — grotesque. The near end looks bulbous, the far end looks stunted, and the whole thing resembles a traffic cone with ambitions.
That is not a sign that you have failed. It is a sign that you have drawn something your brain has never seen before, and your brain is complaining. Keep going. Around the twenty-fifth minute the shapes settle, and the drawing begins to look like the object again.
My jug took three summers to get right. The one I finally kept is in a sketchbook in a cupboard, and the rim is still a little too flat.
Things to Notice, If You Want Them
- Notice the moment you want to draw the far rim at full size. That impulse is the habit you are unlearning.
- Notice how much of the cup's interior you can actually see. That is your ellipse, stated in plain language.
- Notice that the gap beside the handle is easier to draw than the handle. Use it.
- Notice when your hand stops measuring and starts guessing. That switch is audible.
- Notice, at the end, that the object on the table looks more tilted than it did an hour ago. It hasn't changed. You have.
Closing
The jug in my grandmother's kitchen was never the problem. My angle on it was, and nobody had told me the angle was something you could measure.
So measure it. Block the envelope, sight the pencil, open the ellipse, let the near end win. Ten minutes at the table with a mug is enough to feel the difference.
The drawing will look wrong for twenty minutes. Then it won't.