Introduction
My grandmother's kitchen had a window with a slatted blind. On late summer afternoons the light came through it in stripes across the floor, and I would sit on the cool tile and trace them with one finger.
Not the window. Not the blind. Just the bright bars and the dark bars between them.
She asked what I was drawing. I told her the light. She said that was the right thing to draw, and went back to the dishes.
It took me thirty years, a sheet of black paper and a pair of small scissors to understand what she meant.
This is the practice that finally explained it to me. It is called notan, and it asks you to see a scene as two shapes only — light and dark — before your pencil ever touches paper.
No shading. No blending. No eraser. Just shapes, arranged until they feel settled.
What Notan Means, and Where It Came From
Notan (濃淡) is a Japanese word meaning light-dark. It names the balance and contrast between the light and dark masses in a design, not the modelling of a single form.
That distinction is easy to read past. Notan is not about how a shadow wraps around an apple. It is about how much dark sits against how much light, and whether those two masses feel right beside each other.
The idea reached Western art teaching through Arthur Wesley Dow, whose book Composition was published in 1899. Dow had studied Japanese art and design closely, and he built its habits of spacing and balance into a teaching method.
Among his exercises was a black-and-white paper-cutting study: cut a shape, arrange it, judge the result by eye. Art schools still use a version of it more than a century later.
I like knowing that. Somewhere in a classroom this week, someone is hunched over a square of black paper with school scissors, doing exactly what I do at my kitchen table.
It is a rare thing, a technique that has survived that long without becoming fussy or expensive.
Why Exactly Two Values Is the Whole Point
Here is the rule that makes notan what it is: two values. Black and white. Light and dark. Nothing in between.
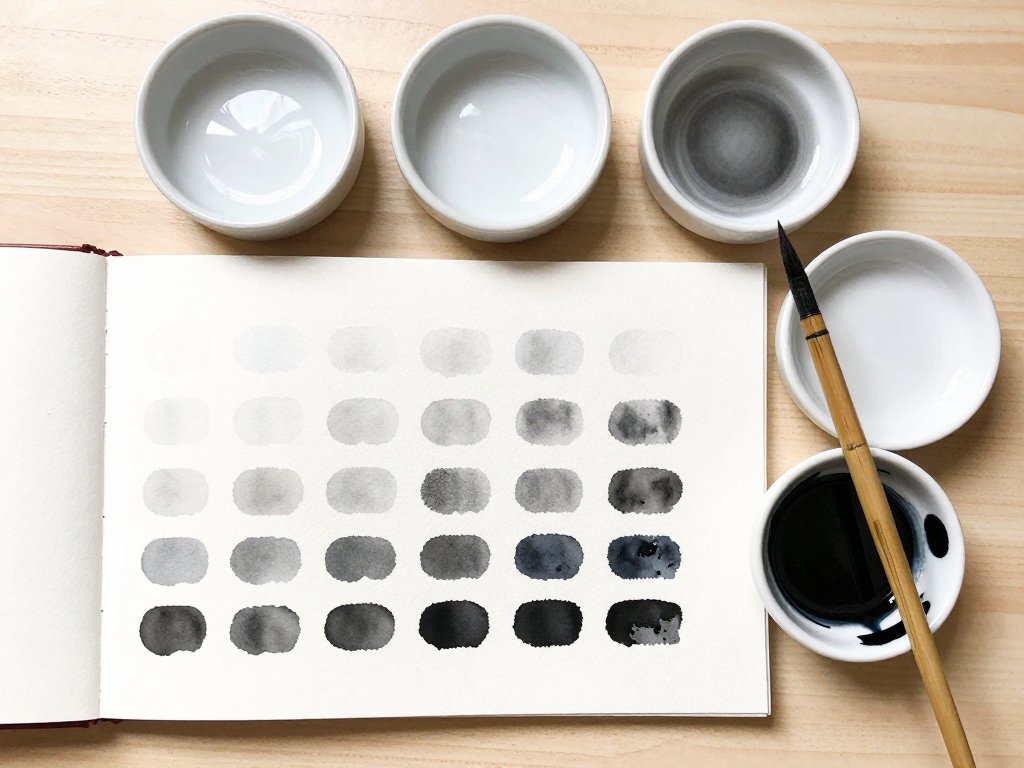
The moment you reach for a grey, you have changed the exercise. A study with three or five steps is a value study, and a good one, but it is a different job. It asks how a form turns from light into shadow.
Notan asks something else. It asks whether the arrangement of light and dark shapes is readable at a glance, and whether the two masses balance.
If you have ever looked at chiaroscuro drawing, you have seen that other approach — many soft steps of tone used to model volume and depth. Notan comes before it, and it is not a lesser cousin. It is the design decision underneath.
Two values is also a mercy for a beginner. There is nothing to blend and nothing to get subtly wrong. A shape is either black or it is not.
Working this way forces you to commit. Half-measures disappear. You find out quickly whether your idea has a shape at all, which is more useful than a beautiful passage of shading over a weak design.
The Paper You Need
You do not need much, and none of it is precious. This is one of the reasons I keep coming back to it on tired afternoons.
- Black and white construction paper or cardstock — a few sheets of each will last weeks.
- Small sharp scissors. A craft knife on a cutting mat works too, and gives cleaner inner corners.
- A glue stick.
- A pencil, for marking on the back only.
- A viewfinder: a card with a rectangular window cut in it, about two inches by three.
Construction paper is perfectly fine. Cardstock holds a crisper edge and resists curling when you glue it down, so I use cardstock for pieces I want to keep.
The whole kit costs a few dollars, and most of it is probably already in a drawer. The viewfinder is the only thing you may have to make.
Cut the window with a craft knife against a mat, or with scissors if you are patient. Hold it up, close one eye, and slide it around until a scene frames itself.
That small window does more work than it looks like it should. It removes everything you are not deciding about, which is most of the room.
Your First Study, Step by Step
This is the classic exercise, and it takes about ten minutes. Work at a clear table with the light coming over your shoulder.
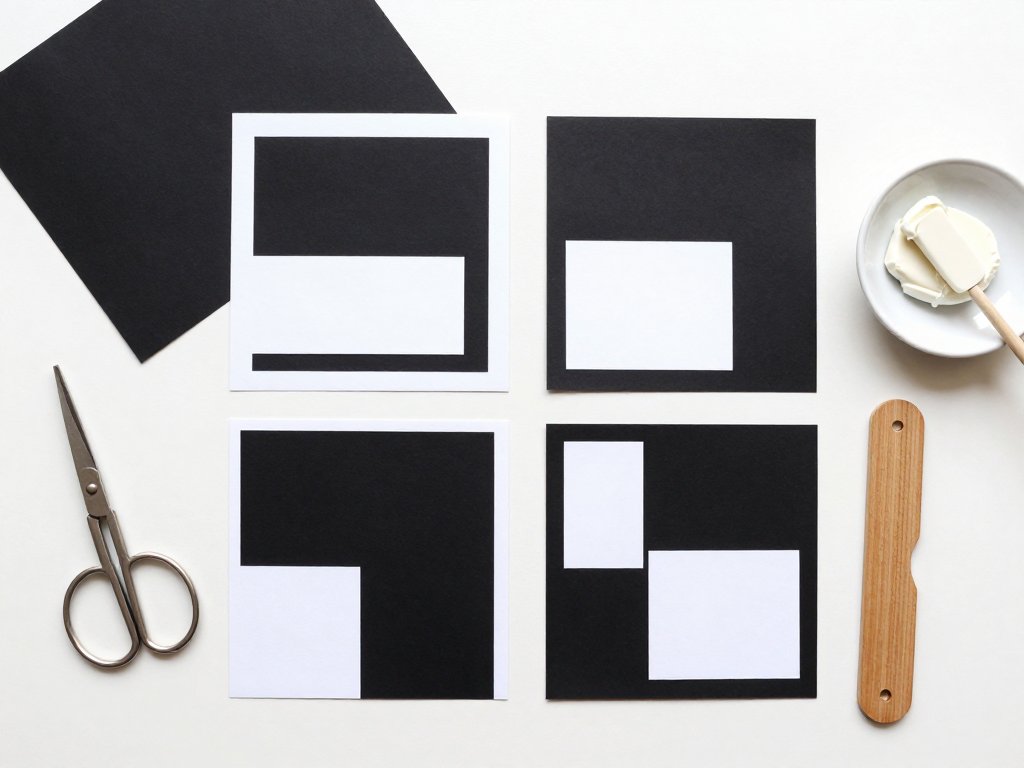
- Cut a white square, roughly six inches by six. This is your ground.
- Lightly divide it into four with a pencil on the back, or fold it and press the creases flat.
- Take a smaller piece of black paper and cut one simple shape — a leaf, a bowl, a chair, a hill.
- Place the shape on the square without gluing. Step back. Look.
- Move it. Try it high, then low, then crossing a fold. Notice when the square begins to feel settled.
- Cut two or three more shapes that relate to the first — smaller echoes of the same curve, or a counterweight on the empty side.
- Arrange the family of shapes until the black and white areas feel balanced.
- Glue them down once you are satisfied, pressing from the centre outward.
Notice what you are not doing: you are not drawing the object. You are cutting a shape that stands in for it. The leaf on the paper is not a leaf. It is the dark mass the leaf makes.
My first attempt looked like a ransom note — five unrelated scraps scattered across the square. The second was better because I stopped cutting new shapes and started cutting smaller versions of the first one.
That instinct, cutting a family rather than a collection, is most of the skill. The rest is patience with your own eye.
The Inverted Pair: Same Shapes, Opposite Light
Once you have a composition you like, make its twin. Cut a black square the same size, and rebuild the design with white shapes on black.
This is the inverted pair, and it teaches something that words cannot quite reach. The same arrangement, reversed, behaves completely differently.
A shape that felt like a solid object on white may read as a hole on black. The eye flips its assumptions and you finally see the design instead of the subject.
Do not simply turn your first piece over. Cut fresh shapes and place them deliberately, matching the arrangement but reversing the values.
Pin both pieces side by side and step back. One will usually feel stronger. Ask yourself which, and try to answer in terms of weight and position rather than subject matter.
I keep my pairs clipped together in a folder. They are not beautiful, but they are honest records of what my eye could see on a given afternoon.
The Expanded Square: Watching a Shape Move
The expanded square is the exercise that made notan click for me. It is looser, stranger and more playful than the four-part study.
Start with a black square, about four inches across. Cut into it from one edge — a curve, a wedge, a spiral — and keep the piece you remove.
Now lay the black square on a larger white square and set the cut piece just outside the edge it came from, spaced away from the parent shape.
The composition has expanded. Black shape, white gap, black fragment. The eye travels across the gap and completes the form on its own.
Keep going. Cut another piece and move it outward, then another. The design spreads across the white ground like something unfolding.
What you are learning is that the space between shapes is doing work. The white gap is not empty. It is a shape, and its width is a decision you are making.
My best expanded square came from a shape I nearly threw away, a lopsided cut I nudged outward almost by accident. The gap gave it a reason to exist.
Try three versions in one sitting. The third is usually the one worth keeping, because by then your hand has stopped arguing with your eye.
How to Judge Whether the Balance Works
Notan is judged by eye, and there are three quick tests that do most of the work. None of them needs anything but your own attention.
Squint. Squint until the edges go soft. If a single area pulls your attention and holds it, that mass is too heavy for where it sits.
Step back. Three or four feet is enough. Details vanish and the arrangement declares itself. Problems you could not see at arm's length become obvious at once.
Flip it upside down. Turn the piece so the shapes stop being objects. A leaf becomes a wedge, a bowl becomes a curve. You are finally looking at design rather than subject.
Balance does not mean symmetry. A large dark mass near the centre can be answered by a small dark shape far out near the edge. The small one carries more weight because of where it sits.
If one area feels heavier than it should, the fix is usually position rather than size. Slide the shape; do not immediately cut a new one.
And if a piece never settles, that is information too. Some scenes simply do not have a readable structure at two values, and knowing that early saves you hours later.
Using Notan Before You Paint, Quilt or Print
This is where the ten-minute study earns its keep. Notan is a planning tool, and it works for almost any medium that depends on shape.
Before you paint a small canvas, cut the scene in paper first. If the masses do not balance in black and white, they will not balance in colour, and colour will only disguise the weakness for a while.
Quilters use the same logic when they audition fabric values. A block can have lovely prints and still fail if the light and dark pieces do not divide the space well. A paper version shows you that in minutes instead of after an evening of piecing.
Block printers have the clearest case of all. A relief print is essentially a notan decision — what stays ink and what stays paper. Cutting the design in cardstock first is a free rehearsal.
For a scene you have already photographed, there is a shortcut. Open the photo on your phone and set it to grayscale. Squint at it. You will see at once whether the scene has a readable light-dark structure at all.
If it turns to mush in grayscale, choose another scene. That is not a failure of your drawing. It is your eye doing its job early, which is the whole point of a study.
I have saved myself several disappointing afternoons this way, usually by admitting on paper what I had been trying to talk myself into on a canvas.
A Ten-Minute Daily Habit
Notan is unusually well suited to a small daily practice, because a single study genuinely takes about ten minutes and needs no cleanup.
Keep a stack of small squares cut ahead of time — three inches is plenty — clipped together with the scissors and glue stick in the same tin.
Then, whenever you have ten quiet minutes, cut one shape and place it. That is the whole session. No finished piece is required.
Mornings work well if you can find them. Ten minutes before the house wakes, with the kettle on, is a different kind of start to a day than ten minutes of a screen.
If mornings are impossible — and for years they were impossible for me — take the ten minutes after lunch, or after the children are down. The time of day matters less than the repetition.
Keep the studies in a folder, dated if you think of it. After a month, lay them out together. You will see your eye change, which is a quiet and specific pleasure.
Do not judge the individual pieces. Some will be dull. The practice is the point, and the dull ones are doing their work by teaching you what not to do.
Common Beginner Mistakes and Their Fixes
Almost everyone makes the same handful of mistakes at the start. Knowing them in advance saves a good deal of quiet discouragement.
- Using grey as a middle value. That is a value study, not notan. Fix: put the grey away and decide — black or white, no compromise.
- Cutting shapes too small and fussy. Tiny pieces read as texture rather than design. Fix: cut fewer shapes, each at least a third of the square.
- Treating the white paper as background. It is a shape, and often the larger one. Fix: study the white areas as deliberately as the black.
- Cutting one shape instead of a family. A single floating shape rarely balances a square. Fix: cut two or three related shapes that answer each other.
There is a fifth mistake that is harder to name: finishing too fast. Gluing the first arrangement down because it looks acceptable ends the conversation the piece was trying to have with you.
Leave it loose for longer than feels comfortable. Move things. Take one shape off entirely and see whether you miss it.
The pieces I regret are the ones I glued down early. The ones I still like are the ones I nearly ruined by moving everything one last time.
What These Studies Teach You Over Time
After a few weeks of this, something shifts in how you look at ordinary things. Not dramatically. Just a habit of noticing where the dark sits.
You will catch yourself squinting at a doorway, at a washing line, at the shape a chair back makes against a bright window. You will start to see scenes as arrangements rather than objects.
That is the real return on ten minutes a day. Not a portfolio. A slightly better eye, carried around with you into kitchens and gardens and waiting rooms.
It also makes you kinder to your own work. Once you have cut twenty studies, you know that most of them are ordinary and a few are good, and that this ratio is entirely normal.
The good ones are worth the ordinary ones. They always are.
Conclusion
My grandmother never called it notan. She would have called it noticing, and she would have said it was free.
Start with one white square and one black shape. Place it, step back, move it, place it again. Ten minutes, a few dollars of paper, no experience required.
You are not making a picture of a leaf or a bowl or a window. You are deciding how much dark the scene needs, and where it should sit. That decision underlies every drawing you will ever make.
When you are ready for the next layer — many values, modelled form, soft edges — that work is waiting for you. For now, two values is plenty. It is more than plenty.
Cut a square this afternoon. Sit where the light falls. See what you notice.