Introduction
There is a particular pleasure in cutting into a lump of clay and finding a pattern you made yourself. Not painted on. Not printed. Built into the material, layer by layer, like the cross-section of a cake.
That pleasure has a name. Nerikomi is the Japanese technique of stacking colored clay bodies and slicing through them to reveal a design.
The picture lives inside the clay. Sand the surface, carve it, wear it down with years of use — the pattern is still there, all the way through.
It is also one of the friendliest decorative techniques for a beginner. There is no glaze chemistry to learn and no brush skill to build. You need clay, color, patience, and a wire.
This guide covers what nerikomi is, which clays work, how to color clay safely, and how to build a first pattern block.
What Nerikomi Actually Is
Nerikomi is a hand-building tradition. Potters take two or more differently colored clay bodies, stack or bundle them together, compress the mass, and then slice it.
Each slice is a cross-section. What you see is the pattern you assembled, revealed rather than applied.
The name is usually translated as "kneading in" or "pressed in," which is exactly right. The color belongs to the clay body itself, not to a surface coating.
Nothing is glued or faked. A nerikomi tile that chips along its edge still shows the pattern running straight through the broken face.
Nerikomi, neriage, agateware, and caning
These four names get used interchangeably online, and that is a small shame, because they are not quite the same thing.
Neriage also combines colored clays, but it generally means clays blended or marbled together rather than stacked into a legible, repeating picture.
Neriage is often paired with slip casting, where the mixed body is poured into a plaster mold — soft, swirling, and marbled rather than graphic.
Agateware is the English name for the wider family. It comes from the stone, whose bands and swirls the technique imitates.
Millefiori caning, familiar from polymer clay and from glass, is the closest cousin of all. Bundles of colored material are drawn into a long cane, then sliced.
Practically, all four reward the same skill: learning to think in cross-sections.
Where the technique comes from
A short, honest note on provenance. Nerikomi is a Japanese tradition, and it is usually discussed alongside the studio pottery movement of the twentieth century.
Tomimoto Kenkichi is frequently named as an early and influential figure in colored-clay work. Later masters built on that foundation.
The technique is strongly associated with the Mashiko and Kyoto studio pottery traditions, where colored clay bodies were treated with the same seriousness as glaze.
Colored-clay pottery appears in China, Korea, and Europe too. Tracing exact influence quickly becomes guesswork, so I have left it there.
The Clays That Play Well Together
There are two routes and both are legitimate. You can tint one clay body by hand in several colors, or you can buy commercially colored clay and use it as it arrives.
Buying ready-tinted clay is the easier start: it is consistent, and you skip the measuring and the dust.
Hand-tinting gives you control: your own palette, your own intensity, and colors nobody sells in a bag. It costs you a mixing session and real attention to dust control.
Pick whichever keeps you making. For a first block, I would buy the color and save the mixing for a later weekend.
Why every layer must shrink at the same rate
This is the rule that decides whether your piece survives the kiln. Every layer in the stack has to shrink at the same rate during drying and firing.
Differences of only a few percent are enough to cause trouble. The layers pull against one another, and something has to give.
The crack usually opens along the boundary between a pale layer and a dark one, early in drying. It does not heal, and glazing will not hide it.
The safest approach is to tint the same base body in several colors. Same clay, same shrinkage, no argument.
If you buy colored clay, buy compatible colors from the same supplier and the same body family — porcelain with porcelain, stoneware with stoneware.
Grog complicates things. A heavily grogged body behaves differently from a smooth one, so keep texture consistent across your layers.
Test tiles before test pots
Fire three or four small tiles before you commit an entire weekend. Press a striped sample of each pairing, label the back, and bisque them.
Color changes dramatically in the kiln. A red iron body that looks muddy brown raw can warm into a rich brick tone once fired.
Smooth porcelain discs cut from a slab make ideal test tiles. They are flat, they stack neatly, and they cost nothing but a corner of the kiln shelf.
Coloring Clay Safely
If you tint clay yourself, you will be handling ceramic body stains, also called ceramic stains or oxide colorants. Powdered color is the only genuine hazard in this technique.
The risks worth respecting are three: inhaling pigment dust, contaminating food surfaces, and tracking fine colorant through the house on your clothes and shoes.
Your protection is boring and effective. A fitted N95 or P2 dust mask, worn whenever you open a jar, scoop, or sieve pigment. Good ventilation, ideally working outdoors.
A wet wipe-down of the bench when you finish. A dedicated apron. Pigment on your hands is fine and washes off; pigment in the air is what you avoid.
Work wet where you can. Mixing a stain into a water slurry before adding it to clay cuts airborne dust sharply.
Never use your kitchen scale or your good spoons. A small set of dedicated mixing tools costs very little.
Fired into the body, the stains are stable. The finished pot is not the hazard — the dust is.
Common stains and what they do
Red iron oxide gives a warm terracotta or brick red, and it is the most forgiving colorant there is.
Cobalt oxide or cobalt carbonate produces a deep, strong blue. It is powerful, so a small amount goes a very long way.
Manganese dioxide makes purple-brown and near-black tones. Handled with a mask and clean hands it is manageable; its dust is the concern.
Chrome-tin pink is a blended stain of tin and chromium, and it gives a soft, stable pink that plain oxides rarely reach.
A typical beginning dose of body stain is a small percentage of the dry clay weight, kneaded in until the color is even. Start lighter than you think you want.
Building Your First Pattern Block
Here is the sequence for a simple striped block, roughly the size of a thick paperback. Work on canvas or a wooden board rather than a slick table.
- Roll each color into an even slab. Aim for consistent thickness, around one centimeter.
- Trim the slabs to the same width so the stack has straight sides. A ruler and a needle tool are enough.
- Stack the slabs in your chosen order: cream, charcoal, cream, terracotta.
- Press each layer down firmly as you add it. Slide your palm across the surface to push out trapped air pockets.
- Compress the whole block with a rolling pin or a rib, working from the center outward.
- Neaten the sides by pressing them flat against the board, then wrap the block in plastic.
- Let it rest to a firm, cheese-like state — firm enough to hold its shape when squeezed, soft enough to cut cleanly with a wire.
That resting step is the one beginners skip. A block cut too soft will drag and smear. A block cut too hard will crumble at the edges.
The feel you are looking for is closer to a firm bar of soap than to bread dough.
For the cut itself, use a wire clay cutter if you own one. A taut cheese-wire or a length of guitar string stretched between two dowels works just as well.
Draw the wire through in a single confident stroke. Do not saw back and forth. Do not press hard, and do not stop in the middle of the slice.
What to do when a pattern smears
It will happen. A slice goes soft and the dark layer drags sideways into the light one, blurring the clean lines you had planned.
The cause is almost always moisture rather than technique. Rewrap the block, let it firm for twenty minutes, and cut again.
If one layer is softer than the others, you probably rolled them at different times or on a damp board. Roll all the layers in one session next time.
You can also press a failed slice back into a fresh block rather than throwing it away. Nerikomi is unusually generous about mistakes.
Pattern Families Worth Trying
Once you can cut one clean slice, a whole vocabulary opens up. These are the patterns a beginner can genuinely reach over a single weekend.
Stripes, and stripes to checks
The simplest pattern is a straight stack. Sliced across the layers, you get stripes — even, confident, and surprisingly satisfying.
Then slice the stripe block into slabs, stack those slabs on top of one another, and press them together. Cut across the new block.
You now have a checkerboard. The stripes gave you the lines; the second direction gives you the grid.
Bullseyes and dot stacks
Roll a small cylinder of one color and wrap it in a slab of another. Keep wrapping — three or four skins are plenty.
Slice across the resulting log and every piece holds a bullseye. Offset the core slightly and the rings turn eccentric, which is often lovelier.
Checkerboards
True checkers come from stacking square rods rather than flat slabs. Roll coils, square them by pressing against the bench, and alternate the colors.
Cut a finished bundle in half and rejoin the halves with the colors reversed. Then slice. The result is an offset checker with real crispness.
Spirals and rolls
Lay two long coils of different colors side by side, then twist them together like a rope. Slice across the twist to reveal spirals.
Roll the twisted rope under your palm to compact it before cutting. A loose twist cuts into mush.
Chevrons
Build a striped stack, then cut it on a diagonal instead of square. Every slice now carries a chevron rather than a straight line.
Flip alternate slices when you lay them down, and you get arrowheads that meet and part, like herringbone.
The second cut, where the magic happens
This is the idea worth remembering above all the others. Nerikomi compounds, because a pattern block can itself be sliced and rebuilt.
Take your finished striped block, cut it into slabs, and stack those slabs in a new order or a new direction. Then cut again.
The second-generation pattern is almost always more interesting than the first, because it carries the memory of how it was built.
A stripe becomes a grid; a grid becomes a woven lattice; a bullseye becomes a flower. The clay does most of the work, and you only steer.
From Slice to Shape
A pattern slice is a flat, decorative sheet. Now you have to turn it into a pot, and how you do that changes how the pattern reads.
Pressing slices into a mold or a bowl
The gentlest method. Set a slice inside a plaster hump mold or an ordinary bowl lined with plastic, and press it down with a soft rib.
Work from the center outward to avoid trapping air. The pattern stays roughly true because the slice is barely stretched.
Join additional slices for a larger bowl by scoring and slipping the edges — rough both surfaces, add slip, and press firmly together.
Wrapping a slab around a cylinder
For mugs and vases, lay the patterned slab over a cardboard tube or a rolling pin wrapped in paper.
The pattern bends around the form on a single axis. Vertical stripes will spiral slightly. Horizontal stripes will curve like contour lines on a map.
Both results are handsome. Neither is quite what you drew on the board, and that is the point of the technique.
Slices joined into a sheet, then formed as a soft slab
This is the most versatile route. Butt slices edge to edge to make a larger patterned sheet, then let it stiffen to a soft-slab state.
Lift the sheet, drape it over a mold or roll it into a cylinder, and join the seam.
Because you assembled the pattern while it was flat, you can plan the whole surface: a band of checks around the rim, stripes fading down the belly.
How slice orientation changes everything
The same slice looks entirely different depending on where it sits. Slices laid pattern-up read as a picture.
Slices laid on edge read as contour lines following the wall of the pot — quieter, and often more sophisticated.
Photograph your slices on a plain white sheet before forming. Ten minutes of looking saves a bowl formed the wrong way round.
Drying, Firing and Finishing
Colored clay rewards slow drying more than almost any other technique. The layers and your joins dry at slightly different rates, and a fast dry will find the weakest seam.
Keep the formed piece under loose plastic for a day or two. Then crack the plastic open at one corner, then a little further the next day.
After another day, remove the cover entirely. Let the piece finish in the open air, away from direct sunlight and cold drafts.
Thicker blocks take proportionally longer. A chunky patterned base joined to a thin wall is a classic cracking scenario, so keep wall thickness consistent.
Bisque the dry piece slowly to around cone 04. A gentle early ramp gives the last traces of water time to leave without stress.
Then glaze with the pattern rather than against it. Clear, transparent, or a thin satin finish lets the color speak for itself.
A heavy opaque glaze will hide the very thing you built. If you want more depth, use a transparent glaze with a faint tint instead of an opaque one.
Unglazed outside and glazed inside is a lovely, practical option for cups and bowls. The outside keeps the honest texture of clay and stays easy to grip; the inside stays clean and food-safe.
Generally, colored clay is fired to the maturity of its base body. Follow the supplier's recommendation, and remember that some stains dull if fired too high.
When Patterns Go Wrong
Almost every problem in nerikomi traces back to moisture, air, or impatience. Here are the four you will actually meet.
Layers separating
If the stack opens along a boundary, the layers were not at the same moisture when you pressed them together.
Fix it by letting both sit wrapped until they feel identical, then scoring the surfaces lightly and pressing firmly.
Muddy or bleeding colors
Colors bleed when the clay is too soft during cutting, or when a strong stain migrates into pale clay during handling.
Fix it by cutting firmer, keeping your hands and rib clean, and not stacking a very soft dark layer against a soft pale one.
Dark against light is always the risk. A thin pale layer between a near-black and a cream can act as a buffer.
Air bubbles and blisters
A trapped pocket of air expands in the kiln and lifts a blister off the surface. It spoils a piece precisely because everything else was fine.
Fix it by pressing every layer thoroughly as it goes down, and always opening one corner of a wrapped block after compressing it.
Distortion during forming
Slice patterns stretch and skew when you press them into a shape. A circle becomes an oval; a square becomes a lozenge.
Fix it by pressing gently, working from the center outward, and accepting mild distortion as part of the handmade character.
A Weekend Project, Honestly
Nerikomi is not a one-hour craft, and pretending otherwise only sets you up to feel slow. It is a weekend project, across two days, on a table.
Day one: roll slabs, tint clay if you are tinting, and build the block. That is a couple of hours, with breaks for tea.
Day two: let the block firm, slice it, assemble a pattern, and form a small dish. That is another afternoon.
Then the clay keeps working without you. Wrapped plastic, slow drying, and eventually a kiln.
If your first pattern comes out muddy or your joins show, that is normal and expected. Colored clay is honest about effort; it shows exactly what you put into it.
Final Thoughts
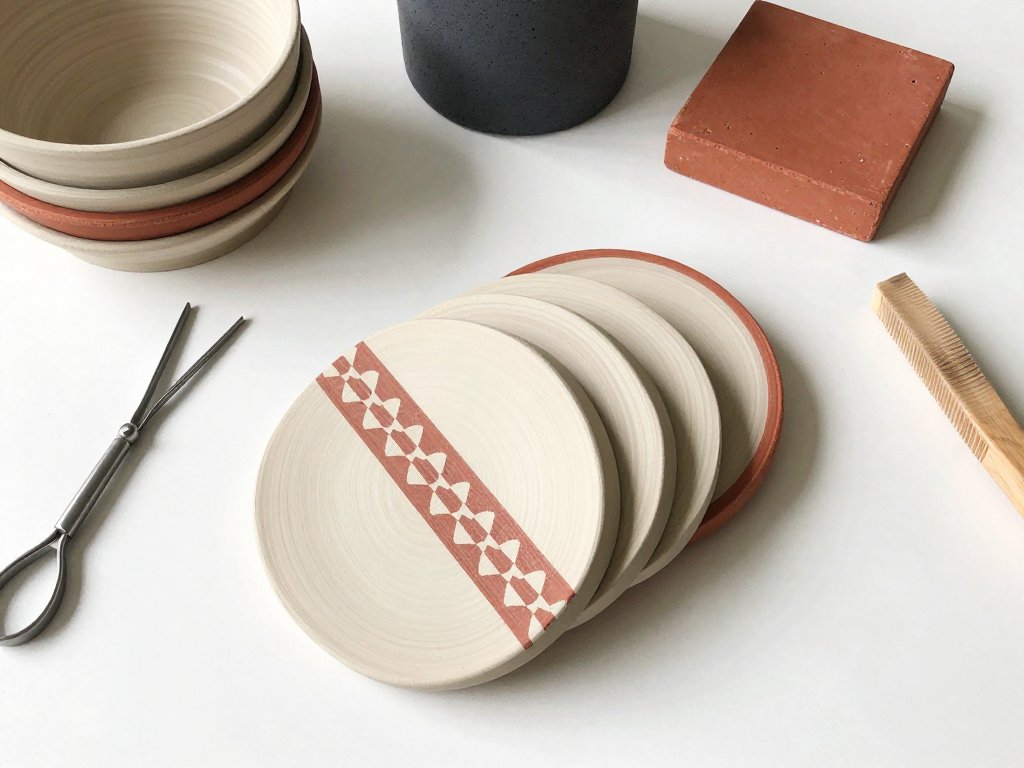
Start small. A coaster, or a little dish for rings, is the right first project. Four slices, one simple shape, a week of patient drying.
Small pieces are cheap to fire, quick to finish, and they teach you the entire cycle: build, cut, form, dry, fire, glaze.
Then make the bigger one — a bowl, a mug, a serving plate. By then you will know your own clay, your own pressure, and your own colors.
If you love the moment of cutting through a layered block and finding the pattern inside, you may also enjoy its opposite. Where nerikomi builds color into the clay, sgraffito pottery carves color away. Both reward the same unhurried afternoon.
Nerikomi asks very little of a beginner. Clay, color, a wire, and a little patience. Stack, press, slice, and look — something you built is waiting inside.