Introduction
You have watched a hundred anime openings and you still freeze the moment the pencil touches paper. That is completely normal. Manga faces follow conventions, not talent, and conventions can be copied, drilled, and learned in an evening.
This guide stays strictly with manga technique: the oversized expressive eye, the heavy upper lid line, stylised hair spikes, and the proportions that make a face read as anime rather than as a Western cartoon.
By the end you will be able to draw one convincing anime eye from memory and build a simple head around it. Fifteen minutes a night is enough.
Supplies: Exactly What You Need
Manga is a line art style, so your paper and your pens matter more than they would in a painting project. Here is the short, specific list.
- Smooth Bristol or marker paper. Fine nibs and fineliners drag and feather on rough watercolour paper. Smooth Bristol takes ink in a clean, unbroken line.
- An HB and a 2B graphite pencil. The HB draws your light guidelines. The 2B darkens the upper lid and lash mass.
- A 0.5 mechanical pencil. Consistent thin guidelines with no sharpening pause.
- A kneaded eraser. It lifts pencil without scuffing the paper surface. Never scrub graphite lines with a hard eraser.
- A 0.1 and a 0.3 black fineliner, or a nib pen. The 0.1 draws lashes, iris line and fine hatching. The 0.3 draws the thick upper lid and outer contour.
- A ruler or small straightedge. For the vertical centre line and the eye line.
- A light pad or a bright window. For tracing practice over reference sheets.
- A spare sheet. Reserved for warm-ups so your good paper stays clean.
One optional extra: a piece of scrap card to slide under your hand so the graphite does not smear as you work across the page.
Use the light pad for tracing practice, not for finished work. Lay a printed reference sheet on the pad, your Bristol on top, and trace the eye ten times. Your hand learns the path of the lid line faster than the eye learns it.
Why Manga Faces Look Different
Put a manga head next to a Western cartoon head and the differences are structural, not decorative. Four changes do most of the work.
- The eye occupies far more of the face. In manga, eyes can take up a third of the head height. In classic Western cartooning they are smaller and rounder.
- The nose is reduced. A dot, a short tick, or a tiny wedge. Sometimes it is left out entirely in a three-quarter view.
- The mouth is a single line. One stroke with a slight curve, not a full outlined shape with lips drawn in.
- The jaw narrows to a soft point. Not a round ball. Two gently angled lines travel down and meet near the chin.
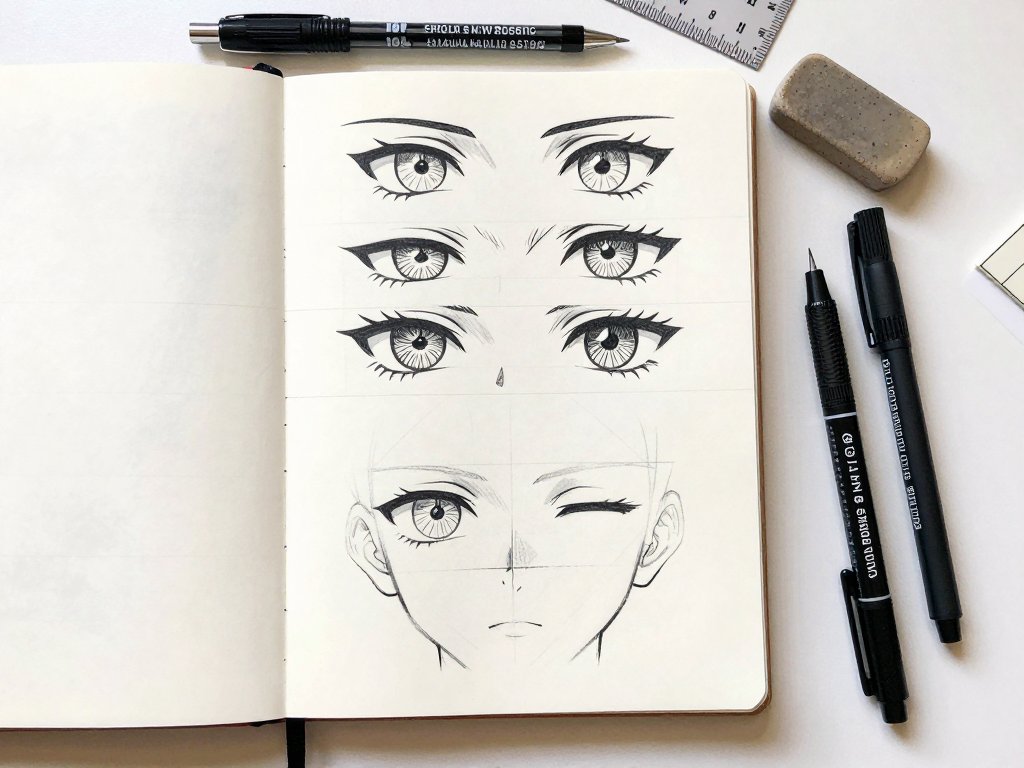
The single most useful convention is this: a manga eye is not an outline of a whole eye. It is built outward from the dark upper lid line. That one heavy curve carries the emotion.
Manga also changes its line weight deliberately. Outer contours stay thin. The upper lid, lash line and hair silhouette go thick. Shading arrives as hatching, cross-hatching or dotted screentone texture rather than blended tone.
If you also want the rounded Western approach for comparison, the techniques in Cartoon Drawing: Faces and Expressions make a useful side-by-side study.
A Line Weight Map
Japanese manga keeps a deliberate hierarchy of thick and thin. Copy this map and your pages start looking like printed manga pages.
- Heaviest: upper lid line, hair silhouette, chin and jaw contour.
- Medium: lash spikes at the outer corner, the eye's outer rim above the iris.
- Thin: lower lid, nose tick, mouth line, the inner contour of the far cheek.
- Lightest: iris edge, hatching strokes, chin shadow hatching.
Two weights of pen, big and small, are enough. The contrast between them is what the eye reads as style.
Anime Eye Anatomy in Plain Terms
Before you draw anything, name the parts. An anime eye is built from seven pieces, and each one has a job.
- Upper eyelid line. Thick and dark. This is the shape that carries the emotion — everything else is detail.
- Lower lid line. Thin, or omitted completely. It should never compete with the upper lid.
- Iris. A large circle that is usually cut off at the top by the upper lid. It rarely appears as a full circle.
- Pupil. A dark shape inside the iris, positioned slightly off-centre for life and focus.
- Main highlight. A crescent of white in the upper third of the iris. Leave the paper bare — that is your white.
- Secondary highlight. Small, near the lower edge of the iris, opposite the main one.
- Eyelash spikes. Two or three triangular flares at the outer corner, thicker than the lid line itself.
Notice what is missing: no drawn eyelids above the lid line, no lower lashes, no detailed iris texture. Manga eyes are edited, not detailed.
Eye size is a character signal as well as a drawing choice. Larger irises read as younger and more innocent; narrower, flatter eyes read as older, colder or more composed. Pick the read you want before you draw the first stroke.
Drawing One Eye: A Checklist Walkthrough
Work in this order on smooth Bristol. Each step is quick; the whole eye takes two or three minutes once you know the sequence.
- Draw the upper lid line first. One flowing arc, thicker in the middle, with a small flick up at the outer corner.
- Add the iris circle. A large circle placed so the upper lid cuts across its top edge. The lid hides part of it — that is correct.
- Place the pupil. A dark oval inside the iris, offset slightly toward the nose or the gaze direction.
- Add one large highlight. A white crescent in the upper third of the iris. Draw its shape only; leave the inside empty.
- Add the lash spikes. Two or three triangles at the outer corner, angled up and out. Keep them shorter than the eye is tall.
- Thicken the outer corner. Go over the outer third of the lid line once with the 0.3 pen to add weight.
- Keep the lower lid to one thin stroke. A single gentle curve under the iris, with a gap at the outer corner.
If the eye looks dead, the upper lid is too thin. That is almost always the answer.
When you draw the second eye, do not copy the first. Draw it as a mirror and match the lid line's height at three points: inner corner, middle, outer corner. Matching those three points keeps both eyes looking at the same thing.
Eye Shapes by Emotion
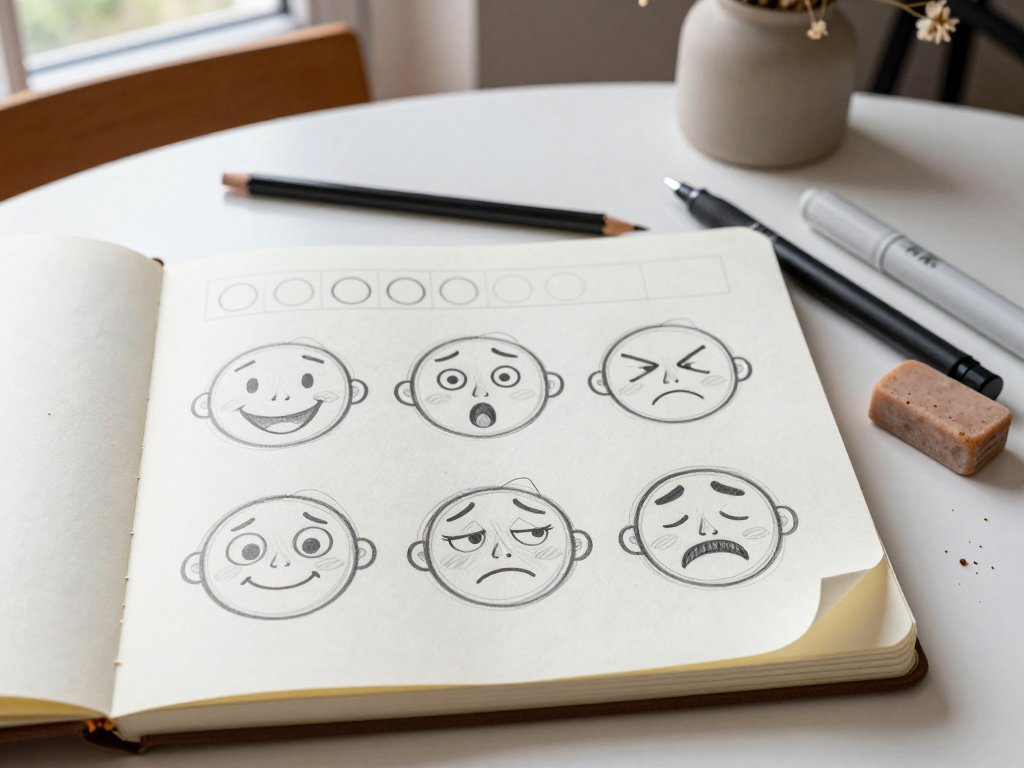
Same seven parts, six different expressions. Change the upper lid line and the highlights, and the emotional read changes completely.
| Emotion | What Changes |
|---|---|
| Happy | Lower lid curves upward; iris is slightly hidden by the raised lid; highlights stay big. |
| Surprised | Round iris almost fully visible; lashes thin; pupil small; a ring of white above the iris. |
| Calm or soft | Half-lidded; flat upper line; small pupil; reduced lash spikes; second highlight kept tiny. |
| Angry | Inner corner dips down toward the nose; upper lid low; sharp, long lash spikes. |
| Shy | Lashes downcast; pupils drawn low; one small highlight; the upper lid stays thin. |
| Cool or confident | Narrow eye; flat lid; one crisp highlight; iris mostly covered; heavy outer corner. |
Draw all six on one sheet in a row. Seeing them side by side teaches the lid line faster than copying any single expression.
Manga Face Proportions, Step by Step
Once one eye works, build the head around a pair of them. These proportions suit a teenage or young adult character.
- Start with a circle for the skull. Light HB. This is the cranium, the larger upper mass of the head.
- Add a jaw line. Two angled lines dropping from the sides of the circle, meeting at a soft point below. Not a curve.
- Mark the vertical centre line. A light straight line down the middle. It checks that both eyes sit level.
- Mark the eye line. About halfway down the head, or lower for a childish look. Manga faces put the eye line lower than most beginners expect.
- Space the eyes roughly one eye-width apart. The gap between the eyes equals the width of one eye. This is the most common beginner error.
- Place the nose two-thirds of the way down. Between the eye line and the chin — just a small tick.
- Drop the mouth close to the chin. Higher than the true human position, which is exactly why it looks manga.
Raising the eye line makes a character look younger. Lowering it makes them look older and more mature. That one move changes apparent age more than any other adjustment.
Chibi and Teen Proportions
Two manga body types cover most of what beginners want to draw, and they differ mainly in head-to-body ratio.
- Chibi: two to three heads tall. Enormous eyes taking a third of the face, tiny nose, wide rounded skull, short soft jaw.
- Teen or young adult: six to seven heads tall. Eye line halfway down the head, longer jaw, thinner nose and mouth lines.
- Both: keep the one-eye-width gap between the eyes and let the upper lid cut the iris.
Draw the chibi version first. It exaggerates every manga convention, so the rules become obvious before you apply them at a realistic scale.
Hair as Shapes, Not Strands
Beginners draw hair strand by strand and end up with a tangle. Draw shapes instead.
- Block the silhouette first. A single outline around the whole hairstyle, drawn before any interior lines.
- Add a few stylised spikes. Three to six large pointed shapes, not twenty small ones.
- Leave gaps so the forehead shows. The parting and the strand gaps let the paper breathe.
- Thicken where hair meets the skull. The outer silhouette gets the heaviest ink line on the page.
Line Confidence: From Pencil to Ink
Manga lives or dies on line quality. Shaky lines read as amateur no matter how good the proportions are. Four habits fix it.
- Draw light guidelines in HB. Keep them pale enough to ignore. They are scaffolding, not drawing.
- Commit to the ink pass in one stroke. Decide the line, then draw it once, at a steady speed, from the shoulder rather than the fingers.
- Rotate the paper instead of bending your wrist. Turn the sheet until the line runs toward you comfortably. Your hand should barely change shape.
- Erase guidelines only after the ink is dry. Wait a full minute or two, then lift them with the kneaded eraser.
Never go over a line twice in ink. A single confident stroke with a wobble looks better than a doubled line that is technically straighter. Speed helps — slow, careful movements shake.
A fineliner keeps a constant width and forgives nothing. A nib pen varies from hairline to thick within one movement, which is closer to real manga.
The trade-off: a nib needs a light touch or it catches the paper fibres. Practice nib strokes on the spare warm-up sheet first.
Beginner Mistakes and How to Repair Them
These five problems account for most disappointing first manga faces. Each has a direct repair.
- The eyes float too high. Recheck the eye line. It belongs about halfway down the head, sometimes lower. Measure before you ink.
- The face looks flat. Thicken the upper lid and darken the lash line. Contrast in line weight creates depth without any shading.
- The jaw is too round. Redraw it as two angled lines meeting at a soft point. Round jaws read as Western cartoon instantly.
- The iris is too big. Let the upper lid cut across it. A partially hidden iris looks intentional; a full circle looks like a bug eye.
- The lines are shaky. Draw ten warm-up sheets of straight and curved lines before a session. Yes, ten.
None of these require starting over. Ink is unforgiving, so check each one in pencil first and fix it before the fineliner comes out.
Your 15-Minute Nightly Practice Routine
Fifteen focused minutes a night beats a three-hour session once a month. Set a timer and split it into three blocks.
- Minutes 1 to 5 — line warm-ups. Fill half a scrap sheet with straight lines, long curves and small circles. No drawing, just movement.
- Minutes 6 to 10 — copy one reference eye three times. Same eye, three passes. Trace it once on the light pad, then draw it freehand twice.
- Minutes 11 to 15 — draw one full head. Use the proportion steps above. Circle, jaw, centre line, eye line, eyes, nose, mouth.
Date each sheet. In three weeks the difference in your lid lines will be obvious, and that visible progress is what keeps the habit alive.
Once a week, spread the last seven sheets side by side and pick the single worst problem. Floating eyes, a round jaw, shaky lids — choose one. Spend the next week's warm-up block on that fault only.
Fixing one repeated error a week improves a face faster than drawing twenty new ones.
Taking a Finished Drawing to Ink
Ink in this order and you will not have to redraw anything.
- Ink the upper lid lines and lash spikes first with the 0.3 — these are the heaviest lines.
- Ink the iris, pupil and jaw with the 0.1, then the lower lid as a single thin stroke.
- Ink the hair silhouette with the 0.3, working in one direction around the shape.
- Add hatching or light stippled dots for shadow under the chin and inside the hair mass.
- Wait for the ink to dry completely, then lift every pencil guideline with the kneaded eraser.
Leave the highlights bare. They should be untouched paper, never filled in afterwards.
Manga Is a Skill, Not a Talent
Every manga artist you admire has thousands of practice heads behind their published pages. The style is a set of conventions — an eye built from a lid line, a pointed jaw, hair blocked as shapes — and conventions are learnable.
Start tonight with one eye and three reference copies. Tomorrow, one full head. Keep the sheets in a folder and flip back through them in a month.
Your first manga face is not meant to be good. It is meant to be finished, and then to be the first of many.