Introduction
There is a canvas tote hanging by our back door that I painted three summers ago. The leaves are uneven. One lemon is noticeably larger than the others. I use it every week anyway, and nobody has ever asked me why the fruit is different sizes.
That is the quiet gift of fabric painting. It does not ask you to be precise. It asks you to sit down for an hour, spread out an old shirt or a plain bag, and put some color on cloth that will then go out into your life.
This guide covers everything a first-timer needs: which paints to buy, how to prep a tote or tee, how to handle denim's stubborn texture, and how to make the color survive the washing machine, plus three small projects and a supply list that costs less than a takeout dinner.
If your first attempt comes out a little wobbly, that is not a failure. That is what a first attempt looks like.
Why Fabric Is a Forgiving First Surface
Paper punishes you: a wrong stroke cannot be lifted, and one heavy puddle ruins the sheet. Fabric is kinder than that.
Cotton has a woven texture that softens edges on its own. At arm's length, a slightly uneven outline reads as handmade rather than sloppy. Jersey knit stretches and moves, so small wobbles disappear when the shirt is on a body instead of flat on a table.
Fabric also lets you build. You can paint a shape, let it dry, and paint over the part you dislike. You can turn a stray blob into a flower center. You can add a second color once you see how the first one behaves.
The one thing fabric will not forgive is ignoring its texture. Paint applied thickly across a seam or a chunky weave will crack later. Thin layers, built slowly, are the whole secret.
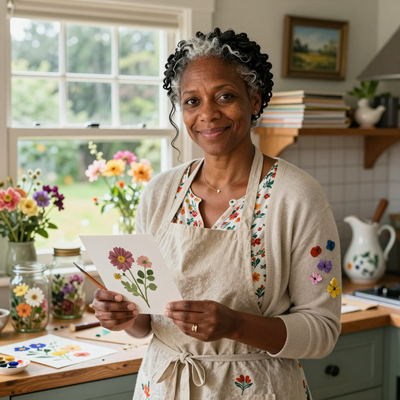
If you find you love the look of cloth colored all the way through rather than painted on the surface, shibori fabric dyeing is a lovely companion craft, and the two look beautiful together on the same tote.
Choosing Paints and Markers
You have two good roads here, and both work. The simpler one is textile paint, often sold as fabric paint: a soft-bodied acrylic made to stay flexible on cloth. It is ready to use, opaque enough for denim, and labeled with its own heat-setting instructions.
The second road is ordinary acrylic paint mixed with a textile medium. This is the budget route, and it works well if you measure. Start with two parts acrylic to one part medium, stir thoroughly, and check your bottle, since some brands suggest one to one.
The medium is not optional. Acrylic alone dries into a stiff film that cracks when the fabric bends, which is exactly what a t-shirt does all day. Medium keeps the film elastic.
Think about finish, too. Soft matte fabric paint belongs on jersey and anything that will be washed often. Metallic and pearl paints sit on top of the cloth rather than sinking in, so they shine on denim and canvas totes but feel a little rigid on a stretchy tee.
Fabric markers are the third tool, and they earn their place. A fine-tip black marker gives you outlines, dots, stems and tiny details that a brush simply cannot manage. Markers are less opaque than paint, so they behave best on light cotton or over a dried painted base.
Start with four colors. White, black, and two you actually like. A shelf of twenty bottles is a lovely thing to own and a terrible thing to choose from on a Tuesday afternoon.
Prepping the Fabric and Sketching a Design
Wash and dry the item first, with no fabric softener. New fabric carries sizing that keeps paint from gripping the fibers, and thrifted pieces carry whatever they have lived through.
Next, put something inside the bag or shirt. This barrier is the step beginners skip and then regret, because paint wicks straight through cotton and leaves a ghost on the back panel.
Cut a piece of cardboard to fit, wrap it in wax paper or foil, and slide it in.
Freezer paper works even better for shirts: cut it slightly larger than the design, iron it plastic side down onto the inside of the fabric, and you have both a barrier and a firm surface.
Tape matters as much as paint. Painter's tape pressed firmly along a border gives you a clean edge, and it lifts off without pulling fibers. Press the tape down with your thumbnail, especially over a textured weave where paint likes to creep underneath.
Work flat. Lay the tote or tee on a table covered with newspaper or a plastic sheet, smooth out the wrinkles with your hands, and resist the urge to hold the fabric up while you paint. Cloth that is stretched while wet will crack when it relaxes.
A light sketch is a map, not a commitment. White chalk shows up on denim, and a washable marker works on light cotton because both vanish in the first wash.
Keep the design to three to five shapes. A cluster of leaves, a sun with flat rays, three lemons, a row of daisies, a simple mountain line. Simple silhouettes paint beautifully and complicated ones frustrate.
Trace around things you already own: a cookie cutter, a mug, a real leaf from the yard, a child's hand. Tracing gives you confident curves without any drawing skill.
Place the design where the object actually bends. A tote looks best with the motif in the lower third or centered; a shirt usually wants something small on the chest or a larger shape high on the back.
Before you commit, test your paint on the inside hem or an inside seam. You will learn how far it spreads, how opaque it really is, and whether the color shifts against that particular fabric.
Brush Technique: Loading, Layering and Edges
Two brushes cover almost everything. A one-inch foam brush lays down flat, even coverage for backgrounds and large shapes. A round brush, around size six, handles outlines and curved fills.
Load the brush by dipping only the bottom half of the bristles, then tap off the excess on the rim. If paint reaches the metal ferrule, it dries there and ruins the brush. A damp brush, not a wet one, moves paint most smoothly.
Work light to dark. Pale colors go down first, because dark paint covers light easily while light paint over dark needs several coats. Let each layer dry to the touch, about fifteen to twenty minutes, before adding the next.
On knits, dab or stipple rather than dragging the brush back and forth. Scrubbing raises the fibers and leaves a fuzzy, worn-looking patch that no amount of paint will fix.
Keep a rag nearby and wick up mistakes immediately. A blot lifted in the first minute usually disappears; a blot left to dry becomes a design decision.
When you finish a section, pull the tape while the paint is still slightly tacky. If it has dried completely, score along the tape edge with a craft knife first, then lift slowly.
Painting Denim: Texture and Indigo
Denim painting is the most satisfying work in this guide, and the most stubborn. Its twill weave has diagonal ridges, and paint that sits on top of those ridges will wear off in a month.
Work the paint down into the weave with a stabbing, dabbing motion instead of long strokes. Two thin layers pushed into the cloth outlast one thick layer sitting on it.
Indigo is the second consideration. Dark denim dye can lift and tint whatever you put on top, so bright yellows may turn greenish and whites may go blue-grey. Test on an inside seam first, and expect to need a second coat of white as a base for anything pale.
Skip the seams when you can. Paint crossing a thick double seam will crack the first time the jacket is folded, and rivets and buttons repel paint anyway.
Denim loves opaque color: warm white, mustard, rust, deep green, anything metallic. Soft pastels tend to sink into the indigo and disappear. Plan one panel per session.
Fine Detail with Fabric Markers
Markers come out after the paint is dry. A marker dragged across wet paint lifts it and clogs the tip with pigment.
Shake the marker, then press lightly and let the tip do the work. Build thin lines slowly; a heavy hand leaves a dark blob at the start of every stroke.
Markers behave differently depending on what is underneath. On bare cotton they soak in and spread slightly. On a dried painted base they sit on the surface and stay crisp, which is what you want for clean outlines.
This is the stage for eyes on a flower, veins in a leaf, the fine stems of a small bouquet, a dotted border. Small details are what make a simple painted tote bag look intentional rather than unfinished.
Set markers with heat too, following the package. Most need the same iron treatment as paint, and skipping it means your careful outlines fade in the third wash.
Heat Setting, Washing and Care
Heat setting is the difference between a painted shirt and a painted shirt you can actually wear. The heat cures the binder in the paint so it bonds to the fiber instead of resting on it.
Wait at least twenty-four hours after painting, then turn the garment inside out. Place a press cloth, a thin cotton towel or a sheet of parchment, between the iron and the painted area. Never let the soleplate touch paint directly.
Set the iron to the cotton setting with steam turned off. Press and move continuously for three to five minutes, covering the whole painted area including the edges. Lift and reposition rather than sliding the iron around.
For a tote, slip the cardboard barrier back inside and iron both sides. For a painted denim back panel, work in sections and give the thick seams extra time.
Let the piece cool completely before you fold it, then leave it alone for seventy-two hours before the first wash. A full week is even better. This waiting period is not fussiness; the paint is still settling into the fibers.
Turn the item inside out, use cold water on a gentle cycle, and choose a mild detergent. Skip bleach and fabric softener, which coats the fibers and dulls color over time.
Line dry when you can, or use the lowest dryer setting. High heat makes painted areas crack and fade, especially on jersey.
After washing, a painted patch may feel slightly firmer than the surrounding cloth. That softens with wear. If a corner has lifted, press it back down with a warm iron and a press cloth.
Expect slow, gentle fading over the years. A painted tote that has softened and faded a little looks loved, which is the whole point.
Troubleshooting: Bleeding, Stiff Patches and Cracks
Paint bled under the tape. The brush was too wet, or the tape was not pressed into the weave. Let it dry, then either paint a clean border over the seep or lean into it and extend the shape. Next time, use less paint and burnish the tape edge.
A patch feels stiff as cardboard. The paint went on too thick, or acrylic was used without enough medium. You can soften it slightly by washing and ironing, but the real fix is prevention: thin layers, always with medium.
Coverage looks patchy and streaky. One thin coat, fully dried, then a second thin coat. Repainting over half-dry paint drags it and makes the streaks worse.
The paint cracked after a few wears. Thick layers, fabric stretched while wet, or no heat setting. Small cracks can be painted over and re-set. Larger ones are a lesson in thin layers.
Color faded in the wash. Hot water, no heat setting, or washing too soon. None of these are disasters. You can touch up the design, set it again, and carry on.
Three Small Starter Projects
Each takes one sitting and teaches a different skill. Pick the one that matches fabric you already have.
A canvas tote bag. The friendliest first project, because canvas is firm and forgiving.
- Wash and dry the tote, then slide a cardboard and wax paper barrier inside.
- Sketch three loose leaves in white chalk, low and slightly off-center.
- Fill the leaves with two greens using a foam brush, working light to dark.
- Add stems and veins with a fine fabric marker once the green is dry.
- Heat set inside out with a press cloth, and wait three days before using it for groceries.
A denim jacket back panel. This one teaches you to work with texture.
- Lay the jacket flat with a board inside the back panel so the front does not print through.
- Chalk a large simple sun, about the width of your hand, centered between the shoulders.
- Dab warm white into the disc in two thin layers, pushing paint into the twill.
- Add rays in mustard with a round brush, then outline the sun with a marker.
- Heat set the panel in sections, giving the shoulder seams extra time.
A plain white tee. The smallest project, and the one you will wear most.
- Wash the tee, then iron freezer paper to the inside behind the chest area.
- Chalk three small daisies, staggered, about two inches across.
- Paint white petals first, let them dry, then add yellow centers.
- Heat set, wait three days, and wash inside out in cold water.
A Budget Supply List and Variations for Kids
You do not need a craft store. Here is what actually gets used:
- Three or four small bottles of textile paint, two ounces each, in white, black and two colors you love.
- One bottle of textile medium if you are using acrylics instead.
- A one-inch foam brush and a round size-six brush.
- One fine-tip black fabric marker.
- A roll of freezer paper and a roll of painter's tape.
- White chalk and a washable marker.
- Cardboard from the recycling bin, a plastic sheet or newspaper, a water cup and a rag.
Children can work alongside you with a few adjustments. Sponge stamps cut from a kitchen sponge give clean shapes with no brush control needed, and thumbprint dots turn into flowers with a marker stem added later.
Freezer paper stencils are wonderful for kids: cut a simple shape, iron it on, let them dab paint inside with a foam brush, then peel it away while still tacky.
Aprons and old t-shirts keep the paint off school clothes, and a sheet of newspaper under the work catches the rest.
Give a child a cheap white tee or a plain canvas pouch for the first try. Something that is allowed to be imperfect is the best possible start.
Conclusion
Your first painted tote will not look like the ones on a shop shelf, and that is exactly why it will be the one you reach for.
The uneven leaf, the lemon that came out larger, the border that wobbles near the handle, all of it says a person made this on a Tuesday.
Start with one small project this week. Wash the fabric, cut the cardboard, put out three colors, and give yourself an hour.
Then wear it, wash it, and see how it holds up. You will learn more from one trip through the laundry than from any tutorial, and by then you will already be eyeing the back of an old denim jacket.