Introduction
The smell of beeswax takes me straight back to my grandmother's kitchen, where she kept a dented electric griddle she never once cooked on.
She would set it low, wait for the pale wax to turn glossy, and slide a small birch panel across the surface like a sheet of paper on a desk.
I was maybe eleven. I remember thinking the wax looked like honey that had forgotten how to drip, and that the whole room felt warm and slow.
It would be years before I learned the word for what she was doing. Encaustic painting.
The name comes from the Greek enkaustikos, meaning "to burn in." That is almost literally what happens: pigment rides in molten wax and is then fused to the surface with heat.
For a long time I assumed encaustic was a museum technique, something kept behind glass. It is not.
It is one of the most forgiving, tactile crafts a beginner can pick up at a kitchen table with a spare afternoon and very little equipment.
This is how to start with one small panel, a modest griddle, and the quiet hour you have mostly to yourself.
What Encaustic Painting Is
Encaustic is pigment suspended in molten wax medium, applied warm to a rigid surface, then fused with heat so the layers melt into one continuous skin.
You are not painting with a liquid that dries by evaporation, the way acrylic and watercolor do. You are painting with a substance that sets by cooling.
That single difference explains almost everything about the craft: the speed, the smell, the glow, and the way a finished panel feels cool and slightly waxy under your thumb.
The technique reaches back to ancient Greece and Ptolemaic Egypt, where artists worked with beeswax, resin, and pigment on wood.
The best-known survivors are the Fayum mummy portraits, painted on wooden panels in Roman-era Egypt around the first and second centuries AD.
Those faces still hold their color two thousand years later, which is a quiet argument for how durable properly made encaustic can be.
I find that history comforting when a layer misbehaves. People were solving this exact problem with a heat source and a stick of wax long before anyone owned a temperature dial.
Practically, encaustic sits somewhere between painting and sculpture. You build up, you scrape back, and you carve into what you made.
If you enjoy the tactile part of pottery or collage more than the precision of watercolor, this is very likely your medium.
The Wax Medium: Beeswax, Damar and the Ratio
Traditional encaustic medium is simple: beeswax combined with damar resin. That is the whole list, and it has not changed much in a very long time.
The classic recipe runs somewhere between four parts beeswax to one part damar, and eight parts beeswax to one part damar, measured by weight.
More damar gives a harder, glossier, more brittle surface. More beeswax gives a softer, tackier, more forgiving one.
Damar is doing two jobs at once. It raises the melting point so the finished surface is less prone to softening in a warm room.
It also hardens the film, so the wax does not stay sticky and does not pick up every fingerprint the way pure beeswax will.
Here is the honest beginner's shortcut: buy pre-made encaustic medium. It is mixed, filtered, and ready to melt, and it removes the entire question of getting the ratio right on your first attempt.
If you do want to make your own, melt the two together gently in a double boiler or a dedicated wax pot. Never over direct heat.
Stir until the resin disappears, then strain the molten mixture through a fine cloth to catch any debris before you pour it into palette cups.
For color, you have three common choices. Dry artist pigment, a small amount of oil paint, or pre-pigmented encaustic wax sticks.
Oil paint is the easy route for a beginner because it is already bound and predictable. Keep it to roughly one part paint to several parts medium so the wax stays workable.
What you must never do is stir in acrylic, watercolor, gouache, or any water-based paint. Water and wax refuse to mix, and the result is a grainy, unstable mess.
Heat Tools and the Panel Underneath
You do not need a studio's worth of equipment. You need a warm surface, a way to move molten wax, and a way to fuse it.
The warm surface is either a dedicated encaustic palette or a cheap electric griddle. Both hold a steady range of roughly 200 to 220 degrees Fahrenheit.
That range is the target. Hot enough to keep the medium liquid, cool enough that the wax is not smoking or flashing.
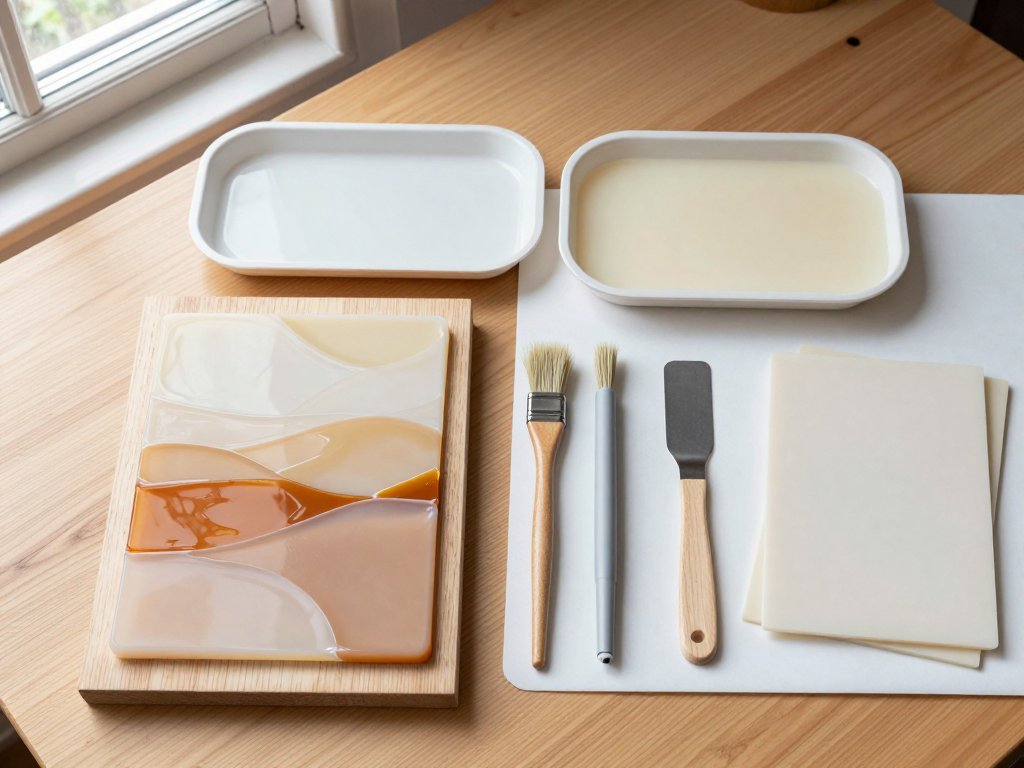
Hake brushes are the traditional tool. They are soft, flat, natural-bristle brushes that hold molten wax and release it gently without scratching the layer below.
Buy two or three in different widths. Natural bristle works best because synthetic fibers can melt or stiffen against a warm palette.
For fusing, you have two choices. A heat gun is the gentle, beginner-friendly option, moving a broad current of hot air across the surface.
A small torch is faster and more precise, but it demands a steadier hand and more respect. Most people start with a heat gun and add a torch later.
Metal palette cups sit on the warm surface and hold your colors separately, so each tone stays clean and ready to load.
Then there is the panel itself. Encaustic demands a rigid substrate, and this is not a suggestion. It is a requirement.
A cradled birch board is close to ideal: flat, firm, and stable. Masonite works just as well when it is sealed properly first.
Paper and canvas are the wrong choice. They flex, they absorb wax unevenly, and over time they can crack the film or let it separate from the surface.
To prime, seal bare masonite with a coat of shellac or a couple of thin layers of gesso, sanding lightly between coats.
Let the primer cure completely before the first wax layer. A gummy or damp ground will fight the wax from the very first stroke.
Safety in Plain Language
None of this is frightening, but it does involve heat, and heat deserves plain rules rather than vague warnings.
Work near an open window. Even at modest temperatures, melted wax and resin release a faint smell, and good airflow keeps the room pleasant.
Keep your wax temperatures modest. If you can see smoke rising from the palette, you are running it too hot, and it is time to dial back.
Never leave a torch unattended, not even for a moment to answer the door. Set it down, turn it off, and only then walk away.
Keep a small fire extinguisher within reach. You will almost certainly never need it, but having it turns a scary moment into a boring one.
Use a dedicated craft griddle, and decide now that you will never cook on it again. Wax and food do not belong on the same surface.
Tie back long hair and roll up loose sleeves before you pick up a heat gun. Loose fabric near a hot tool is the most common avoidable accident.
Set the hot palette and the heat tool on a heatproof mat, and keep a clear zone around them so nothing can be nudged into the heat.
Ventilate while you work and let the room air out afterward. Small habits, repeated every session, are what make this craft genuinely safe.
Layering and Fusing
This is where encaustic rewards patience. The whole method is a rhythm: a thin layer, fuse it, let it cool, then repeat.
Paint your first pass as thinly as you can manage. Thick, gloppy layers trap heat unevenly and turn muddy when you fuse them.
Then fuse. Pass the heat gun over the surface until the wax just glosses and settles, watching for that brief shine that tells you it has melted into the layer below.
Fusing is not decoration. It is adhesion. Unfused layers sit on top of one another like dry leaves and can lift, flake, or peel away later.
A properly fused layer has a slight even sheen and looks bonded to what is beneath it, not resting on top like a coat of paint.
Over-fusing is the opposite problem. Hold the heat too long and the whole surface liquefies together, colors blur, and you lose every edge you built.
The tell is easy to learn. If your distinct shapes start bleeding into one another, you have gone too far and should let it cool before continuing.
Cool between layers. Warm wax will lift and smear when you paint over it, and a hot surface refuses to hold a crisp line.
Think in many thin passes rather than one confident gesture. Ten patient layers will always outshine one heavy one in this medium.
It helps to plan your first layers with the same care you would give to any painting's beginning, which is exactly the thinking behind Underpainting: The First Layer That Matters.
That first fusing pass is the one that decides whether everything above it will hold. Give it your attention and the rest of the panel cooperates.
Techniques: Scraping, Incising, Embedding and Burns
Once you can build and fuse layers, the medium opens up. These are the techniques I reach for most often, and all of them suit a first small panel.
Scraping and Carving Back
Scraping is the technique that surprises beginners most. Instead of only adding wax, you take it away with a scraper or the edge of a palette knife.
Skim across the surface to reveal the colors hiding in the layers below. The result looks excavated rather than painted, because it is.
Incising Lines
To draw, use a pointed tool to cut lines straight into the cooled wax. A skewer, a pottery needle, or an old stylus all work beautifully.
Wipe a darker wax or an oil paint into the groove, then buff the surface clean. The line stays behind, sharp and permanent.
Embedding Objects and Paper
Wax is a wonderful glue. Press thin paper, thread, dried petals, or pressed leaves into a warm layer, then fuse gently over the top.
Keep inclusions thin and flat. Anything bulky will trap air and lift. The wax should flow over the object and hold it like a window.
Accretion Texture
For raised, sculptural texture, let the medium cool slightly and apply it thickly, then fuse only the top so the wax holds its shape.
This is called accretion, and it is where encaustic stops behaving like paint and starts behaving like frosting on a cake.
Image Transfer
Laser-printed images transfer onto warm wax. Press the print face-down, burnish it with a spoon, wet the paper, and rub it away.
The toner stays fused into the wax, leaving a soft, ghosted image that reads like a memory rather than a photograph.
The Shellac Burn
For a glossy, aged finish, brush shellac over the cooled surface and pass a torch quickly across it. The shellac bubbles and blisters.
Fuse the bubbles back down and you get a mottled, golden depth that is hard to achieve any other way. Practise this one on a scrap first.
Finishing, Buffing and Common Mistakes
Letting the Piece Cure
A finished encaustic panel is not finished the moment you set down the heat gun. Give it time to cure and firm up, ideally a few days.
During that time the surface settles and hardens. Handle it gently and keep it out of direct sun and away from warm radiators.
Buffing to a Soft Sheen
Once cured, buff the surface with a soft, lint-free cloth. A slow circular rub brings up a gentle sheen and evens out the finish.
Buff lightly. Hard pressure on a soft layer can scratch or dull it rather than polish it, so let the cloth do the work.
Should You Seal It?
Traditional encaustic does not need a sealer. Wax is the finish, and it is remarkably stable once cured.
If you want extra protection, a thin coat of wax or a specialist encaustic varnish is fine. Avoid solvent-heavy varnishes that can cloud the surface.
The Mistakes I See Most
- A cold substrate. Wax laid onto a cold panel sets too fast, fails to bond, and can flake later. Warm the board slightly or work in a warm room.
- Layers that are too thick. Heavy applications trap heat, blur your shapes, and crack as they cool. Thin and many always beats thick and few.
- Skipping the fuse between layers. This is the mistake that ruins work weeks later. Fuse every layer or the panel will not hold together.
- Mixing in water-based paint. Acrylic and watercolor will never blend with wax. Use dry pigment or oil paint, and keep water away from the palette.
Notice that every one of these comes down to heat and patience rather than talent. Fix the habit and the results follow on their own.
If a layer goes wrong, you rarely have to start over. Scrape it back, refill the area with fresh medium, and fuse again once it is cool.
The Honest Cost for a Beginner
Let me talk money, because encaustic has a reputation for being expensive, and that reputation is only half earned.
A small block or bag of pre-made medium goes further than you would guess. A couple of ounces will cover several small panels comfortably.
The griddle is where you can genuinely save. A basic warming tray or a secondhand craft griddle costs far less than a dedicated artist palette.
Heat guns are inexpensive and widely available. This is one tool where the budget version is genuinely fine for years of beginner work.
Hake brushes are the one place to spend a little more. Cheap synthetic brushes melt and shed, while a modest set of natural hake brushes lasts.
For panels, buy a few small cradled boards rather than one large one. Smaller panels let you learn the medium without risking much medium.
What to improvise: the scraper, the palette cups, the heatproof mat, and the surface you warm the wax on. Kitchen and hardware-shop stand-ins work well.
What to actually buy: good pre-made medium, one or two decent hake brushes, and a reliable heat gun. That trio does most of the heavy lifting.
Total spend for a genuine first setup is often less than a single framed print. The wax teaches you more per dollar than almost any other painting medium.
Conclusion
My grandmother never called herself an artist. She called it her wax table, and she made small panels she gave away to anyone who admired them.
That is the spirit I would hand to you. Encaustic is not a technique you master before you are allowed to enjoy it.
Start with one small cradled panel. Melt a little medium, lay a thin warm layer, and fuse it just until it glosses.
Add one more layer. Scrape a little back. Buff it when it has cured, and hold it up to the window to see how the light moves through the wax.
You will probably make something imperfect on the first try. Make it anyway. The second panel will be better, and the third will surprise you.
The wax does not ask for talent. It asks for a warm surface and an unhurried hour, and it gives back a glow that no other medium quite matches.