Introduction
Somewhere between school runs, laundry, and dinner, your craft time keeps shrinking. You have ideas in your head, half-finished projects in a basket, and supplies you forgot you owned.
A bullet journal can gather all of it in one place. Plans, habits, wish lists, sketches — one notebook, one system, zero apps to learn.
This is a beginner-friendly guide to bullet journaling for crafters. It covers the basics, the supplies, and the spreads that actually help busy moms.
You do not need artistic talent. You do not need fancy pens. You just need a notebook and ten minutes.
What Is Bullet Journaling?
A bullet journal is a flexible planner you build yourself. It was created by Ryder Carroll as a way to track the past, organize the present, and plan the future.
The magic is simplicity. You use short notes, small symbols, and pages that grow with you. At its heart, it is creative planning — you design the pages your life actually needs.
The core pieces are:
- Rapid logging — short, quick notes instead of long sentences.
- The index — a table of contents at the front of your notebook.
- The key — a small legend of the symbols you use.
- Collections — themed pages, like a project tracker or gift list.
- Future log — a place for events months away.
- Monthly log — a bird's-eye view of the current month.
- Daily log — your day-to-day notes and tasks.
That is the whole system. Everything else is optional decoration.
For crafters, the system adapts beautifully. Your daily log holds tasks. Your collections hold fabric stashes and pattern ideas. Your future log reminds you about the craft fair in three months.
The best part? You can start any time. There is no right day, no perfect first page, no annual setup to miss.
Why does this simple system work so well for busy moms? Because it holds everything without asking you to maintain it. Apps need updates and subscriptions. A notebook just waits. When life gets loud, you can close it and come back later. No notifications, no guilt, no learning curve.
What You Need to Get Started
Here is exactly what you need. The full list is five items, and three of them are probably already in your house.
- A notebook — dot grid is the crafter's favorite. The dots guide straight lines without shouting at you. A4 or A5 both work; A5 fits in a bag.
- A pen that makes you happy — one reliable pen for writing, plus one or two colors for headers. Gel pens and fine-liner pens are easy choices.
- A ruler — for boxes, calendars, and tidy tracker grids.
- Washi tape — instant decoration with zero drawing skill required.
- Stencils — circles, banners, and letter guides make quick work of fancy spreads.
If you can, choose a notebook with 120 to 160 pages. That gives you room for a full year plus extra collections.
Lay-flat binding is a small luxury that makes writing on both pages easy. If you are not sure, any notebook you already own is the right one to start.
Budget options
Bullet journaling can be as cheap or as fancy as you like.
- A plain notebook with grid or dot pages costs little and works fine.
- One black pen and one colored pen are enough to begin.
- A long ruler from the kitchen drawer beats a pretty one from the shop.
- Sticky notes can stand in for washi tape while you test the hobby.
- Skip the matching sets until you know what you actually use.
Start with what you have. Upgrade later, one item at a time, when a tool earns its place.
Setting Up Your First Journal
Ready to begin? This is the easy part. Follow the order below and your journal will have a solid foundation in about an hour.
Before you draw anything, take one minute to think about what you want from this journal. Craft planning? Daily sanity? A creative outlet? Your answer shapes which spreads you build first.
Step 1: Leave the first pages for the index
Open your notebook and number the first few pages, or simply reserve them. The index is a running list of where everything lives.
Whenever you start a new spread, add its name and page number. Later, you will flip straight to your stash inventory instead of hunting.
Step 2: Make a simple key
Draw a small box with your symbols and their meanings. Common ones are:
- A dot (•) for a task.
- An X for a completed task.
- A greater-than sign (>) for a moved task.
- A dash (–) for a note.
- A circle (○) for an event.
Three symbols are plenty for beginners. Add more only when you need them.
Step 3: Set up a future log
Take two pages. Divide them into six boxes, one per month. Write the month name at the top of each box.
Use this page for anything more than a month away. Doctor appointments, birthdays, the autumn craft fair — it all goes here.
Step 4: Build your monthly spread
On a fresh two-page spread, write the month name as a header. On the left page, list the dates down the side with space for notes. On the right page, keep a simple task list.
That is a complete monthly log. No art required, though a strip of washi tape along the edge looks lovely.
Step 5: Start your daily log
Each day, write the date and jot down tasks, notes, and events using your key.
That is it. You are officially bullet journaling.
Do not add every spread from this article on day one. Start with the index, key, future log, monthly log, and daily log. Add craft pages next month, one at a time, as you need them. A journal you actually use beats a beautiful journal you abandon.
Craft-Specific Spreads
Now for the fun part — pages made just for makers. These spreads turn your journal from a planner into a creative command center.
Project tracker
Keep a list of every project in progress. For each one, note the name, start date, and next step.
- Column 1: Project name.
- Column 2: Start date.
- Column 3: Next small step.
- Column 4: Status (planning, active, paused, done).
When a project feels stuck, open this page. The next step is already written down, so you can act without deciding.
Supplies wish list
This is the page that saves you money. Every time you see a tool you want, add it here instead of buying on impulse.
Include the item, the approximate price, and the reason you want it. Review the list once a month. You will be amazed how many wants quietly become "no thanks."
Stash inventory
Do you own three packs of gold paint you forgot about? Same. A simple inventory fixes that.
List categories — yarn, fabric, paper, paint, tools — and jot down what you own in each. You do not need a full catalog. A running list of what you actually have is enough.
Update it when you buy something new or finish a project. Your future shopping trips will thank you.
Pattern and sketch ideas page
Ideas vanish fast. Give them a home.
Dedicate a few pages to quick sketches, color palettes, pattern notes, and magazine clippings. No need for polish — this page is a capture zone, not a gallery.
You can glue in fabric swatches, tape in washi samples, and doodle layout ideas. Future you will flip through this page on a blank-creative day.
Gift ideas page
A gift ideas page saves you every December. List birthdays and holidays down the page, then add a handmade gift idea beside each name. When the date rolls around, your plan is already made.
Shopping list
A dedicated shopping list keeps craft store trips focused. Make two columns: "need" and "want."
Take the list with you. Stick to the need column first, and only move to wants when the budget allows. Your wallet and your stash will both stay healthier.
Habit and Mood Trackers
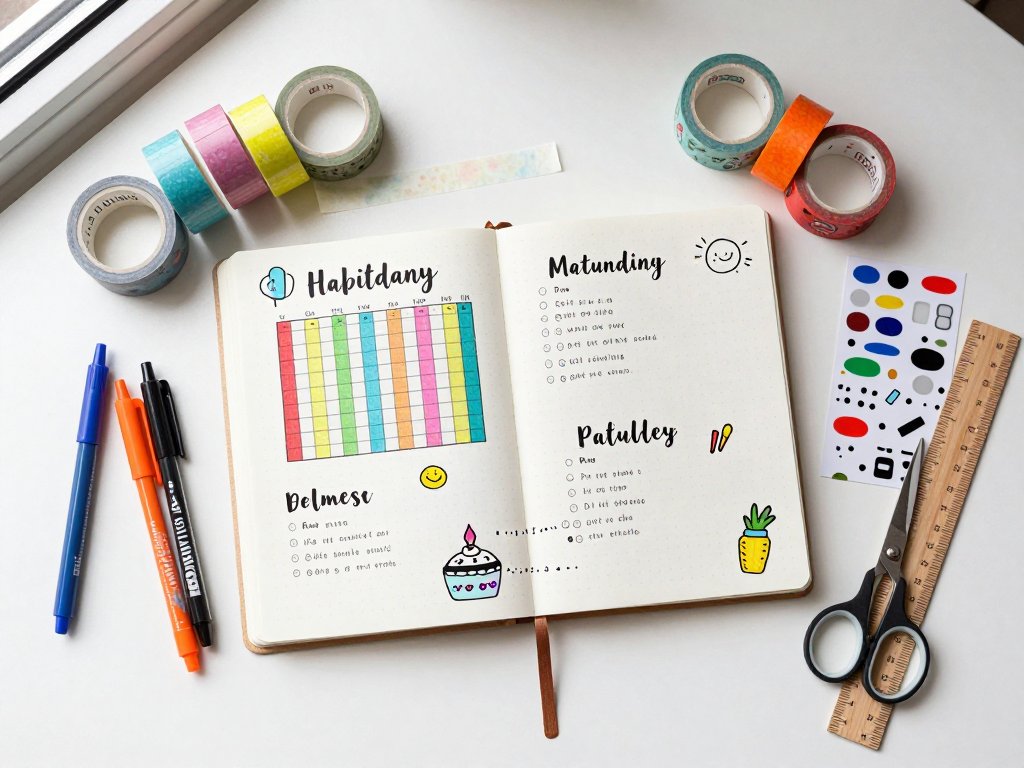
Trackers are the heart of many bullet journals, and for good reason. A simple grid makes your habits visible, and visible habits are easier to keep.
How to build a habit tracker
- Draw a grid with the days of the month across the top.
- List two to four habits down the side. Start small.
- Fill the box each day you complete the habit.
- Choose one color for a perfect week. Little celebrations matter.
Good habits for crafters include: fifteen minutes of crafting, tidying the craft corner, adding one sketch to your ideas page, and putting supplies away after a session.
Begin with one or two habits, not six. A tracker with three empty rows feels like failure; a tracker with one full row feels like winning. Once a habit becomes automatic, add the next one.
Mood tracking for makers
A mood tracker is a tiny daily check-in. Color a small box or circle each evening with the color that matches your mood.
For crafters, mood and making are linked. You may spot that you craft more on calm days, or that a creative session lifts your whole week.
Keep it gentle. The tracker is information, not a judgment. There are no bad moods, only data.
Keep it to one minute a day. If a tracker feels like homework, shrink it or drop it.
Simple Doodles and Headers for Non-Artists
You do not need to draw well to have a pretty journal. These easy wins take minutes and look like you tried hard.
Headers that always work
- Write the title in big letters, then outline it with a second color.
- Write normally and underline with washi tape.
- Write the word, then draw a thin box around it.
- Use a stencil for banners and ribbons.
- Add three dots or stars at the end of the line.
Five doodles anyone can draw
- A simple flower — five petal ovals around a dot.
- A leafy vine — a wavy line with small leaves on both sides.
- A cluster of stars — small plus signs with a dot in each corner.
- A little house or heart for margins.
- Washi-style stripes — three parallel lines in different colors.
Practice each doodle twice on scrap paper first. Repetition makes it look intentional.
A fineliner pen and a soft pencil are all you need for these. Keep them in your journal's pocket or a pencil case with your washi tape. When inspiration strikes, the tools are already there.
Remember the golden rule of journal art: a straight line, a clean margin, and one accent color look like a design. You are already 80 percent there.
Your Monthly Setup Routine
The journal only helps if it gets maintained. The good news? Maintenance takes fifteen minutes, once a month.
Here is the routine, step by step:
- Review the old month. Cross off what got done; migrate what did not.
- Set up the new monthly spread with dates and tasks.
- Move birthdays and events from the future log into this month.
- Flip through your craft pages and update the project tracker.
- Pick three small goals for the month — one craft, one home, one you.
- Add one tiny decoration: a strip of tape, a doodle, a sticker.
Your three goals might look like this: finish the quilt top, declutter one kitchen drawer, and read one chapter a week. Notice the mix — one craft, one home, one you.
Fifteen minutes, once a month. That is the entire upkeep.
For the daily part, spend two minutes each morning. Read yesterday's log, write today's date, list three tasks.
Weekly, take five minutes on Sunday to tidy your pages and update trackers. Small habits beat big sessions every time.
Every few months, add a seasonal page. A spring cleaning craft list, a summer project bucket list, a holiday making calendar. These pages keep the journal feeling fresh without extra work.
Keep a "monthly setup" note in your index. When life gets loud, you can find the routine again in seconds.
Troubleshooting: When Life Gets in the Way
Every journal hits bumps. Here is how to handle the most common ones without quitting.
Perfectionism
A blank page that must be beautiful will stay blank. Give yourself permission to make ugly pages.
Draw your first spread in pencil or on scrap paper. Messy is allowed. The journal is a tool, not a portfolio.
If a page goes wrong, tape a piece of paper over it and move on. Nobody is grading you.
Blank page fear
Staring at an empty page is intimidating for everyone. The fix is a tiny first move.
Write just the date. Draw one line. Stick one piece of tape. Action dissolves fear faster than motivation does.
Falling off track
You missed a week? A month? Welcome back — that is all you need to do.
Do not backfill every missed day. Flip to today, write the date, and continue. The past is already recorded in your memory; your journal only needs the now.
What if you miss days?
Missing days is normal, not a failure. Bullet journals forgive gaps better than any app.
If daily logging feels heavy, drop it for a while and keep only the monthly spread. The system flexes to fit your season of life.
When you return, resist the urge to "catch up." Future you only needs today's page.
Comparing yourself to others
Worried your pages look plain next to the decorated spreads online? Remember that those photos are highlights, not daily life. A functional page in your own hand is the whole point. Comparison is the fastest way to quit a journal. Close the app, open your notebook, and keep going.
Conclusion
Your bullet journal can be anything you need it to be. A planner, an idea book, a project tracker, a tiny creative home.
Start with the basics in this guide. Notebook, pen, ruler, and a first spread. Then let the journal grow with you.
If you want more ideas after this setup, try these next spreads:
- A gift-making list for birthdays and holidays.
- A "finish or donate" page for UFOs (unfinished objects).
- A color palette page for future projects.
- A seasonal craft calendar with project deadlines.
One notebook. One system. Ten minutes a day. That is all it takes to plan your making and protect your creative time.
The best journal setup is the one you will actually keep using. Start small, stay gentle with yourself, and let the system bend around your life — never the other way around.
Your craft corner is not the only place for creativity. Open your journal, make a mark, and begin. Your future projects — and your future self — will thank you.