Introduction
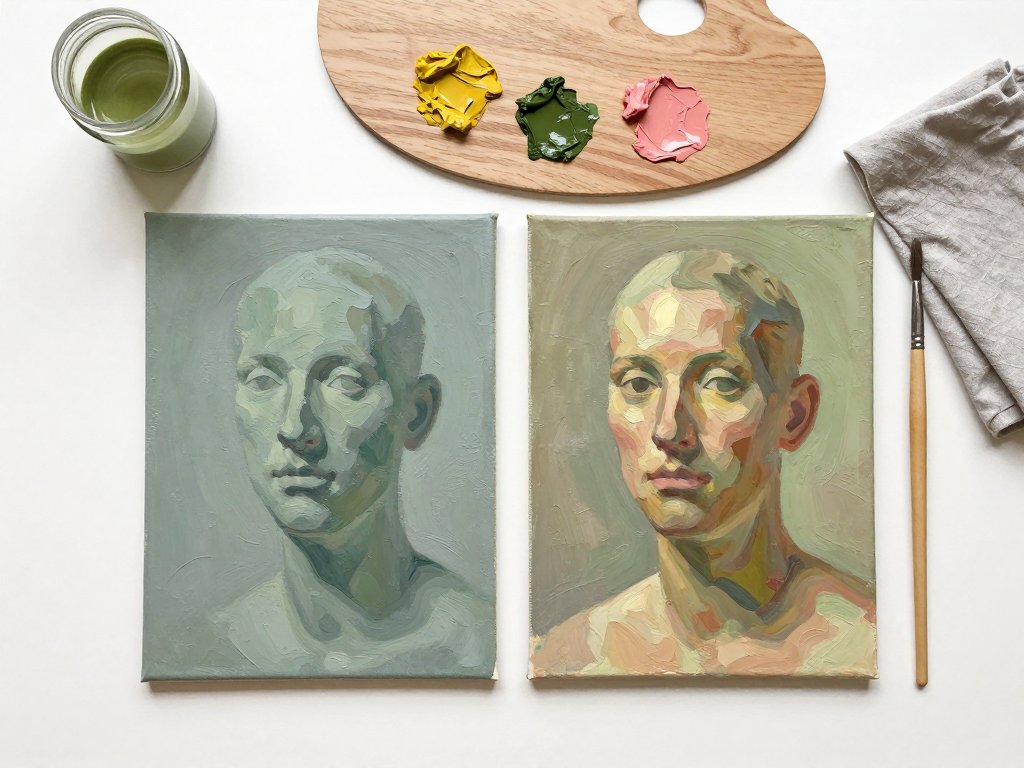
There is a stage in portrait painting that nobody warns you about. The drawing is down, your flesh colours are mixed, and then someone tells you to cover the entire face in green.
It feels wrong. It looks worse. And then, a few hours later, the skin you paint over it comes out more alive than anything you have made before.
That green layer has a name: verdaccio. It is one of the oldest quiet tricks in oil painting, and it is still the reason some faces read as skin while others read as plastic.
I am not going to sell you a system here. This is one small method for one small job — the layer that sits under flesh and does most of the work before you ever pick up a warm colour.
If you want the general method of first layers — what they do to value and temperature across a whole picture — that lives in Underpainting: The First Layer That Matters. Start there if the whole idea is new to you.
What follows is narrower. It is green, it is for skin, and it is surprisingly forgiving.
You will need about forty minutes for the first sitting, and you will spend most of it telling yourself the face looks like a sick alien. That part is normal. I promise.
What Verdaccio Actually Is
Verdaccio comes from the Italian verde, meaning green. In the painting workshops of the Renaissance it named a green-grey or green-ochre paint used specifically beneath flesh.
Cennino Cennini, writing his painter's handbook around 1400, described mixing ochre, black and white into a greenish tone for faces. Terre verte — green earth — was the pigment most often underneath.
It was not decoration. On a panel or a canvas, the green layer gave the painter a cool, neutral bed, so the warm flesh above it did not have to fight a bright white ground.
Then it went quiet. As oil painting moved toward direct, opaque handling in the seventeenth century and after, most painters built flesh from the first stroke in warm mixtures and never laid a green bed at all.
It came back the way most old methods come back: through ateliers and teachers who noticed the old faces held together better than the new ones. Today it is a standard exercise in classical realist training.
So you are not learning a novelty. You are learning something that was ordinary for two hundred years, forgotten for three, and quietly restored.
Why Green Works Under Skin
Here is the plain version of the colour theory. On the colour wheel, green sits directly opposite red, and flesh is built from reds, oranges and yellows.
Opposites do not cancel each other out when paint is involved. They neutralise — they pull each other toward grey, and grey is what real skin is full of.
That is the first job. Warm flesh painted onto a pale ground is high in chroma, which is exactly why beginner portraits look like a plastic doll. A green bed lowers that chroma from underneath.
The second job is temperature in the shadows. Shadows on a face are cooler than the lit planes: less blood close to the surface, more reflected light from the room.
Green naturally sits in that cool range. So the shadow side of the nose, the eye sockets and the underside of the jaw can be left as green, and they read as shadow without you mixing a special shadow colour.
The third job is unity. Every part of the face shares one shadow family, so the forehead, the cheek and the neck belong to the same head instead of looking pasted together.
One more thing is worth knowing: the effect is optical, not chemical. Thin warm paint over green lets some green through, and your eye does the blending. Nothing mixed on the palette quite imitates it.
Three Ways to Mix the Green
You need three mixes, and you can get them from any of three routes. Pick one route and stay with it for the whole study — changing routes halfway is how a face goes patchy.
The Traditional Route: Yellow Ochre and Black
This is the workshop recipe, and the cheapest. Start with four parts yellow ochre to one part black — ivory or mars black, whichever you have.
Add white and the mix turns into a soft olive grey. That is your mid green-grey. Add more black and less white for the deep value.
If the black makes it chalky or dead, swap it for raw umber. Umber keeps a little warmth and behaves more gently in thin layers.
The Authentic Route: Terre Verte from a Tube
Terre verte, or green earth, is the pigment the old painters actually used. It is a natural iron silicate, weak in tinting strength and naturally transparent — exactly what an underlayer wants.
Straight from the tube it is a soft sage. Three parts terre verte to one part white gives you the pale wash; three parts terre verte to one part raw umber gives you the deep.
If you are buying one tube for this method, buy this one. Look for green earth, or PG23, on the label.
The Modern Route: Viridian, Raw Umber and White
Viridian is a strong, staining blue-green, so a little goes a long way. Start with one part viridian to four parts raw umber, then add white until it looks like a dull grey-green.
This route gives the most luminous darks of the three. It is also the easiest to overshoot, so mix it at the side of your palette and add viridian in pinpricks.
Three Values, Not Three Colours
Here is the part beginners skip, and it is the part that decides whether the method works. Verdaccio is not really about green. It is about value.
Value means how light or dark a tone is, ignoring its colour. A face is a map of values long before it is a map of colours, and the green layer is where you draw that map.
You need exactly three.
- Pale wash — a light sage, roughly value seven or eight. This goes on the lit planes: forehead, cheekbone, the bridge of the nose, the chin.
- Mid green-grey — a middle value, around five. This is the general form of the head, the turning sides, the temples.
- Deep green — a dark value, three or four. This is for the coolest recesses: eye sockets, nostrils, under the jaw, the hollow beside the nose.
If you are unsure whether your three tones are far enough apart, photograph the palette and switch the picture to black and white. They should look clearly, almost boringly, different.
You are painting a value structure, not a colour scheme. The green is only the vehicle.
If you would rather build that same structure in grey, the grey version is Grisaille Painting — same idea, different vehicle, equally good under a portrait.
Thin as Skimmed Milk
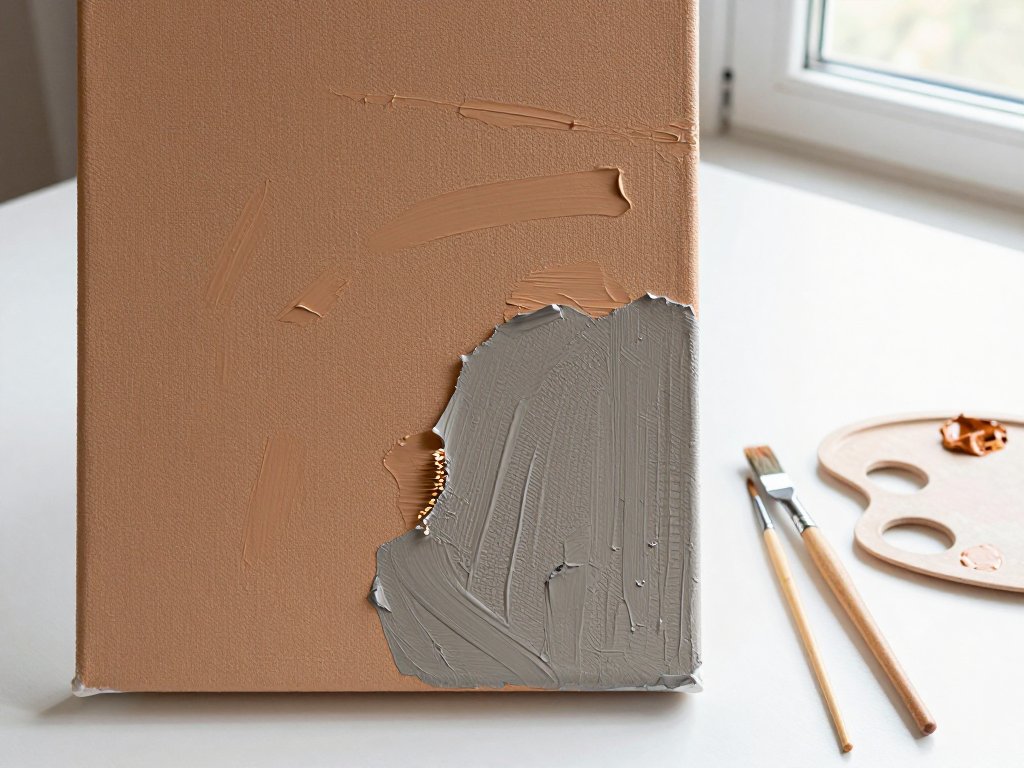
Verdaccio is applied thin. Thinner than you think. The consistency you are aiming for is skimmed milk, not cream and certainly not toothpaste.
If you are working in oils, a few drops of odourless mineral spirit in the mix gets you there. The paint should move like a stain.
Load a soft brush and scumble it across the panel — a light, half-dry scrubbing motion that leaves paint in the texture instead of sitting on top of it.
Then wipe it back. Use a lint-free rag or a soft paper towel folded to a point, and lift the paint off the high points of the face.
Forehead centre, the top of each cheekbone, the bridge and tip of the nose, the chin. Wipe those and the pale ground shows through again.
Why keep it transparent? Because an opaque green layer acts like a mask. It blocks the light bouncing back through the paint, and the flesh above it goes flat and dull.
Thin and transparent, the green behaves like stained glass. Light passes through, comes back, and the shadows have depth for free.
If a passage starts to look solid, wipe it with a rag dampened in spirit and begin again. This layer forgives almost anything except thickness.
Let It Dry Before You Touch It
The green must be touch-dry before flesh goes over it. Not cured, not bone-dry — just dry enough that a fingertip or a brush does not move it.
A thin layer like this, cut with solvent, usually dries to touch in a few hours. Overnight is the safe answer; twelve to twenty-four hours covers almost every home studio.
Paint over it wet and you get two problems at once. The green lifts and muddies your flesh mix, and the layer underneath shrinks as it dries, cracking whatever sits on top.
That is the old lean-over-fat rule in miniature: thin and lean below, richer and fatter above. Verdaccio is the leanest layer in the painting, which is exactly where it belongs.
Test before you start. Brush a clean dry finger across the temple. If any green transfers, make a cup of tea and come back tomorrow.
The Ugly Stage Is Part of the Method
At this point your painting looks like a sickly alien. The face is green, the values are crude, and the whole thing has the pallor of something dug up.
This is not a sign that you have ruined it. It is the layer doing its job, and every painter who uses verdaccio goes through this hour.
The green is not the finished colour. It is the cool scaffolding that the warm flesh will lean on.
If you can look at that green face and still see the light and the shadow clearly, the hard part is already finished.
Painting Flesh Over the Green
Now the pleasant part. You paint skin over the green in thin warm layers, and you deliberately let some of the green stay visible.
Start in the shadows. A thin, slightly warm mix — ochre, a little red, a touch of white — glazed over the deep green in the eye sockets and under the jaw.
The green comes up through the warm glaze and turns into a believable grey-brown shadow. That is the moment most people first understand the method.
Move to the mid values next, then finish with the lights. The lights can be painted opaquely; the shadows should stay thin and transparent.
Here is the rule that keeps the effect alive: paint opaquely where the light hits, transparently where it does not.
If you cover every inch of green with solid flesh, you have painted a face the ordinary way and done extra work for nothing. The green is meant to show.
Where the Green Should Show
- The sides of the nose, especially the shadowed side.
- The eye sockets and just under the brow.
- The hollows of the temples.
- Under the cheekbone, on the shadow side.
- The underside of the jaw and the hollow of the neck.
- The corners of the mouth and the shadow under the lower lip.
Where It Should Never Show
Keep green out of the lights: forehead, cheekbone tops, nose bridge, chin, and the warm flush of the cheek.
Keep it out of the lips, which need their own warm red, and out of the whites of the eyes and the teeth. Those want neutral greys, not sage.
If you want the colour side of this — mixing flesh that actually matches a person — that lives in Painting Skin Tones. Verdaccio is the layer under it, not a replacement for it.
When It Goes Wrong
Five things go wrong with verdaccio, and all five are fixable without starting over.
- Too green. Usually too much pigment rather than too much green. Wipe back with a rag and a little spirit, add ochre to the mix, and remember it reads stronger wet than dry.
- Too grey. Too much black or umber. Add yellow ochre until it warms, or let it dry and glaze a thin warm layer over the whole face.
- Too dark. Thin the mix with spirit instead of adding white, which turns it chalky. A verdaccio should be a wash, never a coat.
- Patchy. Usually an over-dry brush on an absorbent ground. Add a drop of medium, use a larger soft brush, and work each area in one pass instead of scrubbing back into it.
- Beading on a slippery ground. The surface is too glossy for the paint to grip. Wipe it with spirit, scuff it lightly with fine abrasive, or brush a whisper of medium on first.
None of these need a restart. Verdaccio sits under everything, which makes it the cheapest layer in the painting to correct.
A Small Study in Three Short Sittings
Here is a study to try: one head, or one hand if faces feel like too much today. A six by eight inch panel is plenty. Small is kinder and faster.
Sitting one, about forty minutes.
- Tone the panel with a thin warm neutral and wipe it back, so you are not painting on white.
- Draw the head simply: an oval, the centre line, the eye line, the nose and the mouth. No detail yet.
- Mix your three greens from whichever route you chose, keeping them clearly apart in value.
- Scumble the pale wash over the lit planes with a soft brush.
- Lay the mid green-grey over the general form and the turning sides.
- Drop the deep green into the eye sockets, the nostrils, under the jaw and beside the nose.
- Wipe the high points back with a rag: forehead, cheekbone, nose bridge, chin.
- Stop there and let it dry overnight, even if you are enjoying yourself.
Sitting two, about forty-five minutes.
- Check the green is touch-dry with a clean finger before you load a brush.
- Glaze thin warm shadow colour over the green in the sockets and under the jaw.
- Paint the mid flesh tones with slightly more paint, still letting green show at the edges.
- Lay opaque lights on the forehead, cheekbone, nose and chin.
- Leave the sides of the nose and the eye sockets alone. That is the green doing its work.
Sitting three, about thirty minutes.
- Squint at the study and compare it with your reference. Fix value first, colour second.
- Glaze a little warmth into the cheeks and the lips.
- Soften any hard edge where flesh meets green, keeping the green in the hollows.
- Add the darkest accents last: nostril, lash line, the shadow under the jaw.
- Sign it, put it on a shelf, and resist repainting it tonight.
Three sittings, about ninety minutes of actual painting, and a face with more depth than a month of direct colour would have given you.
A Note on Ventilation and Solvents
Keep a window open, even in winter, and place a small fan so it pulls air away from you rather than toward you.
Keep the solvent jar lidded between uses, and keep used rags in a metal tin with a lid instead of the kitchen bin.
Choose odourless mineral spirit over turpentine if your head is sensitive, wash your hands with soap rather than solvent, and keep the whole setup out of reach of small people.
None of this is fussy. It is simply what makes an evening at the easel repeatable.
A Few Questions to Sit With
Which plane of the face did you leave coolest, and does it still read as shadow rather than as paint?
Did you cover more green than you meant to? That is the most common first-time habit, and it is easy to correct next time.
Can you see the difference between the lit side and the shadow side from across the room? If yes, the underpainting worked.
And a small encouragement: your first verdaccio will look strange for an hour and ordinary by tomorrow. That is not a flaw in your painting. That is the method.
Keep the study. In six months, that green face on the shelf will be the proof of how far your flesh painting has come.