Introduction
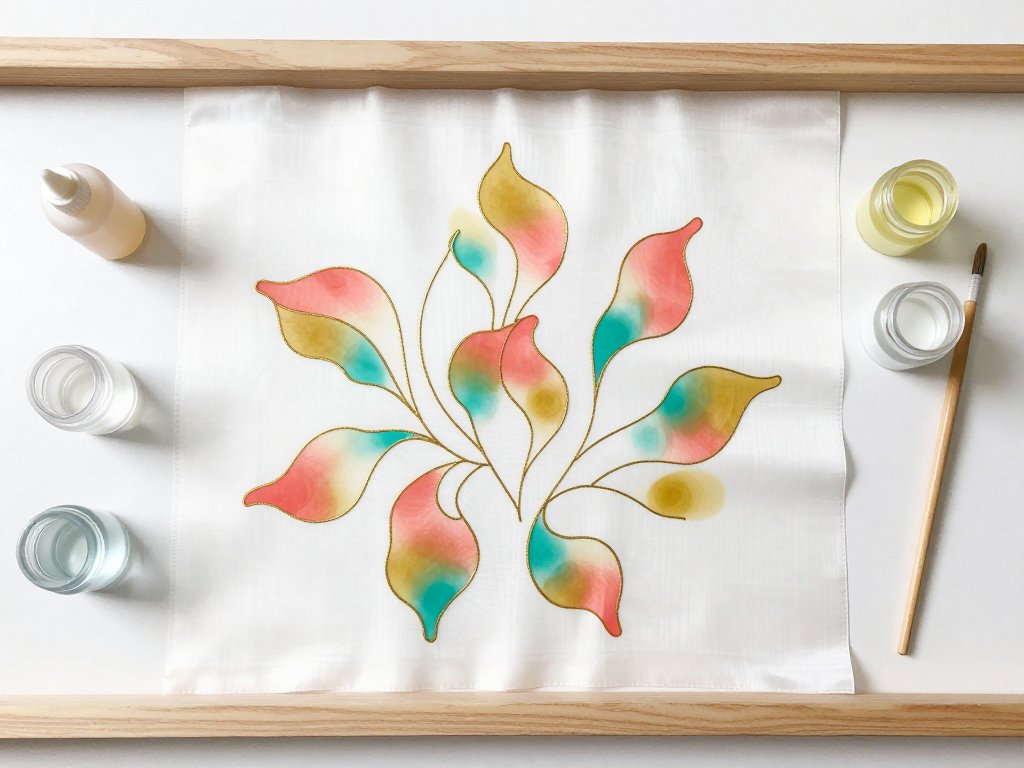
The first time dye stops at a line, it feels like a small magic trick. You touch a loaded brush to white silk and a pool of coral colour spreads outward, soft as a stain on a tablecloth. Then it reaches the resist and simply stops.
The edge stays clean. The colour sits exactly where you put it, and the white stays white on the other side of the line.
I remember the first time it happened at my own kitchen table. The frame was propped against the window, rain was running down the glass, and a small lake of teal was holding its shape on a piece of silk I had pinned that morning.
I think I said oh out loud to nobody. Some techniques you learn in your head, and some you learn in your hands. This one arrives in your hands first.
That is serti, and it is the reason silk painting feels unlike watercolour or acrylic. You are not pushing paint around a surface. You are inviting dye into a shape you have already drawn, and letting the fabric carry it the rest of the way.
This guide walks the whole method at an unhurried pace: what gutta is, which silk to buy, how to stretch it, how to draw the line, how to fill it, and how to make the colour permanent.
What Serti and Gutta Actually Are
Serti comes from the French sertir, to set or enclose. The name describes the whole idea. A resist line is drawn on the silk, and the dye brushed inside that outline flows outward until it meets the line and stops there.
Each colour stays in its own shape, like water held by a low bank of earth. You are not controlling the dye so much as giving it somewhere to stop.
Gutta is that resist. It is a liquid drawn from a small bottle with a fine metal nib, and it sinks into the fibres just enough to block the dye. Nothing about it is precious. It is a fence, and fences only need to be continuous.
The difference from other resist methods is worth naming, because it changes how the cloth behaves. If you have read our guide to batik fabric dyeing, you will recognise the principle of a barrier, but almost nothing else carries over.
Wax sits on cotton in thick hot layers. Gutta is a thin cold line on stretched silk, and the silk itself does most of the work.
Because the dye is liquid and the silk is sheer, you can see the colour from both sides. That transparency is the whole charm of the medium, and also the reason a single gap in the line shows up so clearly.
Solvent Gutta or Water-Based Resist?
Traditional gutta is natural rubber latex dissolved in a solvent, usually white spirit or naphtha. It draws a beautiful, crisp line and holds dye firmly. It also smells strongly, needs an open window and gloves, and can only be removed by a dry cleaner once the piece is finished.
Water-based resist is the beginner-friendly alternative, and it is where I would start. There are no fumes, it cleans up with water, and after the dye is set it washes out in warm water at your own sink.
The line is a little softer, and very fine detail takes more patience with it. On a first project, that trade is a good one.
Whichever you choose, treat the bottle as chemistry rather than craft glue. Keep dyes off your skin, cover the work surface, and give solvent products real ventilation, not a cracked door.
One practical note: resist bottles clog at the nib when they sit. Wipe the tip after every few inches of line, and cap the bottle the moment you stop drawing.
Choosing and Preparing Your Silk
Light habotai, about 8mm to 12mm, is the standard beginner silk. It is thin enough for dye to penetrate quickly, smooth enough that the nib glides, and forgiving when you lift a shape that has gone slightly wrong.
Heavier silks, 16mm and up, or crepe de chine, hold more dye and bleed less. The line stays sharper and the colour sits deeper, but you will use noticeably more dye to saturate an area, and the fabric costs more while you are still learning.
Whatever you buy must be PFD, prepared for dyeing, or washed first. Sizing and factory finishes sit on the surface and block dye from bonding, which shows up later as pale, uneven patches that no amount of extra dye will fix.
To wash it, swirl the silk in warm water with a drop of mild soap, rinse until the water runs clear, and hang it to dry. Do not wring it. Press it lightly while still slightly damp, and you have a surface that will take colour evenly.
Stretching the Silk on a Frame
Silk has to be taut like a drum. Slack silk pools dye in the low spots and dries with dark rings where the colour gathered, which is the single most common reason a first piece looks muddy.
Pin the silk to a wooden frame with three-prong silk pins, about an inch apart, working all the way round. Start at the middle of one side, then the middle of the opposite side, and keep alternating. Pulling evenly from the centre outward is what keeps the grain straight.
You are aiming for a soft, even tension, not a trampoline. Tap it with a fingertip: it should sound faintly like a drum, with no wrinkles and no sag between pins.
A proper silk frame is lovely, but a canvas stretcher frame or an old picture frame works just as well for a first project, and costs a few dollars at most. Lay newspaper or a plastic sheet underneath. Dye travels.
Drawing the Resist Line
Now the part that decides everything else. Fill the applicator bottle, wipe the fine metal nib clean, and hold the tip just touching the silk, not pressing into it.
- Rest your hand on the frame edge or a small bridge of card so your wrist stays steady.
- Touch the nib to the silk and let the resist flow by itself for a second before you move.
- Draw slowly at an even pace. Speed is what makes a thin, gappy line.
- Keep the nib in contact the whole way. Lifting it mid-line leaves a break that dye will find.
- At every junction, pause and let the lines overlap slightly, so the two strokes fuse.
- Work one shape at a time and close it completely before starting the next.
- Wipe the nib every few inches, and cap the bottle whenever you pause.
Slow is not a personality trait here, it is a technique. A line drawn at half your natural speed will hold dye; a fast, elegant sweep usually will not.
Checking for Gaps Before You Dye
Before any colour touches the silk, hold the frame up to a window and look through the fabric from the back. Gaps and skips show as tiny bright breaks in the line, and they are far easier to find now than after a pool of magenta has escaped through one.
Touch up anything you find, then let the resist dry completely. Dry means dry to the touch and no longer cool or tacky, which usually takes twenty minutes to half an hour in a warm room.
A cool hairdryer, held well back and moving, speeds this up considerably. What you must not do is dye into a damp line. Wet resist is soft, and a brush will lift it.
If you are working on a large piece, this is a good moment to make tea. The silk will not reward hurrying.
One quiet habit that saves a lot of grief: check every shape twice, once from the front and once from the back. The eye gets used to a line very quickly, and a break you missed at first glance will usually show itself on the second pass.
Mixing and Testing Your Dye
Silk dyes are concentrated, so mix small amounts in clear jars and keep the jars labelled with a scrap of tape. A little goes a long way, and a diluted dye brushes more evenly than a strong one.
Before you commit a colour to your design, test it on a scrap of the same silk, stretched the same way. Dyes look different wet, dry, and after steaming, and a colour that reads as soft grey-blue in the jar can dry three shades deeper.
Test the whole sequence on that scrap: resist, dye, dry. You will learn more from one small square than from any photograph of someone else's work.
Keep a few jars of plain water at hand too. Water is not a lesser material here. It is how you lighten a tone and how you soften an edge.
Tempting as it is to mix eight colours for a first piece, three will serve you better. A deep tone, a middle one, and something pale give you more harmony than a shelf of unrelated jars.
Filling Shapes and Blending Colour
Load the brush lightly and work from the inside of the outline inward. Let the dye run to the resist line on its own rather than brushing across it. A brush pushed against the line will push dye under it.
Too much dye is the quiet enemy. A flooded shape pools in the middle and dries with a hard tide mark around the edge, and no amount of fixing afterwards will remove it.
For soft, blended colour, wet the silk first with plain water, then drop or brush dye into the damp area and let the two colours meet on their own. For crisp, even fills, work dry and lay the dye down in one confident pass.
While a shape is still damp, you can salt it or drip clear water into the dye. Salt pulls colour into small starry blooms; water pushes it outward in pale rings. Both are worth one test square before you use them in a design.
Work adjacent shapes one at a time, and let each one settle before you start the next. Silk rewards patience in a way that paper never demands.
Setting the Colour: Steaming or Iron-Fix
Dye on dry silk is not yet permanent. Until it is set, it will lift at the first wash, so this step is not optional housekeeping. It is the difference between a painting and a stain.
Steam-set silk dyes need about two to three hours of steaming. You can use a proper steamer, or a large pot with a rack and a lid. Wrap the dry silk loosely in paper, so it does not touch the water or the pot sides, and steam gently.
Iron-fix silk paints are the lower-fuss route for a first project. You set them by ironing, following the manufacturer's instructions for heat and time, usually through a pressing cloth on the reverse.
If you are unsure which you have, read the label before you begin, not after. Steaming a paint meant for ironing, or ironing a dye meant for steam, will disappoint you.
Washing Out and Removing the Resist
Once the colour is set, wash out the unfixed dye in cool water with a little mild soap. Rinse and change the water until it runs completely clear. Some colour always leaves the silk at this stage, which is normal, and the design stays put.
Water-based resist washes out in warm water after the dye is set. Soak the piece, rub the line gently between your fingers, and rinse. A soft brush helps on stubborn patches.
Solvent gutta comes out at the dry cleaner, so plan that errand before you start a piece with it. Tell them it is a resist, not a stain.
Dry the silk flat, away from direct sun, and press it on the reverse while slightly damp. The colours will look softer and more even than they did on the frame, which is one of the small pleasures of this craft.
If the piece is going to be worn or washed, finish the edges by hand. A narrow rolled hem in matching thread is the traditional choice, and it takes an evening rather than an afternoon.
Common Beginner Mistakes and Their Fixes
Almost every problem in serti comes from one of a handful of small habits, and all of them are fixable.
- Too little resist at a junction. Dye leaks between shapes. Fix: overlap strokes slightly and check the join against the light.
- Silk not taut. Dye puddles and dries in rings. Fix: repin, working from the centre of each side outward.
- Working the resist too fast. The line thins and skips. Fix: slow down and keep the nib in contact.
- Over-loading the brush. Pooling and tide marks. Fix: load less, work inward, and let the silk pull the dye.
- Dyeing before the resist is dry. The line lifts or bleeds. Fix: wait, or use a cool hairdryer.
- Skipping the test square. An unexpected colour shift on a finished piece. Fix: always test on the same silk.
None of these ruin a piece permanently. A leak can become a shadow, a tide mark can become texture, and a wobbling line can become part of the drawing. Silk is more forgiving than it looks.
Conclusion
The thing that stays with me about serti is not the finished scarf or the cushion cover. It is that small pause at the edge, when the colour arrives at the line and stops, and the shape you drew holds.
Start with a small piece, one colour, and a simple closed outline. Pin it taut, draw slowly, wait for it to dry, and give yourself the whole afternoon. The rest of the method will follow in its own time.
And when a line leaks, which it will, remember that you are learning a fence, not a wall. Set the piece aside, let it dry, and come back to it in better light. That is how everyone learns this craft, one quiet shape at a time.