The Joy of Yarn Weaving: Why Kids Love Making Wall Hangings
There is something magical about watching a child transform a simple ball of yarn into a textured, colorful work of art. Yarn weaving is one of the oldest crafts in human history, with roots stretching back thousands of years across cultures from ancient Egypt to the Andes, and yet it feels fresh and exciting every time a young crafter threads yarn across a loom for the first time. A woven wall hanging is more than just a decoration — it is a tangible record of patience, creativity, and the little choices made along the way: which color goes next, how tight to pull the yarn, whether to add a fuzzy fringe or leave the edge clean.
This project is designed for children ages five and up with adult supervision, and it works just as well for teens and adults who want a relaxing, screen-free creative afternoon. The finished piece — a bright, sunshine-inspired wall hanging — looks wonderful in a bedroom, a playroom, or a cozy reading nook. And because you build it yourself on a simple loom (which you can make from recycled cardboard), the sense of accomplishment is enormous. Let us walk through everything you need to know, from gathering supplies to hanging your finished weaving on the wall.
Gathering Your Materials
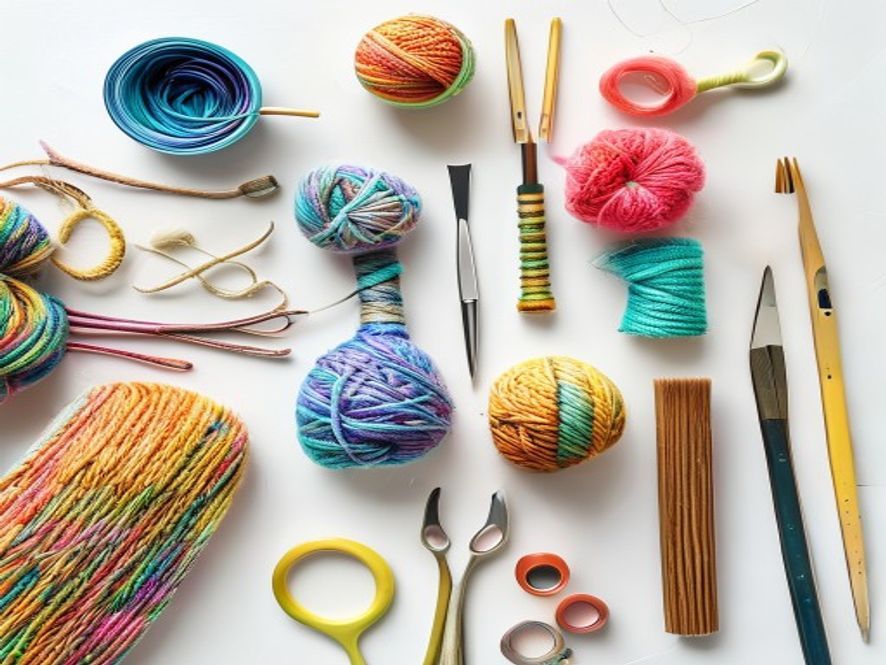
One of the best things about yarn weaving is that the materials list is short, affordable, and easy to find. Most households already have many of these items tucked away in a craft drawer or recycling bin. Here is what you will need:
Yarn
Yarn is the star of the show, so choose a variety of colors and textures that make you happy. For a sunshine-themed wall hanging, think warm yellows, oranges, coral pinks, soft whites, and touches of gold or turquoise to suggest sky and warmth. You will want at least four to six different colors to create visual interest. Worsted-weight (medium, size 4) acrylic or cotton yarn is ideal for beginners because it is thick enough to cover the warp threads quickly and does not split easily. Avoid very thin lace-weight yarn or overly fluffy novelty yarn until you have some experience — save those for later projects when you want to experiment with texture.
A good rule of thumb: gather about 10 to 15 yards of each color you plan to use. That sounds like a lot, but it goes fast once you start weaving, and leftover yarn can always be used for fringe, tassels, or your next project. If you are shopping on a budget, dollar-store yarn works perfectly fine for this project.
Loom
You have two excellent options here. The first is to make your own loom from a piece of sturdy cardboard — a recycled shipping box or the back of a cereal box works wonderfully. The second is to purchase a small wooden frame loom or a plastic kids' weaving loom from a craft store. Both approaches produce beautiful results. A cardboard loom is free, easy to customize to any size, and teaches children that you do not need expensive specialty tools to make art. A purchased loom is sturdier, reusable for many projects, and often comes with a built-in stand or notches that make warping easier. For this tutorial, we will describe both methods so you can choose what works best for your family.
Whichever loom you choose, aim for a finished weaving size of about 6 by 8 inches (15 by 20 centimeters) for a first project. That is large enough to show off colors and texture but small enough to finish in one or two crafting sessions — important for maintaining a child's interest and sense of accomplishment.
Tapestry Needle
A tapestry needle (also called a yarn needle or darning needle) is a large-eyed, blunt-tipped needle used for weaving yarn. The blunt tip is essential for children's safety — it will not poke or prick little fingers — and it slides easily between warp threads without splitting them. Look for a plastic or metal tapestry needle with an eye large enough to thread worsted-weight yarn. If you are making a loom from cardboard, you can sometimes weave without a needle by using your fingers, but a needle makes the work much easier and more precise.
Scissors
A sharp pair of scissors is needed for cutting yarn. Child-safe scissors work fine for cutting yarn, though an adult may need to help with thicker ropes or trimming fringe evenly.
Dowel, Stick, or Branch for Hanging
Once the weaving is finished, it needs something to hang from. A wooden dowel (about 6 to 8 inches long, or 15 to 20 centimeters) works perfectly. You can also use a straight tree branch, a bamboo skewer, a chopstick, or even a sturdy drinking straw. The natural look of a twig or branch adds a lovely rustic touch that complements the handmade feel of the weaving.
Beads, Feathers, and Embellishments (Optional)
This is where the project becomes truly your own. Wooden beads, glass beads, feathers, small shells, buttons, or even dried flowers can be threaded onto warp threads or fringe strands to add sparkle and personality. For a sunshine-themed hanging, consider yellow wooden beads that look like little suns, or small orange beads that echo the warm color palette. Beads with holes large enough to thread yarn onto work best.
Making Your Own Cardboard Loom
Making a loom from cardboard is a wonderful first step because it teaches the basic structure of weaving in a hands-on, low-pressure way. Here is how to do it:
Start with a piece of corrugated cardboard at least 8 inches wide and 10 inches tall (about 20 by 25 centimeters). The cardboard needs to be sturdy — a single-layer cereal box is too flimsy; use the side of a shipping box or glue two layers together for strength. Draw a rectangle 6 inches wide by 8 inches tall (15 by 20 centimeters) in the center of the cardboard and cut it out carefully. You now have a rectangular frame with a hole in the middle — that hole is your weaving area.
Along the top and bottom edges of the frame, use a ruler and pencil to mark small notches every half inch (about 1.25 centimeters). You should end up with about 10 to 12 notches along the top and the same number along the bottom. Use scissors to snip a small V-shaped cut at each mark. These notches will hold your warp threads in place and keep them evenly spaced. If you have a purchased loom with pre-cut notches or pegs, you can skip this step — your loom is ready to go.
Warping Your Loom: The Foundation of Your Weaving
Warping means stringing the vertical threads that form the foundation of your weaving. These threads are called the warp, and they will be partially hidden by the colorful horizontal threads (the weft) as you weave, but they need to be strong and evenly tensioned. A neutral color like cream, white, beige, or light gray works well for warp yarn because it blends into the background. Using a brightly colored warp can be a fun design choice too — it will peek through in places and add unexpected pops of color.
Cut a length of warp yarn about three times the height of your loom. Tie one end around the top left notch of your loom with a secure knot. Pull the yarn straight down to the bottom left notch, loop it around, and bring it back up to the next notch on the top. Continue this zigzag pattern — down, around, up, over — until every notch has a warp thread. Tie off the end at the last notch. The warp threads should feel firm and straight, like guitar strings, but not so tight that they bend the cardboard or the loom frame. If the tension is uneven, gently adjust each thread by sliding it in its notch until the tension feels consistent across the whole loom.
Once all warp threads are in place, you are ready to weave. Take a moment to admire the neat grid of vertical lines — this is the skeleton of your wall hanging, and every thread you add from here on builds on this foundation.
Weaving Stitches: Four Essential Techniques
Now comes the most exciting part: adding color and texture. There are four basic weaving stitches that every young weaver should learn. Once you know these four, you can create an endless variety of patterns, stripes, and textures. Practice each one on a small section of your loom before diving into the full project.
1. Plain Weave (Tabby Weave)
Plain weave is the simplest and most fundamental weaving stitch — the one that appears in fabric all around you, from T-shirts to dish towels. Thread your tapestry needle with about 18 inches of yarn and tie a small knot at the end. Starting on the right side of the loom, pass the needle over the first warp thread, under the second, over the third, under the fourth, and so on all the way across. When you reach the left side, gently push the yarn row down against the bottom edge with your fingers or a small comb. Now go back the other way: this time, go under the first warp thread, over the second, under the third, over the fourth — the opposite of the first row. This over-under pattern creates a sturdy, flat fabric. Continue back and forth, pushing each row snugly against the previous one. Keep the tension even: not so loose that the weave looks gappy, and not so tight that the warp threads bunch together.
Plain weave is perfect for creating solid blocks of color. Use it to make wide stripes of yellow, orange, and white for your sunshine wall hanging. Because it is so simple, young children can master it quickly and build confidence before moving on to more complex stitches.
2. Soumak Stitch
Soumak (pronounced soo-mahk) is a decorative stitch that creates a thick, braided-looking line across your weaving. It adds wonderful texture and visual weight, making it ideal for horizontal bands that separate different sections of your design. To make a soumak stitch, bring your yarn across two warp threads to the right, then loop back under those two threads and pull through. Move to the next two warp threads and repeat — across two, loop back under. The result is a raised, twisted cord that sits on top of the plain weave. Soumak works beautifully as a border between color blocks or as an accent line that draws the eye across the weaving. Try it in a contrasting color like deep coral or gold against a yellow background.
3. Rya Knots
Rya knots are the secret to making a fuzzy, fluffy, shaggy wall hanging. They are the same knots used in traditional Scandinavian rya rugs, and they create soft tufts of yarn that stand out from the surface of the weaving. To make a rya knot, cut a piece of yarn about 3 to 4 inches long. Place it over two warp threads, with the ends pointing toward you. Bring both ends around the back of the warp threads and pull them through the loop in front. Pull gently to tighten — the knot should sit snugly against the warp but not squeeze it. The two ends stick out like a little tuft. Repeat across a row of warp threads to create a thick, brush-like stripe.
Rya knots are incredibly satisfying for kids because they produce an immediate, dramatic texture. Use yellow rya knots at the top of your wall hanging to suggest sun rays, or scatter them throughout for a playful, grassy look. After all the knots are made, you can trim them with scissors to create a perfectly even fringe or leave them varied for a more organic feel.
4. Loop Stitch
The loop stitch creates raised loops of yarn that add another layer of texture and dimension. It is similar to rya knots but instead of cutting the yarn ends, you leave them as loops. Thread your needle and bring it up between two warp threads. Push the needle back down two warp threads to the right, but before pulling the yarn tight, use your finger to hold a small loop — about half an inch tall — above the surface. Pull the yarn gently to secure the loop, then repeat. The result is a row of soft, springy loops that catch the light and invite touching. Loop stitch is wonderful for creating fluffy clouds, rolling hills, or simply adding a tactile element to your wall hanging that changes how it looks from different angles.
Step-by-Step Project: Building Your Sunshine Wall Hanging
Now let us put all those techniques together into a cohesive project. Follow these steps, but feel free to adapt the colors and patterns to your own vision.
Step 1: Set Up Your Workspace
Find a flat, well-lit surface like a kitchen table or desk. Lay down newspaper or a placemat to catch any loose fibers. Organize your yarn by color in small piles or on a tray so everything is easy to reach. Make sure young children have adult supervision, especially when using scissors and needles. A comfortable chair and good lighting make a big difference in how long a child can focus happily on weaving.
Step 2: Warp the Loom
Following the warping instructions above, string your loom with a cream or light yellow warp yarn. Take your time getting the tension even — this foundation affects everything that follows. If using a purchased loom, follow the manufacturer's warping guide, which is usually simpler and faster than a cardboard loom.
Step 3: Weave the Bottom Border
Using plain weave, weave three or four rows of a neutral color like cream or white at the very bottom of the loom. This creates a clean border and anchors the weaving. Push each row down firmly with your fingers so there are no gaps.
Step 4: Add Sunshine Yellow
Switch to a bright yellow yarn. Weave about eight to ten rows of plain weave in yellow. This forms the main sunny body of your wall hanging. Do not worry about making every row perfectly straight — slight variations in tension give handmade work its character. After the yellow section, add one row of soumak stitch in a warm orange to create a distinct boundary line.
Step 5: Create a Rya Knot Stripe
Cut about fifteen 4-inch pieces of golden-yellow or orange yarn. Tie them onto two adjacent warp threads using the rya knot technique. Spread them across the width of the loom. This fluffy row will look like a band of sunshine or a field of wildflowers. Once all knots are secured, you can leave them long or trim them to a uniform length.
Step 6: Weave an Ocean or Sky Section
Switch to a turquoise or light blue yarn and weave six to eight rows of plain weave. This represents the sky behind the sunshine. Add a row of loop stitch in white to suggest clouds. The loops will stand up from the surface, creating a soft, airy texture that contrasts beautifully with the flat weave and the fluffy rya knots.
Step 7: Add Decorative Beads (Optional)
If you have beads, now is a wonderful time to add them. Thread a bead onto your yarn before passing it through a warp thread, then continue weaving. The bead will sit on the surface like a little jewel. Space them out randomly or create a deliberate pattern. Yellow and orange beads work beautifully for a sunshine theme, but a few turquoise or green beads can add an unexpected pop of complementary color.
Step 8: Weave the Top Border
Finish the weaving section with three or four rows of plain weave in the same neutral color you used at the bottom. This frames the design and gives the wall hanging a finished look. Weave as close to the top notches as you can manage — within about half an inch.
Step 9: Remove the Weaving from the Loom
Carefully cut the warp threads at the top and bottom of the loom, just behind the notches. You will now have a woven rectangle with loose warp threads sticking out at the top and bottom. Do not pull on the weaving — support it from underneath as you lift it off the loom. If you used a purchased loom with pegs, gently slip the warp loops off each peg.
Adding Fringe
The loose warp threads at the bottom of your weaving are not a mistake — they are the beginning of your fringe. Fringe gives wall hangings a casual, boho look and can be styled in several ways. The simplest method is to tie pairs of warp threads together in a double knot. Take two adjacent warp strands, tie them snugly against the bottom edge of the weave, and trim the ends to an even length. Repeat across the entire bottom row. For a fuller fringe, you can knot three or four strands together, or tie small beads onto each strand before knotting.
If you want an extra-long, dramatic fringe, tie additional lengths of yarn onto the warp threads using a lark's head knot (fold a piece of yarn in half, place the loop behind the warp thread, and pull the ends through the loop). Repeat this across the bottom to double or triple the thickness of your fringe. Trim everything to the same length with sharp scissors for a polished look, or leave it uneven for a more organic, wild appearance.
Attaching Your Weaving to a Dowel
The top warp threads will be used to hang your weaving. Take your dowel, branch, or stick and lay it across the top edge of the weaving. Bring each warp thread up and over the dowel, then tie it securely at the back. Space the warp threads evenly so the weaving hangs straight. If some warp threads are too short to tie, you can add a new piece of yarn and knot it around the dowel at that spot.
For the hanging cord, cut a piece of yarn or twine about 24 inches long. Tie one end to the left side of the dowel and the other end to the right side, creating a U-shape. Adjust the knot positions so the dowel hangs level. You can also tie a third piece of yarn in the center of the dowel for a single-point hanging loop if you prefer. Test the balance by holding the hanging cord — the weaving should hang straight and level. Adjust knots as needed.
Color Palette Ideas to Inspire You
While this tutorial focuses on a sunshine theme, the techniques you have learned can create wall hangings in any color scheme. Here are five palette ideas to spark your imagination for future projects:
Sunset Palette: Deep purple, magenta, coral, orange, and gold. This warm, dramatic palette mimics a summer sunset and looks stunning in a bedroom or living room. Use plain weave for smooth color transitions and rya knots in coral for a fiery texture.
Ocean Palette: Deep navy, teal, seafoam green, white, and sandy beige. This cool, calming palette evokes the sea. Use loop stitch in white for waves and soumak in navy for horizon lines. Add small shell beads for an extra coastal touch.
Rainbow Palette: Red, orange, yellow, green, blue, and purple in sequence. A classic rainbow wall hanging is cheerful, educational (great for teaching color order), and works in any child's room. Keep the sections roughly equal in height and use plain weave throughout for a clean, graphic look.
Neutral / Boho Palette: Cream, tan, brown, grey, and black. This sophisticated palette appeals to older children and teens. Focus on texture rather than color — combine plain weave, soumak, rya knots, and loop stitch in different neutral tones. The result is a modern, minimalist wall hanging that complements any decor.
Garden Palette: Leaf green, bright pink, sunny yellow, sky blue, and white. Inspired by a flower garden, this playful palette is perfect for spring and summer. Use loop stitch for flower petals and rya knots in green for grass. Add small fabric flowers or leaf-shaped beads for extra charm.
Tips for Weaving with Kids
Yarn weaving is a wonderful activity for children, but a few practical tips can make the experience smoother and more enjoyable for everyone involved.
Age Recommendations: Children ages five and up can participate with close adult supervision. Children ages eight and older can typically warp a loom and weave independently after a brief demonstration. For very young children (ages three to four), focus on the sensory experience — let them choose colors, pull yarn through warp threads with their fingers (no needle needed), and explore different textures.
Yarn Tension: This is the most common challenge for new weavers. If the weave is too loose, the warp threads will show through in unattractive gaps. If it is too tight, the weaving will pinch in at the sides (called draw-in) and become narrower at the top than the bottom. The solution is practice and gentle reminders: pull the yarn snug but not tight, and push each row down evenly with your fingers after every two or three passes. If draw-in occurs, you can gently stretch the weaving sideways when you remove it from the loom — the warp threads usually relax and widen again.
Patience and Breaks: A 6-by-8-inch weaving takes most children between one and three hours to complete, depending on age and attention span. That is perfectly fine to spread across multiple sessions. Weaving is meditative but also repetitive, and little fingers can get tired. Take breaks, have a snack, and come back fresh. A completed weaving is a wonderful reward for sustained effort.
Mistakes Are Beautiful: Unlike knitting or crochet, where a dropped stitch can unravel hours of work, weaving is very forgiving. If a row looks uneven, you can simply pull it out and redo it. If a rya knot is crooked, it adds character. If colors do not blend the way you expected, they create happy accidents. Encourage children to embrace imperfections — they are what make handmade items special and different from factory-made decor.
Cleanup: Yarn weaving produces loose fibers and small scraps of yarn. Keep a small bowl or bag nearby for trimmings. At the end of each session, shake out the weaving gently over a trash can to remove loose bits. Store works-in-progress flat or hanging in a safe place where they will not get tangled.
Conclusion
Congratulations — you have created a beautiful, one-of-a-kind sunshine wall hanging through the art of yarn weaving. What started as a pile of yarn, a piece of cardboard, and a simple idea has become a textured, colorful piece of art that brings warmth and personality to any room. Every row you wove, every knot you tied, and every bead you added represents a choice you made and a skill you practiced. That is something to be proud of.
Yarn weaving is an ancient craft, but it is also a deeply modern one — a slow, hands-on antidote to screens and busy schedules. The techniques you learned here (plain weave, soumak, rya knots, and loop stitch) are the same ones used by professional fiber artists to create museum-worthy tapestries. You now have a foundation that can grow with you: weave larger pieces, experiment with finer yarns, try shaped looms, or even design your own patterns on graph paper before you begin.
Share your sunshine wall hanging with friends and family, and do not be surprised if they ask you to make one for them, too. Each weaving is unique, and each one carries the energy and care of the person who made it. Happy weaving, and may your days be filled with color, texture, and creativity.