Introduction
There is something almost magical about watching a ball of yarn transform into a tiny creature.
The Japanese art of amigurumi — knitting or crocheting small, stuffed yarn creatures — has roots that reach back to the early 20th century, when Japanese crafters began making small woolen toys for children using the knitting techniques that had arrived via trade routes from Europe.
What started as a practical way to use leftover yarn has blossomed into a worldwide crafting phenomenon, and for good reason.
Amigurumi is one of the most satisfying crochet projects for beginners. The pieces are small enough to finish in a single sitting, the stitches are basic, and the results are utterly charming.
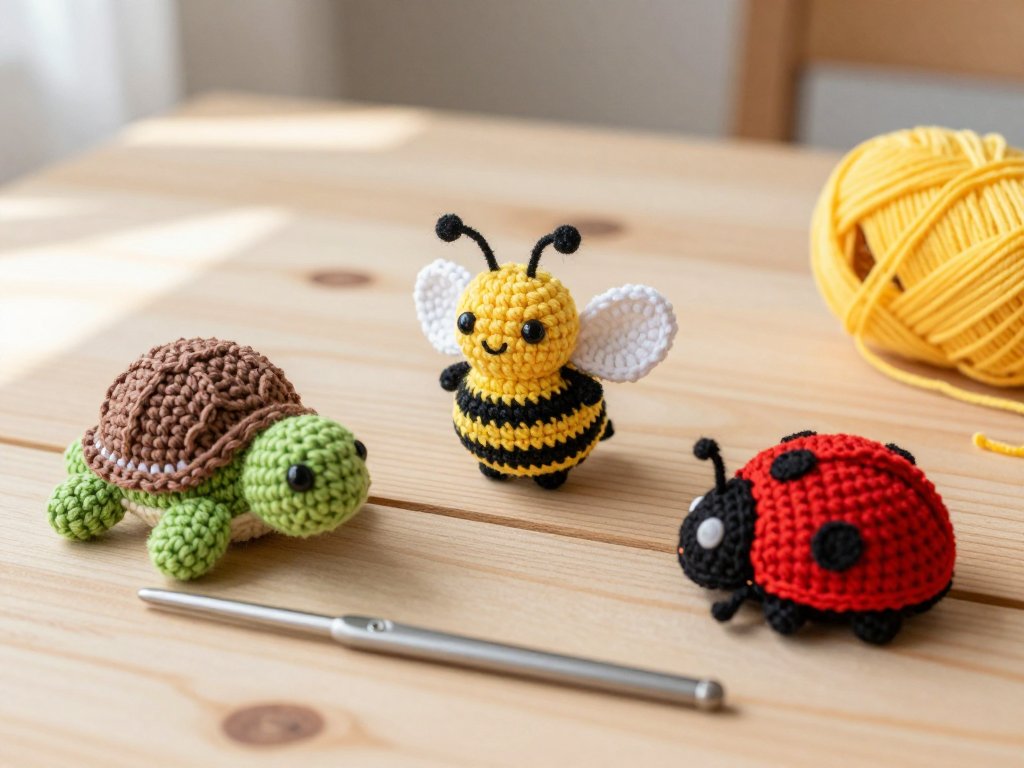
A tiny turtle with a striped shell, a little bee with embroidered wings, a sweet octopus with curly tentacles — each one feels like a small victory when you hold it in your hand.
If you have ever looked at a photo of amigurumi animals and thought, "I wish I could make that," I am here to tell you that you absolutely can.
You do not need to be an experienced crocheter. You do not need a dozen specialty hooks or an expensive yarn stash.
You just need to know two basic stitches, a little patience, and the willingness to start with something simple.
Let me show you how.
A Brief History of Amigurumi
The word amigurumi combines two Japanese words: ami, meaning "crocheted or knitted," and nuigurumi, meaning "stuffed doll." The craft first gained widespread popularity in Japan during the 1970s and 1980s, when kawaii (cute) culture was on the rise.
Craft magazines began publishing patterns for small, round, adorable creatures, and the trend spread quickly through craft communities.
By the early 2000s, amigurumi had reached Western crafters through the internet. Crochet forums and early blogging platforms became gathering places where pattern designers shared their creations.
Today, amigurumi is a global craft with countless designers, books, and online tutorials dedicated to it.
The essential techniques, however, have remained unchanged. The magic circle, single crochet, increases and decreases — these are the same stitches that Japanese crafters used decades ago.
What I love most about amigurumi is how it connects us to this tradition. When you make a tiny amigurumi bee, you are participating in a craft that has brought joy to people across generations and continents.
And you are doing it with nothing more than a hook, some yarn, and your own two hands.
What You Will Need
One of the best things about amigurumi is how little equipment it requires. Here is your essential shopping list.
- Yarn. Worsted weight (weight 4) cotton or acrylic yarn in your chosen colors. Cotton is lovely for amigurumi because it holds its shape well and feels nice to touch. For summer animals, think bright colors: coral, sky blue, sunny yellow, soft green, and white.
- A crochet hook. For worsted weight yarn, a 3.5mm (E) or 4mm (G) hook works beautifully. If you are using a lighter weight yarn, adjust accordingly. The hook should match your yarn but go one size smaller than the label recommends — amigurumi works best with tight stitches that keep the stuffing inside.
- Stuffing. Polyester fiberfill is the standard choice. It is inexpensive, hypoallergenic, and easy to work with. You can find it at any craft store or online.
- A yarn needle. A blunt-tip tapestry needle for sewing pieces together and weaving in ends.
- Stitch markers. These are invaluable for keeping track of your rounds. A small piece of contrasting yarn works as a stitch marker if you do not have the plastic kind.
- Scissors. Any small sharp scissors will do.
- Safety eyes (optional). Plastic safety eyes in 6mm or 8mm size give your animals a polished look. If you are making toys for very young children, embroider the eyes with yarn instead for safety.
That really is all you need. Most of these items cost less than ten dollars together and will last through many projects. It is one of the most affordable crafts I know.
Two Stitches You Must Know
Amigurumi is built on two fundamental stitches: the single crochet and the magic circle. Master these, and you can make almost any amigurumi pattern.
Single Crochet (sc)
The single crochet is the workhorse of amigurumi. It creates a dense, tight fabric that holds stuffing well and looks clean and professional.
To make a single crochet: insert your hook into the next stitch, yarn over, pull through (you will have two loops on your hook), yarn over again, and pull through both loops.
That is one single crochet complete. Practice making a chain of ten stitches, then working single crochets into each chain, then turning and working back.
Once you can make a neat row of single crochets, you have the fundamental skill for amigurumi.
The Magic Circle (aka Magic Ring)
The magic circle is how most amigurumi pieces begin. Instead of chaining a few stitches and joining them into a ring (which leaves a visible hole in the center), the magic circle creates an adjustable loop that pulls tight to close completely.
To make a magic circle: wrap the yarn around two fingers to create an X shape, insert your hook under the first strand and over the second, pull up a loop, chain one to secure it, then work your first round of single crochets into the center of the ring.
Pull the tail end to tighten the ring closed. It takes a little practice, but once you get the feel for it, you will never go back to chain rings for amigurumi.
Basic Amigurumi Techniques
Beyond the two core stitches, a handful of techniques will carry you through almost any pattern.
Working in the Round
Amigurumi is worked in continuous spiral rounds, not joined rounds. This means you do not slip stitch at the end of each round; you just keep going.
Place a stitch marker in the first stitch of each round so you can keep track of where each round begins.
The spiral creates a seamless surface with no visible join lines — exactly what you want for a smooth little animal body.
Increasing and Decreasing
To make your amigurumi piece wider, you increase: work two single crochets into the same stitch.
To make it narrower, you decrease: insert your hook into the next stitch, yarn over and pull through, insert your hook into the following stitch, yarn over and pull through (three loops on hook), yarn over and pull through all three loops.
This is called an invisible decrease and it creates a neat, nearly invisible shaping point.
Increases and decreases are what give amigurumi its characteristic round, chunky shapes. A typical ball shape starts with a magic circle of 6 stitches, then increases by 6 each round until it reaches the desired width, works even for several rounds, then decreases by 6 each round until closed.
Changing Colors
To change colors neatly, complete the last stitch of the old color until you have two loops on your hook, then yarn over with the new color and pull through both loops.
This means the color change happens in the final yarn-over of the stitch, not after it.
Continue working with the new color. Carry the unused color loosely along the inside of the piece, or cut and weave in ends if the color change is permanent.
Project: Amigurumi Summer Bee
Let us put these techniques into practice with a simple project: a tiny amigurumi bee. This little bee works up in about an hour and uses only single crochet, increases, and decreases. It is the perfect first amigurumi project.
What You Need
Yellow and black worsted weight cotton yarn, a 3.5mm hook, polyester stuffing, two 6mm safety eyes (or black embroidery thread), a yarn needle, and scissors.
Body (Yellow and Black)
Start with a magic circle in yellow and work 6 single crochet into it. (Round 1: 6 stitches.)
Round 2: Increase in each stitch around (12 stitches).
Round 3: Single crochet in next stitch, increase in next, repeat around (18 stitches).
Round 4: Single crochet in next 2 stitches, increase in next, repeat around (24 stitches).
Rounds 5-6: Single crochet in each stitch around (24 stitches each round). Switch to black.
Round 7: Single crochet in each stitch around (24 stitches). Switch back to yellow.
Rounds 8-9: Single crochet in each stitch around (24 stitches each round). Switch to black.
Round 10: Single crochet in each stitch around (24 stitches). Switch back to yellow.
Rounds 11-12: Single crochet in each stitch around (24 stitches each round).
Begin stuffing the body firmly. Round 13: Single crochet in next 2 stitches, decrease in next, repeat around (18 stitches).
Round 14: Single crochet in next stitch, decrease in next, repeat around (12 stitches). Add more stuffing.
Round 15: Decrease around (6 stitches). Fasten off, sew the remaining hole closed, and weave in the end.
Wings (White)
Using white yarn, chain 6. Single crochet in the second chain from hook and in each chain across (5 stitches).
Chain 1, turn. Work 2 single crochet in the first stitch, single crochet in the next 3 stitches, 2 single crochet in the last stitch (7 stitches).
Chain 1, turn. Single crochet in each stitch across (7 stitches). Fasten off, leaving a long tail for sewing.
Make two wings.
Assembly
Attach the safety eyes between rounds 3 and 4 of the bee's face, about 4 stitches apart. Using black embroidery thread or yarn, sew a small smile between the eyes. Sew the wings to the top of the body, one on each side. Your bee is complete!
This pattern is wonderfully adaptable. Make the bee in different color combinations — a pink and white bee, a blue and yellow bee, or even a rainbow bee. The basic shape works for any color scheme.
More Summer Animal Ideas
Once you have mastered the bee, the world of amigurumi opens up. Here are a few other summer animals that use the same techniques.
Tiny Turtle
Make a green body using the same basic ball shape, but work the bottom half flat instead of rounded.
For the shell, use a brown or multicolored yarn and make a slightly larger dome shape.
Sew the shell onto the body at an angle so it looks like the turtle is peeking out.
Add four small tube-shaped legs and a tiny tail. Embroider the eyes and a little smile.
Little Ladybug
Make a red body ball, then work a flat black oval for the head area.
Add black spots to the red body using embroidery thread or small circles of black felt.
Make six tiny black legs from chains of single crochet. Add antennae using short lengths of black yarn with small knots at the ends.
The ladybug is charming and incredibly quick to make.
Mini Octopus
The octopus is one of the simplest amigurumi animals because its legs are just chains.
Make a round head in your chosen color, then from the bottom edge, work eight chains of about 12 stitches each.
Slip stitch back along each chain to create the tentacles. Add big eyes and a small smile.
The octopus sits flat on its tentacles and makes a wonderful desk buddy or gift topper.
Tips for Success
After making a few amigurumi projects, you will develop your own preferences and techniques. Until then, here are some tips that will save you frustration.
Count your stitches. Amigurumi depends on accurate stitch counts. If you miss an increase or decrease, the shape will be lopsided. Use stitch markers and count each round before moving to the next.
Stuff firmly but not tightly. Under-stuffed pieces look deflated and wrinkly. Over-stuffed pieces stretch the stitches and show gaps.
The ideal is firm enough to hold its shape but still squeezable. Use small bits of stuffing at a time and work it into the piece with the back of a crochet hook or a chopstick.
Weave in ends as you go. Nothing is worse than finishing a whole amigurumi and facing a pile of loose ends to weave in. Weave each end as soon as you finish the color change or piece. It makes the final assembly much more enjoyable.
Blocking is optional. Unlike garments or lace, amigurumi rarely needs blocking. The tight stitches hold their shape naturally. If a piece is slightly uneven, a gentle steam from a garment steamer (holding it a few inches away) can relax the fibers.
Embrace imperfection. Your first bee will not look exactly like the pattern photo, and that is perfectly fine.
Handmade things have character. My first amigurumi was a bunny with one ear significantly larger than the other, and I still display it proudly on my desk.
The little quirks are what make your creations yours.
Conclusion: Your Amigurumi Journey Begins
Amigurumi is a craft of small joys. Each round of stitches brings your creature closer to life. Each finished piece is a tangible accomplishment you can hold in your hand, squeeze, and smile at. The techniques are simple, the materials are affordable, and the possibilities are endless.
Start with the bee. Master the magic circle and single crochet. Then try the turtle, the ladybug, or the octopus.
Before you know it, you will have a whole collection of cheerful little animals — perfect for gifts, decorations, or just bringing a smile to your own face on an ordinary afternoon.
For planning your amigurumi projects and yarn requirements, try our yarn yardage calculator to figure out exactly how much yarn each animal needs.
And if you want to explore more crochet patterns, the crochet pattern generator can help you design custom amigurumi of your own.