Introduction
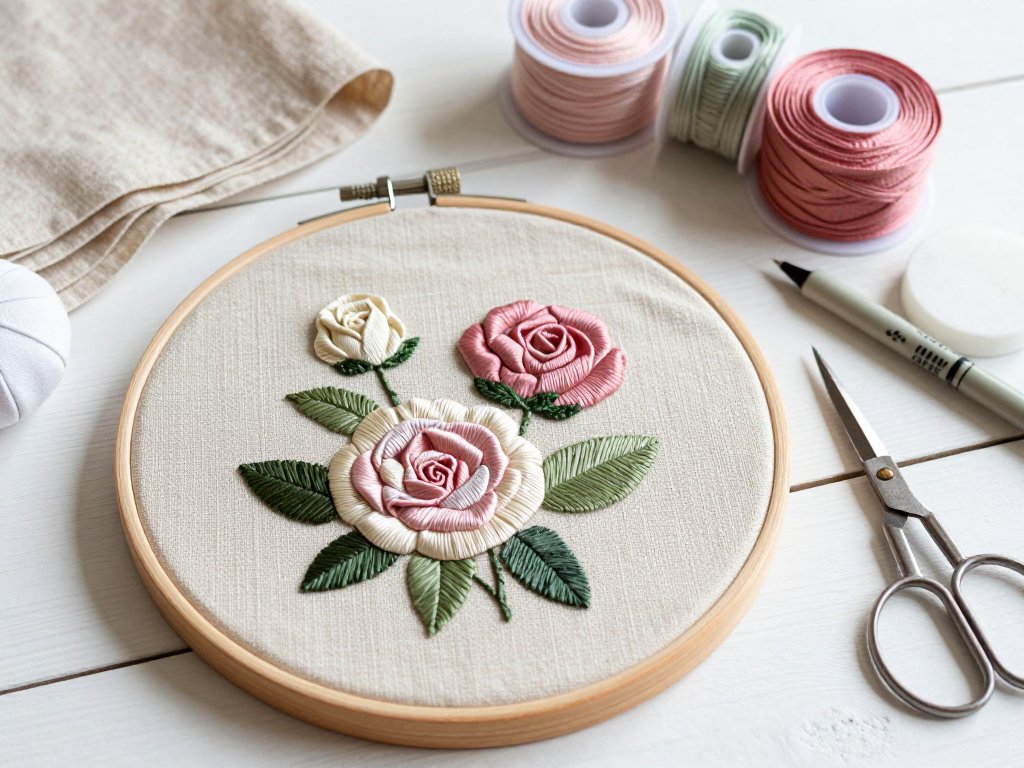
The first time you see real ribbon embroidery, it does something thread cannot manage. A rose stands up off the linen, catching light along every folded petal.
It looks like years of practice. It is not. Most of the flowers that stop people at a craft fair are built from three or four stitches, repeated slowly.
I have taught this to absolute beginners in a single afternoon. By the second hour they were making roses. By the third, they had stopped asking whether they were doing it wrong.
You do not need to have embroidered before. You need half an hour, a hoop, and the willingness to make one lumpy rose first.
A Short History of Ribbon Embroidery
Silk ribbon has decorated clothing for centuries, but its grandest hour came in the eighteenth century. In France and England, court dress was embroidered with a lavishness we rarely see now.
A court mantua or a gentleman's waistcoat could carry ribbon work across the whole front, mixed with metal thread and spangles. Ribbon added volume and shine without endless hours of stitched silk.
Then came the Victorian revival, roughly from the 1870s to the 1890s. Needlework became a respectable, almost expected accomplishment for women with an hour to spare in the afternoon.
The Arts and Crafts movement embraced the craft for its honesty. Hand-worked flowers suited their love of nature, and a ribbon rose was unmistakably made by a person rather than a machine.
Ribbon embroidery faded in the twentieth century, overtaken by machine work and two long wars. It returned in the 1990s on the wave of the crazy-quilt revival, and it has been growing quietly ever since.
How Ribbon Embroidery Differs From Thread
The difference is scale, and it changes everything. Thread draws a line; ribbon builds a form. A single ribbon stitch is already the shape of a petal.
Ribbon has loft — body, memory, a little stiffness. It will not lie flat unless you make it, so your stitches stand off the surface and cast small shadows.
It also folds and twists. A twist in the ribbon becomes the centre of a bud; a fold becomes the corner of a leaf. You are shaping the material, not drawing with it.
The last difference is speed. Ribbon covers ground quickly, so a motif that would take an evening in fine thread takes about ten minutes here.
That is what makes this a genuine weekend project. You can start on a Saturday morning and hang the finished hoop on the wall by Sunday afternoon.
If you love the opposite pleasure — fine counting and hairline patterns — start with Blackwork Embroidery for Beginners: Line Patterns instead. Ribbon is its soft, dimensional cousin.
The Silk Ribbon You Actually Need
Ribbon is sold by width, measured in millimetres. You can work an entire garden with three widths, and most beginners never need more than that.
- 2mm: tiny leaves and fine stems, best for miniature work
- 4mm: buds, small petals, lazy daisy leaves
- 7mm: the workhorse width — most roses, spider web roses and petals
- 13mm: large folded roses and any flower that needs real body
Material matters more than width. Pure silk has the softness and sheen that made this craft famous, and it holds a fold beautifully.
Silk-rayon blends cost less, come in more colours and behave almost as well. Rayon takes dye vividly, which is why hand-dyed variegated ribbons are usually blends.
How do you tell a good ribbon? Let a length hang from your fingers. Silk falls with weight and keeps a gentle curve where you press it.
Quantity is smaller than you expect. A 7mm rose uses roughly 50cm of ribbon and a small leaf about 20cm.
One beginner's square with three roses, five buds and a dozen leaves takes about three to four metres in total. Buy five-metre spools and you will have plenty left.
Needles, Scissors and the Small Tools
Ribbon needs a needle with a large eye, not a fine one. The eye must be wide enough to let the ribbon pass through without folding or twisting.
A chenille needle is the standard choice: a sharp point and a long oval eye that opens the ribbon flat as it passes through the fabric.
A tapestry needle also belongs in the tin. Its blunt tip is safer on loosely woven linen, where a sharp point would split the threads instead of slipping between them.
Sharp embroidery scissors matter just as much as the needle. You need small blades with a fine point to snip ribbon ends cleanly, close to the fabric.
Add a thimble you actually enjoy wearing, and a needle threader with a wide wire loop. Cheap threaders bend on the second use, so buy two.
Fabric, Backing and the Hoop
Ribbon pushes rather than pulls, so it wants a firm ground. A floppy fabric lets the stitch sink, and the flower collapses before it ever stands up.
Linen is the classic choice and my own favourite. Its weave is even, it holds a crease, and it looks like the antique pieces this craft grew from.
Cotton twill and quilting cotton both work well and cost far less. Quilting cotton is ideal for a first project because it marks and presses so easily.
Silk dupioni is the luxury option. Its slubs read as texture beneath the ribbon, and it holds a stitch superbly once backed with interfacing.
If your chosen fabric feels at all loose, iron a lightweight fusible backing onto the reverse. That single step prevents most sinking-stitch trouble.
A temporary stabiliser does the same job while you work, then rinses or tears away. It also keeps dense areas from distorting.
Use a wooden hoop with a sturdy screw, not a decorative one. You want the fabric drum-tight, so it rings faintly when you tap it with a finger.
Transferring Your Design Onto Fabric
You need a faint, clean line that will disappear later from the finished piece. There are four methods I trust, and one I would avoid.
Avoid ordinary graphite pencil. It smudges the ribbon as you work, and on silk it simply will not come out.
Tracing on tissue paper is the easiest route for a beginner. Tape the design to a window or lightbox, lay fine tissue over it and trace in pencil.
Place the tissue on your fabric, pin or tack it in place, and work straight through it. When the motif is done, tear the paper away in small pieces with tweezers.
The prick-and-pounce method is the traditional one. Prick the design lines with a fine needle at close intervals, then lay the paper on the fabric.
Water-soluble pens are the modern shortcut. Test yours on a scrap of the same fabric first, because some leave a faint residue after washing.
There is also the old freehand route. Press a crease down the centre of your fabric and draw the design directly with chalk, working confidently rather than small.
The Core Stitches
Seven stitches will carry you through most ribbon work. Learn them in this order and you can build almost any flower you see in a book or a pillow.
The Ribbon Stitch
This is the petal stitch. One flat ribbon goes down, and the tip is pierced so it curls to a point.
- Bring the needle up at the base of the petal, with the ribbon lying flat and untwisted.
- Lay the ribbon along the petal line to the point, keeping it relaxed, not taut.
- Push the needle down just beyond the tip, piercing through the middle of the ribbon.
- Pull slowly from underneath; the end curls and forms a soft pointed tip.
- Repeat around a centre for a full flower, keeping each petal the same length.
The Straight Stitch
The straight stitch works nearly the same way, but you do not pierce the ribbon. The end stays square and full instead of curling.
- Bring the ribbon up where the stitch begins, flat and untwisted.
- Lay it along the line and hold it gently with your thumb.
- Take the needle down beside the ribbon, not through it, at the far end.
- Ease the ribbon flat as you pull, so it sits smooth on the surface.
- Use it for leaves, stems and simple grass, where a blunt end is wanted.
The Twisted Straight Stitch
One deliberate twist turns the straight stitch into a stem, a tendril or a slim leaf. The twist must be formed before the needle goes down.
- Bring the ribbon up at the starting point.
- Twist the ribbon once or twice between your fingers, holding the twist.
- Lay the twisted ribbon along the line, keeping that twist intact.
- Take the needle down at the far end, beside the ribbon, and pull gently.
- Vary the number of twists for heavier stems or finer tendrils.
The Loop Stitch
The loop stitch makes a soft, three-dimensional petal with an open centre. It is the stitch that surprises beginners most.
- Bring the needle up at the base of the loop.
- Hold the ribbon loosely with your thumb where the loop should end.
- Take the needle down a thread or two away from where it came up.
- Pull from underneath until the loop is the size you want, then stop.
- Pin the loop in place with a tiny stitch or a bead if it wanders.
The French Knot Rose
Working a French knot over and over in a spiral builds a small, tightly packed rose. It is the ideal bud.
- Bring the ribbon up at the centre point of the rose.
- Wrap the ribbon once around the needle, keeping it flat rather than bunched.
- Take the needle down a thread away and pull slowly to form the knot.
- Bring the needle up just beside the knot and repeat, spiralling outward.
- Add four to six knots for a bud, more for a fuller bloom.
The Spider Web Rose
This is the stitch that sells books. It is worked over a foundation of straight thread stitches and looks far harder than it is.
- Work five straight thread stitches from a centre point, like the spokes of a wheel.
- Bring the ribbon up at the centre, beside the spokes.
- Begin weaving the ribbon over and under the spokes, going round the wheel.
- Keep the ribbon flat and untwisted; let it lie loosely as you circle.
- Weave until the rose reaches the size you want, then take the ribbon to the back.
The Folded or Gathered Ribbon Rose
The gathered rose is built from a length of ribbon folded back on itself. It gives a large, dense bloom that no other stitch matches.
- Cut a length of 7mm or 13mm ribbon about 30cm long.
- Fold one end over twice to hide the raw edge.
- Fold the ribbon back on itself at an angle, then again, making pleats.
- Secure each fold with a tiny stitch using fine matching thread.
- Keep folding and securing until the roll is the size you want.
- Tack the base firmly and stitch the finished rose to your fabric with small hidden stitches.
Leaves: Lazy Daisy and Twisted Leaf
Leaves deserve their own ribbon in a contrasting green, and they anchor the flowers visually.
- Cut a short length of 4mm or 7mm green ribbon.
- For a lazy daisy leaf, bring the ribbon up at the stem end.
- Hold a loop and take the needle down at the same point it came up.
- Tack the loop at the tip with a tiny stitch so it holds its shape.
- For a twisted leaf, simply work a twisted straight stitch and press the end flat.
- Vary leaf size around the flower so the cluster looks natural.
Your First Project: A Rose, a Bud and Three Leaves
Here is the project I give every beginner. One rose, two buds and three leaves on a stretched cotton square, about two hours of work.
You will need a 20cm square of quilting cotton, a 15cm wooden hoop, 7mm pink ribbon, 4mm green ribbon, one chenille needle, fine matching thread and a water-soluble pen.
- Press the cotton square flat, then snap it into the hoop drum-tight.
- Draw a light circle roughly 6cm across in the middle for the rose, and two small dots for buds nearby.
- Work five straight thread stitches across the rose circle to form the spider web spokes.
- Weave 7mm pink ribbon around the spokes, flat and loose, until the rose fills the circle.
- Take the ribbon to the back and fasten it off without pulling the weave tight.
- Work a French knot rose in the same pink near one of the dots for the first bud.
- Work a second French knot bud in a slightly deeper pink for contrast.
- Thread the 4mm green ribbon and work a lazy daisy leaf beneath the rose.
- Add two more leaves at different angles, varying the length so the cluster breathes.
- Work a twisted straight stitch in the same green down from the rose as a short stem.
- Slip a tiny length of gold thread or a single seed bead into the rose centre.
- Press the finished work face down on a folded towel, then let it rest before mounting.
Colour, Variegated Ribbon and Threaded Detail
Choose your palette before you thread a needle. Three or four tones of one flower colour and two greens will always look better than a rainbow.
Variegated and hand-dyed ribbons are where this craft becomes genuinely beautiful. One ribbon carries several tones along its length as you stitch.
That colour shift reads as light moving across petals, and it happens without any effort on your part. No two flowers from one spool match.
Thread embroidery underneath your ribbon anchors a design and gives it a backbone. A stem stitch line in matching floss stops a heavy flower from drifting.
For centres, consider a few seed beads or a length of fine gold thread. A single gold knot in the middle of a cream rose lifts the whole piece.
Use a beading needle for the beads and bring your thread up through the flower centre, fastening on the reverse with small, tidy stitches.
Finishing and Mounting Your Piece
Never press ribbon embroidery face up. Lay it face down on a folded towel and press the reverse with a warm iron and a little steam.
Blocking evens out any distortion from dense stitching. Mist the fabric lightly, pin it square on a board and let it dry completely before you move it.
To mount in a hoop, trim the excess fabric to about 3cm, then run a gathering thread around the edge and pull it snug to the back.
Cut a circle of felt or wool fabric to fit and stitch it over the reverse with a hidden running stitch. That gives a tidy, finished back.
Add a hanging loop of ribbon or cord through the hoop screw before you cover it. Trust me: you will not want to undo the felt later.
For framing, use a padded backing so the ribbon has something soft to sit against. Backing board alone flattens the loft you worked to create.
Troubleshooting: When Ribbon Misbehaves
Almost every ribbon problem has a simple cause, and none of them mean you are doing this wrong. Here are the ones I see most often.
Ribbon twisting on the needle. This is the most common beginner complaint. As you pull through, the ribbon rolls into a cord.
Stop, let the ribbon hang free for a moment so it untwists, then lay it flat with your thumb before the next stitch. Keep lengths short.
Ribbon fraying. Cut the end on a clean diagonal rather than straight across; a diagonal end threads more easily and frays more slowly.
If it keeps fraying, seal the tip with a little clear drying glue, then let it dry before threading.
Loops pulling flat or collapsing. Usually you are pulling too hard or holding the ribbon taut as you stitch. Ribbon wants slack.
Pin each loop with a thumb as you take the next stitch, and choose a wider ribbon if your petals keep sinking into the fabric.
Ribbon shredding through tight fabric. The weave is fighting the ribbon. Use a larger needle, open the hole slightly, and pull in short, gentle stages.
Holes left by a needle that was too large. Swap to a smaller chenille needle and work the stretched hole closed from the back with fine thread.
A design that sags after damp-blocking. Silk ribbon can relax when it gets wet. Mist rather than soak, dry flat, and never hang a damp piece.
Caring for a Ribbon-Embroidered Piece
Treat a ribbon-embroidered piece as you would a delicate garment, not as upholstery. A little care keeps silk looking new for decades.
Spot clean with cool water and a drop of mild soap on a cotton bud. Blot, do not rub, and let the piece dry flat away from direct heat.
Do not wring or soak silk ribbon. If a whole piece truly needs cleaning, hand wash it briefly in cool water and dry it flat on a towel.
Keep finished work out of direct sunlight. Silk and dyed rayon both fade, and a window that seems gentle will strip the colour within a season or two.
Store flat in acid-free tissue inside a box, with nothing resting on the ribbon. Folding a worked piece creases the loops permanently.
A Living Tradition
When you finish your first flower, you join a long line of people who have done exactly this. Some worked in a French court, others in a Victorian parlour.
Now it is your turn, and the technique asks very little of you. A hoop, a few metres of ribbon, and the patience to make one imperfect rose.
Start small and finish it. A finished small piece teaches more than an ambitious one you never complete.
And when a friend asks how you did it, hand her a needle and a length of pink ribbon. That is how this tradition has always travelled.