Introduction
My first plein air outing was a disaster. I showed up at a local park with a $70 French easel I had convinced myself I needed, a folding stool that collapsed twice, a block of expensive watercolor paper, and a brand-new set of professional-grade paints.
I set everything up by a pond, and within twenty minutes a gust of wind sent my easel — and my palette — tumbling into the grass.
I spent the next hour chasing windblown paper across the field while my paints dried in the sun.
I painted exactly one sketch that day, and it looked like a child's interpretation of a car accident.
Here is what I learned: you do not need any of that stuff. Not the fancy easel, not the premium paints, not the expensive paper block that catches every breeze.
Plein air painting — the practice of painting outdoors, directly from observation — is one of the most rewarding ways to improve your watercolor skills, and it can cost almost nothing to start.
I have spent the past three summers refining my setup, and I want to share what actually works for a painter on a budget.
This guide covers the gear you actually need (and what you can skip), the practical logistics of painting outside, and a handful of techniques that will make your summer sketches look better than mine did on that disastrous first day.
The Minimum Viable Plein Air Kit
Here is the thing about plein air gear: there is an entire industry trying to convince you that you need specialized equipment. You do not. You need four things, and you probably already have three of them.
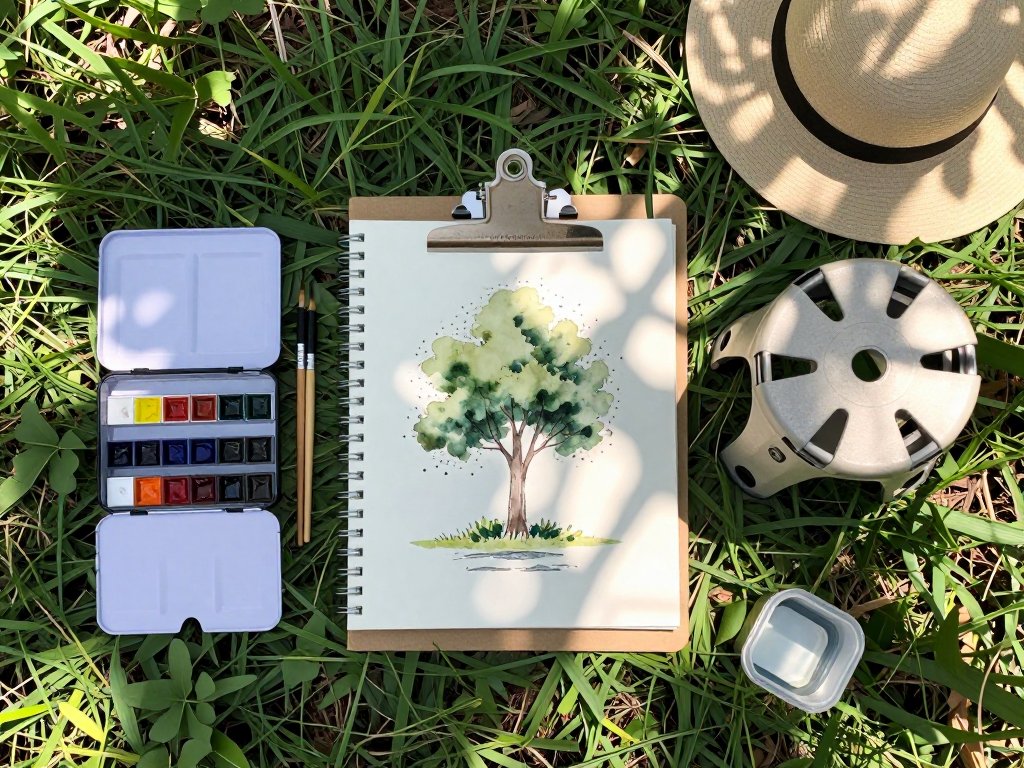
Paint. A basic set of student-grade watercolor pans will do more for your painting than a single tube of professional paint ever could.
Brands like Winsor and Newton Cotman or Kuretake Gansai are affordable (under $30 for a full set) and perform beautifully outdoors.
I used a $15 set of Reeves pans for an entire summer, and the only limitation was my skill, not the paint.
Stick to a limited palette: a warm yellow, a cool yellow, a warm red, a cool red, a blue, and maybe a green.
Six colors are plenty. If you can mix it, you do not need to buy it.
Paper. Do not buy the expensive spiral blocks. A pad of 140 lb cold-press paper from a mid-range brand like Canson or Strathmore (400 series) costs half as much as Arches and performs beautifully for practice and study.
The key is weight, not brand — 140 lb paper will not buckle with the light washes you use outdoors.
Cut your sheets into quarters (about 5x7 inches each) and you get sixteen painting surfaces from one $15 pad.
That is less than a dollar per sketch. If you are really pinching pennies, buy a roll of 140 lb student-grade paper and cut it yourself.
The savings are substantial.
Brushes. You need exactly two brushes for plein air: a size 8 round and a size 2 round.
That is it. A $6 synthetic brush from Princeton or a multipack from the craft store will last years with basic care.
Do not bring your good kolinsky sables outside — the wind, dust, and sun will destroy them.
Synthetic brushes handle the abuse better and cost a fraction of the price. Replace them once a year and you are still spending less than a single trip to the coffee shop.
Water container. A clean yogurt cup, a takeout soup container with a lid, or a collapsible silicone camping cup works perfectly. Do not buy the fancy collapsible brush-washing gadgets. I have owned three different expensive water containers, and my favorite is still a 32-ounce deli container that cost nothing.
Something to sit on (optional but recommended). A $10 camping stool from a discount store is lighter and more compact than a traditional painting stool.
If you prefer to stand, a sturdy rock or fallen log works just as well.
I spent an entire summer painting from the ground, leaning against a tree, and my paintings did not suffer for it.
Total cost for a complete kit: under $50. That is less than the fancy easel I bought on day one and have not touched since.
What to Leave at Home
Here is a short list of things I carried around for way too long before I realized I did not need them:
The French easel. It is heavy, it is expensive, it catches wind like a sail, and it takes five minutes to set up.
A simple lap board — a piece of 1/4 inch plywood cut to 12x16 inches with sanded edges — costs $3 at the hardware store and works better.
Clip your paper to it with binder clips and you are ready to paint in ten seconds.
No assembly, no wind issues, no regrets.
The folding stool with the canvas seat. If it has legs that telescope, it will eventually collapse. Buy a solid three-legged camping stool or sit on the ground. Your back will thank you either way once you adjust your setup.
An easel umbrella. These clamp-on umbrellas look practical in theory but act as kites in even a light breeze. A wide-brimmed hat and a shady spot are more reliable and cost nothing.
More than two brushes. I know it is tempting to bring your whole collection. I have done it, and I have spent more time switching brushes than painting. Two brushes. The size 8 for washes and broad strokes, the size 2 for details. That is the whole kit.
Finding Your Spot
One of the biggest challenges of plein air painting is simply deciding where to set up. Here is what I have learned about finding a good painting location, especially if you are new to painting outdoors.
Start close to home. Your backyard, a local park, or even a quiet street corner are all excellent places to begin.
You do not need a scenic vista to make a good painting. In fact, the more familiar a place is, the easier it is to notice the subtle play of light and shadow that makes a watercolor interesting.
I have painted the same oak tree in my local park at least a dozen times, and each sketch captures something different — the way the morning light filters through the leaves, the long shadows of late afternoon, the soft gray-green of an overcast day.
Look for three things in a spot: shade (direct sunlight dries your paper too fast and makes it hard to see your colors), a comfortable place to sit (even if it is the ground), and a view that gives you at least fifteen minutes of interest.
A fence line with tangled vines, a cluster of flowers, the edge of a pond, a bend in a walking path — all of these make wonderful subjects because they give you clear shapes and natural framing.
Time of day matters, too. Early morning and late afternoon (the golden hours) offer the most dramatic and forgiving light.
Midday sun creates harsh contrasts that are difficult for beginners to capture. If you can only paint during midday, look for subjects in the shade of a building or a dense tree canopy.
Setting Up in Under Two Minutes
Speed matters in plein air painting. The light changes, the wind picks up, and the longer you spend setting up, the less time you have to actually paint. Here is my streamlined setup routine:
Clip your paper to the lap board. Fill your water container. Open your paint set.
Arrange your two brushes within easy reach. That is it. The whole process takes less than two minutes, and it gets faster with practice.
I time myself every spring as a reminder — last year I got it down to forty-seven seconds.
Once you are set up, take sixty seconds to just look at your subject before you touch brush to paper.
Notice where the light is coming from. Identify the darkest darks and the lightest lights.
Pick out three main colors you see. This observation phase is worth more than any technique tip I can share, because it trains your eye to simplify.
And simplification is the single most important skill in watercolor.
Techniques That Work Outdoors
Plein air watercolor requires a slightly different approach than studio painting. The conditions change constantly, and your techniques need to adapt. Here are the methods that have saved my sketches more times than I can count.
The Three-Value Sketch
Before you paint, do a quick three-value thumbnail sketch in your sketchbook or on a scrap of paper.
Draw three rectangles about the size of a business card. In the first one, block in only the darkest shapes you see.
In the second, add the mid-tone shapes. In the third, leave the paper white for the lightest areas.
This exercise takes ninety seconds and dramatically improves the composition of your finished painting. It forces you to decide what matters before you commit water to paper.
Wet-on-Dry for Control
Outdoors, wet-on-wet techniques can be frustrating because the wind and sun dry your paper unpredictably.
Instead, paint wet-on-dry for more control. Lay down a wash, wait for it to dry (which happens fast outside — usually thirty to sixty seconds), then add the next layer.
The result is cleaner edges and more deliberate color placement. Save wet-on-wet for cloudy, still days when the air is humid and you have time to work slowly.
The Five-Minute Limit
Set a timer for five minutes and do not let yourself paint longer than that on your first pass.
This sounds restrictive, but it is liberating. When you know you only have five minutes, you stop fussing and start making decisions.
You mix bigger washes, use broader strokes, and leave more white paper. The result is usually fresher and more dynamic than a painting you labor over for an hour.
After the timer goes off, you can take a break, evaluate, and decide if you want to add a second layer.
Almost always, the first five minutes are the best ones.
Spray Bottle for Slow-Drying
If the sun is drying your paper before you can blend, a small spray bottle filled with clean water is your best friend.
Give your paper a light mist before you start painting, and your washes will stay wet thirty to sixty seconds longer.
A $2 travel-sized spray bottle from the drugstore works perfectly. Do not overdo it — you want a fine mist, not puddles.
Test the spray pattern on your hand before you aim it at your paper.
What to Paint When You Feel Stuck
Some days the view is overwhelming and you do not know where to start. On those days, pick one small thing.
A single dandelion against a stone wall. A rusty gate hinge. The shadow of a tree branch on the grass.
The handle of your water container in the sun. Small subjects are easier to simplify, and they teach you to see light and color in a focused way.
I have made some of my favorite plein air paintings of a single leaf floating in a puddle.
Do not underestimate the humble subject.
Another trick: paint the same subject three times in one session, each time in under ten minutes.
The first sketch captures the general shapes. The second one refines the composition and color choices.
The third one — usually the best — flows from muscle memory and instinct rather than overthinking.
This exercise is worth doing even if you throw away the first two sketches.
Extending Your Session
Once you are comfortable with the five-minute sketch and the three-value thumbnail, you can extend your plein air sessions confidently.
A typical outdoor painting session for me lasts about forty-five minutes from setup to cleanup.
The first ten minutes are for observation and the first wash. The next twenty minutes are for layering and refining.
The final fifteen minutes are for finishing touches, drying time, and packing up.
If you want to try longer sessions, bring a second piece of paper so you can start a new sketch while the first one dries. Alternating between two paintings keeps your hands busy and your mind fresh. It also doubles your output, which means twice the learning per session.
Preserving and Transporting Wet Paintings
One logistical challenge of plein air is bringing your wet paintings home. A simple solution: bring a flat portfolio or a piece of corrugated cardboard slightly larger than your paper.
Lay wet paintings flat in the portfolio, separated by sheets of wax paper or parchment paper (the kind from your kitchen).
Do not stack more than three or four paintings on top of each other. When you get home, remove the paintings immediately and lay them flat to dry completely before storing them.
If you do not have wax paper, clean newsprint works in a pinch. Do not use paper towels — the texture will imprint on your painting surface. And never stack wet paintings directly on top of each other unless you enjoy abstract mixed-media effects on both pieces.
Conclusion
Looking back at that first disastrous plein air outing, I realize the problem was not the easel or the wind.
The problem was that I thought I needed everything to be perfect before I could start.
I needed the right gear, the right location, the right conditions. Plein air painting taught me that waiting for perfect is the fastest way to never paint at all.
The best plein air setup is the one you can carry in one hand and set up in under two minutes.
The best subject is whatever is in front of you right now. And the best time to start is today, not when you have saved up for better equipment.
Grab a brush, step outside, and paint something imperfect. It will be better than my first attempt — of that I am certain.