Introduction
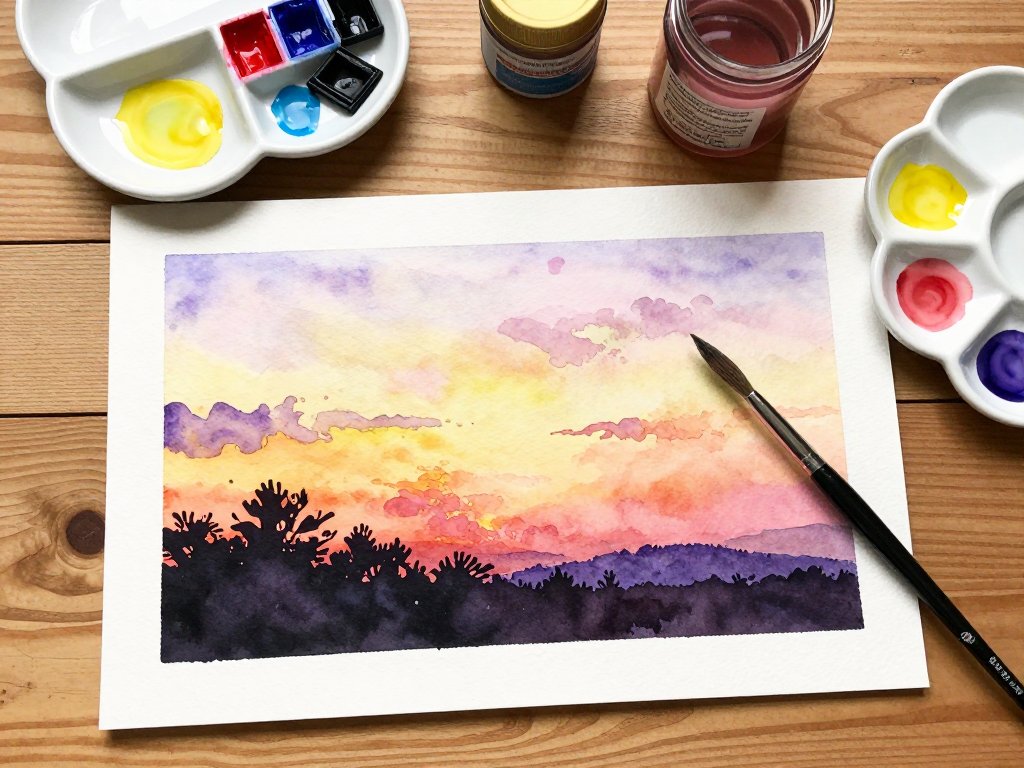
There is something almost magical about a watercolor sunset. The way the colors bleed from warm gold into soft pink and finally into deep violet — it feels as though the sky itself is painting, and you are just lucky enough to catch it.
If you have ever looked at a sunset sky and wished you could capture it on paper, I have good news: watercolor is the perfect medium for the job.
It blends naturally, dries in layers, and rewards a gentle, relaxed hand. You do not need years of experience or an elaborate studio setup.
Just a few basic supplies, a quiet hour, and a willingness to let the paint do some of the work.
In this tutorial, I will walk you through painting a warm sunset sky from start to finish. By the end, you will have a luminous, frame-worthy painting and the confidence to paint the next sunset that catches your eye.
Gathering Your Supplies
One of the best things about watercolor painting is how little you need to get started. For this sunset sky tutorial, gather these supplies:
- Watercolor paper — Cold press, 140 lb (300 gsm) or heavier. A quarter sheet (about 11 by 15 inches) or a 9 by 12 inch block is perfect. Heavier paper holds more water without buckling, which matters for the wet-on-wet technique we will use.
- Watercolor paints — You need just five colors: cadmium yellow medium, permanent rose or alizarin crimson, ultramarine blue, dioxazine violet, and a warm orange (or mix it from yellow and red).
- Brushes — A medium round brush (size 8 or 10) and a larger flat brush (about three-quarters of an inch wide). Both should hold plenty of water.
- Two jars of clean water — One for rinsing, one for mixing clean colors.
- A soft cloth or paper towels — For blotting your brush and lifting excess paint.
- Masking tape — To secure your paper to a board and create a clean white border.
That is truly all you need. If you have been eyeing a basic watercolor set at the craft store, this is the perfect project to break it in.
Preparing Your Paper
Before you pick up a brush, take a moment to prepare your surface. Tape your paper to a sturdy board or table using masking tape along all four edges. This keeps the paper flat as it absorbs water and prevents frustrating buckling.
If your paper is lighter than 140 lb, consider stretching it first: soak it in a tray of clean water for five minutes, then tape it to your board while wet. Let it dry completely before painting. For heavier paper, simply taping the edges is enough.
Set up your workspace somewhere you can relax and take your time. A sunset painting deserves a calm, unhurried atmosphere.
Understanding the Wet-on-Wet Technique
The key to a beautiful watercolor sunset is the wet-on-wet technique — painting wet color onto a wet surface. This allows the pigments to bloom and blend naturally, creating the soft, seamless transitions that make sunset skies so breathtaking.
Here is how it works: you wet the paper first with clean water, then drop in your colors while the surface is still damp.
The paint spreads on its own, feathering outward in soft clouds of color. You guide it gently with your brush, but you do not fight it.
The water and pigment do the blending for you.
The most important skill to practice is knowing how wet your paper should be. Too wet, and the colors turn into formless puddles.
Too dry, and you get harsh edges instead of soft blends. Aim for a damp, glistening surface — like the look of morning dew on a leaf.
If you see standing water, blot it gently with a paper towel before adding paint.
Step 1: Wet the Paper and Paint the Sky
Using your flat brush, wet the entire sky area with clean water. Work in smooth, even strokes, making sure the surface is uniformly damp but not pooled. Take your time with this step — a good wet-in-wet wash starts with a good wet surface.
While the paper is still glistening, load your brush with cadmium yellow medium and paint a band of yellow across the lower third of your sky area — this will be the warm glow near the horizon.
Rinse your brush, then pick up permanent rose and paint a band of pink above the yellow.
Let the two colors touch and blend where they meet. Do not overwork them. The water will pull them together naturally.
Rinse your brush again, and paint a band of ultramarine blue above the pink, gradually transitioning into dioxazine violet at the very top of the sky.
Work quickly but calmly. You want all the colors to be applied while the paper is still damp, so they blend into one another without hard edges.
Step 2: Soften and Blend
Now comes the truly satisfying part. With a clean, damp brush (not soaking wet, just moist), gently soften the edges where two colors meet.
Use light, sweeping strokes in the direction of the gradient — horizontal for a horizontal sunset.
This softens the transition between yellow and pink, pink and blue, and blue and violet.
If you see a hard line forming, add a tiny touch of clean water along the edge and let the pigment bleed into it. Be patient. Sometimes the best blending happens in the minute or two after you put down the brush, as the water continues to move the pigment.
Let this layer dry completely before moving on. A hairdryer on low speed, held at least twelve inches away, can speed things up if you are eager to continue. Otherwise, simply wait fifteen to twenty minutes.
Step 3: Paint the Sun
Once the sky is fully dry, it is time to add the sun. Mix a warm, concentrated orange from your cadmium yellow and permanent rose.
Using your round brush, paint a circle near the horizon line — the warmest part of the painting.
Do not worry about making it perfectly round. A slightly irregular sun looks more natural, as though it is shimmering behind the heat of the horizon.
While the orange is still wet, touch a tiny amount of clean water to the bottom edge of the sun.
This softens the lower edge and creates the illusion of the sun melting into the horizon.
Add a touch of pure yellow to the center of the sun for a glowing highlight.
Step 4: Add Clouds
Clouds are what give a sunset its personality. Thin, wispy clouds catching the last light of the day can transform a simple gradient into a scene that feels alive.
Mix a dilute purple-gray from dioxazine violet with a tiny touch of ultramarine blue. Using your round brush, paint soft, horizontal cloud shapes across the sky.
Think of them as loose bands of color rather than distinct objects. Keep the edges soft by painting onto dry paper and immediately softening the edges with a damp brush.
For clouds near the sun, add a touch of warm orange to the mix. For clouds at the top of the sky, use more blue and violet.
The key is keeping everything soft and horizontal — sunset clouds are shaped by the wind, and they stretch across the sky in long, graceful lines.
If a cloud looks too dark, blot it gently with a paper towel while it is still wet. This lifts some of the pigment and leaves a softer, more translucent shape. Let the clouds dry completely before adding any more detail.
Step 5: Paint the Silhouette
A dark foreground silhouette gives your sunset depth and scale. It anchors the painting and makes the glowing sky feel even more luminous by contrast.
Mix a deep, rich dark from ultramarine blue and alizarin crimson, with just a touch of dioxazine violet. It should be almost black but with a warm undertone — pure black would feel flat and dead against the vibrant sky. The mixture should be thick and concentrated, like creamy coffee.
Using your round brush, paint the silhouette of a simple landscape across the bottom of your paper.
A row of distant trees, a gentle hill, or a line of simple houses all work beautifully.
Keep the shapes simple and avoid detail — silhouettes look most convincing when they are bold and uncluttered.
Paint in one confident layer. Going over it repeatedly will disturb the underlying colors and create muddy patches.
Let the silhouette extend slightly beyond the horizon line to create a clean edge. You can soften the top edge of the silhouette slightly with a damp brush if it feels too sharp.
Step 6: Add Final Highlights
This is the detail step that brings your painting to life. Using a small round brush and pure, concentrated yellow, add tiny highlights: the glint of sunlight on the edge of a cloud, a narrow band of gold just above the horizon, a few small stars beginning to appear in the deepening violet at the top of the sky.
Less is more here. A few well-placed highlights are more effective than many scattered ones. Step back from your painting every few strokes and see how it reads from a distance. If something catches your eye naturally, you have done it right.
Troubleshooting Common Issues
My colors look muddy. Muddy colors usually happen when too many pigments are mixed together, especially complementary colors like red and green or blue and orange.
Keep your palette simple — five colors is plenty — and rinse your brush thoroughly between colors.
If you see mud forming, stop painting in that area and let it dry. You can paint over it later.
My clouds have hard edges. Hard edges form when paint dries on dry paper without being softened.
Next time, soften the edges with a damp brush immediately after painting the cloud shape.
If your clouds are already dry, you can soften them by gently rewetting the edge with clean water and blotting with a paper towel.
The paper buckled. This happens with lighter-weight paper or when too much water is used.
If your paper buckled, do not worry — once the painting is completely dry, place it under a stack of heavy books for a day or two.
It will flatten significantly. For future paintings, use heavier paper or stretch it beforehand.
My sky looks patchy. Patchiness is usually caused by uneven wetting in the first step. Make sure the entire sky area is uniformly damp before you start adding color. If you notice a patch forming, add a tiny drop of clean water to the area and let the pigment redistribute.
Painting Different Types of Sunsets
Once you have mastered the basic sunset, try experimenting with different color palettes:
A dramatic sunset — Use deeper purples, rich oranges, and a touch of crimson. Add more clouds with darker undersides for a stormy, dramatic feel.
A pastel sunset — Use pale pinks, soft lavender, and the barest touch of warm yellow. Keep the contrast low and the values light for a dreamy, romantic atmosphere.
A desert sunset — Use warm terracotta, deep orange, and dusty purple. Paint a cactus or mesa silhouette in the foreground for a southwestern feel.
A winter sunset — Use cool pinks, icy blue, and pale lavender. Paint bare tree branches in the silhouette for a quiet, snowy evening scene.
Each variation uses the same basic wet-on-wet technique. The only difference is the colors you choose. Let the sky outside your window be your guide, and paint what you see.
Sharing Your Painting
One of the sweetest joys of watercolor is sharing what you have created. Sunsets are universal — everyone loves them, and everyone connects with them. Your painting is a small piece of beauty that you brought into the world, and that is worth celebrating.
If you decide to share your painting, consider photographing it in natural daylight with even lighting.
Crop out the tape edges and include a bit of the white border if you like the clean finish.
You might be surprised by how many friends and family members say, "I wish I could do that."
You can tell them they can. All it takes is paper, paint, water, and a quiet hour to watch the colors bloom.
Conclusion
Painting a sunset sky in watercolor is one of those rare creative experiences that delivers beauty far beyond the effort you put in.
The wet-on-wet technique works with you, not against you, producing luminous, soft transitions that look like they took hours of careful work — when really, the water and pigment did most of the blending on their own.
I hope this tutorial has given you the confidence to try your own sunset painting.
Start with the basic warm palette, then experiment with different color combinations as you grow more comfortable.
Each sunset you paint will teach you something new about how water moves, how colors interact, and how beautiful imperfection can be.
So fill your jars with clean water, tape down a sheet of paper, and let yourself paint. The sunset is waiting.