Introduction
My grandmother lived in a small house at the edge of a valley, and I spent many childhood afternoons sitting on her porch watching the sky change.
She would point out the different cloud shapes and name them for me — cumulus, stratus, cirrus — as if they were old friends passing by.
I remember one evening in particular when the sunset turned the whole valley pink and gold, and she said, "That is nature showing off." I think that was the moment I first wanted to learn how to paint the sky.
Watercolor is the perfect medium for sky painting. Its transparency and fluidity mimic the way light moves through clouds and air.
A well-painted sky can transform a simple landscape into something atmospheric and memorable. And the wonderful thing about sky painting is that no two attempts ever look exactly the same, which keeps the process endlessly interesting.
This guide will walk you through three sky painting techniques — soft clouds, glowing sunsets, and dramatic storm skies — with step-by-step instructions for each.
You will also learn the essential materials, colour mixing tips, and common pitfalls to avoid.
By the end, you will have the confidence to paint any sky you see.
Essential Materials
Before we dive into techniques, let us talk about the tools that will make your sky painting experience smoother. You do not need an expensive setup, but a few key items will help you achieve better results from the start.
Paper. Use 100% cotton cold-pressed watercolor paper in at least 140lb (300gsm) weight. Cotton paper handles wet washes without buckling and lets you lift paint more easily than cellulose paper. A quarter sheet or even a smaller block is plenty for practicing these techniques.
Paint. For sky painting, you will want a basic palette that includes ultramarine blue, cerulean blue, cadmium yellow, cadmium red, alizarin crimson, burnt sienna, and a neutral grey or Payne's grey.
These colours will mix into every sky tone you need, from the softest morning blue to the deepest storm grey.
Brushes. A large round brush (size 10 or 12) for wet washes, a smaller round brush (size 4 or 6) for details, and a rigger brush for fine cloud edges. A flat wash brush is also helpful for covering large areas quickly.
Additional supplies. Have two jars of clean water — one for rinsing and one for mixing — a soft paper towel or sponge for lifting paint, and a spray bottle for keeping your washes workable. A hairdryer can speed up drying between layers, though patience works just as well.
Before You Paint: The Wet-on-Wet Foundation
All three sky techniques in this guide use the wet-on-wet method, which means you apply wet paint onto a wet paper surface. This technique creates soft, diffused edges that are essential for realistic clouds and atmospheric skies.
To prepare your paper, stretch it if you are using a block or tape it to a board if using individual sheets.
Wet the paper evenly with clean water using your large brush or a spray bottle.
The surface should have an even sheen without puddles. If there are pools of standing water, blot them gently with a paper towel or tilt the board to let them run off.
Once the paper has that gentle, even dampness, you are ready to begin. You will have about thirty to sixty seconds of working time before the paper dries, depending on your climate. Work quickly and confidently, and do not overwork the paint once it starts to dry.
Technique One: Soft Cloud Skies
Cloud skies are the most versatile sky painting and a wonderful place to start. A blue sky with soft white clouds works in almost any landscape and teaches you the fundamental wet-on-wet control you will use for the other techniques.
Step 1: Apply the blue wash. Wet your paper as described above. Mix a light wash of cerulean blue with a tiny touch of ultramarine.
Using your large brush, apply the wash across the entire sky area, leaving some lighter patches where the clouds will go.
The clouds should be brightest at the top and get slightly warmer toward the horizon.
Step 2: Lift the clouds. While the wash is still damp, rinse your brush and squeeze out most of the water so it is just damp.
Gently press the damp brush into the paper where you want cloud shapes, lifting the blue pigment.
Blot the brush on a paper towel after each lift. The damp paper will pull pigment back toward the lifted area, creating soft, fluffy cloud edges.
Work from top to bottom, making clouds smaller and closer together near the horizon.
Step 3: Add cloud shadows. Once the first layer is completely dry, mix a very pale grey-blue from ultramarine and a touch of burnt sienna.
Using a dry brush with a small amount of this mixture, paint soft shadows on the underside of your clouds.
Keep these shadows subtle — they should suggest depth without looking harsh.
Step 4: Soften edges. If any cloud edges look too hard, go over them with a clean, damp brush to soften the line. This step is what gives cloud skies their realistic, airy feel.
Technique Two: Glowing Sunset Skies
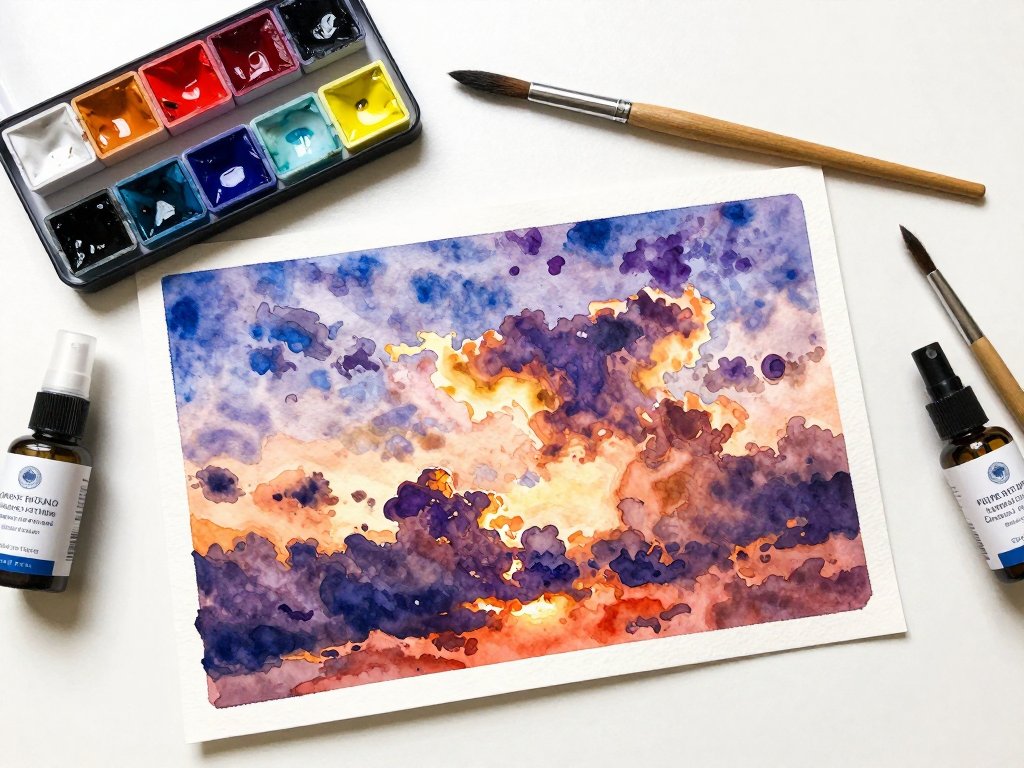
Sunsets are some of the most rewarding skies to paint because of the rich colour transitions. The key to a convincing sunset is building colour in layers, starting with the lightest yellows and working toward the deepest reds and purples.
Step 1: Plan your colour zones. Before you wet the paper, decide where your sun will be.
The horizon line should be low — about one-third from the bottom — to leave room for the sky.
The area around the sun will be the brightest (yellow), radiating outward to orange, then pink or red, and finally purple-blue at the top.
Step 2: Wet the paper and lay down the yellow. Wet your paper thoroughly. While it is still wet, apply a bright wash of cadmium yellow in the area around where the sun will be.
Keep this area small and intense. The wet surface will help the yellow spread outward slightly.
Step 3: Add the warm colours. While the yellow is still wet, blend cadmium orange outward from the yellow zone, then alizarin crimson beyond that. Work quickly and let the colours merge on the paper. Tilt your board slightly to encourage the paint to flow in the direction you want.
Step 4: Paint the upper sky. Mix ultramarine blue with a touch of alizarin crimson to create a warm purple-blue.
Apply this to the top of the sky while it is still damp, letting it blend with the warm colours below.
The transition from warm to cool should be gradual — if it looks abrupt, spritz with water and tilt the board.
Step 5: Add cloud silhouettes. Once the sky is completely dry, you can add dark cloud shapes using a mix of ultramarine and burnt sienna with a touch of alizarin crimson.
These clouds should be warm-toned to match the sunset light. Keep them low and stretched horizontally, like the clouds you see near the horizon at dusk.
Step 6: Paint the sun. For the sun itself, leave a small area of paper white by painting around it, or lift the paint from the centre of the yellow zone while it is still damp. A white paper sun glows beautifully against the warm colours around it.
Technique Three: Dramatic Storm Skies
Storm skies are all about contrast — deep, brooding greys against patches of pale light. They create a moody atmosphere that adds drama to any landscape painting. Storm skies look more complex than they are, and with a few controlled steps you can create skies full of tension and movement.
Step 1: Wet the paper and lay a pale base. Wet your paper, but less thoroughly than for the sunset technique.
You want the paper damp but not soaking, which will give you more control over the paint.
Apply a very pale wash of Payne's grey mixed with a touch of cerulean blue across the sky.
Step 2: Add the dark clouds. Mix a strong, dark grey from ultramarine blue and burnt sienna, adding a touch of alizarin crimson for warmth.
Using your large brush, paint irregular cloud shapes across the upper two-thirds of the sky.
Leave gaps of lighter paper between the dark clouds — these gaps will become the patches of light breaking through the storm.
Step 3: Create rain shafts. While the dark paint is still damp, rinse your brush and squeeze it dry.
Use the damp brush to create diagonal streaks downward from the cloud bottoms. This lifting technique creates the illusion of falling rain.
Work quickly — the paint should still be wet enough to lift cleanly.
Step 4: Add light breaks. With a clean, damp brush, lift paint from some of the gaps between clouds to create bright areas where light breaks through. These light breaks should be brightest near the horizon and softer higher up.
Step 5: Deepen the drama. Once the first layer is dry, mix an even darker grey and add more defined cloud shapes to the upper sky.
Add a very thin, pale yellow wash to the horizon area to suggest the light trying to break through.
This contrast between dark clouds and a warm horizon makes the whole sky feel alive.
Step 6: Add a misty horizon. Using a clean, wet brush, soften the line where the sky meets the land. A misty or blurred horizon line suggests rain or fog in the distance and adds depth to the storm scene.
Colour Mixing for Skies
Understanding a few simple colour relationships will dramatically improve your sky paintings. Here are the key mixtures to keep in mind.
For blue skies. Cerulean blue creates a clean, bright sky tone for sunny days. Adding a touch of ultramarine deepens the blue without making it muddy. For the horizon, add a tiny amount of cadmium yellow to the blue — this creates the warm, hazy look of distant sky.
For sunset colours. Build warm tones from the centre out. Cadmium yellow at the brightest point, blended into cadmium orange, then alizarin crimson, then a mix of alizarin crimson and ultramarine for the purples. Adding burnt sienna to any warm colour makes it feel more natural and less artificial.
For storm greys. The best storm greys come from mixing complementary colours. Ultramarine plus burnt sienna creates a rich, neutral grey that feels natural. Payne's grey is convenient but can look flat — warm it with a touch of alizarin crimson for depth.
For cloud shadows. Never use black for cloud shadows. Mix ultramarine with a tiny amount of burnt sienna for a transparent grey-blue that looks like genuine shadow. Adjust the ratio to make it warmer or cooler depending on the light in your painting.
Common Mistakes and How to Fix Them
Even experienced watercolorists make mistakes with sky painting. Here are the most common ones and how to handle them.
Muddy colours. This happens when you overwork the paint or use too many colours in one area.
The fix is to let it dry completely, then lift the muddy area with a clean, damp brush and blot with a paper towel.
If the area is small, you can paint a fresh wash over it once dry.
Hard edges where you want soft ones. Hard edges appear when the paper dries before you finish blending.
Keep a spray bottle handy to re-wet the paper, or work smaller sections so the paper stays wet long enough.
You can also soften hard edges after they dry by going over them with a clean, damp brush.
Clouds that look like cotton balls. Real clouds are rarely perfectly rounded. They have flat bottoms, irregular tops, and stretched shapes. Look at reference photos and try to capture the structure rather than the shape. A flat-bottomed cloud with a soft, irregular top reads as much more realistic.
Cauliflowers or blossoms. Those uneven, branching edges that form when wet paint hits a drying area.
To avoid them, make sure your paper stays evenly wet. If a blossom forms, stop immediately and let it dry.
Once dry, you can soften it with a damp brush or incorporate it into the cloud texture.
Sky too dark or too light. Watercolor dries lighter than it looks when wet. Mix your washes at least one value darker than you want the final result to be. Test the colour on a scrap piece of the same paper before applying it to your painting.
Practice Exercises
The best way to improve your sky painting is to practise with intention. Here are three exercises to build your skills.
Exercise 1: The five-minute sky. Set a timer for five minutes and paint a small sky from start to finish.
Do not worry about details. Focus on getting the wet-on-wet wash down quickly and letting colours blend naturally.
Do one of these every day for a week and compare the results.
Exercise 2: Copy from a photograph. Find a photograph of a sky you love and try to copy it in watercolor. Study the colours, the cloud shapes, and the light. This exercise trains your eye to see the subtle variations in real skies.
Exercise 3: Paint from memory. Go outside, study the sky for two minutes, then go inside and paint it from memory. This exercise forces you to simplify and capture only the essential elements. You will be surprised at how expressive memory paintings can be.
Finding Your Sky Style
As you practise these three techniques, you will naturally develop preferences. Some artists love the soft, dreamy quality of cloud skies.
Others are drawn to the rich drama of sunsets or the moody tension of storms.
There is no right answer. The style that resonates with you is the one you will practise the most, and practice is what leads to improvement.
I still think about my grandmother naming the clouds on her porch. She was not an artist, but she taught me to look closely at the sky, and that is where all good painting begins.
Whether you are painting from a photograph, from life, or from memory, the sky you paint will carry something of how you see the world.
That is what makes each painting unique.
Conclusion
Painting skies in watercolor is one of the most accessible and rewarding techniques a beginner can learn.
The materials are simple, the methods are forgiving, and the results are almost always beautiful in their own way.
Even a sky that does not turn out as planned has a charm that a photograph cannot capture.
Start with the soft cloud technique and practise it until you feel comfortable with wet-on-wet control.
Then try a sunset, letting the colours blend on the paper. Finally, challenge yourself with a storm sky and embrace the drama of dark washes and light breaks.
With each attempt, you will build confidence and develop your own approach.
So wet your paper, pick up your brush, and paint the sky above you. It is always there, always changing, always ready to inspire.