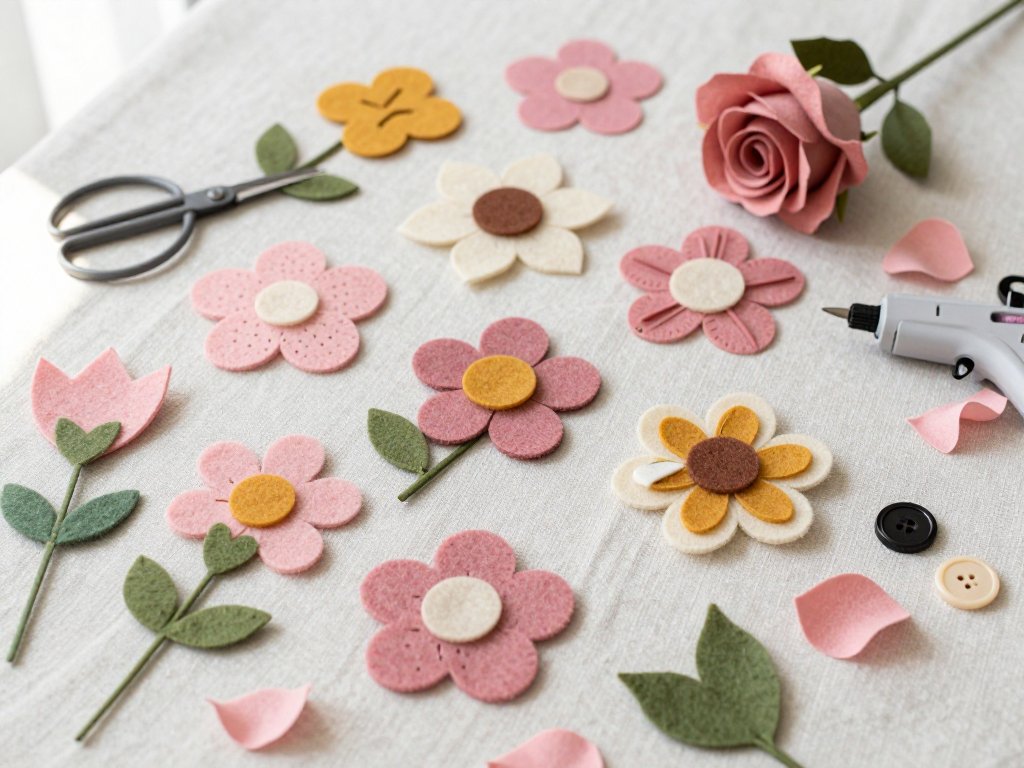
Introduction
Some crafts ask a great deal of you before they give anything back. Felt flowers are not that kind of craft.
You need a sheet of felt, a pair of sharp scissors, and a little glue. There is no machine to thread, no pattern to decode, and no sewing skill required at all.
In about twenty minutes you can be holding a bloom that looks like it came from a boutique shelf, not a craft table.
This guide walks through four beginner-friendly felt flowers, from the classic rolled rose to a ruffled poppy. Every single one is no-sew, which means you can start with what is already in your craft drawer.
If you have ten quiet minutes this afternoon, that is genuinely enough. Let's make something soft and pretty.
Why Felt Is the Kindest Material for a First Flower
Felt does not fray. You can cut any shape you like and the edges stay exactly where you left them.
That one quality removes the two hurdles that stop most beginners: hemming and the fear of messy edges.
There is no wrong side to hide and no raw edge to finish. Press the felt flat and it behaves.
Felt also holds a shape beautifully. Curve a petal between your fingers and it stays curved. Fold a strip in half and it remembers the fold.
It is forgiving, too. A slightly wonky petal reads as handmade rather than as a mistake, which is exactly what you want from a first project.
A quick word on felt types. Craft-store acrylic felt is the cheapest option and perfectly fine for practice. Wool-blend felt costs a little more, cuts crisper, and resists pilling.
If your budget allows, buy one wool-blend sheet in a color you truly love for your first flower. The difference in the finished bloom is easy to spot.
What You Need to Get Started
Nothing on this list is expensive, and most of it is probably already within arm's reach of your kitchen table.
- Felt sheets. Two or three colors — one for petals, one for leaves, one for the center.
- Scissors. Small, sharp craft scissors cut felt best. Fabric scissors work just as well.
- Hot glue gun with low-temperature sticks. Low-temp glue will not singe acrylic felt or your fingertips.
- Fabric glue. A quiet alternative for anyone who dislikes glue strings.
- Green floral wire (22–24 gauge) and floral tape. For flowers that need a stem.
- Buttons, beads, or tiny pom-poms. For the center of each bloom.
- Cardstock or freezer paper and a pencil. For templates, once you begin cutting matching petals.
You do not need a template for your very first flower. Your own hand is a good enough ruler.
Keep the glue gun on a scrap of cardboard and work in small dots rather than long rivers of glue. Less glue means fewer strings and a cleaner finish.
Pick a Palette Before You Pick a Petal
Color is the fastest way to make a simple felt flower look expensive.
Choose three shades that live in the same family: a light, a medium, and a deep. Then repeat that trio across every flower in your bouquet.
Blush pink, dusty rose, and deep burgundy read like a spring garden. Cream, mustard, and rust feel like late autumn.
Two colors are plenty for a first project — one petal shade and a green for leaves. Three begins to feel like a collection.
If you are unsure where to start, look at a grocery store bouquet and copy the combination in felt. It already works because someone chose it for you.
The Three Shapes Behind Every Felt Bloom
Almost every felt flower is built from one of three cuts. Learn these and you can invent your own blooms instead of following instructions.
The circle
A circle becomes a rolled rose, a daisy center, or a leaf once you cut it into a lens shape and pinch the ends together.
The petal
Round the corners of a small rectangle, or cut a soft teardrop, and you have a petal. Felt is soft enough to cut freehand.
The strip
A strip is a petal, a leaf, a ruffle, or an entire flower depending on how you fold, fringe, or roll it.
Felt layers beautifully, so cut two or three squares at once when you need matching petals. It saves time and keeps every petal the same size.
If the layers shift, hold them together with a pin and cut through all of them in one long, confident stroke.
Project One: The Five-Minute Rolled Rose
The rolled rose is the flower that convinces beginners to keep going. It looks intricate and takes almost no time.
Cut the spiral
Cut a circle about four inches wide. Freehand is genuinely fine here — a wobbly circle rolls into a more natural rose anyway.
Now cut a spiral into that circle, keeping the strip about half an inch wide and letting it widen slightly toward the outside.
Leave a small circle at the center, roughly the size of a coin. That little circle becomes the heart of the rose.
For a ruffled bloom, cut a gentle wave along the outer edge of the strip. Straight edges give you a tidy rose; waves give you a garden rose.
Roll and glue
- Roll the center circle tightly between your fingers, about two full turns.
- Keep rolling loosely, letting the spiral relax as it grows outward.
- Hold the shape with one hand so the outer petals stay open and airy.
- Dot low-temp glue on the outer tail and press it against the base of the roll.
- Hold for ten seconds, then set the rose down to cool completely.
Glue your finished rose onto a pair of green felt leaves. Two simple lens shapes, overlapped at the base, are all a rose needs.
If the rose springs open, add one more dot of glue underneath and press the whole flower flat against the table while it sets.
Project Two: Layered Daisy with a Button Center
The daisy is the flower that teaches you layering, and layering is what makes felt blooms look full rather than flat.
Cut the petals
Cut ten petal shapes, each about an inch and a half long and three-quarters of an inch wide. Rounded rectangles are easiest.
Cut them in batches of three by stacking your felt squares. Ten petals go faster than you would expect.
Build the layers
- Glue five petals in a fan, overlapping each one slightly at the center.
- Glue the remaining five petals on top, rotated so they fill the gaps.
- Add a one-inch felt circle in a contrasting shade over the center.
- Glue a button or a felt ball on top of that circle as the final touch.
- Tuck two green leaves under the bottom layer and press everything flat.
The trick is to place the second layer of petals between the first layer's petals, not directly on top of them. That single rotation is what makes the flower read as full.
Buttons are wonderful centers because they add weight and shine without any extra effort. Raid the button jar.
Project Three: Loopy Pom-Pom Bloom
This one is pure fluff and takes about three minutes. It is the flower my own children ask for most often.
Fringe the strip
Cut a strip of felt about one inch wide and nine inches long.
Fold it in half lengthwise and run a thin line of glue down the fold, then press it closed.
Snip fringe along the folded edge, spacing your cuts about an eighth of an inch apart and stopping three-quarters of the way through. You are making a tiny felt grass skirt.
Roll it up
- Start at one end and roll the fringed strip into a tight spiral.
- Add a dot of glue every half turn so the spiral holds as it grows.
- Glue the final tail to the outside of the roll.
- Fluff the fringe outward with your fingertips.
- Glue a contrasting felt circle over the base to hide the spiral's end.
The result looks like a ruffled carnation or a preppy pom-pom bloom. Make three in different heights and you have an instant bouquet.
Fringe this flower in a pale color and the center stays soft. Fringe it in a deep jewel tone and it reads as a dahlia.
Project Four: Ruffled Poppy
Once you have made a daisy and a pom-pom bloom, the poppy will feel like a natural combination of the two.
Cut two ruffle circles
Cut two circles, one roughly three inches across and one two inches across, each with a gently wavy edge.
Run a thin line of glue around the center of the larger circle and press the smaller one on top, slightly off-center if you like a relaxed look.
Add the dark center
- Cut a half-inch circle in a very dark color: black, charcoal, or deep plum.
- Glue it in the middle of the smaller ruffle circle.
- Add three tiny black beads or a few French knots' worth of black thread for seeds.
- Pinch the outer edge of each ruffle layer between your fingers to lift the petals.
- Glue the flower to a leaf pair and let it set for five minutes.
Poppies look best when they are not perfectly symmetrical. Let one side of the ruffle ride higher than the other.
That small asymmetry is what makes the flower look grown rather than manufactured.
How to Add Stems Without a Needle
A flower becomes a bouquet the moment it has a stem, and there is not a single stitch involved.
The wire method
Cut a length of 22-gauge floral wire. Bend one end into a small hook.
Glue the hook between two small felt circles, sandwich style, then glue that pad to the back of your flower.
Wrap the wire tightly with floral tape, stretching the tape as you wind so it sticks to itself. Stretch is the secret — unstretched tape slides right off.
The dowel method
For a sturdier stem, use a wooden skewer or a slim dowel and glue it directly to the back of the flower with a felt circle over the top.
A strip of green felt wrapped around the dowel hides the wood and looks like a real stem.
The wearable method
Skip the stem entirely and glue your flower to an alligator clip, a bobby pin, a headband, or a brooch pin back.
Wearable felt flowers are one of the few crafts that get better the more they are used.
Small Ways to Use Your Blooms
A single felt flower is charming. A dozen of them quietly transform a room or an outfit.
- Hair clips and headbands. Glue one bloom to a clip and two small leaves beside it.
- Wreaths and garlands. Glue blooms along a twine loop or a grapevine wreath base.
- Gift toppers. Replace the bow on a wrapped present with a felt rose.
- Napkin rings. Glue a flower onto a felt strip, then join the ends into a ring.
- Card fronts. A flat layered daisy presses beautifully through the mail.
- Journal covers and pencil pouches. A couple of blooms make an ordinary object feel custom.
If you enjoy the felt-and-glue rhythm, our felt pocket pals are built with the same low-temp glue and small scraps.
And when you feel ready to add a needle to your skills, stitching felt flowers onto denim is the loveliest next step.
Troubleshooting: When Your Flower Looks Flat
Most felt flower problems have a quick, forgiving fix. Here are the ones I run into most often.
The petals look flat and lifeless. Felt has a little stretch, so gently pull each petal edge between your thumbs to curve it upward.
The bloom looks thin. Add another layer underneath in a darker shade. Depth comes from layers, not from more glue.
Glue strings are everywhere. Your glue is too hot or you are lifting the gun too far from the felt. Touch the nozzle to the felt, dot, and pull straight up.
The edges look fuzzy. You are cutting acrylic felt with dull scissors. Sharpen them or switch to a wool blend for a crisper outline.
The center is heavy and the flower droops. Use a lighter button or a felt circle instead, and glue the center on last.
Your traced marker line is showing. Trace on the back of the felt and cut just inside the line. Felt hides a surprising amount.
Nothing sticks. Press felt against felt for a full ten seconds. Felt is porous and absorbs heat, so it needs a moment longer than paper does.
Your First Bouquet
Start with the rolled rose. It is the fastest win, and holding a finished flower in your hand will teach you more than any instruction can.
Then make a daisy in the same palette, and a pom-pom bloom in a lighter shade. Three flowers of different heights already look like a small arrangement.
Keep your scraps. Felt offcuts are the beginning of the next flower, not trash.
When you finish, set your blooms somewhere you will actually see them — a windowsill, a desk, the strap of your bag. Handmade things deserve to be looked at.
You have just made fabric flowers without touching a needle. That is a real skill, and it belongs to you now.