The Sweet Sound of Summer
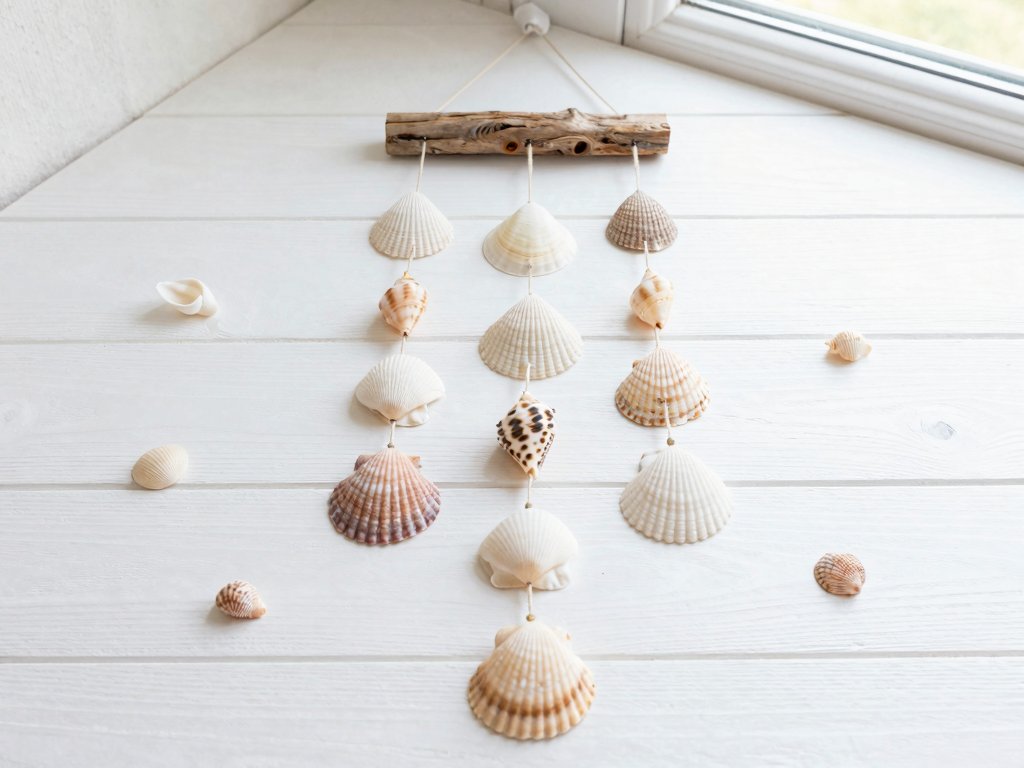
Every time I hear wind chimes, I am transported back to beach vacations and lazy summer evenings. You do not need to live by the ocean to enjoy that coastal charm – a simple seashell wind chime can turn any porch into a seaside retreat. Best of all, this project is perfect for busy moms because it requires minimal supplies and can be completed in under an hour.
Why Shell Wind Chimes Work So Well
Unlike metal chimes that can clang harshly, seashells produce a soft, melodic tinkling that feels like a gentle reminder to slow down. The natural holes in many shells make them easy to thread, and their varied sizes create beautiful visual interest along with lovely sound patterns.
Materials You will Need
- 12-15 assorted seashells (mix of small, medium, and large)
- Clear fishing line or thin nylon cord (about 3 yards)
- One larger decorative shell or driftwood piece for the top
- Beads or small charms (optional, for extra sparkle)
- Scissors
- Hot glue gun (optional, for securing knots)
Step-by-Step Instructions
Step 1: Prepare Your Shells
Give your shells a good rinse and let them dry completely. If you collected them yourself, soak them in a solution of one part bleach to three parts water for 10 minutes, then rinse well. Check that each shell has a natural hole – conchs, whelks, and scallops work perfectly. If a shell has no hole, carefully drill one using a small hand drill.
Step 2: Cut Your Cords
Cut six pieces of fishing line in varying lengths: 8 inches, 10 inches, 12 inches, 14 inches, 16 inches, and 18 inches. The varying lengths will create layers of sound and visual depth.
Step 3: Thread the Shells
Thread the line through each shell is hole. For a layered look, you can add 2-3 shells to a single line, spacing them about 2 inches apart. Tie secure knots at each end. If you are worried about knots slipping, add a tiny drop of hot glue.
Step 4: Create the Top Ring
If using driftwood: Tie all six lines evenly spaced around the driftwood piece. If using a large shell: Thread all six lines through the shell is opening and tie them together above it.
Step 5: Add the Finishing Touch
Tie the ends of all six lines together in one secure knot about 6 inches above the longest shell. This creates a loop for hanging. Trim any excess line.
Pro Tips for Beautiful Results
- mix textures – combine smooth scallop shells with ridged conch shells for visual variety
- consider sound – larger shells produce deeper tones; smaller shells create higher notes
- weather protection – for outdoor chimes, use UV-resistant line and check annually for wear
- kid-friendly – let children paint tiny beach scenes on the shells before assembly (use acrylics and seal with clear spray)
Hanging and Placement
Choose a spot where your chime will catch the breeze – a corner of your porch, near an open window, or from a tree branch. Make sure it has room to move freely without hitting walls or furniture.
Gift-Worthy Packaging
This wind chime makes a thoughtful handmade gift for neighbors, teachers, or anyone who loves coastal decor. Package it in a clear cellophane bag with a sprig of dried lavender and a handwritten tag that says "Listen to the Ocean."
Maintenance Tips
Shell chimes are low-maintenance, but give them a gentle rinse with the hose every few months to remove dust and debris. If algae builds up (on outdoor chimes), scrub gently with an old toothbrush and soapy water.
The Joy of Simple Projects
There is something satisfying about creating beauty from collected treasures. This wind chime is not just decor – it is a memory of beach days and the promise of many peaceful summer evenings to come. Hang it where you will hear its gentle song and remember that sometimes the simplest crafts bring the most joy.