Introduction
There is something quietly magical about watching a pattern emerge from a tangle of thread and fabric.
Cross stitch, one of the oldest forms of embroidery, has been practiced for centuries across cultures worldwide, from the ornate altar cloths of medieval Europe to the vibrant samplers sewn by young women in colonial America.
Today, this gentle craft is experiencing a beautiful revival, and for good reason. It is meditative, portable, and deeply satisfying.
Floral patterns, in particular, make an ideal starting point — they are forgiving of imperfect stitches, naturally beautiful, and endlessly versatile.
Whether you are looking to create a thoughtful handmade gift or simply want a calm evening activity after the children are asleep, cross stitch offers a quiet space of your own.
What You Will Need
One of the wonderful things about cross stitch is how little you need to begin. Unlike painting or pottery, where the cost of supplies can add up quickly, cross stitch is remarkably budget-friendly. Here is what you will need to start your first floral pattern.
Aida fabric. This is the woven fabric specifically made for cross stitch. It has a grid of tiny holes that make it easy to count your stitches.
For beginners, 14-count Aida (meaning 14 squares per inch) is ideal — the squares are large enough to see clearly without being too loose.
A small piece measuring 8 by 10 inches costs only a few dollars and will be enough for several small projects.
Embroidery floss. This is the thread used for cross stitch. It comes in six-strand skeins, but you will typically separate it and use just two strands at a time.
For floral patterns, you will want a small selection of colors: greens for leaves and stems, and a few flower colors like pink, purple, yellow, or blue.
Start with six to eight colors from a brand like DMC or Anchor — each skein costs about a dollar and will last through many projects.
A needle. Tapestry needles with a blunt tip are best for cross stitch. The blunt end slides through the fabric holes without piercing the threads. A size 24 needle works well with 14-count Aida fabric.
Embroidery hoop. A six-inch hoop made of wood or plastic will keep your fabric taut and your stitches even. It is a small investment that makes a significant difference in your results.
Scissors. A small, sharp pair of embroidery scissors will help you snip threads cleanly. Regular household scissors will work in a pinch.
In total, you can start your first project for under fifteen dollars. That is the kind of investment that makes trying something new feel easy and low-pressure.
Choosing Your First Pattern
When selecting your very first floral cross stitch pattern, look for designs labeled "beginner" or "starter." A good beginner pattern will have fewer than ten colors, large clear symbols on the chart, and a design that fits within a four- or five-inch hoop.
Small motifs like a single rosebud, a lavender sprig, or a cluster of tiny wildflowers are perfect starting points.
Many craft stores sell beginner kits that include everything you need: pre-cut Aida fabric, pre-sorted floss, a needle, a hoop, and printed instructions.
These kits take the guesswork out of shopping and let you focus purely on learning the stitches.
You can also find thousands of free patterns online from generous stitchers who share their designs on blogs and crafting communities.
Pinterest is a wonderful resource for discovering patterns at every skill level. When you are just beginning, there is no need to spend money on complex charts.
A simple free pattern of a single daisy or a small heart with a flower will teach you everything you need to know.
Save the elaborate garden scenes for later, when your confidence has grown.
One practical tip: choose a pattern with distinct, well-separated colors. Patterns where the flowers and leaves are clearly different shades are easier to follow than those with subtle tonal variations.
A pink flower with green leaves on white Aida fabric offers the highest contrast and the most satisfying results for a beginner.
Understanding Your Pattern
A cross stitch pattern looks like a grid of tiny symbols on paper or a screen.
Each symbol represents a different color of floss, and each square on the grid represents one stitch on your fabric.
Floral patterns for beginners typically use ten to fifteen colors and a simple repeating design.
A small flower might consist of five stitches for the petals in one color, a center in a contrasting shade, and a few green stitches for the stem.
Before you begin stitching, take a few minutes to study your pattern. Look for the center point — most patterns are marked with arrows along the edges pointing to the middle.
Finding the center of your fabric and starting there helps ensure your design sits nicely on the fabric without running off the edge.
Fold your Aida fabric in half and then in half again, and gently press the center point.
This will be your starting point.
Floral patterns are especially beginner-friendly because flowers in nature are rarely perfectly symmetrical or uniform. If your stitches are slightly uneven, it does not matter — real flowers have their own charming imperfections too. This forgiving quality makes floral designs the perfect first project for a new stitcher.
Getting Started: Your First Stitches
Begin by threading your needle with two strands of embroidery floss. Cut a piece about eighteen inches long — any longer and it will tangle easily. Separate two strands from the six, thread your needle, and tie a small knot at the end.
A single cross stitch is exactly what it sounds like: a small X shape on your fabric.
Bring your needle up from the back of the fabric at the bottom left of one square, then down at the top right.
Bring it back up at the bottom right, and down at the top left. You have just made your first cross stitch.
For the neatest results, try to make all your bottom stitches slant in the same direction and all your top stitches slant in the opposite direction.
For example, if your bottom stitch goes from bottom-left to top-right, your top stitch will go from bottom-right to top-left.
Consistency in this direction gives your finished piece a polished, professional look.
Do not worry if your first few stitches feel awkward. Tension takes practice — you want the thread to lie flat against the fabric without puckering it.
The stitch should feel snug, not tight. Imagine the thread resting gently on the fabric like a blanket rather than being pulled taut like a drum.
Reading Your First Floral Pattern
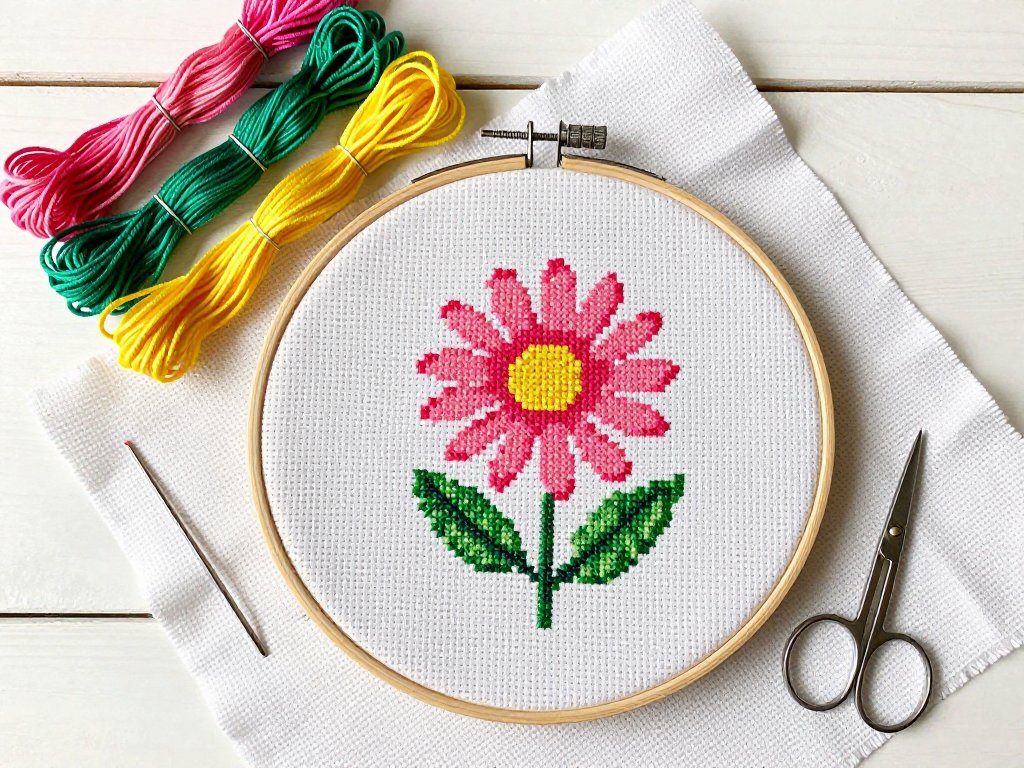
Let us walk through a simple floral pattern together. Imagine a pattern with a single daisy: five oval petals in a soft pink around a yellow center, with two green leaves and a stem.
The pattern would show each petal as five squares in pink, the center as one square in yellow, the stem as a vertical line of green stitches, and each leaf as two or three green stitches angled outward.
You would start at the center of your fabric with the yellow center stitch, then work outward to the pink petals.
Then add the green stem below, followed by the leaves. If you make a mistake — a petal in the wrong place or a color you are not happy with — simply pull the thread out and try again.
Cross stitch is wonderfully forgiving. The fabric does not get damaged by re-stitching, and neither will your enthusiasm.
Adding a Border for a Finished Look
Once your floral element is complete, consider adding a simple border. A border gives your design a finished, framed appearance.
For a beginner, a backstitch border in a complementary color is a lovely choice. Backstitch is simply a line of straight stitches connecting the corners of your cross stitches.
Choose a color that coordinates with your flowers — a soft sage green often works beautifully.
To backstitch a border around your daisy, you would count three or four squares outward from the outermost petals and then stitch a line all the way around. It adds just enough structure to make your tiny floral design feel intentional and framed.
Expanding Your Floral Garden
After you have completed your first flower, the possibilities multiply. A single daisy can become a cluster of wildflowers.
Add a lavender sprig — purple stitches arranged in a slender column — beside your daisy.
Add a small blue forget-me-not nearby. Before you know it, you have a little garden growing on your fabric.
As you become more comfortable with the rhythm of stitching, you can experiment with more complex floral patterns.
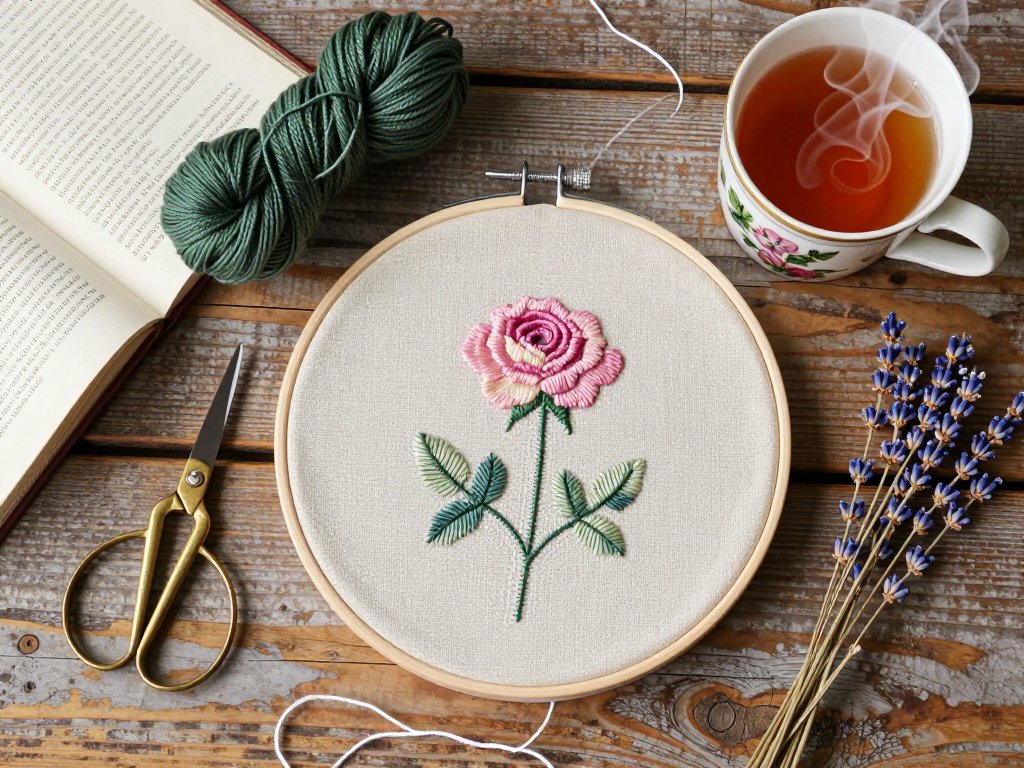
Try a rose motif formed by concentric circles of stitches in graduating shades of pink.
Or a sunflower with elongated stitches for the petals and dense black or brown stitches for the center.
Each new flower teaches you something about color, texture, and the patience of handcraft.
The History of Floral Cross Stitch
Crafting with floral motifs in cross stitch has a long and storied history. In sixteenth-century England, girls as young as five would begin stitching samplers — pieces of fabric covered with letters, numbers, and decorative motifs that demonstrated their embroidery skills.
Flowers were among the most common decorative elements, not only for their beauty but also for the symbolic meanings they carried.
A rose might represent love, a lily purity, and a forget-me-not faithful remembrance.
In Victorian times, cross stitch patterns became widely available in printed form, and floral designs were among the first published patterns. Women would stitch elaborate floral wreaths, bouquets, and garden scenes as decorations for their homes. These pieces were treasured as expressions of both skill and sentiment.
Today, when you pick up a needle and choose a pink thread for a flower petal, you are connecting yourself to generations of women who found joy, solace, and creative expression in the same simple act of stitching. There is something grounding about that continuity in our fast-paced digital world.
Troubleshooting Common Beginner Questions
My thread keeps tangling. This usually happens when the thread is too long. Try cutting shorter pieces — twelve to fifteen inches instead of eighteen. Also, let your needle dangle every few stitches to let the thread untwist naturally.
My stitches look uneven. Check your tension. If the thread is pulled too tight, the fabric will pucker. If it is too loose, the stitches will look sloppy. Practice on a scrap piece of fabric until the rhythm feels natural.
I lost my place on the pattern. Use a highlighter to mark off each row of stitches as you complete it. Many stitchers also use magnetic pattern holders or simple sticky notes to track their progress.
Can I wash my finished piece? Yes. Gently hand wash it in cool water with a mild soap, roll it in a clean towel to remove excess water, and lay it flat to dry.
Iron it face down on a towel using a medium heat setting. This will refresh the fabric and help the stitches settle.
Ideas for Your Finished Piece
Once you have completed your first floral cross stitch design, you will want to display it.
A small finished piece can be framed in a simple embroidery hoop, trimmed, and hung on the wall.
Or you can sew it onto a pillow cover, a tote bag, or a greeting card.
Floral cross stitch designs also make heartfelt gifts — a hand-stitched flower is a gift of time and care that cannot be replicated.
Consider stitching a small lavender sprig onto a linen hand towel for a housewarming present. Or stitch a cluster of forget-me-nots onto a bookmark for a friend who loves to read. Each stitch carries a piece of your attention, and that is a gift people truly feel.
Conclusion
Cross stitch is a craft that rewards patience and presence. There is no rush. A single flower may take an evening or two, and that is exactly the point.
In a world that constantly asks for more speed and efficiency, sitting down with a needle and thread is a quiet act of resistance.
You are making something beautiful, one stitch at a time, and that is enough. Your first floral design does not have to be perfect — it just has to be yours.
So choose your colors, find your center, and let the stitching begin.