Introduction
There is something quietly magical about holding a finished amigurumi in your hands for the first time.
You began with nothing more than a skein of yarn and a hook, and through a series of small, deliberate loops, you ended up with a creature that seems to have a personality of its own.
This is the draw of amigurumi, the Japanese art of crocheting small stuffed toys, and it has captivated crafters around the world with a gentle persistence that shows no signs of fading.
The word itself tells a story. Amigurumi (編みぐるみ) is a compound of two Japanese words: ami, meaning "crocheted or knitted," and kurumi, meaning "wrapping" — a reference to the stuffed, wrapped form of a doll derived from nuigurumi (縫い包み), or "sewn stuffed doll." While the term emerged in Japan in the latter half of the twentieth century, the impulse to create three-dimensional figures from yarn is far older.
Early examples of crocheted dolls have been documented in China, and records from Japan's Heian period, as early as 1185, describe needle-binding techniques that predate both knitting and crochet.
During the Edo period (1603–1867), when Japan traded with Dutch merchants, knitting techniques were introduced and refined by samurai, who became skilled at creating decorative coverings for their katana handles and warm winter garments.
When amigurumi first appeared in Western craft circles around 2003, it arrived carrying this long history within each stitch.
By 2006, amigurumi had become one of the most popular categories on Etsy, with handmade plushies selling from ten to over a hundred dollars apiece.
Today, the craft spans the globe, and its appeal is easy to understand: amigurumi projects are portable, quick to complete, and use minimal materials.
A single ball of yarn can become a bear, a cat, a tiny succulent in a pot, or a dragon no bigger than your thumb.
Best of all, the techniques required are well within reach of a beginner who knows just a few basic crochet stitches.
This article will guide you through everything you need to know to create your first amigurumi, from choosing your materials to shaping your first sphere and adding the details that give your creation its character.
A Brief History of Amigurumi
To appreciate amigurumi fully, it helps to understand where it comes from. The art form as we recognize it today — small, stuffed, and worked primarily in single crochet in continuous spirals — began taking shape in postwar Japan.
The country had a strong tradition of craft culture, and crochet had been practiced for decades, but the specific aesthetic of amigurumi, with its exaggerated proportions and oversized heads, owes a debt to the Japanese kawaii (cute) culture that blossomed in the 1970s and 1980s.
Characters like Hello Kitty and other Sanrio creations popularized a visual language of roundness, simplicity, and emotional warmth that translated naturally into three-dimensional crochet.
Japanese craft magazines began publishing amigurumi patterns in the 1980s, and the art form grew steadily within Japan before reaching a global audience through the internet in the early 2000s.
The first English-language amigurumi patterns appeared on personal blogs and early craft forums, where Western crocheters adapted Japanese pattern notation — which often uses charts and symbols rather than written abbreviations — into the format familiar to English-speaking makers.
By 2006, the craft had become a phenomenon, with crafters who had never considered themselves toy makers creating armies of tiny crochet animals.
Free patterns circulated widely, and experienced makers offered guidance to newcomers with a patience that reflected the gentle spirit of the craft itself.
What is remarkable about amigurumi's journey is how much of its Japanese character it has retained.
The emphasis on proportion, the careful attention to tension, the preference for working in one piece rather than sewing multiple parts together — these are hallmarks of the Japanese approach to making, and they have been preserved even as the craft has been adopted and adapted by makers around the world.
When you pick up a hook to start your first amigurumi, you are participating in a tradition that connects the needle binders of twelfth-century Japan, the crochet innovators of the twentieth century, and the vibrant online community of today.
What You Will Need: Materials and Tools
One of the most appealing aspects of amigurumi is how little you need to begin. The materials list is short, and you may already own the essentials if you have tried basic crochet before.
Yarn
The best yarn for a beginner amigurumi project is a worsted-weight (weight 4) cotton or acrylic yarn in a light color.
Worsted weight is substantial enough to create a firm fabric that holds its shape, and light colors — cream, pale yellow, soft pink, light gray — make it much easier to see your stitches as you work.
Dark yarns, while beautiful, hide the individual loops and can be frustrating for a beginner learning to count stitches and identify stitch placement.
Cotton yarn produces a crisp, defined stitch pattern ideal for amigurumi. It does not stretch as much as acrylic, which helps your toy maintain its shape over time.
Acrylic yarns are softer and more affordable, and they work beautifully for plushies meant to be cuddled.
Whichever you choose, look for a smooth, even twist rather than a novelty yarn with bumps or fuzzy texture.
You want to see each stitch clearly so you can count and correct your work with confidence.
Crochet Hook
For worsted-weight yarn, a 3.5 mm (E) or 4.0 mm (G) crochet hook is the standard recommendation.
The key difference between amigurumi and other types of crochet is that you want a tighter tension than usual.
Tighter stitches prevent the stuffing from poking through the gaps and give your amigurumi a professional, polished look.
If you tend to crochet loosely, use a hook one size smaller than the yarn label suggests.
A 3.5 mm hook with worsted-weight yarn produces a nice, firm fabric for most beginners.
Ergonomic hooks with padded handles can make a significant difference in comfort, especially if you plan to spend an hour or more working on your project.
Stuffing and Accessories
Polyester fiberfill stuffing is the standard choice for amigurumi — it is lightweight, hypoallergenic, and easy to work with.
You will also need a yarn needle with a large eye and a blunt tip for sewing parts together and weaving in ends.
Stitch markers are essential for keeping track of your rounds, particularly when working in a continuous spiral.
Small safety eyes (6 mm to 9 mm are common) add instant personality to your creations, though you can also embroider eyes with black yarn if you prefer a completely handmade look.
Finally, a small pair of sharp scissors completes your kit.
Understanding Amigurumi Patterns
Amigurumi patterns use a specific notation that may look unfamiliar at first, but once you understand the logic, it becomes second nature.
Most patterns are written in rounds, worked in a continuous spiral — meaning you do not join the end of each round with a slip stitch.
Instead, you keep crocheting around and around, which creates a seamless, smooth surface without visible seam lines.
A typical pattern instruction looks like this: "R1: 6 sc in MR (6)." This means Round 1: work 6 single crochet stitches into a Magic Ring, for a total of 6 stitches.
"R2: inc × 6 (12)" means Round 2: increase in each stitch around, giving you 12 stitches.
"R3: (sc, inc) × 6 (18)" means Round 3: single crochet in the first stitch, increase in the next stitch, repeat this pattern six times, for a total of 18 stitches.
The number in parentheses at the end of each round tells you how many stitches you should have — your checkpoint.
If your count does not match, check your work before proceeding.
As you read through a pattern, you will notice that the rounds build a sphere: you start with a small circle, increase steadily to widen it, work several rounds even (no increases) to create the body, then decrease to close the shape.
This sphere is the fundamental building block of amigurumi. Almost every creature is a combination of spheres — a large one for the body, a slightly smaller one for the head, and small cylinders for the arms and legs.
Once you can make a sphere, you can make almost anything.
The Four Essential Techniques
Every amigurumi project, from the simplest teddy bear to the most elaborate fantasy dragon, relies on four core techniques. Master these, and you will be able to tackle the vast majority of patterns with confidence.
The Magic Ring
The magic ring, also called the magic circle or adjustable ring, is the starting point for almost every amigurumi piece.
It allows you to begin crocheting in the round with a closed center that can be pulled tight, leaving no hole.
This is crucial because a hole at the top of the head or the bottom of a limb would allow stuffing to escape.
To make a magic ring, hold the yarn tail in your palm and wrap the working yarn around your index and middle fingers twice, forming an X.
Insert your hook under the first loop and over the second, yarn over, and pull up a loop.
Chain one to secure. Then work your specified number of single crochet stitches into the center of the ring, working over both the ring loops and the tail.
Once your stitches are in place, pull gently on the yarn tail to tighten the ring, drawing the center closed until the hole disappears.
Weave this tail in securely, and your foundation will be invisible.
The magic ring takes a bit of practice, but it is worth the effort. Once you have made a few, the motion becomes intuitive, and you will find yourself reaching for it automatically for any project that begins in the round.
Single Crochet
Single crochet (abbreviated sc) is the stitch you will use for the entire body of your amigurumi.
Unlike garments or blankets that use a variety of stitches for texture, amigurumi relies almost exclusively on single crochet because it produces a dense, tight fabric that holds stuffing and maintains shape.
To work a single crochet, insert your hook into the stitch, yarn over, pull up a loop (you now have two loops on the hook), yarn over again, and pull through both loops.
That is one single crochet complete.
In amigurumi, you will usually work through both loops of the stitch, but some patterns call for working in the front loop only (FLO) or back loop only (BLO) to create specific effects. For your first project, stick with both loops and focus on keeping your tension even.
Increases
An increase (inc) is simply two single crochet stitches worked into the same stitch from the previous round.
This is how you make your work grow wider. When you increase in every stitch around, you double the stitch count of that round.
When you alternate increases with single crochets, you create a gradual, even curve that forms the sides of your sphere.
The pattern follows a mathematical logic: Round 3 increases every other stitch, Round 4 increases every third stitch, and so on.
This produces the smooth, rounded shape that amigurumi is known for.
Decreases and the Invisible Decrease
A decrease (dec) combines two stitches into one, narrowing your work. The standard decrease in crochet — crochet two together (sc2tog) — works by inserting the hook into the first stitch, pulling up a loop, inserting into the second stitch, pulling up a loop, then yarning over and pulling through all three loops.
This works, but it leaves a small bump on the surface of your amigurumi.
The invisible decrease is a refinement that many amigurumi makers consider essential. Instead of inserting the hook through both loops of each stitch, you insert it through the front loop only of the first stitch, then the front loop only of the second stitch, yarn over, and pull through both front loops.
Then yarn over and pull through the two remaining loops on your hook. The result blends into the fabric almost seamlessly, leaving no bump.
This technique is especially important on the head, where visible decreases would distract from the smooth, rounded shape.
Practice the invisible decrease from the beginning — it takes only a few repetitions to become automatic, and the improvement in your finished work is substantial.
Step-by-Step: Making Your First Sphere
Let us put these techniques into practice by making a simple sphere, the foundation of your first amigurumi. Once completed, you will understand the structure of almost any pattern. We will use worsted-weight yarn and a 3.5 mm hook, with a light color so you can see your stitches clearly.
Round 1: Make a magic ring and work 6 single crochet into it. Pull the tail to close the ring tightly. You should have 6 stitches.
Round 2: Increase in each stitch around. This gives you 12 stitches. Place a stitch marker in the first stitch of this round so you can track where each round begins.
Round 3: Single crochet in the first stitch, increase in the next stitch. Repeat this pattern (sc, inc) six times. You should have 18 stitches.
Round 4: Single crochet in the first two stitches, increase in the next. Repeat (2 sc, inc) six times. You should have 24 stitches.
Round 5: Single crochet in the first three stitches, increase in the next. Repeat (3 sc, inc) six times. You should have 30 stitches.
Rounds 6 through 10: Single crochet in each stitch around — five rounds even. This builds the middle section of your sphere. Move your stitch marker up to the first stitch of each new round.
Round 11: Single crochet in the first three stitches, then decrease (using the invisible decrease) in the next. Repeat (3 sc, dec) six times. You should have 24 stitches.
Round 12: Single crochet in the first two stitches, then decrease. Repeat (2 sc, dec) six times. You should have 18 stitches.
Round 13: Single crochet in the first stitch, then decrease. Repeat (sc, dec) six times. You should have 12 stitches.
At this point, your sphere is almost closed. Add a small amount of stuffing before it becomes too narrow to access.
Use small pieces of fiberfill rather than one large clump, distributing evenly with the blunt end of a pencil or chopstick.
The sphere should be firm but not hard — it should have a gentle spring when squeezed.
Round 14: Decrease in each stitch around (dec × 6). You should have 6 stitches.
Fasten off, leaving a long tail. Thread the tail through your yarn needle and weave it through the front loops of the remaining 6 stitches, then pull tight to close the hole.
Weave the tail inside the sphere to hide it.
You have made your first amigurumi sphere. Make a second one slightly larger or smaller, and you have the head and body of a simple creature. Attach them with a yarn needle and matching yarn, and you have a complete amigurumi.
Adding Character: Eyes, Ears, and Details
Once the basic shapes are complete, the real fun begins. Adding the face and features transforms a yarn sphere into a living creature with its own personality.
The placement of the eyes alone can change the entire expression — eyes placed low and wide apart give a sweet, innocent look, while eyes placed higher and closer together suggest alertness or mischief.
Experiment by using pins to hold safety eyes in position before committing to them.
Safety eyes are plastic eyes with a locking washer on the back. Push the post through the fabric from the front, then press the washer onto the post from the inside.
For a first project, 6 mm or 8 mm eyes suit a wide range of small plushies.
If you prefer not to use plastic eyes, you can embroider eyes with yarn or embroidery floss — a French knot or small satin stitch circle is just as charming.
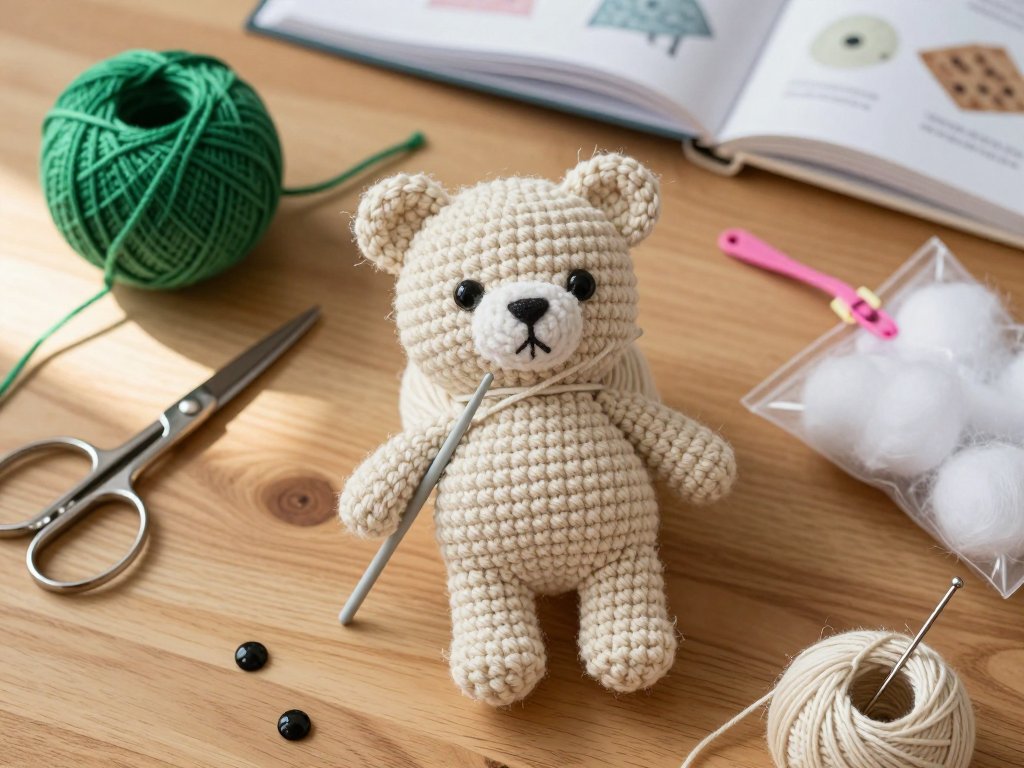
Ears, arms, and legs are usually made separately and sewn onto the body. Using the yarn tail left from fastening off, sew each part on with small, even stitches, going through the body only partway so the needle does not emerge on the opposite side.
Sew each piece twice around to ensure it is secure. A little extra care at this stage makes the difference between a professional finish and a wobbly one.
Other details can be added with simple embroidery: a small nose using pink or brown yarn, a mouth with a curved line of backstitch, or cheeks with a tiny circle of pink blush applied with a cotton swab. These small touches bring warmth and life to your amigurumi.
Choosing Your First Project
Not all amigurumi patterns are equally beginner-friendly. The best first project uses a single basic shape — a sphere or a cylinder — with minimal color changes and simple assembly. A small bear, bunny, bird, or bee are classic first projects that introduce all the essential techniques without overwhelming you.
Look for patterns labeled "beginner" or "easy." A pattern using bulky yarn will work up faster and be easier to see, while worsted-weight yarn produces a medium-sized toy that fits comfortably in your hand.
Avoid patterns requiring frequent color changes, complex shaping, or multiple stitch types on your first attempt — save the striped giraffe for your third or fourth project.
Amigurumi kits from brands like We Are Knitters, Lion Brand, and Loops & Threads include the yarn, stuffing, safety eyes, and pattern in one package, removing the guesswork of materials selection.
For a beginner who just wants to start making, a kit can be the perfect entry point.
Many crafters complete their first amigurumi from a kit and then immediately start designing their own variations.
Troubleshooting Common Beginner Challenges
Every new amigurumi maker encounters a few common stumbling blocks. Let us address the most frequent issues and how to resolve them.
Gaps between stitches. If you can see the stuffing through your fabric, your tension is too loose or your hook is too large.
Switch to a smaller hook and focus on pulling your yarn a bit tighter after each stitch.
In amigurumi, tight stitches are desirable — do not worry if your fabric feels stiff compared to the scarf or blanket you may have crocheted before.
Losing your stitch count. This is the most common frustration. Without an accurate stitch count, your sphere will not be round. Use stitch markers in the first stitch of each round, and count your stitches at the end of every round until counting becomes automatic.
A lopsided shape. If your sphere is more oval than round, the likely culprit is uneven tension. This improves with practice. You can also try adjusting your hook size slightly.
The magic ring comes undone. The tail was not woven in securely enough. After pulling the ring tight, weave the tail back and forth through the stitches of the first round at least three times, changing direction each time.
If still concerned, tie a small knot close to the ring before weaving.
Difficulty with the invisible decrease. The motion can feel awkward at first. Practice on a small swatch before using it on your project. Angle the hook slightly downward as you insert it into each front loop, and keep your tension consistent. After a dozen repetitions, the motion will feel natural.
Conclusion
Amigurumi is a craft of small victories. Each stitch builds on the one before it, each round brings you closer to a finished creature, and each completed project teaches you something that carries into the next.
The first time you close a magic ring and see that perfect, hole-free center, you will feel a quiet satisfaction.
The first time you attach the eyes and the face comes alive, you will be hooked — there is no other word for it.
The amigurumi community is vast and welcoming. Platforms like Ravelry, Instagram, and YouTube are rich with free patterns, video tutorials, and supportive forums.
If you get stuck on a technique, someone has almost certainly filmed a close-up tutorial of exactly that step.
If you finish a project you are proud of, sharing it online connects you to a global network of makers who will celebrate your accomplishment.
Your first amigurumi does not need to be perfect. It will have its quirks — a slightly tilted ear, a stuffing bump you cannot quite smooth out, a stitch count that wandered in one round.
These are not flaws. They are the signatures of a handmade object, evidence that a real person sat down and turned yarn into a companion.
Keep that first creation. Years from now, when you are designing your own patterns and teaching others, you will look at it and remember exactly how it felt to make something from nothing but string and patience.
That feeling never gets old.