Introduction
There is a smell that belongs to an oil painting afternoon. Linseed oil, a little solvent, the faint waxy sweetness of pigment on a wooden palette.
It takes me straight back to my grandmother's sunporch, where a small canvas sat on a folding easel for what felt like an entire season.
She never finished it. Or rather, she finished it in one go, then kept coming back to look at it the way you look at a guest who has fallen asleep in your good chair.
She had painted it wet, all in one sitting, and she was in no hurry to disturb it.
That is alla prima, though nobody in my family called it that. It simply meant: sit down, mix your colours, paint the thing, and let it be.
If you have wanted to try oils but dreaded the idea of waiting days between layers, this is the technique for you. One session, one surface, no calendar pinned to the studio wall.
When did you last make something in a single sitting, without stopping to check whether it was any good?
What "Alla Prima" Actually Means
Alla prima is Italian for "at the first attempt," or more loosely, "first time." In painting it describes working wet into wet, laying down the whole image while the paint beneath is still soft, so the layers marry rather than sit on top of one another.
It is the opposite of indirect painting. In the traditional indirect method, you build a picture slowly.
A ground, then a monochrome underpainting, then what older manuals call a dead layer or dead colouring, then glazes of transparent colour, then a final varnish. Each stage needs to dry. Some paintings took months.
All of that patience exists for a reason. Oil paint dries by oxidation, not evaporation, and it shrinks slightly as it cures. Thin layers cure faster than thick ones. Build a slow, drying layer over a fast, brittle one and the surface can crack.
Hence the old rule: fat over lean. Fat means more oil. Lean means more solvent or turpentine and less binder. Each successive layer should be fatter than the one beneath it, never leaner, so the top layer stays flexible enough to move with what it covers.
Alla prima mostly sidesteps the whole question, because there is only one layer. Everything goes down wet, and everything dries at roughly the same rate. That is one of its quiet gifts to a beginner.
The rule does not vanish entirely. If you return a week later to adjust a passage, that new paint should be fatter than what is already there, usually by adding a touch of oil or medium to your mix.
A Short History of Painting Wet
The technique is old, but it became famous in the seventeenth century, in the busy Dutch city of Haarlem. Frans Hals painted portraits with startling directness, laying strokes beside one another and letting them stand.
Stand close to a late Hals portrait and the illusion dissolves into confident slabs of paint. Step back and a lace collar, a flushed cheek, a laughing man appear. He was not hiding his hand. He was counting on yours.
Later, the Impressionists took the same freedom outdoors, where the light changes whether you are ready or not. A painting of a haystack at noon could not wait three weeks for a glaze to dry.
John Singer Sargent carried the approach into society portraiture, sometimes finishing a face in a single session and leaving the rest of the canvas deliberately loose. His bravura brushwork only looks effortless because it is decisive.
That is the common thread. Alla prima rewards confidence, and it punishes hesitation. A stroke laid down once reads clean. A stroke worried at for thirty seconds turns to mud.
What You Need to Begin
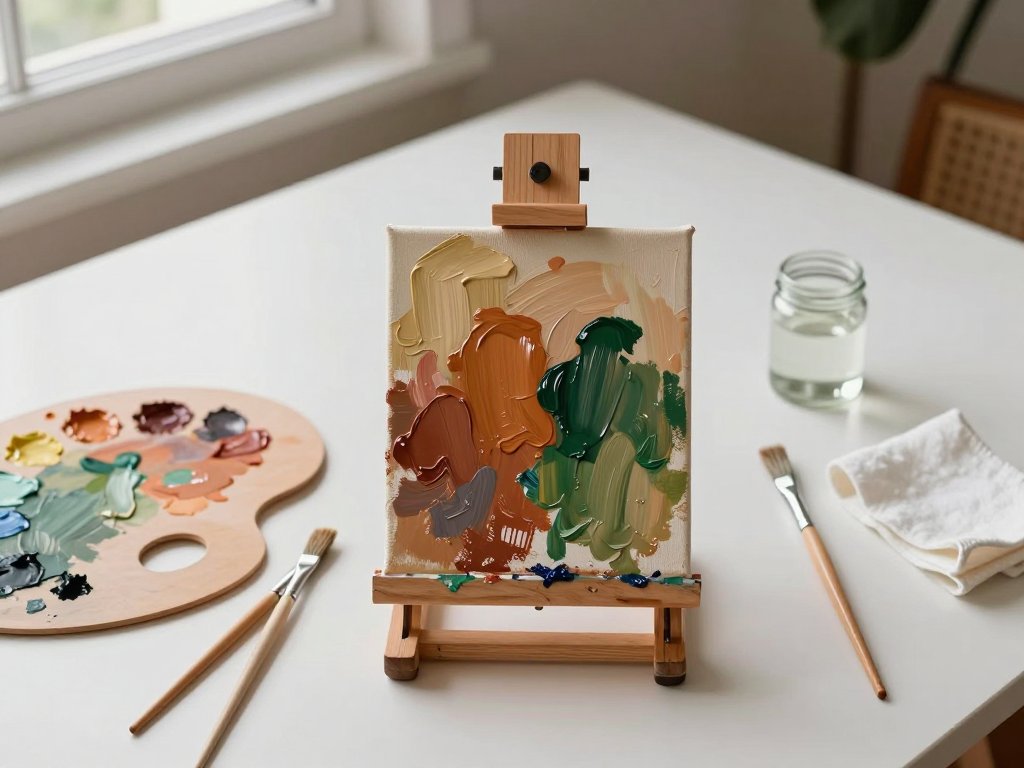
You do not need a full studio. A small table by a window, an hour of quiet, and a short list of supplies will do. Here is the honest minimum.
- A canvas board, a stretched canvas, or a wooden panel. Panel is stiffer under the brush, which helps when you are laying paint thickly.
- A limited palette: a warm and a cool version of each primary, plus a large tube of titanium white. Cadmium yellow light and yellow ochre; cadmium red and alizarin crimson; ultramarine blue and phthalo blue.
- A medium of refined linseed oil and odourless mineral spirits, mixed roughly one to one, or two parts oil to one part solvent later in the session.
- Two or three hog bristle brushes in different sizes. A flat and a filbert in a large and a medium size will carry you a long way, plus one small one for accents.
- A palette knife for mixing, and a palette with plenty of flat mixing room. A glass or sealed wooden palette keeps paint workable longer than cardboard.
- Rags or paper towel, a jar with a lid for solvent, and something to wipe your brushes on that you do not love.
A limited palette matters more here than in almost any other method. When everything on the canvas is wet, every new colour you mix has to relate to colours already there.
Six or seven pigments keep those relationships visible. With thirty tubes open, you will spend the session chasing mixtures instead of painting shapes, and the wet surface will not wait for you.
Setting Up a Small Panel
Begin with a small surface. A nine by twelve or eleven by fourteen inch panel is the honest beginner choice, and not because it is easier to fill.
A small panel lets you cover the whole image in one pass, while your arm still remembers what you did in the corner. On a big canvas, the first passages start setting before you reach the fourth.
Small also forgives. Mistakes stay modest, and you can finish a study in the time a toddler naps, which is its own kind of practical mercy.
Tone the surface first. Wipe on a thin wash of burnt sienna or yellow ochre thinned with solvent, then rub most of it back off with a rag.
This does two things. It kills the glaring white that makes beginners paint too dark, and it gives you a warm middle tone to judge your lights and darks against. Let it dry for a few minutes, or don't. A slightly tacky ground is fine.
Reading the Subject in Big Value Shapes
Before you draw anything, look. Then squint until your eyelashes blur the world into soft blocks of light and dark.
Squinting throws away detail and leaves value, which is the real architecture of a painting. A white jug against a shadowed wall is two shapes. A bowl of lemons is one bright mass and one dark one.
Ask yourself a plain question: how many big shapes is this, really? Usually the answer is four or five.
Name them out loud if it helps. The dark of the window, the light of the table, the mid-tone of the wall, the shadow under the bowl. That is your painting.
Resist the urge to sketch outlines first. Outlines tempt you to colour them in like a map, and a colouring-in painting looks flat no matter how carefully it is done.
The One-Session Workflow
Here is the sequence I use, and the one I would hand to any beginner. It runs from thin to thick, dark to light, broad to fine.
- Tone the panel. A thin wash of warm colour, wiped back, so you are never painting on bare white.
- Sketch with thin paint. Use a small brush and paint diluted with solvent, no oil. Block the main shapes lightly. This is scaffolding, not drawing.
- Block the darkest darks. Find the deepest shadow and lay it in early, while your brush is still clean and the paint is thin. Darks set your range.
- Lay the mid-tones. Fill the large middle areas with slightly thicker paint, mixing as you go and keeping the edges loose and generous.
- Add the lights last. Load a clean brush with opaque, fat paint and place the brightest notes with single strokes. Lights sit on top for a reason.
- Refine the edges. Soften where forms turn, sharpen where they meet, and leave a few edges lost entirely so the eye can rest.
Notice the order does most of the work. Darks first, because they are hardest to add later without muddying. Lights last, because they are the easiest to ruin by over-blending.
If you run out of time, stop after step four. A painting blocked in properly is a good painting waiting.
Brushwork and Edges
An edge is where two shapes meet, and it can be hard, soft, or lost.
A hard edge is crisp and declarative, like the rim of a cup against a wall. A soft edge is a gradual turn, like a cheek. A lost edge disappears entirely, letting two areas melt together.
Beginners tend to make everything hard, because hard edges feel like control. In truth, a painting with all hard edges looks cut out and pasted down. Soften the turning forms and your picture will breathe.
Alla prima painters load the brush and lay a stroke down once. Load, place, lift. Then leave it.
Scrubbing is the enemy. Scrubbing pushes wet paint around, mixes it with what is underneath, and produces a dull, even smear where you wanted a clean note.
Use the biggest brush that will do the job. Detail applied too early, with a tiny brush, kills the freshness you are chasing and takes three times as long.
Mixing Colour on the Canvas
Some of your colour mixing will happen on the painting itself, as one wet stroke pulls a little of the colour beneath it. That is the texture of the technique, and it is worth encouraging.
But it only works if you arrive with enough paint to make the stroke. Mix a generous pile, more than you think. Half a teaspoon of paint looks extravagant and lasts about four strokes.
When you run dry halfway across a shape and stop to remix, you almost never match the first batch. The result is a patchy passage with a visible seam.
The constraint is real: there is no going back. Wet paint does not allow the endless correction of acrylics or the erase of drawing. You must decide, mix, and commit.
That sounds intimidating. In practice it is liberating, because the decision is made and you can move on to the next one.
Managing Wet Paint
A wet canvas is a hazard to sleeves, elbows, and any hand that wanders while you think. A few habits will save you a great deal of grief.
Keep your hand off the surface entirely. Rest your arm on the easel ledge, or on a rolled towel clamped nearby, never on the painting.
If you are right-handed, work from the top left of the canvas toward the bottom right. Your hand then travels over unpainted ground instead of finished passages.
Left-handers should reverse it and start top right. The principle is the same: never lean across wet work.
For fine details in the middle of a wet field, use a mahl stick, a long light rod with a padded end. Rest one end on the easel and the padded end on a dry edge, then steady your brush hand on the stick.
Keep a rag in your non-painting hand. Wipe your fingers before they find the canvas, not after.
Knowing When to Stop
Give yourself two hours. Not because the technique demands it, but because attention has a natural edge and it usually arrives around the ninety-minute mark.
The classic beginner failure is not a lack of skill. It is overworking: going back into a passage that was already saying what it needed to say, to make it slightly more correct.
Each return disturbs wet paint, dulls the colour, and flattens the stroke. A painting can be corrected into lifelessness.
When you feel the urge to fix one more thing, step back three paces and look. If the picture reads from there, you are finished.
What would you paint if you knew you only had two hours, and no chance to redo it?
Finishing, Drying and Storing
Oil paint dries from the surface inward, and slowly. A thin passage may be touch-dry in two or three days. Thick impasto can stay soft for a week or two, and fully cure for months.
Do not varnish yet. Varnish over paint that is still curing traps solvent and can cloud, blush, or crack. Wait at least six months, and a year is kinder for anything painted thickly.
Store the wet panel flat, face up, somewhere dust-free and out of reach of cats and small hands. A shallow cardboard box with the lid propped open works well.
If you must move it, carry it level. A vertical wet painting will slide, and gravity does not care how carefully you mixed your greys.
Sign it when it is dry to the touch, not before. A signature dragged through wet paint is a small heartbreak.
Common Beginner Mistakes
Almost every problem in a first alla prima painting traces back to one of these. Read them before you begin rather than after.
- Too much solvent. Over-thinned paint turns soupy, sinks into the ground, and dries chalky. Use solvent for the sketch, then paint with body.
- Drawing with the brush. Small, scratchy strokes that outline shapes produce a stiff, illustrated look. Think in masses, not lines.
- Mixing too little paint. Skimpy piles force constant rematching and leave thin, patchy areas. Mix double what you think you need.
- Reworking a drying passage. Paint that has begun to set will drag and tear. Leave it, or scrape it back and start the passage fresh.
- Starting with the details. Eyes, lettering, and highlights belong at the end. Early detail locks you into decisions you have not earned yet.
- Chasing local colour too soon. Get the values right and the colour will read. Reverse the order and the picture stays muddy.
None of these are character flaws. They are simply the habits that a wet surface exposes faster than a slow one.
A Last Thought on Imperfection
My grandmother's unfinished painting hung in her hallway for thirty years. The lower left corner was still bare board, and she never once apologised for it.
Alla prima teaches something that has nothing to do with pigment. It teaches you to make a decision, live with it, and keep going. There is no undo, no waiting for a better week, no perfect conditions.
Your first painting will have a clumsy edge and a colour you would mix differently now. So does every painter's first painting, including the ones hanging in museums.
Set out a small panel this weekend. Give it two hours, your whole attention, and permission to be a study rather than a masterpiece.
Then lean it against the wall, step back, and see what you actually made. You may be surprised by how much of yourself is in it.
If you want to understand the opposite approach, our egg tempera techniques guide shows what thin, fast-drying layers can do in the same small format.