Introduction
I ruined $60 worth of tiles my first time. Not the tiles themselves — those were fine. What I ruined was the illusion that expensive supplies equal good results.
I'd watched a half-dozen YouTube tutorials, bought the "starter kit" from a well-known craft brand for $45, picked up a box of six-by-six-inch ceramic tiles from a big-box hardware store for another $15, and settled in for an afternoon of artistic triumph.
What I got instead was a collection of muddy brown splotches that looked like someone had cleaned a paintbrush on a bathroom floor.
Here's what I learned the hard way: alcohol ink on tile is about chemistry, not artistic talent.
And once you understand the chemistry — the one mechanism that makes this whole thing work — you can produce results that look like $80 art-shop coasters for roughly $1.50 each.
That's not a hobby. That's arbitrage.
Let me save you my $60 mistake and show you the actual math, the actual materials, and the actual techniques.
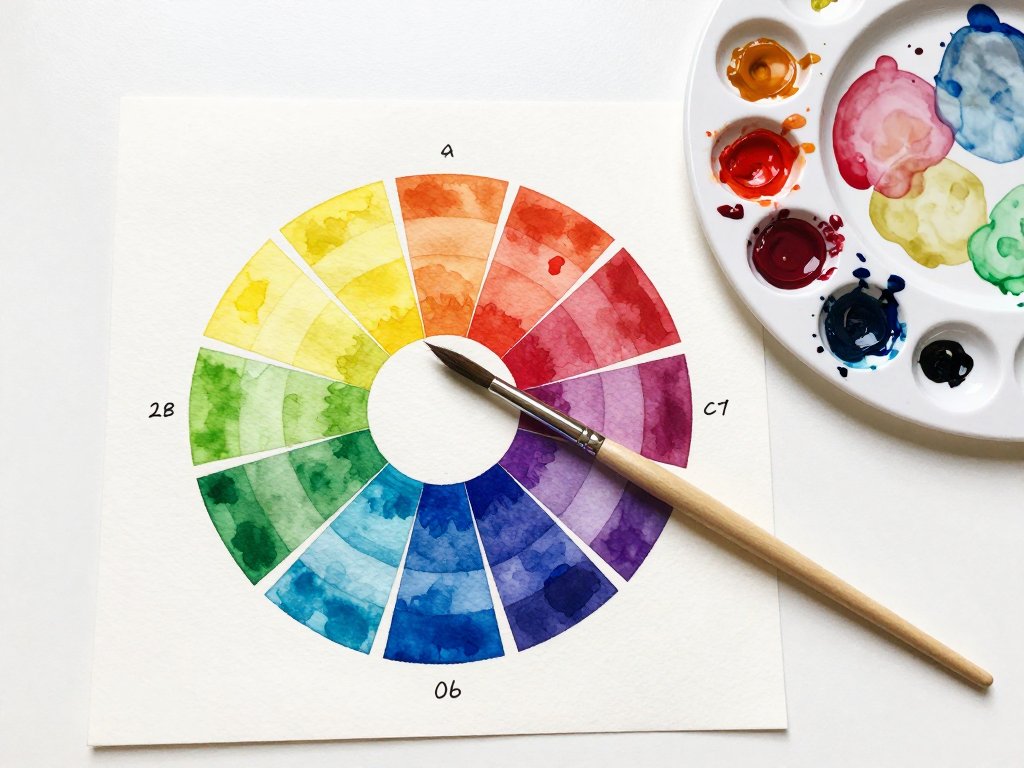
The Mechanism: Why Alcohol Ink Works (and Fails) on Tile
Alcohol ink isn't paint. Paint sits on top of a surface. Alcohol ink sinks into it — or it's supposed to.
The "ink" is dye suspended in denatured alcohol. The "alcohol" in your 91% isopropyl bottle is the same carrier.
When you drop ink onto tile, the alcohol component starts evaporating immediately. As it evaporates, it leaves the dye behind.
But here's the critical detail: the dye is only as interesting as the path it took to settle.
If you just drop ink on a tile and let it dry, the dye sits where it landed. You get a flat, opaque spot. Maybe two flat, opaque spots if you used two colors and they bled into each other. That's a splotch. That's what I made my first afternoon.
The magic — the veining, the marbling, the cell structure that makes alcohol ink art look like polished stone or aerial photography — comes from moving the alcohol before it evaporates. More specifically, it comes from exploiting the surface tension difference between two different alcohol concentrations.
Drop a little 91% IPA onto fresh ink and the lower-concentration alcohol spreads faster than the ink's own alcohol carrier.
It pushes the pigment out in tendrils. Drop more, and you get cells — ring-like structures where pigment concentrates at the edges of spreading circles.
The physics is the same thing that happens when you drop soap into milk with food coloring, except it stops working the second everything evaporates, so you have a narrow window to create your effect.
That's it. That's the whole trick. Manipulate evaporation speed and surface tension gradients, and you control the pattern. Master that, and you're 90% of the way to professional results.
What You Actually Need (and What You Don't)
I'm going to give you a materials list, but I want to be clear about something: you probably already own half of this. And the half you don't own will cost you less than a takeout dinner for two.
Tiles: The Cheapest Canvas You'll Ever Use
Glossy, glazed ceramic tiles. That's the spec. Nothing else.
You can buy these individually at any hardware store for $0.15 to $0.50 each. A 4x4-inch tile is the sweet spot for coasters. Six-by-six gives you a nice trivet. Twelve-by-twenty-four makes a serving tray insert if you have the guts to work big.
Why glossy and glazed? Because the glaze is glass — a glass-like coating fired onto the clay at high temperature.
That non-porous surface holds the alcohol ink on top long enough for you to manipulate it.
The ink doesn't soak in. It floats, spreads, cells, and dries with the pigment sitting right on the surface.
Matte tiles, unglazed quarry tiles, natural stone tiles — these are traps. They absorb the alcohol instantly, pulling pigment into the porous surface before you can do anything interesting. You'll get a faint, muddy stain. Don't waste your money.
Alcohol Inks: Three Brands, One Rule
Three major brands, all good, different personalities:
Ranger Tim Holtz is the standard. Widely available, consistent, least expensive per bottle in sets. Colors lean slightly muted — useful for stone and marble looks.
Piñata is the vibrant option. Higher pigment concentration, brighter results, more aggressive flow. If you want jewel tones — deep amethysts, emerald greens, ruby reds — start here.
Jacquard is the opaque option. Most alcohol inks are translucent. Jacquard's have more body and can cover underlying colors. Useful for corrections, harder for depth effects.
The rule: buy a starter set of 3-5 colors plus one metallic. You don't need forty colors.
Too many is a liability — you'll overcomplicate every tile. Three primaries plus black, white, and gold or silver can produce any combination you want.
That's $25-$35 for the inks, and it'll make 50-100 coasters before any single color runs out.
Per-coaster ink cost: about $0.30.
Isopropyl Alcohol: The Secret Ingredient
91% isopropyl alcohol. Not 70%. Not 99%.
Seventy percent has too much water — spotting and hazing in your dried ink. Ninety-nine percent evaporates so fast you can't work it. Ninety-one percent is the Goldilocks concentration: fast enough for a 30-60 second working window, slow enough to actually use it.
A 16-ounce bottle costs about $3. It'll last through dozens of projects.
The Rest of It (Under $10 Total)
- Nitrile gloves ($8 for 100). Alcohol ink stains skin worse than a Sharpie. Gloves aren't optional.
- Small spray bottle ($2) for IPA.
- Plastic droppers or pipettes ($5 for 100).
- Cardboard or plastic lid (free). Work surface protection.
- Paper towels ($0).
- Straw or compressed air duster ($3-$7). For blowing ink.
- UV-resistant epoxy resin or spray acrylic sealer ($10-$20). Non-negotiable.
Total startup cost: roughly $60-$80. But that's a one-time buy for consumables. Your per-coaster cost after that first batch is about $1.50. Compare that to $20-$40 for a set of four "handmade" coasters on Etsy.
The math works. You're not being frugal. You're being smart.
Setting Up Your Workspace
You don't need a studio. You need a flat surface you don't care about, good ventilation, and about two square feet of elbow room.
Ventilation matters. Isopropyl alcohol vapor is heavier than air. In a small enclosed room, you'll get a headache within ten minutes. In a large room with an open window, you won't notice anything. I work on a folding table in the garage with the door cracked open.
Lay down your cardboard. Put your tile on top. Arrange your ink bottles with caps off but droppers in — you'll be working too fast to unscrew caps mid-blend. Alcohol spray bottle on your dominant side. Paper towels on the other. Gloves on.
This setup takes forty-five seconds. Every time I've tried to skip it, I've ended up with ink on my jeans, alcohol on the table, and a ruined pattern because I couldn't find the spray bottle fast enough.
Technique 1: The Drop-and-Move Method
This is the foundational technique. Master this before anything else.
Step 1: Clean the tile. Wipe it with alcohol first — the ink will avoid oily spots like they're poison.
Step 2: Drop one — one — drop of alcohol ink onto the center. Beginners universally use too much ink. One drop covers a 4x4-inch tile when moved. Two drops on the same tile gives you mud.
Step 3: Immediately tilt the tile. The ink flows downhill. Rotate to guide it. You're not painting — you're steering liquid with gravity.
Step 4: If ink stops flowing before covering the tile, add one drop of 91% IPA into the puddle. Fresh alcohol re-wets the drying ink and gets it moving again. This is how you stretch a single drop across the whole surface.
Step 5: Add a second color while the first is still wet. Drop it on the edge, not the center. The colors bleed into each other along a soft boundary. A quick alcohol spritz pushes them together.
Step 6: Let the tile dry completely — 5-10 minutes. Don't touch it. Don't blow on it. Let it sit.
That's the entire core technique. Everything else is a variation of these six steps.
What you'll notice: the ink doesn't behave like you expect. It spreads unpredictably. Colors you thought would blend turn into brown. Colors you thought would clash produce interesting striations. Don't fight it. Half the appeal is discovering what the ink decides to do.
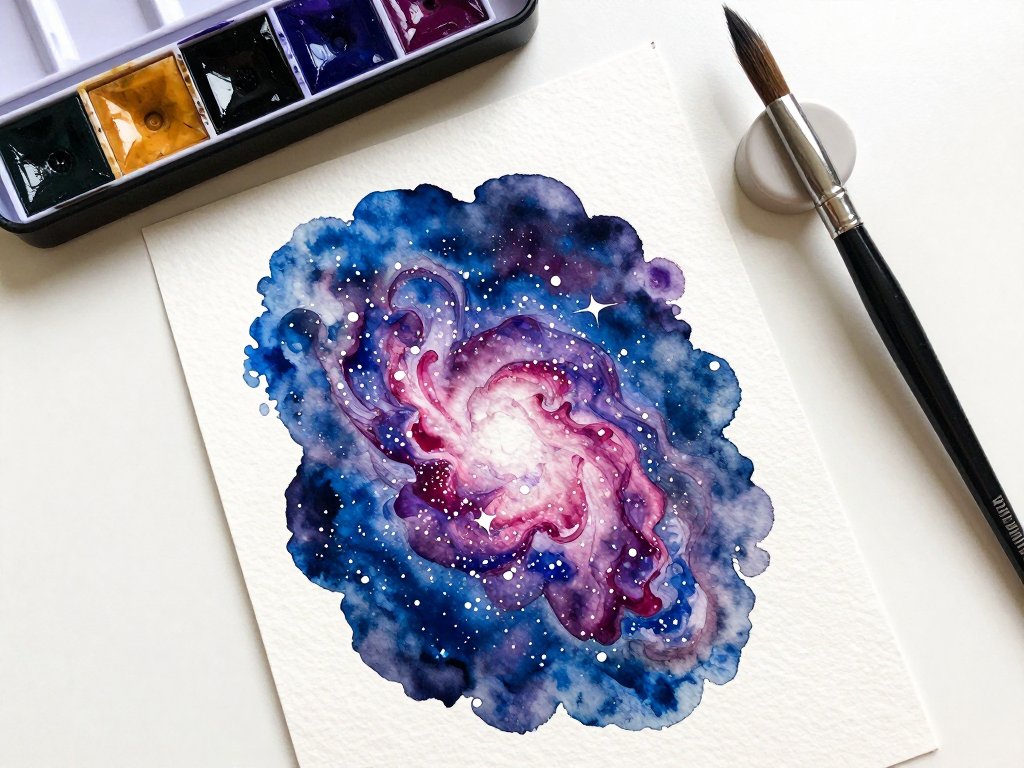
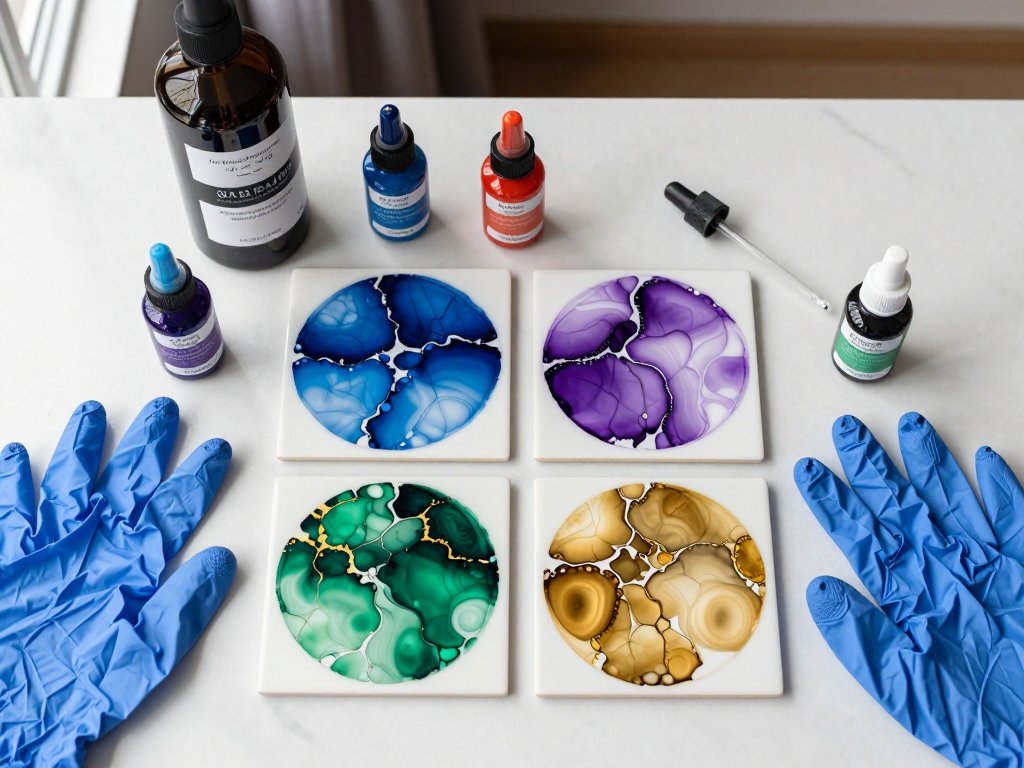
Technique 2: Cell Creation with IPA
This is the technique that separates "nice craft project" from "where did you buy those?"
Cells are ring-like structures — concentric circles of pigment with lighter centers. They give alcohol ink its signature marble-and-agate aesthetic.
How they form: When you drop fresh 91% IPA onto wet ink, the alcohol spreads outward faster than the ink can follow. It pushes the pigment into a ring at the leading edge. As the alcohol evaporates, the ring locks in place.
To create cells deliberately:
- Apply a base color using drop-and-move. Let it dry until tacky (about 2 minutes).
- Drop a second color onto the tacky base. One drop, small, off-center.
- Immediately drop one drop of 91% IPA directly into the center of the second color. Use a dropper, not a spray bottle — you need a focused drop.
- Within two seconds you'll have a cell — a dark ring surrounding a pale center.
- For more cells, add IPA drops around the periphery. Each drop creates a new ring. They can overlap, interlock, or stack.
- Tilt the tile slightly to elongate the cells. This creates the veining effect that looks like agate or marble.
You can layer this technique — create cells, let them dry 3-4 minutes, then add a third color with another IPA drop. Each layer adds depth. Bottom colors peek through translucent layers, creating the illusion that makes finished pieces look like polished stone.
This is where the 30-second working window matters. Have everything in position before you start.
Technique 3: Stencils and Masking
Not everything has to be organic marble. You can create sharp edges, geometric shapes, and logos using stencils.
Apply stencils to a dry tile, then ink over the top. The stencil adhesive creates a barrier the ink can't penetrate. Spray or drop your ink, let it dry, peel the stencil. You get clean negative space where the stencil was.
Caveat: ink can wick under the stencil edge if the adhesive isn't fully sealed. Burnish edges with a credit card before applying ink. Use light misting rather than direct drops — heavy liquid seeps under edges.
Vinyl stencils (Cricut or Silhouette) work best. Paper stencils absorb ink and create fuzzy edges.
Technique 4: Layering and Reactivation
Alcohol inks dry fast, but they're still alcohol-soluble after drying. You can re-wet dry ink with IPA and move it around.
This is incredibly useful for corrections. Made a mistake? Drop IPA on it and the ink lifts right off the tile. Blot with a paper towel and try again. Infinite do-overs as long as the tile's still wet.
For layering: apply a base layer, let it dry completely (10-15 minutes), then apply a second layer using IPA as the blending agent. The fresh alcohol partially re-wets the bottom layer, and the two intermix at the boundary. The result is depth that's almost impossible in a single session.
I've done five-layer tiles that look a foot deep. Each layer was one or two drops of ink and a spritz of alcohol. About 90 minutes spread across an afternoon, and the material cost for all five layers was less than a dollar.
The Sealer Question
Here's the thing nobody tells you on TikTok: alcohol ink is not permanent. Without a sealer, your beautiful coaster will be a pale, scratched ghost within three months.
The dye molecules sit on top of the glaze. They're not chemically bonded to anything. Condensation from a cold glass can reactivate and ruin the pattern. UV light fades colors in weeks. One scratch from a coffee mug base gives you a white line through your perfect marble.
Seal it or lose it.
Option 1: UV-resistant epoxy resin ($15-$25). Hard, glass-like, UV-blocking surface. Coasters sealed with epoxy can handle hot mugs, condensation, even the dishwasher (top rack). Downside: 12-24 hour cure, messy, needs a level surface. This is what Etsy sellers use.
Option 2: Spray acrylic sealer ($8-$12). Less durable, faster, easier. Use UV-resistant brand like Krylon UV-Resistant Clear. Apply 3-5 thin coats, 15 minutes drying between each. Won't survive the dishwasher, but for light-use coasters it's adequate. Reapply yearly.
Option 3: Polycrylic ($10). Water-based Minwax finish. More durable than spray acrylic, less messy than epoxy. Apply with a foam brush in thin coats. Slight yellowing over years, but great for the first year or two.
Whatever you choose, let the ink dry a full 24 hours before sealing. I sealed a tile at 6 hours once and the sealer solvent reactivated the ink, turning a perfect agate pattern into brown soup. Don't rush it.
Projects to Try
Project 1: The Four-Coaster Starter Set
Buy four 4x4-inch glossy tiles ($1.20). Pick two colors that look good together — Prussian Blue and Gold, or Crimson and Black.
Make all four in one session using the drop-and-move technique. Don't overthink them. Let each be different — the variation looks like a curated collection.
Seal with spray acrylic. Total time: 45 minutes active. Total cost: about $2.20 for materials consumed.
Project 2: Marbled Trivet
A single 6x6-inch tile makes a beautiful trivet. Larger surface means two drops of base color instead of one, and more time with cell creation to fill the space. Use three colors plus gold metallic. Seal with epoxy for heat resistance.
Project 3: Serving Tray Insert
Find a wooden serving tray at a thrift store ($3-$5). Buy a 12x12 or 12x24 glossy tile to fit ($2-$5).
Create a large-scale alcohol ink landscape — blues and whites at the top for sky, greens and browns at the bottom.
Cell technique creates convincing cloud textures. Seal with epoxy. You've turned a $5 thrift store find into a $75 serving tray.
Project 4: Coaster Gift Sets
Make 16 coasters in one afternoon using a consistent palette. Gift as sets of four.
With practice, you can produce a set in about 20 minutes of active work. Material cost per set: roughly $2.50.
Perceived value: $30-$40. That's a 12x to 16x return. Every recipient I've given these to asked if I had an Etsy shop.
Common Mistakes
Over-inking. Most common beginner mistake. One drop per tile to start. You can always add more. You can never take it back. If you think "one more drop will make it better," stop. Walk away for five minutes.
Skipping alcohol as a blender. Straight ink dropped and left to dry creates the brown mud puddles I made my first time. The alcohol is the mechanism. Every tile should involve at least one IPA application.
Wrong sealer. Water-based sealers can reactivate alcohol ink. Test on a scrap tile first. Some work fine with fully cured ink. Some turn it into soup on contact.
Wrong tile. Matte, unglazed, textured, or porous tiles absorb ink and give dull results. Glossy glazed only. If the packaging doesn't say "glazed," it probably isn't.
Working too slowly. The 30-second window is real. Have everything laid out. Pre-fill droppers. Once that drop hits the tile, you're racing evaporation.
Forgetting to clean the tile. Dust and oil repel alcohol ink. Wipe every tile with 91% IPA before you start. Five seconds eliminates 90% of spread problems.
The Bottom Line
Alcohol ink on tile is one of those rare crafts where the ceiling for quality is genuinely high — you can produce museum-worthy objects — but the floor for entry is almost nonexistent.
One tile, one bottle of ink, some rubbing alcohol, and the willingness to make a few ugly coasters before you make beautiful ones.
The ugly ones are the tuition. I paid $60 for mine. You can pay about $8 for yours.
My first dozen were disasters. My second dozen were okay. By the third batch — about three hours of practice — I was making coasters people offered to buy.
That's not talent. It's understanding the chemistry. The cells come from surface tension differentials. The depth comes from layering.
The longevity comes from proper sealing. None of it requires a steady hand or an artistic eye.
It requires patience, cheap materials, and the willingness to let the alcohol do the work.
Start with four tiles and two ink colors. Don't try to make them perfect. Just make them.
Learn what the ink does when you tilt right. Learn what it does when you add too much alcohol.
Learn what it does when you add too little. Every tile teaches you something, and every tile after the first few will be better than the last.
And when someone asks where you bought those gorgeous coasters, you get to say the second-best four words in the English language: "I made them myself."
The best four words? "They cost a dollar fifty."