Introduction
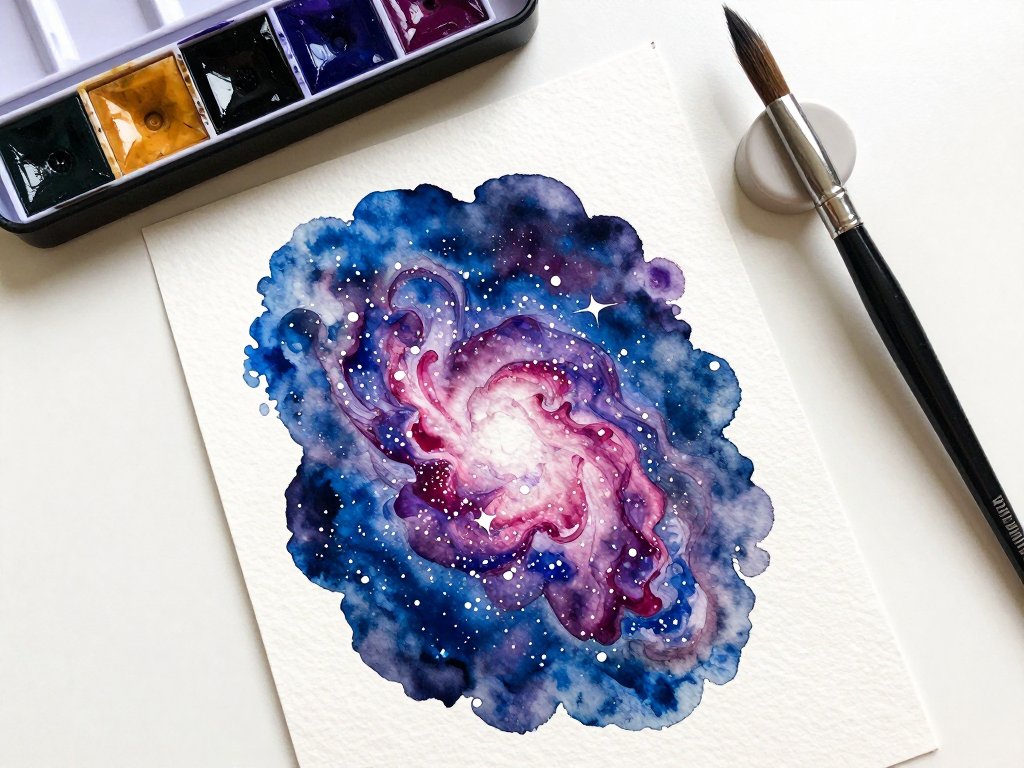
There is something enchanting about a star-filled galaxy. The swirl of cosmic colors, the sprinkle of distant stars, and the deep mystery of space have inspired artists for centuries.
If you have ever looked at a watercolor galaxy painting and thought, "I could never do that," you are about to surprise yourself.
This tutorial breaks the process into clear, manageable steps. By the end of this session, you will have a finished galaxy painting you can frame, send as a card, or use as a background for journaling or calligraphy.
The best part? You only need basic watercolor supplies and about an hour of quiet time.
Let me walk you through exactly what you need and how to use it.
What You Will Need
Before you begin, gather these supplies. The list is short, and you may already own most of it.
Watercolor paper. Use 140 lb (300 gsm) cold press paper. This weight handles the wet-on-wet technique without buckling. Arches or Canson brands work well, but inexpensive student-grade paper from Strathmore is perfectly fine for practice.
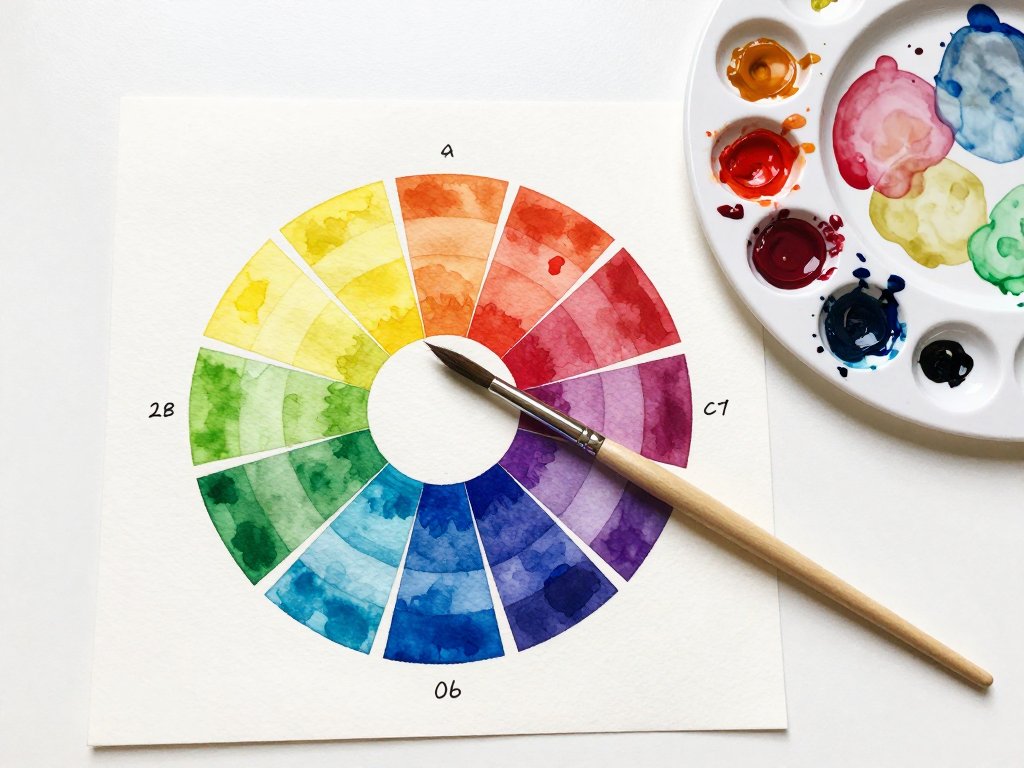
Watercolor paints. You need a set of basic colors. For a galaxy, focus on: ultramarine blue, turquoise or cerulean blue, purple or dioxazine violet, magenta or opera rose, and black. A warm metallic accent like gold or silver is optional but lovely for stars.
Brushes. A round brush in size 8 or 10 is your main tool. You also want a smaller detail brush (size 2 or 0) for stars and splatter effects. A wide flat brush or a sponge helps wet the paper evenly.
Water jars. Keep two jars of clean water: one for rinsing brushes and one for clean water to dilute paint.
Paper towel or a soft cloth. You will blot and lift color throughout the process. Have several pieces ready.
Masking fluid (optional). If you want to preserve certain areas as pure white, masking fluid is useful. For a first galaxy, you can skip it and lift stars with paper towel instead.
An old toothbrush. A clean toothbrush creates the finest splatter for distant stars. Reserve one specifically for art use.
White gouache or white acrylic ink. These create bright, opaque stars after the watercolor layer dries. White gel pens also work.
Setting Up Your Workspace
Galaxy painting uses a wet-on-wet technique, which means you work on damp paper. Set up your paper so it stays wet long enough for the colors to blend naturally.
Tape your paper down. Use artist tape or washi tape to secure all four edges of your paper to a flat board or table. This prevents curling and leaves a clean white border when you remove the tape. If you do not have tape, a heavy clipboard works too.
Tilt your board slightly. Prop the back of your board up about an inch. This helps the water and pigment flow downward as you paint, creating the streaky, nebula-like effects that make galaxy paintings so beautiful.
Have your reference nearby. Open a photo of a galaxy on your phone or tablet. NASA's Hubble images are free and incredibly inspiring. You are not copying the photo exactly — you are using it as a guide for color placement and composition.
Step 1: Wet Your Paper Thoroughly
This is the most important step. Use your wide flat brush or a clean sponge to saturate the entire paper surface with clean water.
The paper should glisten but not have puddles. If you see standing water, tilt the board to let it run off or blot it gently with a paper towel.
Wait about one minute. The paper should feel damp but not soaking wet. If it is too wet, the colors will turn muddy.
If it is too dry, the colors will not blend at all. The right dampness is when the paper still feels cool to the touch but no longer shines.
Step 2: Lay Down Your Base Colors
Load your round brush with clean water and pick up a generous amount of ultramarine blue. Apply it in broad strokes across the top third of your paper. Do not worry about staying inside the lines — galaxies have no edges.
Clean your brush and pick up turquoise or cerulean blue. Apply this in the middle third, letting it overlap slightly with the blue. The wet surface will pull the two blues together naturally.
For the bottom third, use dioxazine violet or purple. Let it blend with the turquoise in the middle. You should see soft gradients forming already.
Add small touches of magenta or opera rose in random spots. These create the pink and purple nebula regions that make galaxies look alive. Keep the magenta areas small — a little goes a long way.
Finally, add black in small amounts around the edges and corners. This gives the painting depth and makes the bright colors pop. Do not cover the whole edge — just dab it in a few places and let the water carry it inward.
Step 3: Tilt and Blend
Tilt your board side to side and up and down gently. Watch how the colors flow and merge. You are guiding the paint, not fighting it. If the colors start looking muddy, you have either used too many colors in one spot or your paper was too wet.
Let the paper rest flat for a moment and observe. If there are hard edges where you do not want them, spritz the area with a fine spray of water. This reactivates the pigment and softens the edge.
Leave any white areas that form naturally — they look like distant stars or gas clouds. Do not try to fill every inch of paper. The white space adds atmosphere.
Step 4: Build Layers (Dry Between Each Layer)
Here is the secret to a professional-looking watercolor galaxy: patience. You need to let each layer dry completely before adding the next. If you add paint to damp paper, you will reactivate the layer beneath and create mud.
Use a hairdryer on a cool or low setting to speed up drying. Hold it about twelve inches from the paper and move it constantly. Drying usually takes three to five minutes with a hairdryer.
Layer two — deepen the colors. Once the first layer is dry, wet specific areas where you want more intensity. Apply a stronger mix of your base colors. Focus on the corners and the center. Let it dry completely.
Layer three — add structure. Mix a dark purple-black and paint curved sweeps across the painting. These represent the spiral arms of the galaxy. Keep your brush loose and your hand light. If the line is too harsh, soften it immediately with a clean damp brush.
Layer four — add the glowing core. The center of a galaxy is bright. Mix a tiny amount of yellow or gold with white gouache. Dab it in the center area while the previous layer is still slightly damp so it blends softly. Let it dry.
Step 5: Create Stars
This is the most satisfying part. You have several techniques for adding stars, and each creates a different effect.
Splatter method. Dip an old toothbrush into white gouache mixed with a drop of water.
Hold the toothbrush over your painting and run your thumb across the bristles. Practice on a scrap piece of paper first to control the spray distance and droplet size.
Hold the brush closer for larger stars and farther for fine dust.
Detail brush method. For larger, brighter stars, use a size 0 or 1 brush loaded with white gouache or white acrylic ink.
Touch the tip to the paper and lift straight up. Vary the size by pressing harder or softer.
Place larger stars near the galactic core and smaller ones toward the edges.
Lifting method. While the final layer is still damp, blot a few spots with a crumpled paper towel. The towel pulls up pigment and leaves soft, glowing star shapes. This technique creates the most natural-looking stars because they are part of the painting, not sitting on top of it.
Metallic accents. If you have gold or silver watercolor, add a few metallic stars near the center. This is optional but gives the painting a beautiful shimmer when the light hits it.
Step 6: Add Final Details
Once the stars are completely dry, step back and look at your painting from across the room. Ask yourself these questions:
Does the composition feel balanced? Are the colors distributed naturally, or are there heavy patches? Are the stars evenly spread, or is there an empty zone that needs a sprinkle?
Add any finishing touches now. You can deepen a corner with more black, add a few more tiny stars with splatter, or soften a hard edge with a damp brush. Do not overwork it. Galaxies are wild and imperfect — that is what makes them beautiful.
When you are satisfied, remove the tape carefully by pulling it back at a 45-degree angle. Your finished galaxy painting is ready to frame.
Troubleshooting Common Issues
Even with clear instructions, things do not always go as planned. Here is how to fix the most common galaxy painting problems.
Problem: The colors turned muddy. This happens when you overwork the paint while the paper is too wet.
To prevent it next time, use fewer colors and let each layer dry before adding the next.
For the current painting, let it dry completely and add a fresh bright layer on top.
The new layer will cover some of the mud.
Problem: The stars are too faint. Your white gouache or ink may be too watery. Mix it to the consistency of heavy cream. If the stars still look faint, let them dry and paint a second layer of white directly on top of each star.
Problem: The paper buckled. This happens when you use paper lighter than 140 lb or when you do not tape it down.
You can flatten a buckled painting by placing it under a heavy book for a day or two.
For future projects, always use 140 lb paper and tape all four edges.
Problem: There is too much black. Black watercolor can easily overwhelm the other colors. If your galaxy looks too dark, rinse your brush and lift some of the black while it is still damp. You can also add a bright color layer on top once everything is dry.
Problem: White spots appeared where I did not want them. Those are usually caused by oil from your fingers repelling the water. Wash your hands before painting and keep the paper surface clean. If the spots are already there, paint over them with a matching color once the layer dries.
What to Do with Your Galaxy Painting
Your first galaxy painting is a milestone, not a final destination. Here are a few ideas for using your finished piece.
Frame it. A simple white or black frame makes the colors pop. Hang it in a home office, a reading nook, or a child's bedroom. Space-themed art works beautifully in any room.
Turn it into cards. Cut your painting into 4-by-6-inch panels and mount each one on a blank card. Write a handwritten note inside. These make thoughtful birthday, thank-you, or encouragement cards.
Use it as a journal background. Paint pages of galaxy backgrounds all at once and let them dry. Later, you can add calligraphy, poetry, or sketch over the top. The dark background makes white ink or gel pen text stand out beautifully.
Give it as a gift. A handmade galaxy painting is a personal and meaningful gift. Pair it with a beginner watercolor set so the recipient can try their own.
More Galaxy Variations to Try
Once you have mastered the basic galaxy, experiment with these variations.
Nebula galaxy. Focus on pink, purple, and turquoise with a bright glowing center. Skip the black and let the colors blend softly. This creates a dreamy, ethereal look.
Milky Way band. Instead of filling the whole paper, paint a diagonal band of galaxy across the center. Leave the top and bottom as dark space. This mimics how the Milky Way appears in the night sky.
Galaxy with silhouette. Paint your galaxy background first. Once it is dry, add a black silhouette of pine trees, a mountain range, or an animal in the foreground. Use black watercolor or India ink and a steady hand. The contrast between the colorful sky and the dark silhouette is striking.
Mini galaxy studies. Use a quarter sheet of paper and paint several small galaxies with different color schemes. This is an excellent way to practice without committing to a full sheet. You can also turn these mini studies into bookmarks, gift tags, or ornaments.
Final Thoughts
Painting a watercolor galaxy is one of the most rewarding projects you can try as a beginner. The technique is forgiving, the results are dramatic, and every painting turns out differently. Your galaxy will be uniquely yours — no two are ever the same.
Set aside an evening, pour yourself a cup of tea, and let the colors flow. You might be surprised at what you create.