Introduction
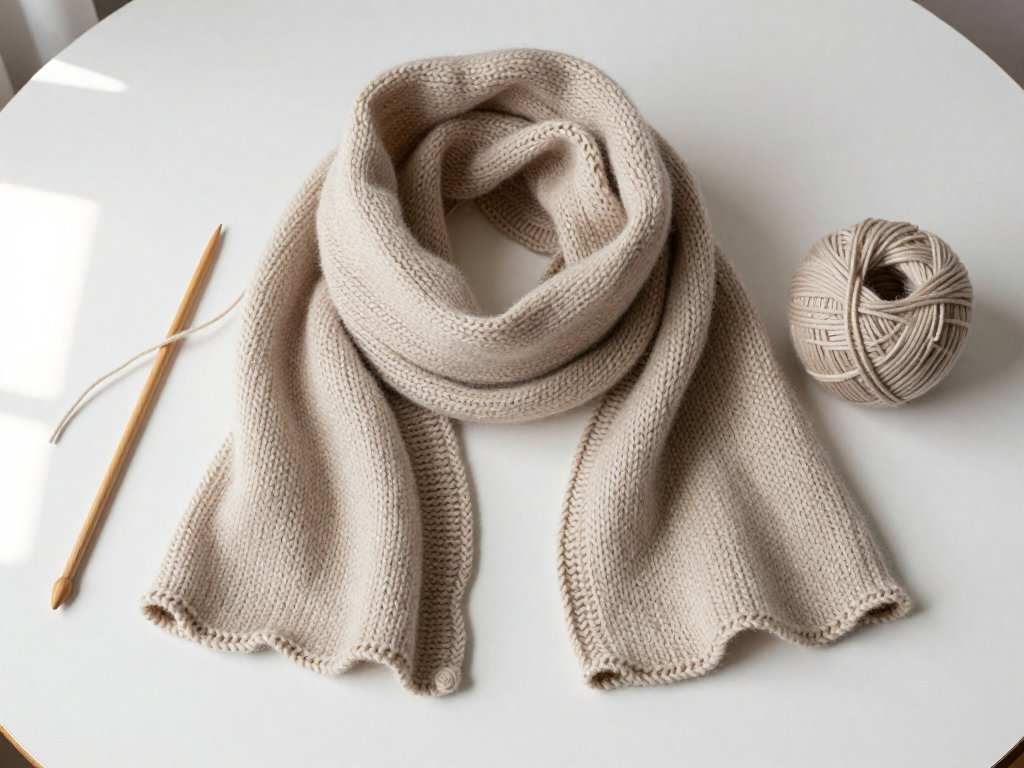
A wiggly scarf does not announce its technique. It simply hangs there, its long edges rising and falling in soft, unhurried waves, the way a shoreline looks from a distance.
Most people assume the ripple must come from a stitch pattern. Cables, lace, a clever sequence of increases and decreases, something intricate worked stitch by stitch.
It does not. The whole effect comes from one old piece of knitting grammar: the short row.
By the end of this guide you will be able to read a wavy edge and see the turns that made it. You will know how to work a wrap-and-turn, and how to stack turns into a curve.
You will also know how to block the finished scarf so the waves stay where you put them.
That is a modest list of skills. It is also enough to knit a scarf people will ask about.
Where the Wavy Edge Comes From
Short rows are older than most knitting books admit. For well over a century, knitters have reached for them wherever flat fabric needed to bend. The turned heel of a sock is the classic case, and the sloping shoulder of a sweater the other.
In both, the knitter works part of a row, turns before the end, and comes back. But those uses are structural. The wavy scarf borrows the same trick for decoration rather than fit.
The silhouette has surfaced repeatedly since — most visibly in the ripple and rickrack trims of the 1970s, when undulating edges appeared on blankets and collars alike. The modern revival of scalloped accessories is that same idea, quieter this time.
Why Short Rows Make Waves
Think about an ordinary row of knitting. You work from one edge to the other, turn, and work back. Every row adds the same amount of height across the full width. The fabric grows evenly and the edges stay straight.
A short row breaks that agreement. You knit only part of the way across, turn before the end, and come back.
The stitches you skipped sit still while the ones you worked gain a row. Do that once and you have a small step. Do it repeatedly, each turn placed a little further in or out, and the steps accumulate into a curve.
This is why the wave is not a stitch pattern. There is no cable, no lace motif, nothing to memorise in the stitch itself. Every stitch is ordinary. The shape lives entirely in where the rows stop.
Knitters sometimes call it partial knitting, which is a fair name. You are knitting part of the fabric at a time, and the edge remembers every interruption.
That is the whole mechanism, and it is worth sitting with before you pick up the needles. Once you see the wave as a stack of rows rather than a pattern, the rest of the scarf becomes arithmetic you can do in your head.
Choosing Yarn and Needles
The yarn has one job here: to let the shaping speak. A smooth, light-to-medium weight wool does that best, because the surface stays quiet and the curve reads clearly from a few feet away.
Heavy variegation works against you. A yarn that changes colour every few inches pulls the eye to its own stripes, and the wave becomes a rumour underneath. If you love a variegated skein, save it for a plain scarf and let this one stay calm.
Needle size is a small decision with a visible result. Go roughly one size up from the size suggested on the yarn band.
The looser fabric drapes more softly and the waves bend rather than fold. Too tight a gauge gives you something that looks creased instead of undulating.
A plainer yarn makes the shaping the star. That is the whole trade, and it is a good one.
Gauge, and Why It Matters Less Here
Most knitting advice about gauge exists because a garment has to fit a body. A scarf does not. Nobody will measure your row count at the door.
So treat gauge here as a design decision rather than a compliance test. Stitch gauge affects the width; row gauge affects the waves.
More rows per inch means each short row adds less height, and the ripple becomes shallow and fine. Fewer rows per inch gives you a deeper, lazier curve. Both are legitimate. They are simply different scarves.
Before you commit, knit a small swatch of two wave repeats. Not to measure — to look. Hold it up, let it hang, and see whether you like the proportion of wave to width.
That swatch will also tell you something a gauge number cannot: whether your turns are closing cleanly. Ten minutes of knitting can save you a scarf.
The Short Row Turn, Step by Step
The standard method is called wrap and turn, and it exists to prevent a small hole at the turning point. The wrap borrows a little yarn from the neighbouring stitch and gives it back later.
- Knit to the stitch where the turn belongs. Stop there, with that stitch still waiting on the left needle.
- Slip the next stitch purlwise to the right needle, without working it.
- Bring the working yarn to the front, between the needles, then slip the stitch back to the left needle.
- Turn the work. The yarn now sits wrapped around the base of that stitch, holding the gap closed.
- Continue in the other direction. When you meet the wrapped stitch again, lift the wrap onto the left needle and knit it together with its stitch.
The wrap is the part beginners tighten. Resist that. A loose wrap sits flat and disappears; a tight one puckers and announces itself from across the room.
If wrapping irritates you, two alternatives are worth knowing. A yarn over before the turn, knitted together with the next stitch on the return, does the same job with less fuss. Japanese short rows use a marker and a pulled loop instead, and leave no wrap at all.
Pick one method and stay with it for the whole scarf. Mixing them mid-project shows.
The Wave Repeat
A wave is built from a small family of turns that move toward the edge, then back away from it. You are not following a chart so much as repeating a rhythm.
Here is a concrete example on a modest stitch count. Work plain to eight stitches from the edge, turn, and work back.
Then work to six stitches from the edge, turn, and return. Then four. Then two. Each turn sits closer to the edge than the last, so the fabric stacks into a curve.
To come back down, reverse the order: two, four, six, eight. The turns retrace their steps and the edge falls away again. That inward-and-out sequence is one complete wave.
The distances can be two stitches apart or five, evenly spaced or not. Wider spacing gives a gentler, longer curve; tighter spacing gives a sharper one.
What matters is consistency. Count. The eye forgives a shallow wave; it notices a lopsided one immediately.
Knitting the Scarf
Cast on a multiple of stitches that suits your repeat and gives you the width you want. Garter stitch is the kindest choice here: it lies flat, hides the turns, and looks the same on both sides.
Work one wave unit — the inward turns, then the outward return. Then work the mirrored unit, with the turns measured from the opposite edge.
That alternation is what keeps the scarf from curling into a spiral. One wave leans left, the next leans right, and the length stays straight while the edges ripple.
Repeat the pair until the scarf is the length you want, ending after a mirrored unit so both ends match. Slip the first stitch of every row for a tidy edge.
If you lose count, lay the work flat and look at the last two waves. They will tell you which direction you are travelling.
Bind off loosely. A tight bind-off at the end of a soft scarf looks like a seam that gave up.
Hiding the Turns
Every turning point is a place where the fabric changes direction, and every such place can open into a small gap. Closing those gaps is most of the finishing work.
The wrap does it, if you treat the wrap generously. Pick it up with the tip of the left needle, set it beside its stitch, and knit the two together as one.
Work that closing stitch at the same tension as its neighbours. Pulling it snug is the common mistake, and it leaves a dimple where the hole used to be.
If a gap survives blocking, thread a short length of the same yarn on a tapestry needle and draw it closed from the wrong side. Two stitches of duplicate stitch will do it invisibly.
Nobody will inspect your scarf at arm's length. But you will know, and a closed turn feels finished in the hand.
Blocking the Waves Into Shape
This is the step that turns a rippled piece of knitting into a wiggly scarf. Unblocked, the waves are suggestions. Blocked, they are the design.
Soak the scarf in cool water with a little wool wash for twenty minutes. Squeeze — never wring — then roll it in a towel to lift the excess.
Pin it out on a flat surface, opening each wave along both long edges and matching the ripples opposite one another. Measure the two ends so the scarf comes out even.
Let it dry flat, away from direct heat. Do not hang it wet; the weight of the water will stretch the waves into a long, sad line.
If you have never blocked anything, this is a kind first project to learn on. The full method is in this guide to how to block knits, and the principles hold for any wool accessory.
Blocking is not optional here. It is the difference between a technique sample and a scarf.
Variations
Once the mechanics are yours, the scarf becomes a set of choices rather than a pattern to follow.
- A wider wrap. Cast on more stitches and lengthen the repeat so the waves stay in proportion. A wide scarf needs deeper curves, or it reads as a blanket with a wavy edge.
- Two colours. Work the wave units in a contrast colour and the plain stretches in your main shade. The waves become a stripe, and the turns hide inside the colour change.
- Lace weight. Same turns, finer yarn, a much lighter scarf. Expect shallower waves and a longer blocking time.
- A short cowl. Knit two or three wave units, seam the ends, and you have a neck piece instead of a scarf. Keep the seam at the back and match the waves across it.
Each variation changes one variable. Change two at once and you will not know which one spoiled the curve.
Troubleshooting
Most problems with a wiggly scarf trace back to a turn, not to the yarn or the pattern.
- Gaps at the turns. The wrap was pulled tight or missed entirely. Rip back to the turn and rework it loosely, picking up the wrap deliberately.
- The scarf curls instead of waving. The waves are all leaning the same way. You are repeating the unit without mirroring it; alternate the direction of the turns.
- The waves flatten after wear. The blocking was too gentle, or the yarn is heavier than the shaping can hold. Block more firmly next time, or choose a lighter yarn.
- The repeat has drifted out of alignment. You stopped counting. Place a marker at each turning point for the next few waves and the rhythm will come back.
- You are running out of yarn mid-wave. Finish the unit you are in rather than stopping halfway. A complete wave at the end looks intentional; a half wave looks like arithmetic.
None of these are failures of skill. They are the ordinary corrections that come with learning where the fabric wants to go.
Care and Conclusion
Wash the scarf by hand in cool water, squeeze it gently, and dry it flat. A machine will not ruin it immediately, but it will soften the waves out of it over a season.
Store it folded rather than hung. Gravity is patient and unkind to an undulating edge.
What you have made is an old idea in a modern shape. The short row has been turning heels and sloping shoulders for generations, quietly doing the work that shaping requires.
Here it is doing something lighter: making an edge move. That is a small thing, and also the whole thing.
Knit one for yourself first. Then knit one for someone who will run a hand along the waves without quite knowing why they are there.