Introduction
Tapestry crochet is single crochet worked over a second color that you carry along the row. The unused strand hides inside your stitches, and wherever you switch colors, a flat graphic picture appears.
If you have ever opened a colorwork chart, stared at hundreds of tiny squares, and quietly closed the tab, you are in good company. Row after row of grids can look like homework instead of a hobby.
Here is the part nobody tells beginners: tapestry crochet uses exactly one stitch. Single crochet, over and over, with a color change every so often.
If you can count to thirty and read a grid, you can make a graphic pouch. This guide walks through the chart, the color change, and a small weekend project from first chain to final seam.
By Sunday evening you will have a finished piece in your hands, plus a skill that opens up bags, coasters, plant sleeves, and pillows.
The goal is confidence, not perfection. Your first chart will teach you more than any tutorial, including this one.
What You Will Need: The Short Supply List
A short, specific list beats a shopping spree. Everything below fits in one basket and one afternoon of shopping.
- Worsted-weight cotton yarn in 2 to 3 contrasting colors. Cotton shows graphic stitches crisply and does not fuzz over your carried strands the way acrylic can.
- A crochet hook 0.5mm smaller than the yarn label suggests. If the label recommends 4.5mm, reach for a 4.0mm instead.
- A stitch marker. Clip it into the first stitch of every row so you never lose your place when a child calls your name.
- A tapestry needle. Blunt tip, large eye — this is the tool that weaves in ends and closes your side seams invisibly.
- A printed copy of your chart. Paper beats a screen, because you will mark each finished row with a ruler or highlighter.
You do not need bobbins, a chart stand, or a special ergonomic hook. A ruler and a highlighter are genuinely the only extras that change the experience.
Budget substitutions. Thrifted cotton sweaters can be unraveled for free yarn, and free graph paper works exactly as well as any paid app. Cheaper cotton is fine too, as long as you check your gauge first.
One practical warning: buy all your yarn at once. Dye lots shift slightly between batches, and a mid-project color change is visible in a way that a chart never shows.
How to Read a Tapestry Crochet Chart
A tapestry chart is not a picture of yarn. It is a map of stitches, and the map follows one simple rule you can lean on all the way through.
One Square Equals One Stitch
Each square on the grid represents a single crochet. A chart thirty squares wide means thirty stitches in every row, no math required.
Each row of squares is one row of crochet. Count the squares and you have counted your stitches, which is why beginners find this method so much calmer than following written color notes.
Which Direction Do You Read the Rows?
On a chart, row one sits at the bottom and you read it from right to left. That matches the way you naturally work a row from the right-hand edge.
If you are working flat and turning your work, the next row is read from left to right. This keeps the picture upright instead of mirrored, so mark the direction on your printed chart.
Working in the round, every row is read right to left, because you never turn. Many tapestry pouches and coasters are made this way for exactly that reason.
Color Charts Versus Symbol Charts
A color chart shades each square in the yarn color you should use. It is the fastest chart to read and the one most beginners should start with.
A symbol chart uses marks instead of shading: dots, crosses, or letters in each square. Symbols are handy when you plan to swap colors, since the marks do not commit you to a palette.
Both charts work identically. The only real difference is how your eye tracks the grid while you stitch.
Turning Chains Are Not Chart Squares
The chain one you work at the start of a single crochet row is not a stitch and does not appear on your chart. It never gets a square.
That means a thirty-square row starts with a chain one, then thirty single crochet. Skipping this detail is the most common reason a beginner's first chart comes out one stitch narrow.
The Two-Color Single Crochet Change
The color change happens in the last pull-through of a stitch, which sounds fussy and becomes automatic within a row. Work through these steps slowly once, and your hands will remember.
- Insert your hook into the next stitch and pull up a loop of color A. You now have two loops on the hook.
- Stop. Yarn over with color B instead of A, and pull that new color through both loops to finish the stitch.
- The stitch reads as color A at its base and color B at its top edge. The change is flat and nearly invisible.
- Continue in color B, working over the strand of color A that lies along the previous row.
- When the chart calls for color A again, repeat the switch in the last pull-through of the final color B stitch.
Notice what your left hand is doing. The unused color rests along the top of the previous row, and each new stitch wraps around it.
That wrapping is the whole trick. The carried strand is trapped inside the fabric rather than looping across the back, which keeps the back of your work tidy enough to wear.
Keep your tension even on both colors. If the carried strand feels tight, your fabric will narrow; if it feels slack, it will peek. Aim for the strand to lie flat inside the stitch.
Tension and Float Management
A float is the strand of unused color traveling behind or inside your work between two color changes. Manage floats and the rest of tapestry crochet feels easy.
Catch Floats Every Three or Four Stitches
Never carry a float farther than about three or four stitches. Longer floats sag, snag on keys and zippers, and pull your gauge out of shape.
How to Catch a Float Invisibly
To catch a float, lay the unused strand over the hook before you pull up the loop of the working color. The stitch swallows it.
Do this in the middle of a run of same-color stitches and the catch disappears. Space your catches evenly and no one will spot them.
Why the Smaller Hook Matters
A hook half a millimeter smaller makes tighter stitches, and tighter stitches hide the carried color. Go down 0.5mm from the label and the difference is immediate.
If your fabric shows shadowy dots of the other color, resist the urge to add more yarn. Change your hook instead — it is almost always the cause.
Make a swatch before you commit to a chart. Ten single crochet stitches in worsted cotton should measure about 2.5 inches with a 4.0mm hook. Adjust from there.
Charting Your Own Simple Design
Designing your first chart is easier than finding one you love. You need a grid, a pencil, and a modest ambition about size.
Graph Paper or a Free Pixel Grid
Printed graph paper works perfectly, and free pixel-grid tools online do the same job. Choose whichever lets you shade squares quickly and erase without a fuss.
Count the squares before you start. A thirty-square-wide chart becomes thirty stitches per row, which measures about eight inches wide in worsted weight cotton.
Design at Three to Five Colors Maximum
Your first chart should use two colors, and three at the very most. Every additional color adds a strand to carry and a new chance to tangle.
Simple motifs read best: a heart, a single flower, a name initial, or a stripe pattern. Blocky shapes suit the grid, so avoid fine curves.
Sketch on paper first, then transfer. What looks charming in pencil sometimes looks like a smudge in yarn, so test small before you plan a tote.
Count your rows too. A sixty-row chart means sixty rows of single crochet, which at this gauge is roughly twelve inches tall.
Project: A Weekend Colorwork Pouch
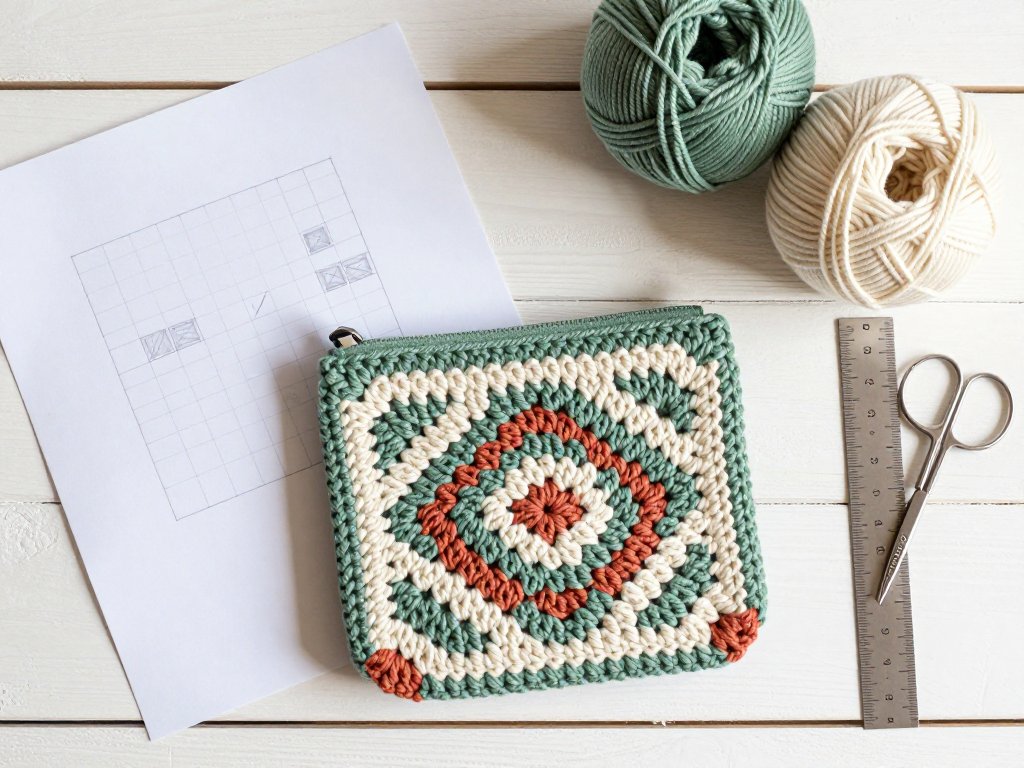
This small zip pouch or phone sleeve uses a thirty-stitch chart and about sixty rows. It is the right size to finish, which matters more than it sounds.
What You Will Use
Plan on roughly 100 yards of your main color and 40 yards of your contrast color in worsted cotton. A standard ball of dishcloth cotton covers both amounts.
Finished size lands near 8 inches wide by 12 inches tall, depending on your gauge and whether you add a folded flap.
Step by Step
- Chain thirty-one. That gives you thirty stitches plus the turning chain for row one.
- Work one single crochet in each chain across, then chain one and turn. Row one is complete.
- Follow your chart row by row, reading right to left on right side rows and left to right on wrong side rows if you turn your work.
- Change colors in the last pull-through of each stitch, and catch your floats every third stitch on long runs.
- Keep your printed chart marked. Lay a ruler under the row you just finished, or highlight it in soft yellow.
- After the final row, do not fasten off yet. Work one round of single crochet around the whole piece for a firm edge.
- Weave in your ends with the tapestry needle, then fold the piece and seam the sides. A whipstitch through both layers is fine.
- Add a zipper if you like, pinning first and stitching by hand, or leave the top open as a simple sleeve.
Time this honestly: about six to eight hours of stitching, spread across a weekend with plenty of interruptions. That is one movie, one nap time, and one quiet evening.
Marking your chart as you finish each row is the single habit that prevents the most common beginner frustration. If you stop mid-row, you always know where you were.
Common Mistakes and How to Fix Them
Every one of these has a simple cause and an equally simple fix. None of them mean you are bad at colorwork.
The Colors Keep Tangling
Keep your balls separated, one resting on each side of your work. Turn your piece rather than your yarn, and the strands cross far less often.
Some crocheters wind each color into a small center-pull ball to stop the rolling. A yarn bowl helps too, but two separate sides solve most of it.
The Pattern Looks Skewed or Reversed
This almost always means the chart was read in the wrong direction. On a right side row you read right to left; on a wrong side row, left to right.
If your heart is upside down, check which row you started from. Row one belongs at the bottom of the chart, not the top.
The Carried Color Shows Through
Peeking yarn means your hook is too large or your stitches too loose. Drop to a 4.0mm hook and keep the carried strand snug inside each stitch.
Give it a few rows before you judge. Cotton relaxes with handling, and small shadows often disappear once the fabric settles.
The Work Curls at the Edges
Curling usually means your tension is too tight, particularly at the row edges. Work the edge stitches slightly more relaxed than the middle.
A single crochet border helps as well, and a light steam with an iron held above the fabric relaxes cotton nicely. Never press the iron directly onto the stitches.
Design Variations From One Chart
Once your pouch is done, the same thirty-square chart becomes four more projects. You already own the hard part.
Coaster
Work only the bottom twenty rows of the chart for a coaster. Two colors, about forty minutes, and a very satisfying way to use leftover cotton.
Bookmark
Narrow the chart to ten squares and work eighty rows instead. A 3.0mm hook keeps it firm enough to slide between pages without stretching.
Tote Panel
Keep the width at thirty and work until you have a square, then seam two matching panels together. Cotton handle straps finish it in an afternoon.
A Modern Palette Swap
Change the yarn and the same chart reads completely contemporary. Try muted sage with warm cream, or cream with soft terracotta.
Swap the third color for charcoal instead of a bright and the motif turns graphic and calm. Kitchens, nurseries, and linen closets all suit those softer tones.
This is the quiet reward of colorwork charts: the design stays, and only the mood changes.
You Only Need One Stitch
If you take one thing from this guide, let it be this: tapestry crochet is single crochet with a color change. The chart is just a map you can count.
Your first pouch may have one wobbly edge or a float that peeks. That is a normal part of learning, and it will not bother you once the pouch is holding your keys.
Start with two colors, a thirty-square chart, and a hook one size smaller than the label. Finish the weekend with something you actually use.
If the geometry of color changes appeals to you, our guide to stranded colorwork takes the same ideas into knitting, where the charts work in much the same way.
Then choose a second chart, swap the palette to sage and cream, and make the coaster. Small finished projects build skill faster than ambitious unfinished ones.
Take a photo before you give it away. Six months from now, you will want to see how far your tension has come.