Introduction
A short row is a row you do not finish.
You knit partway across, turn before the end, and work back the way you came. The stitches you left behind stay where they are, holding their place while the rest of the fabric gains height.
That is the whole of it. No increase, no decrease, no change of any kind in the stitch count. Only a decision about where a row stops.
Knitters have needed that decision for as long as there have been garments to fit. A stocking heel needs a cup to hold the ankle. A tailored shoulder needs to fall away from the neck. A neckline needs to curve.
Partial knitting appears in nineteenth-century sock knitting, in the turned heels of working stockings, and in tailoring long before any commercial pattern thought to name it. The technique is older than its vocabulary.
This guide is about shaping garments with it. Where the turns belong on a body, and which of the four common methods suits the job in hand.
There is no project to follow here. The short row does its quiet structural work inside the fabric, and nobody notices until a sweater fits properly.
What a Short Row Does to the Fabric
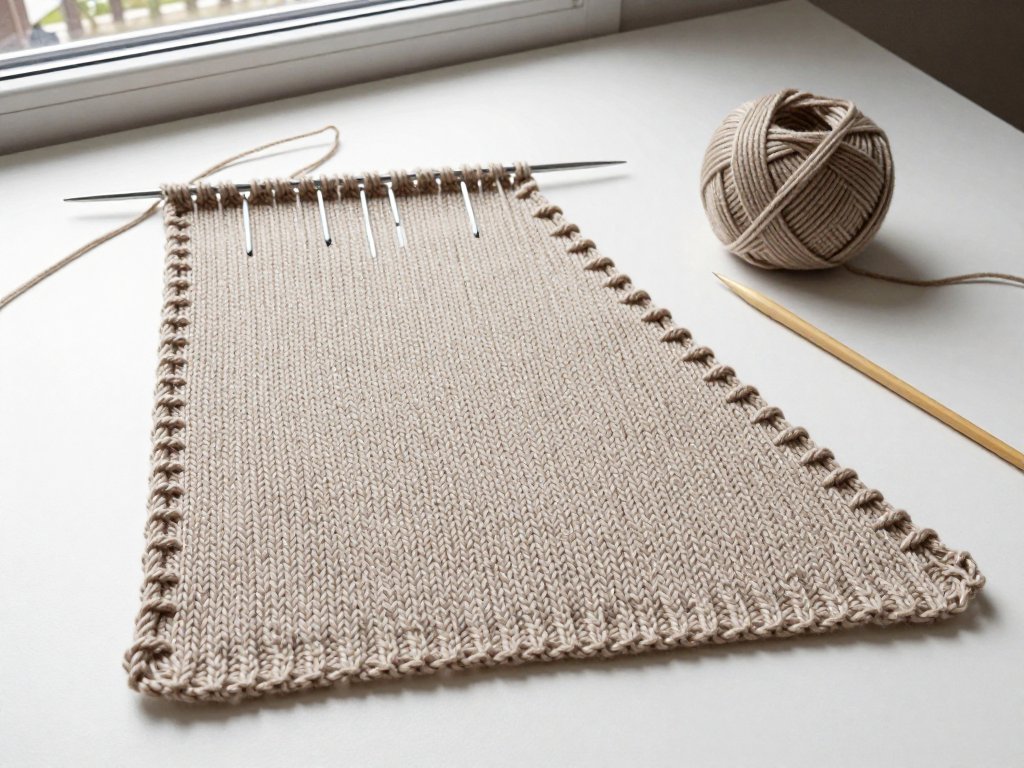
Work a straight rectangle in stocking stitch and every row crosses the full width. Height accumulates evenly, both edges stay level, and the fabric remains a plane.
Stop a row early and turn, and the arithmetic changes. The section you worked gains two rows of height. The section you skipped gains none at all.
Repeat that with the turn placed a little further in each time and you build a wedge. One edge grows while the other stays put. The plane becomes a curve.
Nothing has been added or subtracted. The stitch count at the top of the piece is exactly what it was at the bottom. What changed is how much fabric sits between them.
One turn makes a single step. Six turns spaced evenly make a slope that reads as a straight line from a metre away. This is why short rows scale so gracefully.
It is also why they are useful in construction rather than decoration. The shaping lives inside the fabric rather than at its edge, so it can be folded into a seam and forgotten.
If you would like to see the same geometry used for ornament instead of fit, the site's scarf project, Wiggly Scarf Knitting: Short Rows Made Simple, works short rows as a visible design feature rather than hidden shaping.
Where a Garment Actually Needs Them
Garment shaping is largely a list of places where flat knitting has to stop being flat. Each one is the same wedge, placed somewhere different.
Shoulder slopes. A shoulder seam is not horizontal. It drops from the neck toward the armhole, and on a set-in sleeve it drops noticeably. Short rows take the armhole edge up in steps so the seam follows the body.
Bust darts. A horizontal dart adds length over the bust without adding width. Worked from the side seam inward and stopped short of the apex, it disappears into the fabric entirely.
Curved necklines and the back neck. A back neck worked straight across will gape. Short rows raise the centre back in gentle steps so the collar settles where it should.
Sleeve caps. The top of a set-in sleeve is a dome, and a dome needs rows of unequal length. Short rows turn a straight tube into a cap that seats cleanly into the armhole.
Sock gussets and heel turns. The heel turn is the oldest example of all, where turns cup the fabric around the heel. The gusset is the compensation, and in a short-row heel the turns do that work too.
Seat shaping. Trousers and fitted skirts need more length at the back than the front. A few turns across the back half, worked below the waist, lift the seat without disturbing the front.
Hat crowns. A crown closed by decreases alone pulls to a point. Short rows across the top flatten it, which is precisely what a beret or a slouchy beanie requires.
Read that list again and notice how few of these are decorative. Almost every one is a place where a body refused to be a rectangle.
Four Ways to Work the Turn
All four methods answer the same question: how do you stop a hole forming where the row turns back on itself? They differ in what they leave behind and how long they take.
Wrap and turn. Knit to the turning point, slip the next stitch purlwise, carry the yarn across it, slip the stitch back, and turn. The wrap borrows a little yarn and holds the gap closed until you meet it again.
From the right side the wrap reads as a small horizontal bar across the base of the stitch. In a smooth yarn it fades. In a loose or strongly variegated one it can show as a faint dotted line.
Speed is its weakness. Two extra movements at every turn, then the work of finding and lifting each wrap on the return pass. It is the slowest method here.
Gap control is good but conditional. A wrap worked snugly and picked up deliberately closes cleanly. Worked tight, it puckers and leaves a dimple that no amount of blocking will remove.
German short rows. The wrap is replaced by a double stitch. Turn, slip the first stitch purlwise with the yarn in front, then pull the yarn firmly over the needle to the back. The stitch stretches into two legs.
On the right side it looks like one slightly wider, slightly taller stitch. In smooth wool it is close to invisible, in a haloed yarn it vanishes, and in cotton it stays a little more distinct.
Speed is the reason so many knitters adopt it. One movement per turn and nothing to hunt for afterwards, because the double stitch is worked through both legs when you meet it.
Gap control is excellent and, better still, predictable. The firmness of that single pull is what closes the gap, so a consistent pull gives a consistent result.
Shadow wrap. Work to the turning point, then lift the left leg of the stitch beneath the next stitch onto the left needle and knit it. Turn. A twin stitch now sits under the working stitch.
The result is a doubled stitch flush with its neighbours, a shadow of the stitch above it. From the right side it is among the tidiest of the four and leaves no bar to find later.
Speed sits between the first two. There is one extra lift per turn, and the closure on the return is easy to find because the twin sits directly beneath its partner.
Gap control is very good, and a dimple is less likely here than with any other method. It is a poor choice in slippery silk, where a lifted leg can work loose.
Yarn over, or the Japanese loop. The yarn-over method puts a loop over the needle before the turn and works that loop together with the next stitch on the return. Nothing is slipped and nothing is marked.
From the right side the yarn over can read as a small eyelet, particularly at a loose gauge. In lace that is harmless. On a smooth stocking-stitch shoulder it is a visible dot.
The Japanese version is tidier. Hang a marker on the working yarn at the turn, and on the return lift the marked loop and work it together with the neighbouring stitch.
Both are fast, and the marker version is the quickest to close because the loop is already identified. Gap control is good, provided the loop is lifted rather than merely knitted past.
Choosing Between the Methods
Method choice comes down to three things: the yarn, where the shaping sits, and whether the wrong side will ever be seen.
In smooth, firmly plied wool any of the four will disappear. In cotton, linen or silk, where stitches sit crisply and do not bloom, the double stitch closes most reliably.
In fluffy or haloed yarn the wrap disappears entirely, which makes wrap and turn surprisingly good value there. In variegated yarn, anything that stacks stitches will read as a faint line.
On a shoulder seam, choose for speed. The seam will be sewn and the turns buried under a sleeve head, so the double stitch is the sensible default.
On a neckline, choose for invisibility. The turns are on show and often close to the face, so shadow wraps or the marked loop repay the extra seconds.
If the wrong side shows — an open cardigan, a rolled cuff, a reversible fabric — pick a method that leaves a clean reverse. Wraps can be worked on the wrong side, but it is slower and easier to miss one.
- Smooth wool, hidden seam: German short rows.
- Cotton or linen, on show: shadow wrap.
- Fluffy yarn, either side: wrap and turn.
- Lace, or a deliberate eyelet: yarn over.
- Slippery silk, on show: Japanese marker and loop.
None of these are rules. They are starting points, and one knitter's settled habit is another's last resort.
Calculating Turning Points From a Measurement
Placement is arithmetic, and the arithmetic is short. You need two numbers you already have: the depth of the shaping in centimetres, and your row gauge.
Take a shoulder slope of twelve centimetres. At a row gauge of twenty-four rows to ten centimetres, a common sport-weight figure, twelve centimetres is a little over twenty-eight rows.
Round to something that divides easily. Twenty-eight rows works well because each turn, once you have worked back, adds two rows of height. That gives fourteen turns.
Now divide the stitches being shaped. A shoulder forty-five stitches wide divides into fifteen groups of three, and fifteen groups are separated by fourteen turns.
That is the whole calculation. Depth in rows, rows into pairs, stitches into groups. Every turning point then sits one group further from the edge than the last.
Even spacing is what makes the slope read as a line. Equal groups give a straight slope. Larger groups near the top give a curve that flattens as it approaches the seam.
When the division leaves a remainder, put the extra stitches in the first group, nearest the armhole. An odd stitch there is the least conspicuous place to hide it.
Two practical limits apply. Fewer than three turns reads as a step rather than a slope. More than eight is fussy for a shoulder, though a heel turn may want considerably more.
Write the numbers down before you knit. A row of pencil figures beside the pattern saves counting the same stitches four times.
A Worked Shoulder Slope
Here is that calculation carried through on the needles. The example is a back piece in sport-weight wool, worked bottom-up, with forty-five stitches on each shoulder.
- Work to the armhole edge and turn ready for a right-side row. Count the forty-five shoulder stitches and clip a marker at the neck edge.
- Work across the shoulder to three stitches before the armhole edge. Wrap and turn, or work whichever of the four methods you have chosen.
- Work back to the neck edge in pattern. The turn waits at the armhole side and is closed on the next outward pass.
- Work out again, close the turn as you reach it, and continue to six stitches before the armhole edge. Turn.
- Continue adding three stitches before each turn: nine, twelve, fifteen, and onward in steps of three to forty-two.
- At forty-two, turn and work back to the neck edge. Fourteen turns are complete and the slope is twenty-eight rows deep.
- Work one row across all forty-five stitches, closing the final turn as you go.
- Bind off the shoulder, or leave the stitches on a holder for a three-needle bind-off.
- Mirror the sequence on the opposite shoulder so both slopes fall away from the neck.
The steps look numerous written out. On the needles they are a rhythm of three stitches and a turn, repeated until the armhole edge has been reached.
A word on direction. Some patterns work the slope from the armhole inward instead, leaving stitches at the neck edge. Read the instructions before you begin, because the two versions do not interchange.
Bust Darts That Disappear
A bust dart is the same wedge worked horizontally, usually from the side seam toward the apex of the bust.
Begin the dart two to four centimetres below the apex. Higher than that and the point sits on the fullest part of the bust, where any unevenness shows most clearly.
Depth is the difference in rows between the side seam and the point. Two and a half centimetres is a light dart, five is substantial, and three is a good general figure.
At twenty-four rows to ten centimetres, three centimetres is about seven rows, so three or four turns. Deeper darts need five or six, spaced as evenly as the arithmetic allows.
The dart must stop short of the apex by roughly four centimetres. Fabric needs a flat plateau at the fullest point, and a wedge run all the way to the apex makes a point that blocking will not soften.
Work the second dart mirrored, meeting the apex line at the same height. If one sits higher than the other the whole front will hang crooked, and no amount of pressing will persuade it otherwise.
Stocking stitch suits a dart best. In ribbing or lace the turns are harder to hide, and a dart there is better worked at the very edge or left out altogether.
Remember that a short-row dart is a side dart. The vertical dart is a different animal, shaped with increases and decreases down the front, and it fits a different part of the body.
Closing the Turns
Every method leaves something to close. The wrap is lifted and knitted with its stitch. The double stitch is worked through both legs. The shadow stitch is knitted with its twin. The loop is lifted and worked together.
Direction matters more than most patterns admit. Match the lean of the closing decrease to the side the turn sits on, and follow the pattern when it specifies. When it does not, work the closure so it leans away from the shaping edge.
Tension is where dimples come from. A closing stitch pulled tight compresses the two rows beneath it and leaves a pucker that survives washing. Work it at the same tension as its neighbours.
If a gap survives blocking, duplicate stitch over it from the wrong side with the same yarn. One or two stitches is usually enough, and the repair disappears entirely after a wash.
Never darn a short-row gap closed with sewing thread. The knitted fabric needs to move with the body, and thread will not move with it.
Reading Short Rows in a Printed Pattern
Patterns describe turns in a shorthand that assumes you already know a method. "W&T" means wrap and turn, and a bare "turn" usually means the same thing.
"Short row four stitches before the last turn" tells you where, not how. The how lives in the abbreviations list or the notes at the front of the booklet.
"At the same time" is the phrase to watch. It means two shapings run concurrently, a neckline and a shoulder or an armhole and a dart, and both must be counted on the same row.
Row counts afterwards behave oddly. A short row adds height without adding a number to the pattern's row tally, so the apparent total will not match the measured length of the piece.
Measure rather than count when short rows are involved. A tape run down the side seam is more reliable than arithmetic on a pattern that has stopped being linear.
Mark the pattern as you go. A pencil tick beside each completed turn costs nothing and saves the last hour of a sleeve.
Troubleshooting
Most short-row faults are small, local, and correctable without ripping back a whole garment.
- Holes at the turn. The wrap or loop was missed, or the double stitch was knitted as a single leg. Rip back to the turn and close it deliberately.
- A ladder up the turn line. The turning stitches were worked too loosely, usually because the yarn was left slack after turning. Pull the first stitch firmly after every turn.
- A tight turn that puckers. The closing stitch was pulled hard. Ease it back with a needle tip, or rip back and close it at the same tension as its neighbours.
- An uneven slope. The groups were not evenly spaced, or a turn was counted twice. Check the group size at each turn rather than trusting memory.
- A dimple at the turn. Tension again, and the most common fault in a first garment. It rarely blocks out, so prevention beats correction.
- Losing your place. Clip a marker at every turning point as you work. The line of markers becomes a temporary chart.
None of these are serious. They are the ordinary corrections of a technique that keeps its working inside the fabric.
Conclusion
Short rows are one of the few techniques that change a garment's fit without changing its stitch count. That is why they survive in every tradition that knits to a body.
Learn the arithmetic once and it serves every garment after it. Depth in rows, rows into pairs, stitches into groups. Three lines of pencil work, and the slope is decided.
Start on a shoulder. It is the least visible place to make your first four turns, and the seam forgives a step that is not quite even.
Then work a neckline, where the turns are on show, and see whether your chosen method was the right one. That comparison teaches more than any chart.
The stocking knitter turning a heel in 1880 and the knitter sloping a shoulder today are doing the same thing with the same arithmetic. That continuity is worth a moment's thought.
Pick up the needles. The first turn feels strange, and the second feels ordinary, and by the fourteenth you will wonder why it ever seemed difficult.