Introduction
You have knit a scarf. You have knit a hat. You know how to cast on, knit, purl, and bind off, and you have probably already learned that a dropped stitch is not the end of the world.
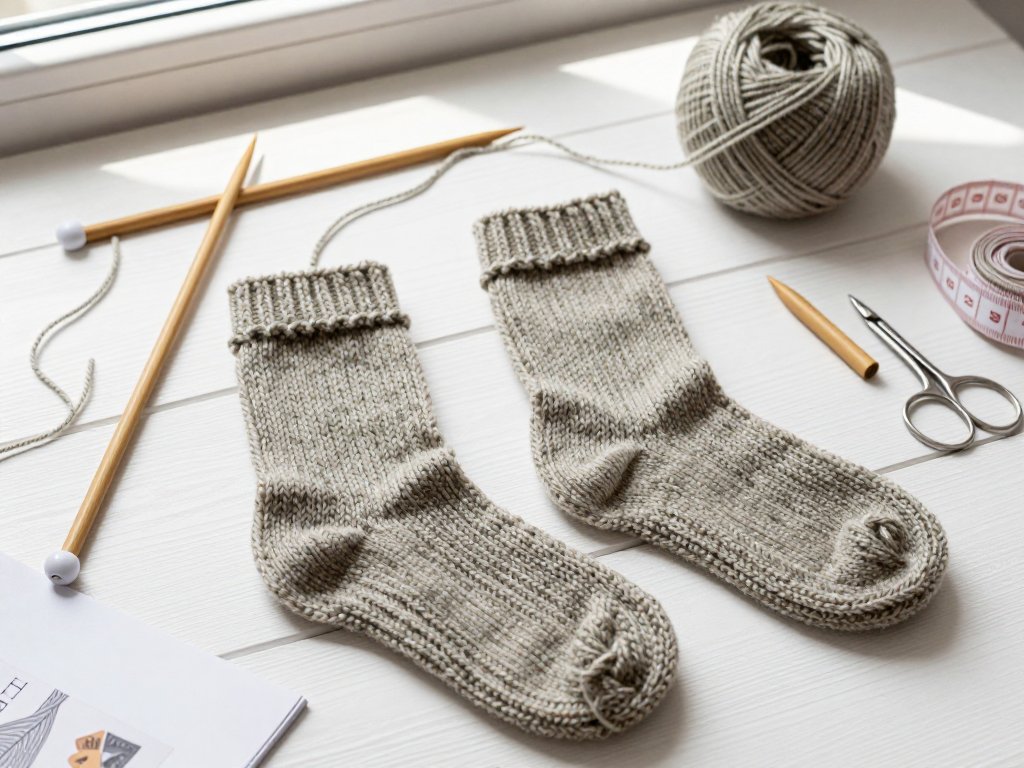
Socks are the natural next step, and they are smaller than you think. A sock is a tube with one bend in it, worked on a handful of stitches that fit in your palm.
That smallness is the whole pleasure of sock knitting. You can finish a heel before the pasta boils, or knit four rounds in the school pickup line and still see real progress.
Most knitters avoid socks for years because of the heel. They picture a puzzle they cannot solve. In truth, a heel is short rows and a few decreases, and thousands of people have learned it in one quiet afternoon.
In this guide we will walk through one sock together, in order, at a calm pace. By the end you will have a pair on your own needles and an honest sense of what your hands can do.
What Makes a Sock Different from a Scarf or Hat
You Knit in the Round
A scarf is knit flat, turned at the end of every row. A sock is knit in the round, so the right side always faces you and you never stop to turn.
That means no purling unless you want it, no seam to sew at the end, and a tube that grows smoothly under your fingers. Working in the round is the biggest change from your hat.
Negative Ease Does the Work
A sweater fits when it is a little bigger than you. A sock fits when it is a little smaller. That stretch is called negative ease, and it is why socks stay up instead of pooling in your shoes.
You will knit a sock narrower than your foot measurement on purpose, then trust the elasticity of the yarn to do the rest. Every number in a sock pattern assumes this.
Sock Yarn Contains Nylon for a Reason
Pure wool is soft and warm, and it wears through at the heel and ball of the foot within months. Sock yarn blends in about 20 to 25 percent nylon to carry that abuse.
You will see labels reading superwash merino and nylon. That blend is not marketing talk. It is the difference between socks you wear for years and socks you mend before spring.
Choosing Yarn for Your First Pair
Fingering Weight Is the Standard
Sock yarn is usually fingering weight, sometimes simply called sock weight: fine, smooth, and knit on small needles. It looks thin on the skein, and that is completely normal.
Thin yarn is what gives a sock its durability and its neat, close-fitting surface. If fingering feels intimidating, a DK weight sock yarn works up faster and hides uneven stitches.
Superwash Wool and Wool-Nylon Blends
Look for superwash merino blended with nylon. Superwash wool has been treated so it can survive the washing machine without felting, which matters for anything that lives in a laundry basket.
Hand-wash-only sock yarn exists and it is lovely. Save it for your third pair, once you know you enjoy the process.
How Much Yarn a Pair Takes
Most adult pairs take roughly 100 grams, which is one standard skein. Taller socks or men's sizes may need a little more, so buy two skeins from the same dye lot if you are unsure.
Leftover half-skeins become contrasting heels and toes, which is both practical and quietly charming.
Why Cotton Is Not a Kind First Choice
Cotton has almost no stretch. It will not hug your ankle, it sags at the heel after an hour of wear, and it makes your hands ache on small needles.
Wool or a wool-nylon blend is the forgiving teacher. Cotton is the strict examiner. Start with the teacher.
Once plain socks feel comfortable, color is the natural next adventure, and our guide to Fair Isle Knitting: Stranded Colorwork Basics walks through carrying two yarns without tangles.
Choosing Needles: DPNs, Magic Loop, and Nine-Inch Circulars
You need one thing from your needles: a way to knit a small tube. There are three good answers, and none of them is wrong. The difference is how often you move stitches around.
Double-Pointed Needles
Double-pointed needles, or DPNs, come in sets of four or five. You divide the sock stitches across them and knit around a square or triangle, so the tube forms right in your hands.
DPNs are what most sock knitters learn on, and they teach you how a round connects. The only cost is that you manage several needle tips at once.
The Magic Loop Method
Magic loop uses one long circular needle, usually 32 to 40 inches, with a loop of cable pulled out at each side of the sock. You knit half the stitches, slide, and knit the other half.
This method has no loose needle to drop between the couch cushions. If you already own a long circular needle, it is the cheapest way to begin.
Nine-Inch Circular Needles
A nine-inch circular is a tiny needle built exactly for socks. You simply knit round and round with no rearranging at all, which feels wonderfully simple at first.
The trade-off is that the short tips can cramp your hands, and the heel is easier to work if you slide those stitches onto a longer cable or a set of DPNs.
Which Is Friendliest for a First-Timer
For a very first sock, DPNs are the kindest choice. Yes, the work looks like a hedgehog at first. But the stitches stay divided into clear sections, and you can see where each part begins.
If you truly dislike them, magic loop is the close second. Try one round of each on scrap yarn before you commit.
Needle Size and Getting Gauge
Standard sock yarn knits at about eight to nine stitches per inch in stockinette. Most knitters reach that gauge on US size 1 or 2 needles, which is 2.25 to 2.75 millimeters.
Small needles are not a punishment; they are what makes the fabric dense enough to survive inside a shoe. Choose the size that gives you the gauge, not the size the label suggests.
Supplies to Gather Before You Cast On
You need less than you think. Set these out once, and your first sock becomes a matter of sitting down rather than hunting for tools.
- One skein of sock yarn, about 100 grams of superwash wool and nylon.
- A set of double-pointed needles in US size 1 or 2, or a long circular if you prefer magic loop.
- A blunt tapestry needle for grafting the toe and weaving in ends.
- Two stitch markers, one for the beginning of round and one spare.
- Small scissors or snips, kept close so you do not stand up mid-round.
- A notebook or a scrap of paper for counting rows and recording your gauge.
The Gauge Swatch, and Why Socks Need One More Than Anything
Gauge matters for every project, but for socks it decides whether the thing fits at all. A sock has no ease to hide in.
Here is the arithmetic that surprises everyone. If your pattern says eight stitches per inch and you knit seven, then 64 stitches make an eight-inch sock instead of the seven inches you intended.
Eight inches around will not stay on a seven-inch foot. It slides down inside your shoe all day, and no amount of blocking will fix it.
So knit a swatch. Cast on about 40 stitches, work four inches of stockinette in the round, and measure the middle without stretching the fabric.
Wash the swatch and let it dry flat, because superwash wool can shift slightly. Then change needle sizes until eight to nine stitches measure one inch.
The Order of Construction
A sock looks complicated from the outside. From the inside it is a sequence of small, honest steps. Here is the whole journey before we take it.
- Cast on 64 stitches using the long-tail cast-on.
- Join in the round without twisting the cast-on edge.
- Knit the cuff in knit 2, purl 2 ribbing for about six inches.
- Knit the leg in stocking stitch for roughly six to seven inches.
- Work the heel flap back and forth in rows on half the stitches.
- Turn the heel with short rows and paired decreases.
- Pick up stitches along both sides of the heel flap for the gusset.
- Decrease the gusset back down to 64 stitches.
- Knit the foot even until it is about two inches short of your toe.
- Shape the toe with paired decreases, then graft it closed with Kitchener stitch.
Casting On, Joining, and the Cuff
The Long-Tail Cast-On
The long-tail cast-on gives a stretchy, tidy edge that survives being pulled over a heel twice a day. Leave a tail about four times the width of your sock, then cast on 64 stitches for an adult medium.
Sixty-four is a friendly number because it divides evenly into four sections of sixteen, which suits DPNs, magic loop, and knit 2, purl 2 ribbing alike.
Joining in the Round Without a Twist
Before you knit the first stitch, lay the cast-on edge flat and check that every bump faces the same direction. A twisted join cannot be repaired later, only unraveled.
Place your marker, then knit the first stitch. Give the working yarn a gentle tug to close the small gap, and begin.
Knit 2, Purl 2 Ribbing
The cuff is worked in knit 2, purl 2 ribbing: two knit stitches, two purl stitches, repeated all the way around, because 64 divides cleanly by four.
Knit the cuff until it measures about six inches. This part is repetitive, and it is also the part that keeps your sock up on your leg.
Ribbing grips because the knit columns pull inward while the purl columns stand out, so the fabric wants to spring back to a smaller size. That elasticity is what holds the cuff against your calf.
The Leg, the Heel Flap, and the Heel Turn
Knitting the Leg in Stocking Stitch
Once the cuff is finished, stop ribbing and knit every stitch. This is stocking stitch, and it creates the smooth fabric that runs down the leg of the sock.
Work even until the leg measures six to seven inches from the cast-on edge, or about one inch shorter than the length you want. This is the last easy part.
Working the Heel Flap
Now the sock stops being a simple tube. You leave half the stitches, 32 of them, resting on spare needles or a cable, and work back and forth on the other 32.
The heel flap is knit flat in rows, usually as slip one, knit one on the right side and purl on the wrong side. That makes a denser fabric exactly where your shoe rubs hardest.
Knit the flap until it is roughly square, about two and a half inches for a medium adult sock.
The Heel Turn in Plain Language
The heel turn is where most beginners stop, and it is simpler than its reputation. You work short rows, stopping before the end of each row and turning early.
Each turn leaves a small gap. On the way back, you knit those two loops together, which closes the gap and pulls the fabric into a gentle curve.
That is all a heel turn is: knit a little, turn, close the gap, repeat, until you have a small cup of fabric shaped like the back of your heel.
The Short-Row Heel as an Alternative
Some patterns skip the heel flap entirely and use a short-row heel, shaping the whole heel with turns and wraps or German short rows. There is no gusset to pick up afterward.
The catch is that a short-row heel has less reinforcement under the foot, and wrapped stitches can look uneven on a first attempt. The flap and gusset is the sturdier path for a beginner.
The Gusset and the Foot
Picking Up Along the Heel Flap
With the heel turned, you go back to knitting in the round. Along each side edge of the heel flap sits a neat column of slipped stitches, and you pick up one stitch in each.
You will pick up about 16 stitches on each side, which brings your total to roughly 96 stitches. Do not worry that the number jumped. That is the plan.
Decreasing Back to 64 Stitches
Now you decrease at both sides of the instep on every other round until you are back to 64 stitches. This triangle of fabric is the gusset, wrapping the curve from heel to ankle.
Work the decreases slowly and count as you go. Rushing this section is what makes a sock look lumpy at the ankle.
Knitting the Foot Even
Once you are back to 64 stitches, knit every stitch, round after round, with no shaping at all. This is the calm middle of the sock, and it is where a pair actually gets finished.
Keep going until the foot measures about two inches short of your toe. Try it on if you can, or measure against a sock you already own and trust.
The Toe, Kitchener Stitch, and Finishing
Paired Toe Decreases
The toe begins with paired decreases: one decrease on each side of the top and bottom of the sock, then a plain round, repeated.
Some patterns work decrease rounds without plain rounds between them, which closes the tip faster. Continue until about 16 stitches remain.
Grafting with Kitchener Stitch
Kitchener stitch joins those remaining stitches with a seamless line, so the toe of the sock feels smooth against your foot instead of pressing on it.
Set the stitches on two needles, then work the four-step sequence with a tapestry needle: front, back, off, back. It feels fussy for the first few stitches, then your hands find the rhythm.
A Simpler Substitute: Three-Needle Bind-Off
If Kitchener stitch makes your eyes cross, use a three-needle bind-off instead. Hold the two sets of stitches together and knit them off as one, sealing the toe in minutes.
It leaves a small ridge, and every sock knitter owns at least one pair like that. A finished toe beats a perfect one still sitting in a project bag.
Weaving In Ends and Blocking
Weave the yarn tails into the inside of the sock, following the path of the stitches rather than cutting straight across. Work in both directions for a few inches so laundry day cannot loosen them.
Then block the sock: soak it in cool water with a little wool wash, press the water out in a towel, and lay it flat to dry in shape.
You block a sock to even out the stitches and settle the ribbing so the cuff remembers how to grip. Blocking also softens superwash wool and shows you the true fit.
Troubleshooting, Second Sock Syndrome, and Your Imperfect First Pair
Ladders at the Joins Between Needles
A ladder is a loose column of stitches where one needle meets the next. It happens when you let go of the working yarn between needles instead of pulling it snug.
Knit the first two stitches on each new needle a little firmly, or shift one stitch forward every round so the joins never line up. Most ladders wash out entirely.
Holes at the Gusset Corners
The corner where the heel flap meets the picked-up stitches often shows a small hole. It looks alarming in the moment and is nearly invisible after blocking.
To prevent it, pick up one extra stitch in that corner and knit it together with a neighboring stitch on the next round, closing the gap quietly.
Socks That Come Out Too Big or Too Small
If the finished sock is too large, check your gauge and drop one needle size next time. If it is too small, your gauge was tighter than the pattern expected.
This is exactly why a five-minute gauge swatch before a ten-hour sock is worth the trouble. Your first pair is a measurement, not a verdict.
Beating Second Sock Syndrome
Second sock syndrome is real: the first sock feels like a triumph, and the second one feels like homework. The cure is to knit both socks at once.
Work the cuffs of both socks, then both legs, then both heels. You never start again from nothing, and the pair finishes together.
Wear the Imperfect Pair
Your first sock will have a loose join, a slightly lumpy heel, or a toe graft that leans to one side. Wear it anyway. Each of those marks is evidence that you learned something.
Sock knitting rewards repetition far more than talent. By sock four you will not think about the heel at all.
Make a cup of tea, sit down, and cast on 64 stitches. Small yarn, small needles, one quiet hour at a time. Your feet are already looking forward to it.