Introduction
There is something magical about what you can create from a simple wooden craft stick.
I have a memory from when my youngest was four years old — we sat at the kitchen table on a rainy July afternoon, a pile of popsicle sticks between us, a bottle of school glue, and absolutely no plan.
By the end of the afternoon, we had built a wobbly little birdhouse that never actually housed a bird but sat on our windowsill for two years.
Every time I looked at it, I smiled.
That is the beauty of popsicle stick crafts. They cost nearly nothing. The supplies are simple. And the projects are forgiving enough that imperfect results still feel like victories, especially when little hands helped build them.
Whether you are looking for a quiet afternoon activity with your preschooler, a summer camp project for a group, or something creative to do after the kids are in bed, popsicle sticks are one of the most versatile craft materials you can keep in your cupboard.
A box of two hundred craft sticks costs about four dollars. Add some glue, paint, and a few basic supplies you probably already own, and you have everything you need for a summer full of making.
Here are seven projects that have become favorites in our house, organized from simplest to most involved. You can pick one and be crafting in under five minutes.
What to Keep on Hand
Before we get into the projects, here is a quick list of supplies that will let you make any of the crafts below without a special trip to the store:
- A box of standard-size craft sticks (about four dollars for two hundred)
- Jumbo craft sticks (about three dollars for fifty — great for structures)
- White school glue (PVA) and a hot glue gun for grown-up use
- Acrylic or tempera paint in a few colors
- Child-safe scissors
- A few extras you probably already have: yarn, markers, googly eyes, buttons, and an empty egg carton for holding paint
One note on glue: for young children, white school glue that dries clear is the safest choice.
For projects that need to hold weight or survive outdoor play, you will want to handle the hot glue yourself while your child arranges the sticks.
I keep both on hand and use whichever makes sense for the project and the age of the child helping.
1. Popsicle Stick Sun Suncatcher
This is the project I recommend for anyone crafting with a preschooler. It is simple, the result is genuinely pretty hanging in a window, and it teaches basic shape-building without frustration.
What you need: Six to eight craft sticks, yellow paint or markers, clear contact paper or white school glue, colorful tissue paper scraps, yarn or ribbon for hanging.
Start by painting the craft sticks yellow or a bright summer color. Let them dry — about fifteen minutes with acrylic paint, a bit longer with tempera.
Arrange the sticks in a sunburst pattern: lay them in a star shape with the ends touching in the center and fanning outward.
Glue the centers together where they meet. Once the glue is dry, cut a piece of contact paper slightly larger than the sun shape.
Have your child tear or cut small pieces of bright tissue paper — oranges, yellows, pinks — and stick them to the contact paper in the center of the sun.
Place another piece of contact paper on top to seal it, trim the excess, and glue the sunburst sticks around the edge.
Add a loop of yarn to the back and hang it in a sunny window.
The tissue paper catches the light beautifully, and the craft stick frame gives it structure. My kids have made these for grandparents, teachers, and the window of their own room, and every single one hangs somewhere proudly.
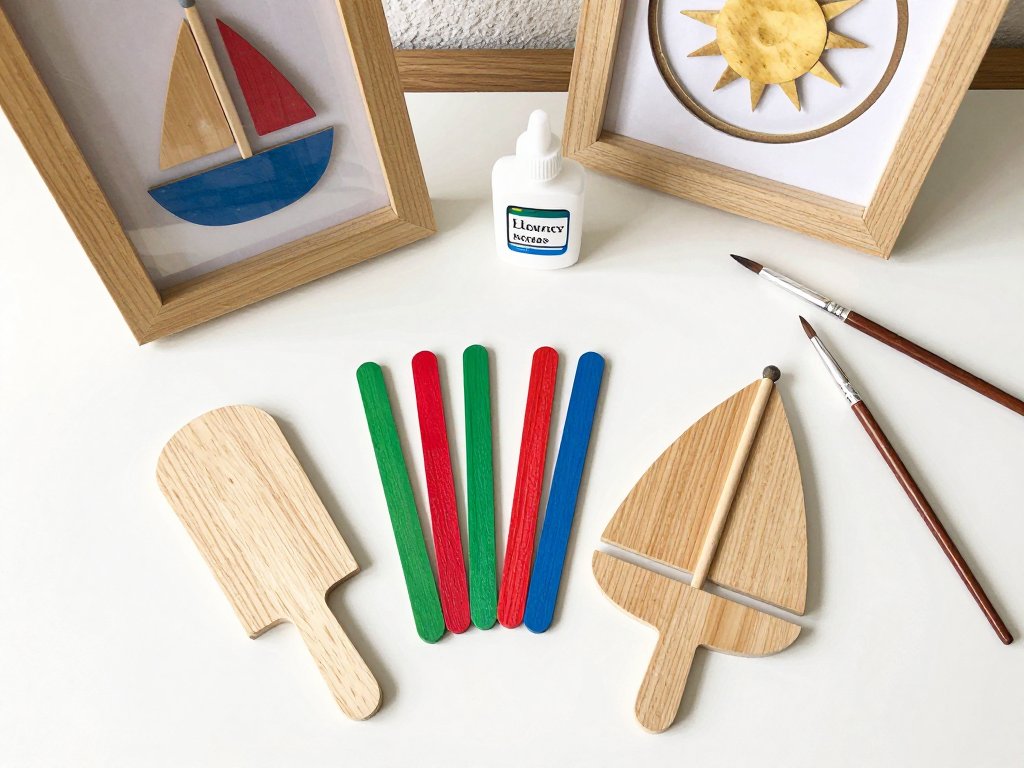
2. Mini Sailboat That Really Floats
On hot summer days, a craft that ends with water play is a guaranteed win. These mini sailboats take about twenty minutes to make and will keep little ones entertained for an afternoon.
What you need: Seven to nine craft sticks, a hot glue gun (adult step), a paper or fabric scrap for the sail, a straw or small dowel for the mast, and waterproof paint or markers if you want to decorate.
Glue six craft sticks side by side to form the hull — a flat raft shape.
Glue two more sticks across the back for stability, like crossbeams. While the hull dries, cut a triangle from an old fabric scrap or heavy paper for the sail.
Glue or tape the sail to a straw. Poke a small hole between two sticks in the center of the hull and insert the mast.
A dab of hot glue holds it in place. Paint or decorate the hull if you like, though they look charming in natural wood.
Test the boat in a kiddie pool, a bathtub, or a large plastic bin. It floats beautifully with the sail catching even a light breeze.
A few of these bobbing around in a pool on a summer afternoon is a simple pleasure that does not cost much and creates exactly the kind of childhood memory that sticks.
3. Woven Popsicle Stick Placemats
This project is wonderful for slightly older children — ages six and up — who have the patience for a weaving pattern. The result is a functional placemat that children can use at every meal with pride.
What you need: About twenty-five to thirty craft sticks per placemat (standard size), paint in two colors, school glue.
Paint half the sticks in one color and half in another. Let them dry completely.
Lay about twelve sticks vertically, side by side, with a small gap between each — about the width of another stick.
This is the warp. Weave the remaining sticks horizontally over and under the vertical sticks, alternating each row: over, under, over, under for the first row, then under, over, under, over for the next.
Push each woven row snug against the previous one. When the weaving is complete, glue the edges of the frame to keep everything in place.
Trim any overhang if needed.
The rhythm of weaving is calming, and children often fall into a quiet focus while they work. The finished placemats make thoughtful handmade gifts for grandparents or teachers, and they wipe clean with a damp cloth.
4. Popsicle Stick Photo Frame
A classic craft that never goes out of style. This one makes a wonderful gift for Father's Day, Grandparents Day, or just because.
What you need: Four craft sticks (or eight for a double-layer frame), paint or markers, school glue, a photo, magnets or a stand.
Create a square or rectangle with four craft sticks, gluing the corners together at right angles.
For a sturdier frame, glue a second layer of sticks on top, offset so the corners overlap.
Paint or decorate the frame with markers, stickers, or small embellishments. Glue the photo to the back of the frame, trimming it to fit behind the opening.
Add a magnet or a cardboard kickstand to the back for display.
Summer is full of photo-worthy moments — the beach trip, the first swim of the season, a picnic in the yard.
Let your child choose their favorite photo and frame it themselves. It becomes a treasured keepsay, and the pride in their eyes when they give it is worth every bit of glue on the kitchen table.
5. Popsicle Stick Birdhouse Ornament
Remember my wobbly birdhouse from the introduction? This version is more refined but keeps the same spirit. It makes a sweet garden ornament or hanging decoration for a porch.
What you need: About fifteen craft sticks, hot glue, paint, yarn or twine for hanging, a small piece of cardboard for the roof base.
Build the walls by stacking craft sticks horizontally, gluing each layer to the one below, with the ends staggered like bricks.
Build two matching wall panels, each about five sticks tall. Cut a small circle of cardboard for the base and glue the walls to it.
For the roof, glue sticks side by side on two pieces of cardboard cut at a slight angle, then glue the roof pieces together at the peak.
Add a loop of twine under the roof peak for hanging. Paint the whole thing in cheerful colors — a red roof, yellow walls, a tiny painted flower by the entrance hole.
This project takes a bit more patience but is very satisfying to complete.
6. Popsicle Stick Wind Chime
This project combines craft sticks with natural elements for a wind chime that sounds as good as it looks. It is also a wonderful way to use up those random sticks, beads, and buttons that accumulate in every craft bin.
What you need: Five to seven craft sticks, yarn or fishing line, beads with large holes, buttons, a small stick or dowel for the top crossbar, paint or markers.
Paint the craft sticks in alternating colors. While they dry, tie a length of yarn to the center of the crossbar.
Thread beads and buttons onto five to seven pieces of yarn or fishing line, each about twelve inches long.
Tie one painted craft stick to the end of each string. Tie the other ends of the strings to the crossbar at even intervals, spacing them so the sticks hang freely and can tap against each other in the breeze.
Hang the wind chime on a porch or in a garden where a light breeze can reach it.
The gentle clacking of wood on wood is a peaceful summer sound.
This is a project where imperfection adds charm — no two sticks need to hang at exactly the same height, and the beads can be arranged in any pattern your child likes.
7. Popsicle Stick Mosaic Coasters
For adults or older children who want a project with a more polished look, these mosaic coasters are practical, beautiful, and make excellent handmade gifts.
What you need: About fifteen to twenty craft sticks, paint in several colors (or wood stain for a natural look), a craft knife (adult step), school glue, cork or felt for backing, Mod Podge or clear sealant.
Paint or stain the craft sticks in your chosen colors. Let them dry completely. Use a craft knife to cut the sticks into small pieces — squares, triangles, rectangles — in a roughly consistent size.
Arrange the pieces on a flat surface in a geometric pattern. A simple alternating checkerboard or a radial sunburst pattern works well for a first attempt.
Once you are happy with the layout, glue each piece onto a square of cork or felt, leaving a thin gap between pieces.
When the glue is dry, apply a coat of Mod Podge or clear sealant over the entire surface.
This protects the coaster from moisture and gives it a smooth, finished feel.
Make a set of four and they will look right at home on a coffee table. They are also a satisfying project for a summer evening when the kids are in bed and you want to make something with your hands without a big commitment.
Tips for Crafting with Children of Different Ages
One of the best things about popsicle stick crafts is how easily they adapt to different skill levels. Here is how I adjust based on the child's age:
- Ages three to five: Focus on painting and gluing. Prepare the sticks in advance (cut, pre-drill if needed). Let them choose colors and arrange pieces. The suncatcher and sailboat projects are perfect for this age with adult help on the hot glue steps.
- Ages six to nine: Introduce weaving patterns and simple tool use. Child-safe scissors, water-based paints, and school glue are within their ability. The placemat and photo frame projects are ideal.
- Ages ten and up: They can handle most of the construction independently. Consider the birdhouse ornament or mosaic coasters. A hot glue gun with supervision is appropriate at this age.
- Crafting together: My favorite approach is to build side by side — you work on your own version of the same project while your child works on theirs. You model the techniques without directing every step, and they get the satisfaction of making their own creative decisions.
Making It a Summer Tradition
What started as a rainy afternoon distraction in our house has become a summer tradition.
Every July, I buy a fresh box of craft sticks and set up a small crafting corner on the kitchen table.
The projects change as the kids get older, but the habit of making something together remains.
Some projects turn out beautifully. Some are crooked and lopsided and wonderful anyway.
The sticks cost almost nothing. The mess cleans up with warm water and patience. And the feeling of sitting together, creating something from simple materials, is the kind of summer memory that lingers long after the glue has dried.
Start with the suncatcher or the sailboat — they are the quickest to finish and the most rewarding for little hands. If your family falls in love with popsicle stick crafting the way ours did, you will find yourself looking at that humble box of sticks and seeing possibilities everywhere.