Introduction
Polymer clay earrings have experienced a remarkable resurgence in recent years, appearing on runways, in boutique storefronts, and across social media feeds with increasing frequency. What was once a medium relegated to children's craft projects and simple bead-making has evolved into a sophisticated material for creating lightweight, durable, and infinitely customizable jewelry. The appeal of polymer clay lies in its remarkable versatility: it can mimic the appearance of natural stone, ceramic, terrazzo, wood, and even metal, yet it costs a fraction of the price of those materials and requires no kiln or specialized equipment to cure. A standard home oven, a modest set of tools, and a bit of patience are all that stand between you and a pair of earrings that look as though they came from a high-end artisan studio.
This guide is written for the absolute beginner, but it contains enough depth that even those who have dabbled in polymer clay before will find fresh techniques and refinements. We will move step by step through the entire process: selecting and understanding the different brands of polymer clay, conditioning the material until it is supple and workable, shaping and texturing the clay using a variety of methods, baking the finished pieces to permanent hardness, sanding and finishing for a professional surface, attaching earring hardware, and finally, troubleshooting the common pitfalls that plague newcomers. By the time you finish reading, you will have the knowledge to create three distinct earring styles — terrazzo, desert sunset, and marble — and the confidence to design your own original pieces.
Essential Materials and Tools
Before we discuss technique, we must first assemble the tools of the trade. One of the great attractions of polymer clay jewelry is how little equipment is required to begin. The list below covers everything you need for the projects in this guide. Most of these items are available at any well-stocked craft supply store or through online retailers, and none of them are expensive.
- Polymer Clay. The heart of the project. Polymer clay is a plastic-based modelling compound that remains soft and pliable until it is baked at a relatively low temperature, at which point it hardens permanently. It is available in dozens of colours and several distinct formulations from different manufacturers. We shall discuss the major brands and their characteristics in the next section. For the projects in this guide, you will need at least two or three contrasting colours plus a white or neutral base.
- Acrylic Roller or Pasta Machine. An acrylic roller — a smooth, transparent cylinder — is used to flatten clay into even sheets. While a simple rolling pin will work in a pinch, an acrylic roller is superior because it does not absorb oils or leave dust on the clay, and its smooth surface prevents sticking. A dedicated pasta machine dedicated to polymer clay work is a worthwhile investment if you plan to make more than a few pairs of earrings. It produces sheets of uniform thickness far more consistently than hand-rolling, and it speeds up the conditioning process considerably.
- Craft Blade. A sharp, pointed craft blade, such as a standard utility knife with a fresh blade, is essential for cutting clean shapes from sheets of clay. Blunt blades drag and distort the clay, so change your blade frequently. A tissue blade — an extremely thin, flexible blade used by florists and clay artists — is even better for clean cuts and for slicing polymer clay canes.
- Toothpicks and Needle Tools. Ordinary wooden toothpicks are invaluable tools in polymer clay work. They are used for making holes for earring posts, blending seams, adding texture, applying liquid clay, and picking up small pieces. A dedicated clay needle tool, which is essentially a metal rod with a pointed or ball-ended tip, offers more precision for detailed work such as scoring lines and creating decorative dots.
- Baking Sheet and Parchment Paper. A dedicated metal baking sheet that will not be used for food afterward is essential. Line it with parchment paper or a silicone baking mat to prevent the clay from contacting the metal surface directly, which can cause shiny spots. Never use a baking sheet that will later be used for food preparation, as polymer clay can leave microscopic residues that are not safe to ingest.
- Oven. A standard home oven is perfectly adequate for baking polymer clay. A convection oven is ideal because it maintains a more even temperature, but a conventional oven works equally well if you monitor the temperature carefully with an oven thermometer. Many home ovens run hotter than their dials indicate, and even a fifteen-degree Fahrenheit deviation can mean the difference between properly cured clay and burnt, brittle clay.
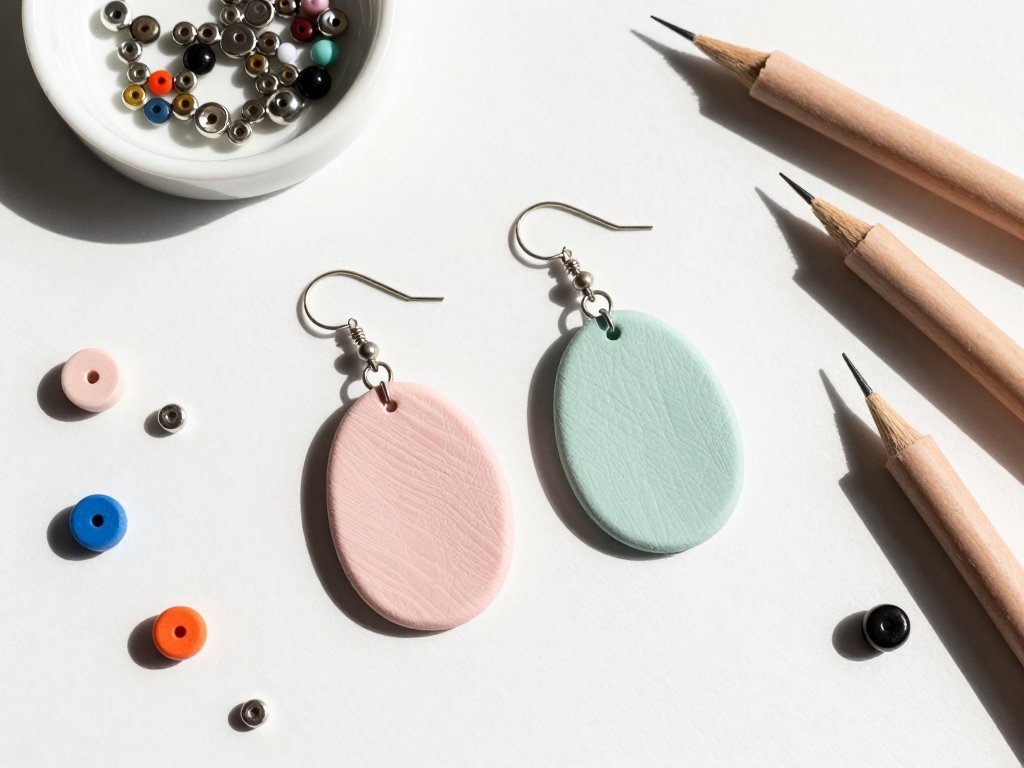
- Jump Rings and Earring Posts. Jump rings are small wire rings used to connect the clay component to the earring finding. Choose jump rings made from hypoallergenic metals such as surgical stainless steel, niobium, or gold-filled wire, especially if the earrings are intended for sensitive ears. Earring posts — the straight pins that pass through the earlobe and are secured with a friction back — come in a variety of styles, including flat pads for gluing and ball-end posts for inserting directly into clay. For the projects in this guide, flat-pad posts are the most straightforward choice.
- Pliers. At minimum, you will need two pairs of chain-nose or flat-nose pliers for opening and closing jump rings. A pair of round-nose pliers is useful for forming wire loops and creating simple wire-wrapped elements. A pair of flush-cut wire cutters is handy for trimming excess wire from earring posts.
- Glaze or Varnish. Polymer clay has a natural matte finish after sanding. A glaze enhances the colours, adds depth, and provides a protective coating that resists scratches and daily wear. There are specialised polymer clay glazes available from brands such as Sculpey and Fimo, as well as general-purpose water-based urethane varnishes. Avoid solvent-based glazes, as they can react chemically with polymer clay and remain tacky permanently.
Optional but recommended additions to your toolkit include a small acrylic block for pressing textures, a silicone-tipped clay shaper for smoothing seams without leaving fingerprints, a dedicated clay blade for cutting, a small roller for flattening small pieces, and a fine-mesh dust mask for sanding. We will discuss the sanding process and its safety considerations in a later section.
Understanding Polymer Clay Types and Brands
Not all polymer clays are created equal. Each major brand has its own formulation, and the differences in firmness, flexibility, colour range, and baking behaviour are significant enough that experienced clay artists develop strong preferences. For a beginner, the choice is largely a matter of which characteristics suit your working style and your project.
Sculpey. Sculpey is the most widely available polymer clay brand in North America. Its original formulation, Sculpey III, is very soft and easy to condition, making it an excellent choice for beginners. It requires minimal kneading before it becomes pliable, and it does not tire the hands. However, Sculpey III is also the most brittle of the major brands after baking. Thin or unsupported pieces are prone to breaking if flexed. For earrings, which are relatively small and are not subjected to heavy stress, Sculpey III is a perfectly viable choice, provided the pieces are of adequate thickness — at least three millimetres — and are treated with reasonable care. Premo, another Sculpey formulation, is firmer than Sculpey III, holds fine detail better, and is significantly stronger after baking. Premo is widely regarded as the best all-around polymer clay for jewellery making, balancing ease of use with durability. Souffle is Sculpey's lightweight, matte-finish clay that has a unique, slightly spongy feel; it is excellent for earrings because the finished pieces are exceptionally light on the ear.
Fimo. Fimo, manufactured by the German company Staedtler, is the other major player in the polymer clay market. Fimo Professional is the firmest of the standard clays, requiring significant conditioning effort, but it rewards that effort with exceptional strength after baking, excellent colour vibrancy, and the ability to hold the sharpest detail of any clay. It is the clay of choice for intricate cane work and miniature sculpture. Fimo Soft is, as the name suggests, noticeably softer than the Professional line and is easier to condition, though it is still firmer than Sculpey III. It offers a good middle ground for artists who want the quality of Fimo without the strenuous kneading. Fimo Effect clays include translucent, glitter, metallic, and glow-in-the-dark varieties that can add interesting dimensions to earring designs.
Cernit. Cernit, a Belgian brand, is distinguished by its natural, porcelain-like finish after baking. It contains a higher proportion of fine porcelain particles than other clays, which gives it a slightly translucent, creamy appearance that is highly prized for realistic doll-making and for jewellery that mimics ceramic. Cernit is firm but not as firm as Fimo Professional, and it conditions well. One of its most notable characteristics is that it becomes more translucent when baked at higher temperatures within the safe range (around 265 to 275 degrees Fahrenheit). This property can be used deliberately to create depth in translucent overlays. Cernit is an excellent choice when you want an organic, stone-like or ceramic feel to your earrings.
Kato Polyclay. Kato Polyclay, formulated by the American clay artist Donna Kato, is formulated for strength and a wide firing range. It bakes to a remarkably hard, durable finish that rivals some plastics in toughness, yet it retains a degree of flexibility that prevents brittleness. Kato is a firmer clay, comparable to Fimo Professional, and it requires thorough conditioning. However, its high strength makes it ideal for earrings that will be worn frequently and for thin, delicate shapes that might break in a softer clay. Its baking range extends from 265 to 325 degrees Fahrenheit, giving it the widest safe window of any polymer clay, which is forgiving for novice oven users.
For your first projects, I recommend starting with Premo or Fimo Soft. Both brands strike a good balance between ease of conditioning and final strength. Once you have developed a feel for the material and have completed a few pairs of earrings, you can experiment with the other brands to discover which suits your hands and your aesthetic.
The Critical Step: Conditioning Clay
Conditioning is the process of kneading and warming polymer clay until it becomes soft, pliable, and uniform in texture. This step is not optional. Unconditioned clay is stiff, crumbly, and difficult to shape. It will crack during forming, trap air bubbles that expand and ruin the surface during baking, and produce a weak, brittle final piece. Properly conditioned clay, by contrast, feels like soft taffy or firm putty. It bends without cracking, holds its shape without slumping, and bakes into a strong, smooth, uniform solid.
Begin by cutting the clay block into thin slices using your craft blade. Smaller pieces condition faster because the warmth of your hands penetrates more quickly. Roll each slice between your palms into a snake or sausage shape, then fold the snake in half, twist it, and roll it again. Repeat this folding, twisting, and rolling process. The warmth of your hands softens the clay, and the folding action distributes that warmth evenly throughout the mass. After three to five minutes of this process, the clay should feel noticeably softer and should bend smoothly without cracking at the fold. If it still cracks, continue conditioning.
For firm clays such as Fimo Professional and Kato, hand conditioning can be strenuous. A pasta machine is a tremendous help here. Feed the clay through the machine at the widest setting, fold the resulting sheet in half, and feed it through again. Repeat this process, gradually reducing the thickness setting as the clay softens. After a dozen or so passes, even the firmest clay will be perfectly conditioned. If you do not own a pasta machine, a small amount of liquid polymer clay softener, such as Sculpey Clay Softener or Fimo Mix Quick, can be kneaded into the clay to reduce conditioning time. Use softener sparingly — a single drop per ounce of clay is often enough. Too much softener can make the clay sticky and can weaken the final cured piece.
There is a common beginner mistake that must be addressed: over-conditioning. It is possible, particularly with soft clays such as Sculpey III, to condition the clay to the point where it becomes overly soft and sticky. When this happens, the clay is difficult to shape because it does not hold crisp edges, and it may trap air bubbles that produce surface blisters during baking. If your clay becomes too soft, let it rest on a cool, clean surface for ten to fifteen minutes, or place it between two sheets of parchment paper and refrigerate it for five minutes. The clay will firm up slightly without losing its workable quality. Alternatively, you can mix the over-soft clay with a small amount of fresh, unconditioned clay to bring it back to the ideal consistency.
Shaping Techniques: From Canes to Marbling
Once your clay is conditioned, the real creativity begins. Polymer clay offers an extraordinary range of shaping and patterning techniques, from simple to highly complex. In this section, we cover the four techniques most relevant to earring making: canes, stamps, texture, and marbling.
Canes. A cane is a log of clay that contains a pattern running through its entire length, like a stick of seaside rock candy. When the cane is sliced, each cross-section reveals the same pattern. Canes are the foundation of much polymer clay art and are the primary method for creating the terrazzo earrings in the project section below. To make a simple cane, roll two or three colours of conditioned clay into snakes of equal length. Arrange them side by side, then gently roll and compress them together into a single log, taking care not to distort the pattern. For a terrazzo effect, you create a base log of white or beige clay, embed small irregular pieces of contrasting coloured clay into the surface, and then roll the log to seal them in. When sliced, each cross-section reveals the confetti-like pattern characteristic of terrazzo. Canes can be reduced — made thinner while preserving the pattern — by gently stretching and rolling the log. The pattern shrinks proportionally, allowing you to create very fine detail. Reducing a cane requires patience and a light touch; stretching too quickly or unevenly distorts the pattern permanently.
Stamps and Moulds. Commercial rubber stamps, texture sheets, and silicone moulds can be used to impress patterns and shapes into polymer clay. Press the stamp firmly and evenly into a sheet of conditioned clay, then peel it away carefully. The clay will retain a sharp, detailed reverse impression. This method is excellent for creating earrings with repeating geometric patterns, floral motifs, or organic textures that would be tedious to carve by hand. Silicone moulds, available in an enormous variety of shapes — from simple geometric forms to elaborate filigree designs — allow you to create identical earring components with minimal effort. Press conditioned clay firmly into the mould, trim away the excess with a blade, flex the mould to release the clay shape, and you have a perfectly formed component ready for baking. If the clay sticks to a stamp or mould, dust the stamp lightly with a small amount of cornstarch or baby powder before pressing, then brush away the excess. This prevents sticking without affecting the final appearance.
Texture. Beyond stamps, nearly any object can be used to create texture in polymer clay. Lace, burlap, corrugated cardboard, crumpled aluminium foil, fine sandpaper, toothbrushes, and even the teeth of a comb all produce distinctive surface textures. Roll a sheet of conditioned clay, press the texturing object firmly into the surface, and lift it away to reveal the pattern. Texture adds visual interest to simple shapes and can transform a plain circle of clay into a piece that resembles carved stone, woven fibre, or hammered metal. For earrings, texture is particularly useful because it catches and reflects light from different angles, making the jewellery more dynamic when worn. Experiment with combining textures — a stamp combined with a hand-drawn line or a textured background with a smooth, polished focal point — to create pieces with depth and complexity.
Marbling. Marbling creates the swirling, vein-like patterns that mimic natural stone, and it is one of the simplest techniques to master. Start with two or three colours of conditioned clay. Roll each into a snake of equal length. Twist the snakes together, fold the resulting twist in half, and twist again. Roll the twisted bundle into a ball or a log, then cut it in half and examine the cross-section. You will see veins of each colour swirling through the other. The number of twists and folds determines the complexity of the pattern. Fewer folds produce broad, bold veins; more folds create fine, intricate marbling reminiscent of agate or malachite. Once you are satisfied with the pattern, roll the marbled clay into a sheet of even thickness and cut your earring shapes. Marbling is a forgiving technique — there is no wrong result, only different and equally beautiful patterns.
Baking Guide: Temperature, Time, and Test Pieces
Baking is the moment of truth in polymer clay work. Everything that came before — the conditioning, shaping, texturing — is preparation for the chemical transformation that occurs in the oven. Polymer clay does not dry like air-dry clay; it cures through a process of polymerisation, in which the plastic particles in the clay fuse together under heat. This process is irreversible, and it is what gives the finished piece its permanent hardness and durability.
Every brand of polymer clay specifies a baking temperature and time on its packaging. These instructions are the best starting point. In general, the standard baking temperature is 275 degrees Fahrenheit (135 degrees Celsius) for fifteen to thirty minutes per quarter-inch of thickness. Thicker pieces require longer baking times, but the temperature should not exceed the manufacturer's maximum, typically 275 degrees Fahrenheit for most clays. Kato Polyclay is an exception, with a range extending to 325 degrees Fahrenheit. Baking at too high a temperature causes the clay to darken, scorch, and eventually burn, producing a brittle, discoloured piece that may smoke and release unpleasant fumes. Baking at too low a temperature or for too short a time results in incomplete curing: the piece will be weak, flexible, and prone to breaking along stress lines.
The single most important piece of advice I can offer about baking is this: use an oven thermometer. Home ovens are notoriously inaccurate. A dial set to 275 degrees Fahrenheit may produce an internal temperature anywhere from 250 to 300 degrees, and that variance is enough to ruin a batch of earrings. Place an oven thermometer on the same rack where the clay will bake, allow the oven to preheat fully for at least fifteen minutes, and adjust the dial until the thermometer reads the correct temperature. This simple step will save you more frustration than any other technique in this guide.
Always bake your pieces on a parchment-lined baking sheet. The parchment prevents the clay from touching the metal, which can cause shiny spots and uneven curing. For earrings that need to lie flat — which most earring components do — place them on the parchment with the back side down. For three-dimensional shapes, support them on crumpled parchment or a small ball of aluminium foil to prevent sagging during baking. Do not bake polymer clay in a microwave oven, a toaster oven without reliable temperature control, or any appliance that cannot maintain a steady low temperature.
The Test Piece. Before you bake your finished earrings, bake a test piece. Take a small scrap of the same clay you used for the earrings, form it into a disc of similar thickness, and bake it according to the same schedule. After it cools, test its strength by bending it. It should be firm and should snap rather than bend. If it bends without breaking, it needs more time or a slightly higher temperature. If it has darkened significantly or feels brittle, the temperature was too high. Adjust your baking conditions accordingly before you commit your finished earrings to the oven. The test piece is your insurance policy, and it costs only a few minutes and a scrap of clay. Use it every time.
Sanding and Finishing for a Professional Surface
Fresh out of the oven, polymer clay has a matte, slightly velvety surface that is pleasant but not especially polished. More importantly, there may be small imperfections: fingerprints, minor scratches, slight unevenness at the edges, or a faint ridge where two pieces of clay were joined. Sanding and finishing transform the surface from handmade-rough to studio-polished.
Sanding is done with wet/dry sandpaper of progressively finer grits. Begin with a coarse grit, such as 320 or 400, to remove major imperfections. Sand under running water or in a bowl of water; wet sanding prevents the fine clay dust from becoming airborne and reduces the risk of inhaling particles. It also lubricates the paper, preventing clogging and producing a smoother finish. Work through the grits in order: 400, 600, 800, 1000, 1500, and finally 2000 or 2500 grit. Spend enough time at each grit to remove the scratches from the previous grit. A good rule of thumb is to sand until the surface looks uniform and matte, then move to the next grit. By the time you reach 2000 grit, the clay will have a smooth, satiny sheen that resembles polished plastic or stone.
After sanding, rinse the piece thoroughly to remove all clay dust and dry it with a lint-free cloth. The surface is now ready for glazing. Apply a thin, even coat of polymer clay glaze using a soft brush. A foam brush works well for even coverage. Allow the glaze to dry completely according to the manufacturer's instructions, then apply a second coat. Two thin coats produce a smoother, more durable finish than one thick coat, which can pool, bubble, or remain tacky. If you prefer a matte finish, look for a matte sealant specifically formulated for polymer clay. The same sanding process applies, but you stop before applying a gloss glaze. The sanded surface itself is beautiful in its own right, and many jewellery makers choose to leave their pieces unglazed for a natural, stone-like matte finish.
Safety note: Always sand wet and wear a dust mask if sanding dry. Polymer clay dust, like any fine particulate, should not be inhaled. Work over a bowl of water to catch the sediment, and dispose of the water by filtering it through a paper towel rather than pouring it down the drain, where the clay particles can accumulate and cause plumbing issues over time.
Adding Hardware: Jump Rings and Earring Posts
With the clay components baked, sanded, and finished, the final step is attaching the earring hardware. This step requires patience and a steady hand, but it is straightforward once you understand the basic mechanics.
If you are using flat-pad earring posts, apply a small amount of strong jewellery-grade epoxy or super glue to the pad and press it firmly onto the back of the clay component. Hold it in place for thirty to sixty seconds to allow the adhesive to set. A 24-hour cure time is recommended before the earrings are worn, as the bond continues to strengthen over the first day. Alternatively, you can drill a small hole into the baked clay using a hand drill or a rotary tool fitted with a tiny bit, then insert a ball-end post with a drop of glue for extra security. The drilled-hole method is more secure for heavier earrings because the glue bond is reinforced by the mechanical grip of the hole.
For jump rings, the technique is to pierce the clay component before baking. Use a toothpick or a needle tool to create a hole at the desired attachment point while the clay is still raw. The hole will shrink slightly during baking — typically by about ten percent — so make the hole slightly larger than you think you need. After baking, open a jump ring by grasping it on either side of the opening with two pairs of chain-nose pliers. Do not pull the jump ring open by spreading its ends sideways; this weakens the wire and distorts the ring shape. Instead, twist one side forward and the other side backward, so the ring opens like a tiny gate. Thread the open jump ring through the hole in the clay component and through the loop of the earring finding, then close the jump ring by reversing the twisting motion. The ring should close completely, with no gap visible, and the ends should meet flush. A properly closed jump ring is less likely to snag on hair or clothing and will not open accidentally during wear.
Test all connections by gently tugging on the finished earring before wearing it. If a jump ring opens or a post feels loose, reinforce it with a drop of glue or replace the jump ring with a slightly heavier gauge. It is far better to discover a weak connection in your workshop than to lose an earring on a crowded street.
Project Style One: Terrazzo Earrings
Terrazzo is a building material composed of chips of marble, quartz, or glass embedded in cement, then polished to a smooth, gleaming surface. The terrazzo look has become enormously popular in fashion and home decor, and polymer clay is the perfect medium for replicating it in miniature. These earrings are simple to make but produce a striking, contemporary result that looks far more complex than it is.
Begin with two colours of conditioned clay: a base colour, which will form the background, and one or two accent colours for the chips. White or a very pale grey makes a classic terrazzo base, while chips of deep navy, terracotta, sage green, or mustard yellow create the characteristic confetti effect. Roll the base colour into a log about half an inch in diameter. Take small pieces of the accent colours — each about the size of a grain of rice — and press them into the surface of the log, distributing them evenly around the circumference. Once the chips are embedded, gently roll the log on your work surface to seal them in. Do not roll too vigorously, or the chips will smear and the crisp edges that define terrazzo will be lost.
Slice the log into thin rounds about one-eighth of an inch thick. Each slice will reveal a unique arrangement of coloured chips against the base. Select the two most balanced slices for your earrings. Form each slice gently into a neat rounded or oval shape, using your fingers to smooth the edges. Alternatively, you can roll the log into a sheet and use a small round or oval cutter to punch out identical shapes. Bake, sand, and finish according to the instructions above. The finished earrings will have the clean, modern look of polished terrazzo flooring, with the advantage of being light enough to wear comfortably all day. The slightly irregular distribution of the chips is part of the charm; each pair of earrings is genuinely unique.
Project Style Two: Desert Sunset Earrings
Desert sunset earrings capture the warm, layered colours of a southwestern evening sky: pale yellow near the horizon, deepening through peach and coral to dusky magenta, and capped by the deep violet of the approaching night. This project teaches gradient blending, one of the most useful techniques in polymer clay jewellery making.
Select four or five colours of conditioned clay that form a natural gradient: pale yellow, peach, coral, magenta, and violet. Roll each colour into a thin sheet about one-sixteenth of an inch thick using a pasta machine or an acrylic roller. Cut each sheet into a rectangle of equal size, approximately two inches by three inches. Stack the rectangles in order, one on top of the other, creating a layered block. Once stacked, press the block together gently to eliminate air pockets between the layers, then roll the block through the pasta machine at the thickest setting. The colours will begin to blend at the interfaces. Fold the resulting sheet in half and roll it through again. Repeat the folding and rolling process three or four times, each time at the same thickness setting, until the colours blend smoothly into one another without distinct boundaries. The result is a gradient sheet that transitions seamlessly from one colour to the next.
Cut the gradient sheet into earring shapes. Teardrops, elongated ovals, or freeform organic shapes work beautifully with the sunset theme. If you wish, you can add a subtle texture to the surface by pressing a piece of crumpled aluminium foil or a fine-textured fabric into the clay before baking, which will give the finished earrings a softly mottled, cloud-like surface. Add holes for jump rings, bake, sand, and glaze. The finished earrings will catch the light differently across the gradient, creating a luminous, ethereal effect that truly evokes the changing colours of a desert sky at dusk.
Project Style Three: Marble Earrings
Marbled earrings are the most classic of the three projects and the one that most effectively demonstrates the magic of polymer clay. The technique is the same marbling method described earlier, but refined and directed toward producing a specific stone-like appearance. Marbled earrings in white and grey, or cream and gold, have the look of expensive natural marble at a fraction of the cost and weight.
Begin with a base colour of white, cream, or pale grey. The veining colours can be a darker grey, black, or — for a dramatic variation — gold or copper metallic clay. Condition both colours thoroughly. Roll the base colour into a ball and flatten it slightly. Roll the veining colour into a thin snake and press it into the surface of the base ball in a meandering pattern, as though drawing veins through the stone. Fold the ball in half, compressing the veins into the interior, and roll it gently into a new ball. This process distributes the veins through the body of the clay without fully blending them, preserving the sharp, distinct lines that characterise natural marble veining. The key to realistic marble is not to overwork the clay. Two or three folds and compressions are usually sufficient. More than five folds will produce a fully blended, uniform colour rather than a vein structure.
Roll the marbled clay into a sheet about one-eighth of an inch thick and cut your earring shapes. For a truly stone-like finish, sand the baked pieces through all the grits to 2000 grit but do not glaze them. The sanded matte finish closely resembles the honed surface of natural marble, and the subtle tactile quality of the polished clay is deeply satisfying. If you used metallic clay for the veining, the sanding will reveal bright veins of shimmering metal against the matte stone background, a combination that is elegant and surprisingly versatile, suitable for everything from casual wear to formal occasions.
Troubleshooting Common Problems
Even with careful attention to every step, problems can and do arise, particularly for beginners. Below are the most common issues encountered in polymer clay earring making, along with their causes and solutions.
Cracking. Cracks in the raw clay appear during shaping or, more distressingly, appear after baking. In raw clay, cracks are almost always a sign of inadequate conditioning. The clay was not soft and pliable enough to bend without separating. Return the clay to the conditioning step and knead it more thoroughly before attempting to reshape the piece. Cracks that appear after baking are usually caused by baking at too high a temperature or for too long, which makes the clay brittle. They can also result from embedding wire or other armature materials that expand at a different rate than the clay during heating. If you must use wire inside a clay piece, use thin wire and roughen its surface so the clay has something to grip, and ensure the wire is completely encased with no air gaps.
Burning or Darkening. If your clay pieces emerge from the oven darkened, brownish, or with a scorched odour, the temperature was too high or the baking time was too long. Check your oven with an independent thermometer; the dial reading is often inaccurate. Darkening can also occur if the clay is placed too close to the heating element, particularly in small toaster ovens. Move the piece to the centre of the oven, away from the elements. If the darkening is only on the bottom of the piece, the baking sheet may have been too hot; allow the sheet to cool slightly between batches, or place a second sheet of parchment under the piece for additional insulation.
Fingerprints. Fingerprints are the bane of every polymer clay beginner. The oils from your skin leave permanent impressions in the soft clay that remain visible after baking. The solution is threefold. First, wash your hands thoroughly before handling clay, and dry them completely. Second, work in a cool room if possible, as warm hands soften the clay's surface and make it more susceptible to impressions. Third, use tools instead of fingers wherever possible. Acrylic rollers, clay shapers, silicone-tipped tools, and the back of a spoon can all be used to smooth surfaces without leaving prints. If you do leave a fingerprint, do not try to smooth it by rubbing, which only compounds the problem. Instead, gently press a piece of clean, smooth plastic — a piece of acetate or a polymer clay work sheet — against the surface and peel it away. This will lift the fingerprint and leave a clean, smooth surface. Alternatively, lightly sand the baked piece with 400-grit sandpaper to remove the impression, then proceed through the sanding grits as usual.
Dust and Lint. Polymer clay is a magnet for dust, lint, pet hair, and every other tiny particle in your workspace. A single hair or fleck of dust embedded in the surface can ruin an otherwise perfect piece. Prevention is the best strategy. Work in a clean area, wipe your work surface with a lint-free cloth before starting, wear clean clothes that do not shed, and keep pets out of the workspace. Cover your clay pieces with a clean plastic container or a sheet of parchment paper when they are not being actively worked on. If a dust particle does become embedded in the clay, try to remove it with the tip of a clean toothpick. If it is pressed too deeply to extract, cut out the affected area and patch it with fresh clay, blending the seam with a silicone shaper. After baking, surface dust can usually be removed by sanding through the grits. For stubborn embedded particles, a light scraping with a craft blade before sanding may be necessary.
Bubbles and Blisters. Small bubbles that appear on the surface during baking are caused by air trapped inside the clay during conditioning or shaping. To prevent bubbles, condition clay slowly and fold it carefully to avoid folding air into the mass. When rolling sheets, start from the centre and roll outward, rather than compressing the entire sheet at once, which forces air into the centre. If a bubble appears during baking, it is too late to fix that piece. The best approach is prevention. If bubbles are a recurring problem, try conditioning your clay using a pasta machine rather than by hand; the machine's rollers are less likely to trap air than hand-folding.
Glaze Problems. A glaze that remains tacky after drying is almost always the result of using a solvent-based varnish on polymer clay. The solvent softens the clay surface, creating a permanent sticky layer. The solution is to use only water-based glazes and varnishes specifically formulated for polymer clay. If you have already applied a solvent-based glaze and the piece is tacky, you cannot fix it. Bake the piece again at a low temperature — around 200 degrees Fahrenheit — for ten minutes to try to drive off the solvent. If that does not work, the piece may need to be stripped by sanding off the glaze entirely and refinishing with the correct product. This is tedious, but it is the only reliable remedy. Prevention is straightforward: read the label of any glaze before purchasing, and buy only products that explicitly state they are safe for polymer clay.
Conclusion
Polymer clay earring making is a craft that rewards patience, attention to detail, and a willingness to experiment. The materials are inexpensive, the tools are simple, and the learning curve is gentle enough that a complete beginner can produce a wearable pair of earrings in a single afternoon. Yet the medium offers enough depth to occupy a lifelong learner. The techniques covered in this guide — conditioning, caning, stamping, texturing, marbling, baking, sanding, glazing, and hardware attachment — form the foundation upon which you can build an endless variety of designs.
The three project styles — terrazzo, desert sunset, and marble — are not merely patterns to copy. They are frameworks for understanding how colour, texture, and form interact in polymer clay. Once you have made each of them once, you will begin to see variations everywhere. The terrazzo technique can use any colour combination, the desert sunset gradient can be adapted to any palette, and the marble method can be applied to shapes far beyond simple discs and ovals. The creative possibilities are limited only by your imagination and your willingness to work through the occasional failed piece.
And there will be failed pieces. Every polymer clay artist, from the newest beginner to the most experienced professional, has a drawer of experiments gone wrong — pieces that cracked, burned, blistered, or simply did not look as good in reality as they did in the mind's eye. These failures are not wasted effort. Each one teaches something: about temperature, about conditioning, about how two colours behave when layered, about the precise moment when a piece has been marbled enough but not too much. The failed pieces are as much a part of the learning process as the successful ones, and they deserve to be kept, studied, and learned from.
So gather your clay, your roller, your blade, and your patience. Set up a clean workspace, preheat your oven with a thermometer beside the dial, and make something with your own hands. The earrings you produce may not be perfect on the first attempt, but they will be yours — unique, handmade, and imbued with the care and attention that only handcrafted objects carry. That is the true reward of this craft, and it is one that never diminishes, no matter how many pairs of earrings you make.