Introduction
There is a moment in every party-planning season when you look at the price of fresh flowers and quietly close the tab. A hundred dollars for centerpieces. Two hundred for an arch. It adds up fast, especially when you are also buying cake and favors.
Here is the good news: you do not need real flowers to get that lush, magazine-worthy backdrop.
Paper flowers give you the same drama for a fraction of the cost, plus a few advantages real flowers cannot match.
They do not wilt. They have no sell-by date. And you can make them in the evenings after the kids go to bed, one flower at a time.
I have made paper flower backdrops for first birthdays, baby showers, bridal showers, and more. Every time, guests asked the same question: "Did you really make those?" Yes — and you can too.
This guide covers everything, from the supply list to the last glue gun touch-up. Clear the kitchen table, and let's get started.
Why Paper Flowers Win on a Budget
Let's talk numbers first, because that is what convinced me.
A single giant paper flower costs about $0.50 to $1.50 in materials. A comparable arrangement of fresh florals runs $10 to $30 per stem, before labor. For a backdrop of twenty flowers, that is roughly $20 in paper versus several hundred in fresh blooms.
Paper flowers also give you time. Make them weeks ahead, and the week of the party is about the cake and the guest list — not a frantic run to the flower market.
And when the party is over? Real flowers go in the trash. Paper flowers go in a box, ready for the next celebration. My daughter's first-birthday peonies have now appeared at three family events.
What You'll Need: The Supply List
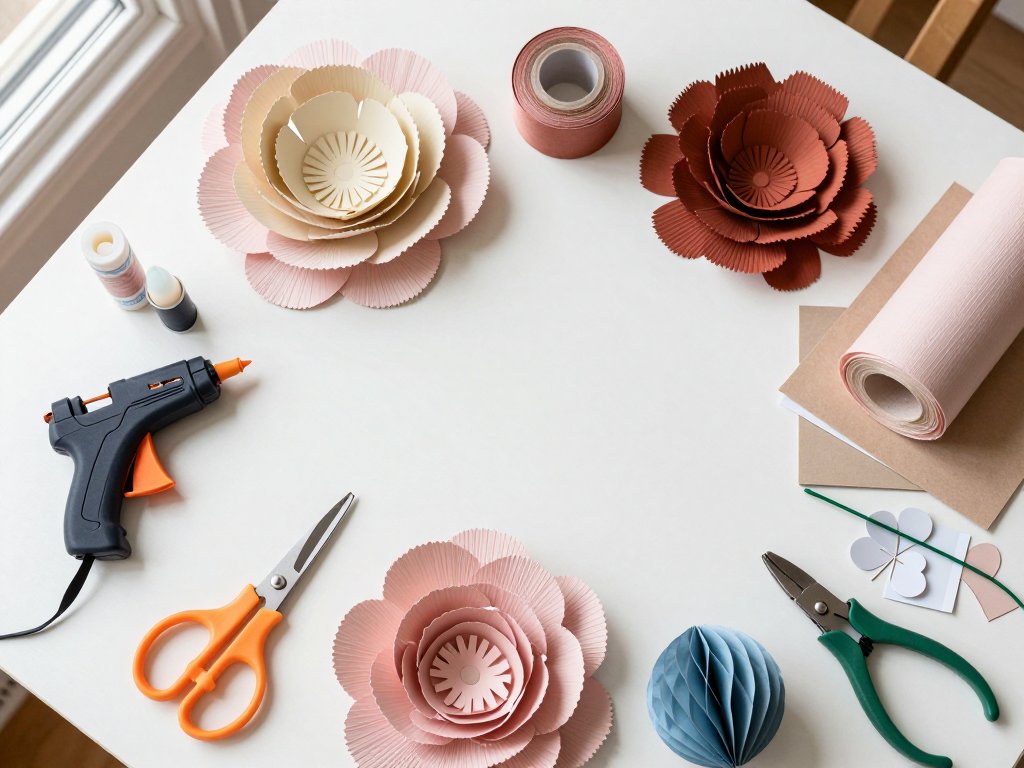
Here's exactly what you need. Most of it is at craft stores, and the whole list costs less than one bouquet from a florist.
- Crepe paper. Look for 180g crepe paper (Italian or heavyweight crepe). The heavier weight holds its shape and stretches beautifully when you ruffle edges. Use lighter crepe for fringe flowers.
- Cardstock. 65lb cardstock is the sweet spot for rosettes: sturdy enough to hold a big shape, but still cuts cleanly.
- Floral wire. A roll of 18-gauge wire for stems and structure, plus a pair of wire cutters.
- A hot glue gun and glue sticks. High-temp bonds hold large flowers best.
- Sharp scissors. A good pair for paper, a separate pair for wire. Dull scissors crush crepe instead of cutting it.
- Templates. Draw petal shapes freehand, or print free templates from craft blogs. Cardboard templates are worth making if you repeat a shape often.
- Cardboard. Save shipping boxes. You will use them for templates and for stiffening the back of your structure.
- Command hooks or removable adhesive strips, if you are hanging on a wall without a frame.
- Optional: a cutting machine (Cricut or Silhouette) for cutting petals in bulk.
One note: party-store crepe streamers are too thin for big flowers. They tear when stretched and flop under their own weight. Spend the extra couple of dollars on 180g crepe — it is the biggest difference between handmade-looking and professionally-made flowers.
Four Flower Shapes That Steal the Show
You only need four shapes to fill a backdrop, and you already know how to make three of them. Here is each one, with simple steps.
Giant Rosettes
Rosettes are the workhorse of the paper flower world. They are fast, forgiving, and look impressive from across the room — which is exactly what a backdrop needs.
You will need: 65lb cardstock in your chosen colors, scissors or a cutting machine, and a hot glue gun.
Steps:
- Cut cardstock strips 2 to 3 inches wide. The longer the strip, the bigger the rosette; a 24-inch strip makes a flower about 8 to 10 inches across.
- Fold the strip accordion-style, making each fold about 1 inch wide.
- Pinch the folded strip in the middle and glue the two ends together to form a fan shape.
- Open the fan into a circle and glue the open edges together at the center.
- Fluff the layers gently. For a fuller flower, stack two rosettes of different sizes.
Ten minutes, one flower. Make a dozen in an afternoon while you listen to a podcast.
Crepe Paper Peonies and Roses
These are the showstoppers — the big, lush flowers people photograph up close. Peonies are easier than they look, because the ruffled petals hide every imperfection.
You will need: 180g crepe paper, scissors, floral wire, and hot glue.
Steps:
- Cut petal shapes in three sizes — teardrops about 2, 3, and 4 inches long — and you will want 6 to 8 petals of each.
- Stretch the center of each petal gently with your thumbs. Crepe paper stretches, which is what gives petals their soft, cupped curve.
- Wrap the end of a piece of floral wire in a small strip of crepe paper to make the flower's center bud.
- Glue the smallest petals around the bud, overlapping them, then work outward with the medium and large petals, letting each layer peek out from under the last.
- Ruffle the outer edges by stretching them between your fingers for a wavy, realistic look.
Expect to spend 15 to 20 minutes on each peony. The first one will be slow. By the fifth, you will be making them without looking.
One tip: do not stress about perfect petals. Real peonies are messy. Yours should be too.
Fringe Flowers
Fringe flowers are the quickest shape on this list, and they fill gaps between bigger blooms beautifully. They look like cheerful little pom-poms.
You will need: crepe paper or tissue paper, scissors, and a pipe cleaner or floral wire.
Steps:
- Cut a rectangle of crepe paper about 6 inches wide and 12 inches long.
- Fold it in half lengthwise, then cut slits from the open edge almost to the folded edge, about a quarter-inch apart. This is the fringe.
- Unfold the paper and roll it tightly around a pipe cleaner or piece of floral wire, with the fringed edge facing up.
- Wrap the base with a small piece of tape or glue to hold it.
- Fluff the fringe with your fingers, and trim the top into a rounded dome if you like.
That is about five minutes per flower. Make ten of these while the oven preheats.
Honeycomb Balls
Technically these are store-bought, but they belong on this list because they add volume fast. Honeycomb paper balls come in every color, collapse flat for storage, and pop open into perfect spheres in seconds.
You will need: honeycomb balls in assorted sizes, plus a dab of hot glue or fishing line to attach them.
Steps:
- Pop each ball open by gently pulling the two cardboard caps apart.
- Attach the included hanger, or glue a loop of fishing line to the top cap.
- Hang them at varying heights in front of your flower arrangement, or glue them directly to your backdrop panel.
Mix them in, and no one will guess the spheres took thirty seconds each.
Building the Backdrop Structure
Before you make a single flower, decide what you are hanging them on. You have three good options, depending on your space and your walls.
PVC Pipe Frame
A PVC frame is the sturdiest option, and it stands on its own — perfect for photo corners or behind a dessert table.
Steps:
- Buy 1-inch PVC pipes and connectors. You will need enough for a rectangle about 6 feet wide and 7 feet tall, plus two legs for stability.
- Cut the pipes to size and assemble the rectangle with elbow and T connectors. You can build it the night before; no glue needed.
- Cover the frame with a white tablecloth or cheap fabric, securing it with zip ties or binder clips. This gives your flowers a clean background.
- Attach flowers with floral wire wrapped around the pipe, or hot glue them to cardboard strips that you wire to the frame.
Total cost for the frame: about $15 to $25. You can disassemble it and reuse it for every party.
Wire Grid Panel
Wire grid panels — the kind used for closet organization — make an instant backdrop that you can hang on a wall or stand on easels.
Steps:
- Get one or two grid panels, about 4 by 6 feet each.
- Zip-tie panels together for a wider backdrop.
- Cover with fabric or leave the grid showing — it is a handy attachment point.
- Thread floral wire through the grid squares to secure each flower.
This option is my favorite for renters, because nothing touches the wall and everything comes down clean.
Command Hooks on the Wall
If you want a flat arrangement directly on the wall, Command hooks are your friend. They hold surprising weight and remove without leaving marks.
Steps:
- Map your arrangement on the floor first, then mark hook positions on the wall with painter's tape.
- Attach hooks in a loose grid, about 12 inches apart, following the outline of your arrangement.
- Hang each flower from a loop of floral wire or fishing line tied around its stem.
- Fill in gaps with fringe flowers and honeycomb balls on shorter hangers.
Give the hooks a few hours to set before you hang anything heavy.
Arranging for Fullness and Balance
Here is the secret that separates a good backdrop from a great one: layers. You are not gluing flowers flat onto a wall. You are building a shallow landscape.
Start with your biggest flowers — the peonies and the large rosettes — and place them in a loose triangle or gentle curve, not a straight line. Straight lines read as clip art. Curves read as garden.
Then add medium flowers between them, tucking fringe flowers and honeycomb balls into the gaps. Every flower should overlap its neighbor just slightly; if you can see background between blooms, you need more fullness. Plan on 3 to 4 layers of depth, with smaller flowers in front of larger ones.
Step back every few flowers. Walk across the room and look. Your eyes will catch lopsided spots faster than your hands will.
And remember, the backdrop does not need to be a perfect circle or a perfect arch. Organic shapes look intentional. A slightly uneven edge is what makes it feel handmade and warm.
Color Palettes That Set the Mood
Choosing colors is half the fun, and it is the cheapest way to make the backdrop feel custom-made for the occasion.
For a baby shower: pastels — blush pink, soft butter yellow, mint, and cream. Mix white rosettes in for texture so it does not look like a candy shop.
For a boho wedding or bridal shower: neutrals — cream, terracotta, dusty sage, and warm sand. Add dried grasses or eucalyptus sprigs to ground the paper flowers.
For a first birthday or kids' party: bold and happy — coral, mustard, teal, and fuchsia. Bright colors photograph beautifully and hide any uneven petal work.
Whatever palette you choose, pick three colors plus a neutral. Three colors keeps the arrangement cohesive; a neutral (white, cream, or kraft) gives the eye a place to rest.
Time and Cost: What to Expect
Let's be realistic about the numbers.
Each giant rosette takes 10 to 15 minutes; each peony, 15 to 20 once you are in a rhythm; each fringe flower, about 5. Twenty flowers means two to three evenings of work — roughly five to six hours total, spread over a couple of weeks.
In materials, each giant flower costs $0.50 to $1.50, depending on size and paper. A full backdrop of twenty flowers, including the frame, typically lands between $35 and $60. Compare that to a florist's quote, and you will want to make two.
Budget Tips That Add Up
Here is how to keep the cost down without sacrificing the look.
- Shop the dollar store first. They carry crepe paper, tissue paper, glue sticks, and scissors for a fraction of craft-store prices — fine quality for fringe flowers and rosettes.
- Buy crepe paper in bulk online. A pack of assorted 180g crepe rolls is often cheaper per roll than buying singles at the craft store.
- Reuse cardboard. Every shipping box is a free template or backing panel. Cut rosette and petal templates from cereal boxes — they are sturdy and last.
- Buy neutral paper in bulk. White and cream are the colors you will use in every arrangement, so buy them in the biggest packs available.
- Skip the fancy tools. You do not need a cutting machine. Scissors and patience make the same flower.
- Watch for sales after big holidays. Craft stores clear out themed paper at steep discounts; pastel paper goes on sale right after Easter.
Storing and Reusing Your Backdrop
This is the part nobody tells you about — and the reason paper flowers are a smart investment.
Let each flower dry completely, then pack them in a large plastic bin, petals nested gently together with a sheet of tissue paper between layers. Crepe flowers flatten slightly in storage; fluff them by hand and they bounce right back.
Store the PVC frame disassembled, connectors in a zip-top bag taped to the pipes. Label the bin with the occasion and palette so you know what you are pulling out next time.
With gentle handling, these flowers will survive a dozen parties. Swap the colors for a different occasion, or keep the same palette and change the arrangement shape — a tall arch one year, a wide curve the next. Same flowers, brand-new look.
Common Beginner Mistakes (and How to Avoid Them)
I made every mistake on this list so you do not have to.
Petals falling off mid-party. This usually means the glue did not bond, or the flower was moved too soon. Use fresh glue sticks, press each petal firmly for a few seconds, and let the flower sit overnight before attaching it.
Spacing flowers too far apart. Your instinct will be to give each flower breathing room. Fight it — gaps read as not finished. Overlap petals slightly and fill every hole with a fringe flower or honeycomb ball.
Not enough fullness. One layer of flat flowers looks thin, no matter how pretty they are. Build 3 to 4 layers of depth, smaller blooms in front of larger ones. When in doubt, make six more flowers — you will use them.
Using party-store crepe streamers. They tear, they flop, and they frustrate you into quitting. Heavyweight 180g crepe is worth every extra dollar.
Waiting until the day before. Paper flowers take longer than you think, especially the first time. Start two weeks out, and you will enjoy the process instead of racing it.
A Final Word
Your backdrop does not need to be perfect. It needs to be yours.
The slightly uneven petals, the flower that leans a little to the left, the color you chose because it matched the birthday kid's favorite shirt — those are the details people remember. When someone asks where you had the flowers done, you get to smile and say, "I made them."
So pick a palette, clear the table, and make your first flower tonight. The party will be beautiful. And so will the memory of making it.