Introduction
Every December I make the same promise: this year the cards go out early, and they will look like they came from one person on purpose. Some years that worked.
The years it did not, I had made twenty cards one at a time, and by card eleven I was improvising.
The fix was not more talent or more time. It was a formula.
One layout, measured once and cut twenty times. One stamp, inked once per card and placed with a tool instead of by eye. One embellishment, flat enough to go through the mail without a trip to the post office.
What follows is the whole system: supplies, measurements, the two-evening schedule, and what to do when the ink smudges. It stays beginner-friendly on purpose, because a batch rewards simple choices.
Why a Batch Beats Twenty One-Offs
Making a single card is a series of small decisions. Which paper? Which stamp? Where does the greeting sit? Where does the snowflake go? Each choice takes seconds, but they stack up across a set, and the stack is what exhausts you.
A batch replaces decisions with stages. You decide once, write it down, and then your hands do the same motion twenty times. The twentieth card looks like the first, which is the entire point of a set.
The time difference is real. Twenty individual holiday cards, made one at a time with setup and cleanup between each, is a three-weekend project that never quite finishes. Twenty cards made in stages is one afternoon plus one evening.
There is a quieter benefit too. When the decisions are already made, card making becomes restful instead of demanding. You are not designing anymore. You are assembling, and assembly is the part most of us actually enjoy.
One rule holds the whole thing together: build flat. Anything that stands up off the paper has to survive a sorting machine, and most of it does not.
What You Need Before You Start
Buy for twenty cards, not for one. A batch is only efficient if you are not stopping halfway through to order more of something.
Card Bases and Envelopes
- 20 A2 card bases, pre-scored, in cream or white. A2 folds to 4.25 x 5.5 inches and fits a standard A2 envelope.
- 20 A2 envelopes, usually sold with the bases. Buy the plain ones; they take a stamp and a address label without fuss.
- Cardstock weight of 80 to 110 lb. Under 80 lb the base buckles when you glue a mat to it.
Paper and Cutting Tools
- Two or three sheets of patterned paper in your palette. Six sheets covers twenty cards with room for mistakes.
- Solid cardstock for mats, one pack in a single colour.
- A paper trimmer with a guillotine or swing arm and a visible measuring guide. This is the one tool worth spending on.
- A bone folder, for crisp folds and for burnishing glued panels flat.
- A small ruler and a pencil for marking the first cut only.
Stamps and Ink
- One main image stamp and one small greeting stamp. Two stamps total is the right number for a batch.
- One clear acrylic stamp block, or a stamp positioning platform if you already own one.
- Two dye ink pads, one dark and one metallic or accent.
- A scrap sheet of the same cardstock you are stamping on, for test impressions.
Adhesives and Embellishments
- A glue pen or a tape runner. The glue pen is better for small shapes, the runner for long straight edges.
- Foam adhesive dots, a small pack. You will use far fewer than you think.
- Flat embellishments: die-cuts, punched shapes, small sequins, thin twine, tiny brads.
- A piercing tool, for starting brad holes without crushing the paper.
- A soft cloth and a stamp scrubber or mild soap for cleaning between colours.
The Layering Formula
Three layers is enough. Base, mat, focal panel. More than three and the card starts to look busy and gains thickness you do not want in an envelope.
The Three Layers, Measured
- Base: 4.25 x 5.5 inches, folded. This is your A2 card and it does not change.
- Mat: 4 x 5.25 inches. That leaves a 1/8 inch border of base showing on all four sides.
- Focal panel: 3.5 x 4.75 inches. That leaves a 1/4 inch border of mat showing on all four sides.
Those three numbers are the whole formula. Write them on a sticky note and keep it on the table, because you will second-guess them around card eight.
Margins and the Rule of Thirds
Consistent margins are what make a set look bought rather than improvised. Pick one border width and never vary it within a batch. If the mat shows 1/4 inch on the left, it shows 1/4 inch everywhere.
Inside the focal panel, divide the space into thirds, horizontally and vertically. Put the main stamped image on the upper third line and the greeting on the lower third line. The middle stays open, and the open space is what makes the card feel calm.
Keeping the Border Consistent
Do not eyeball it. Lay the mat on the base and push it against two edges with your fingertip, then check the opposite two edges with the ruler the first three times. After that your eye is calibrated.
For the focal panel, cut a scrap of cardstock to 1/4 inch and use it as a spacer gauge. Slide it around the panel while the glue is still tacky. It is faster than measuring and it never drifts.
Cutting Twenty of Everything
Cut all the mats first, then all the focal panels. Batching by size, not by card, is what makes the trimming fast.
Working the Trimmer
- Set the guide once and lock it if your trimmer locks.
- Stack two or three sheets under the blade and cut through the stack in one pass. More than four sheets and the bottom one shifts.
- Cut the full sheet down in one direction, then rotate the whole stack and cut the other direction. Two passes per stack.
- Keep the offcuts in a shallow box. They become your test strips for stamping.
Change the blade before you start a batch, not during. A dull blade tears the paper fibres and every torn edge shows against a mat.
Squaring and Folding
Check one cut piece against a corner of your trimmer before you cut the next twenty. If it rocks, the guide moved, and you have just cut a stack that will sit crooked forever.
Fold each base with the bone folder: line up the corners, press the fold with your thumb, then run the bone folder along the crease with firm, even pressure. A fingernail fold looks fine and then cracks along the fold line two days later.
Burnish the fold from both sides. It takes four seconds per card and it is the difference between a card that lies flat in the envelope and one that springs open.
Stamping That Lands
Of all the card making techniques in a batch, stamping is the one that decides whether the set looks polished. It is also where a batch goes wrong, and almost always for one of four reasons: uneven ink, no test impression, no placement guide, or a slip.
Inking the Stamp Evenly
Tap, do not press and drag. Hold the stamp by the block and tap it against the ink pad in a small circular pattern, four or five taps, until the whole image looks uniformly wet. If any part looks dry, it will print pale.
Dye ink dries fast, which is why it suits batches. Pigment ink is slower and richer but needs heat setting or a long dry. For twenty cards, dye ink is the practical choice.
Stamp on Scrap First
Every single time, on the first card of a session and again after any change of ink or pressure. One test impression on the same cardstock tells you whether the image is crisp, whether the ink is even, and how hard to press.
Keep those test strips in the box with your offcuts. A strip with five practice impressions is also useful for checking a colour against your palette.
Using a Positioning Tool
If you have a stamp positioning platform, set the focal panel in the corner, position the stamp, close the lid to pick it up, and then stamp every panel in exactly that spot. Twenty identical impressions, no measuring.
Without a platform, make a paper template. Stamp once on a scrap panel, punch a hole where the image sits, and use the hole to align the rest. It is a small extra step that saves nine crooked cards.
Masking a Small Scene
Masking builds a tiny scene from two stamps. Stamp the first image. Stamp it again on a scrap of thin paper, cut it out, and lay the cutout over the wet image.
Now stamp the second image so it overlaps. The cutout blocks the ink and the second image appears to sit behind the first. Peel the mask off and you have depth from two flat stamps.
Wait until the first impression is fully dry before you mask it, or the paper mask will smear it. Two minutes with a heat tool or five minutes on the table.
Second-Generation Ink
Stamp once on scrap, then stamp again on the card without re-inking. The second impression is noticeably lighter and slightly softer.
Use that lighter tone for background elements and the full-strength ink for the focal image. One ink pad, two tones, and the card looks layered without a second purchase.
Cleaning Between Colours
Clean the stamp the moment you switch colours. Dye ink left on the rubber will tint the next colour, and a green-tinted gold is not what you planned.
Wipe with a damp cloth, then dry on a lint-free towel. Do not soak wooden-mounted stamps. If you are stamping two colours on the same batch, finish every card in colour one before you clean and switch.
When a Stamp Slips
It happens. Do not re-stamp on top of the smear; it will only look worse. Instead, decide fast between three fixes.
- Cover it: punch a small shape or place a die-cut over the slip, and treat it as part of the design.
- Trim it: if the slip is near an edge, re-cut the panel a little smaller and adjust the mat accordingly.
- Retire it: set that panel aside as a test panel and pull a fresh one. With twenty cut, you have spares.
Cut five extra focal panels than you need. That margin is the difference between a relaxed batch and a frantic one.
Embellishing That Survives the Mail
Embellishment is the part that makes a handmade card look handmade, and also the part that makes the postal service charge you extra. The rule is simple: keep it flat, and keep it light.
What Works
- Flat die-cuts, glued down completely, edges included.
- Punched shapes in a contrasting colour, layered in twos or threes.
- Thin twine, tied once and taped flat on the back of the panel, not looped on the front.
- Small sequins glued under a layer so only the top half shows.
- Small brads, pierced through the panel and flattened on the back.
What to Avoid
Avoid thick foam adhesive across the entire card. It adds height to every edge, and height at the edge is what the sorting machine catches.
Avoid heavy charms, metal tags, beads, and anything that dangles. Avoid wet white glue on thin paper, which warps the panel as it dries and leaves a visible buckle under the light.
Avoid glitter that is not sealed. Loose glitter sheds into the envelope, onto the address, and onto whoever opens it.
The Foam Dot Rule
One or two foam dots in the middle of a small embellishment gives it a soft shadow without raising the card edges. That is the whole trick: raise the centre, keep the border flat.
Anything raised more than about 1/8 inch, or covering more than a third of the card face, should go in a padded envelope instead of a standard one.
The Assembly Line: A Two-Evening Schedule
Stages, not cards. Finish a stage for all twenty before starting the next, and let things dry in between. This is where the batch actually pays you back.
Evening One: Cut and Stamp
- Fold and burnish all twenty bases. Ten minutes.
- Cut twenty mats and twenty-five focal panels. Fifteen minutes.
- Test-stamp on scrap, then stamp the focal image on all twenty-five panels. Twenty-five minutes.
- Stamp the greeting on all twenty-five. Ten minutes, with a break so the first ones dry before you stack them.
- Lay the panels out flat, single layer, and leave them overnight.
Evening Two: Layer, Glue, Embellish
- Glue mats to bases, using the spacer gauge. Twenty minutes.
- Glue focal panels to mats. Twenty minutes.
- Press the stack under a heavy book for fifteen minutes while you make tea.
- Add embellishments, two or three per card, in the same position on every one. Twenty-five minutes.
- Write, address, and seal. Thirty minutes.
That is roughly three hours of actual work across two evenings, with drying time built in rather than fought against. If you only have one evening, cut and stamp on a weeknight and assemble on a weekend morning.
Three Palettes, One Supply Drawer
Pick one palette per batch of holiday cards and stay inside it. Three sets that work every year, using supplies you likely already own:
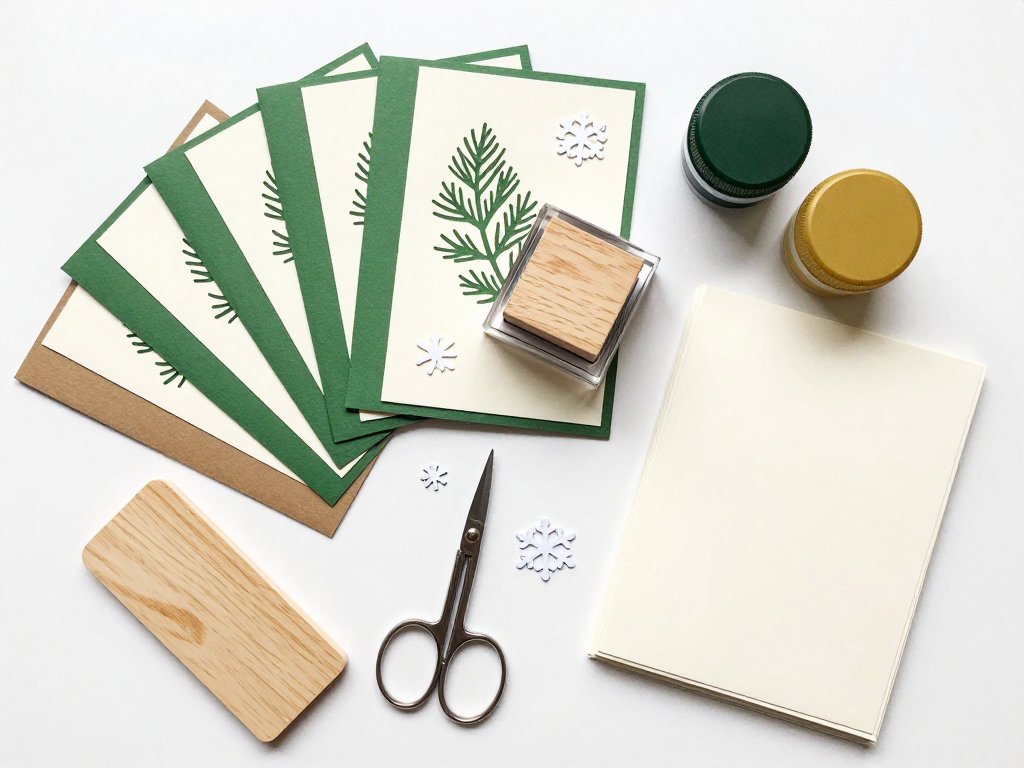
- Evergreen, cream, and kraft. Dark green ink, cream bases, kraft mats. Warm, traditional, and forgiving of slightly imperfect stamping.
- Cranberry and gold. Deep red mats, gold ink for the greeting, cream base. The most festive of the three and the one that photographs best.
- Ice blue and silver. Pale blue mats, silver ink, white base. Cool and quiet, and the best choice if your stamped image is a snowflake or a bare branch.
Swapping palettes does not require new supplies. Keep the same layout and the same two stamps; change only the mat cardstock and the ink pad. Two variables, twenty completely different cards.
If you want a second paper technique once flat layering feels automatic, try iris folding cards on the same bases.
Envelopes, Addressing and Mailing
Write Before You Seal
Write the message and address the envelope before the card goes inside. Once it is sealed, a missed line means cutting the envelope open, and an A2 envelope does not survive that gracefully.
Write on a flat surface with the card outside the envelope. A ballpoint pressed through paper on top of a card leaves an embossed ghost of your handwriting on the front.
Keeping Cards Flat
Stack finished cards under a heavy book for an hour before they go in envelopes. Cards that went into the envelope slightly curved will arrive slightly curved, and the recipient will notice at the fold.
Check each card against the envelope edge before sealing. If the card bows outward, it is still damp somewhere, usually under the mat.
When a Card Needs Extra Postage
- It weighs more than one ounce. Weigh the first finished card on a kitchen scale.
- It is thicker than a quarter inch at any point.
- It is rigid and does not bend slightly in the middle.
- It has a lumpy embellishment that will not pass the postal template.
Take one finished card to the counter and have it weighed before you mail twenty. It takes two minutes and prevents twenty returned envelopes.
Packing a Set as a Gift
Stack six cards with six envelopes, tie a ribbon band around the middle, and tuck the whole bundle into a small kraft box. Add a slip of paper with the palette name written by hand.
Keep one card from every batch for yourself. In three years you will have a small record of what you made, and it costs you exactly one card.
Troubleshooting a Batch Mid-Flight
Something will go wrong around card twelve. These are the five problems that actually show up, and what to do.
Warped Panels From Wet Glue
Wet glue shrinks as it dries and pulls the paper with it. Switch to a tape runner or a dry glue pen for large areas, and press the panel under a book for fifteen minutes.
If a panel is already buckled, place it face down on a clean surface, mist the back very lightly, and press it flat overnight. It will not be perfect, but it will lie down.
Smudged Ink
Dye ink smudges when it is touched before it dries. Give each impression two full minutes before stacking, or hit it briefly with a heat tool on the low setting.
If the smudge is small and at an edge, a white eraser used gently can lift most of it without damaging the cardstock. Test on a scrap first.
Crooked Layers
Crooked layers almost always mean the mat moved while the glue was grabbing. Lay the mat down, align two edges, and hold for five seconds before letting go.
If a mat is already set crooked, do not try to slide it. Slide a palette knife under one corner, lift slowly, and re-place it. Ruining one panel is better than accepting a crooked card in a set of twenty.
Dark or Patchy Impressions
A patchy impression means uneven pressure or too little ink. Rock the stamp gently from corner to corner rather than pressing straight down in the middle.
An impression that is too dark usually means the stamp was pressed into the pad instead of tapped. Tap lighter, and use the second-generation technique for a softer tone.
Running Out Mid-Batch
If you run out of mats, cut the remaining ones from the inside of an envelope flap or from the back of a failed panel. Nobody sees the mat's reverse side.
If you run out of foam dots, use a small piece of scrap cardstock under the centre of the embellishment instead. Same shadow, no shopping trip.
Finishing the Stack
Twenty cards, one formula, two evenings. The set matches because you decided once, and it mails flat because you kept the height in the middle instead of the edges.
Start with a batch of ten if twenty feels like a lot. The formula scales down exactly, and ten matching cards is already more than most people send.
Next year, change one thing: a new ink colour, a different greeting stamp, a different mat tone. The measurements stay. That is the quiet pleasure of a good formula — it lets you be creative in one place and reliable everywhere else.