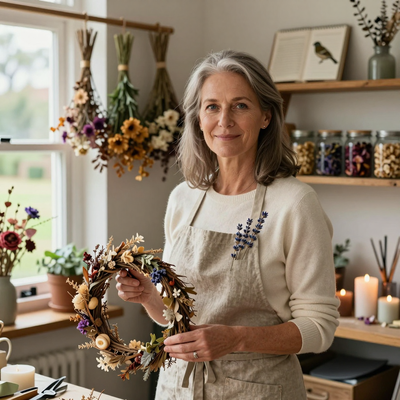
Introduction
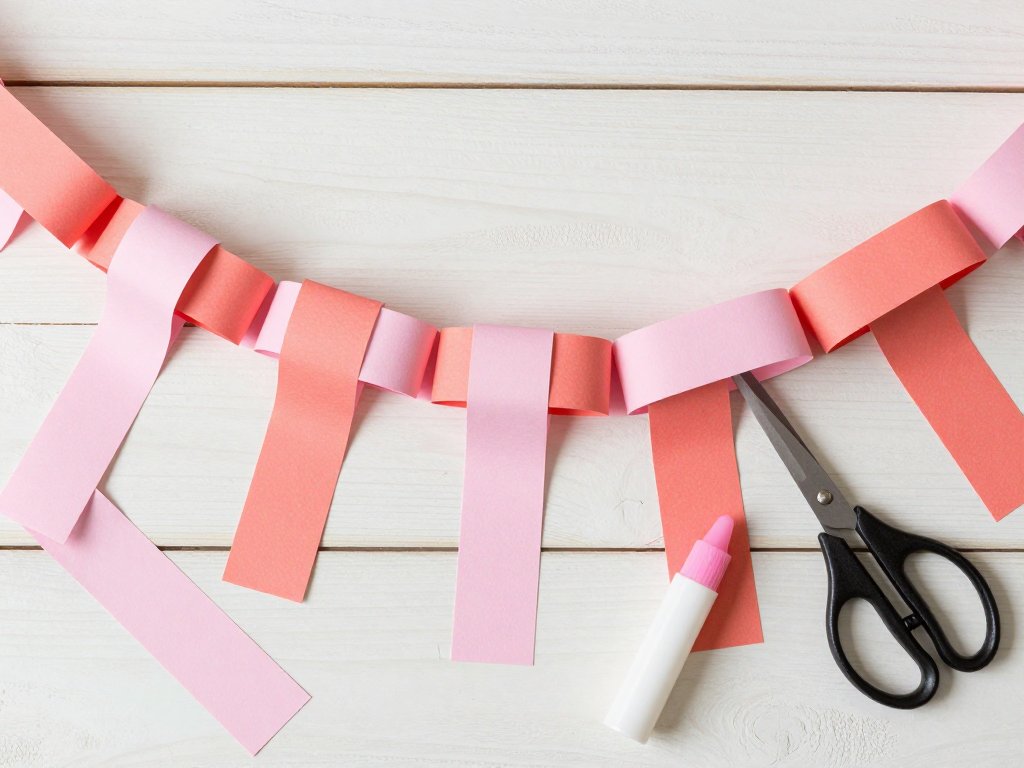
There is something quietly satisfying about cutting strips of paper, forming them into rings, and linking them together until a chain begins to take shape.
The motion is repetitive but meditative. The materials are modest — paper, scissors, a bit of glue.
And yet the result is a decoration that has brought joy to homes for generations.
The paper chain garland holds a special place in the history of home crafting. It first appeared in Victorian-era parlors, where families would spend winter evenings cutting and pasting paper strips into long, decorative chains to drape across mantels and doorways.
In the 1970s, it became a staple of elementary school classrooms — a first crafting project for millions of children.
Today, the paper chain is experiencing a remarkable renaissance, appearing in stylish modern homes, trendy weddings, and sophisticated party décor.
It has shed its reputation as a purely children's craft and emerged as a versatile, design-forward decorating tool.
In this article, I will walk you through the simple techniques you need to create beautiful paper chain garlands for any occasion, share creative variations that elevate the basic method, and show you how to use this humble craft to add warmth and personality to your home.
A Brief History of the Paper Chain
Paper chains as decorative objects have a longer history than many people realize. In mid-nineteenth-century Europe, the rising availability of affordable colored paper and the growing popularity of home-based holiday decorations created the perfect conditions for paper crafting to flourish.
Victorian families, particularly in England and Germany, would spend the Advent season creating elaborate paper decorations, including chains, stars, and intricate cutwork.
These handmade decorations were treasured precisely because they required time, patience, and skill — qualities that made them meaningful in an era when mass-produced decorations were still rare.
The tradition crossed the Atlantic with European immigrants and became firmly established in American holiday customs.
By the early twentieth century, paper chain garlands were a standard feature of Christmas celebrations in schools, churches, and homes across the country.
The Great Depression of the 1930s reinforced their popularity, as families sought inexpensive ways to decorate during lean times.
A single package of construction paper could yield dozens of feet of festive garland, making it one of the most budget-friendly decorating options available.
The post-war boom brought an explosion of colorful commercial decorations, and paper chains fell somewhat out of fashion in mainstream home décor.
They remained a staple of classroom crafting but were rarely seen outside elementary school windows.
That began to change in the 2010s, as the handmade movement, the rise of Pinterest, and a growing interest in sustainable, low-waste celebrations brought paper chains back into the spotlight.
Today, they appear in design magazines, on wedding blogs, and in the carefully styled homes of influencers who appreciate the nostalgic charm and eco-friendly nature of this simple craft.
Understanding this history reminds us that when we make paper chains, we are connecting to a tradition that spans nearly two centuries.
The same motions that Victorian mothers taught their children, that Depression-era families used to brighten their homes, and that kindergarten teachers passed on to generations of students — these are the motions we repeat each time we cut a strip and loop it into a ring.
What You Will Need
The beauty of paper chain garlands is that the supply list is almost laughably short. You likely have everything you need in your home right now.
Essential supplies: Colored paper in your chosen palette — construction paper, scrapbook paper, cardstock, or even pages from old magazines or books all work beautifully.
A pair of sharp scissors or a paper trimmer for straight, even strips. A glue stick, double-sided tape, or a stapler for joining the rings.
A ruler or cutting guide if you want uniform strip widths. That is truly all you need to begin.
Optional upgrades: Patterned scrapbook paper adds visual interest and allows you to create sophisticated designs without any extra effort.
Washi tape can be used to decorate plain paper strips before you form them into rings.
A paper cutter or rotary trimmer makes quick work of cutting large quantities of strips.
Decorative edge scissors create scalloped or zigzag ring edges for added texture. A hole punch and ribbon allow you to hang your chain with a polished finish.
Fabric or felt strips can be substituted for paper to create a more durable, textured garland.
Paper weight considerations: Standard 65-pound cardstock produces sturdy rings that hold their shape well. Lighter weight construction paper is easier to cut and glue but may not hold up as well for long-term display.
Very heavy cardstock or cardboard can be difficult to glue and may require stapling instead.
For most projects, a mix of weights and patterns creates the most interesting visual effect.
Basic Technique: Making a Classic Paper Chain
If you have never made a paper chain, or if it has been a few decades since you last tried, here is a quick refresher.
Cut your paper into strips about one inch wide and four to six inches long.
The width determines the thickness of the chain, while the length determines the diameter of each ring and the overall look of the finished garland.
A one-inch width with a five-inch length is a good starting point for a standard chain.
For a more delicate chain, try half-inch-wide strips cut to three inches. For a bold, statement-making chain, use two-inch strips cut to eight or ten inches.
Take one strip and form it into a ring, overlapping the ends by about half an inch.
Apply glue or tape to the overlap and hold it in place for a few seconds until it sets.
Thread the next strip through the first ring before forming it into a loop of its own, and continue in this manner until your chain reaches the desired length.
The interlocking rings create the classic linked pattern that has been used for generations.
The key to a professional-looking chain lies in consistency. Use a ruler or cutting guide to ensure all your strips are exactly the same width and length.
Irregular strips produce rings of different sizes, which creates a lopsided, uneven chain. If you are making a long garland, cut all your strips at once before you begin linking — this allows you to focus on the assembly without interruption and ensures a uniform result.
Elevating the Basic Chain: Design Variations
Once you have mastered the basic method, the possibilities for creative variation are nearly endless. Here are some of my favorite ways to transform a simple paper chain into a design statement.
The Gradient Chain
Choose a single color in five to seven shades, from lightest to darkest. Arrange your strips in gradient order as you assemble the chain, starting with the lightest shade and gradually transitioning to the darkest.
The result is a sophisticated ombre effect that looks elegant draped across a mantel, along a staircase railing, or over a nursery crib.
Soft pinks, muted blues, or warm earth tones all work beautifully for this approach.
The Patterned Chain
Instead of solid colors, use patterned scrapbook paper to create your rings. Mix two or three coordinating patterns — perhaps a small floral, a subtle stripe, and a geometric print — for a chain that has depth and visual interest.
This technique works especially well for themed parties and seasonal decorations. For a Christmas chain, combine plaid, holly print, and solid red papers.
For a baby shower, mix delicate florals with polka dots and pastel solids.
The Mixed-Media Chain
Incorporate materials beyond paper to add texture and variety. Intersperse fabric rings made from ribbon, lace, or cotton fabric scraps every few links.
Add felt rings in contrasting colors. Thread small wooden beads or paper flowers onto short lengths of string between paper rings.
The combination of textures creates a rich, tactile garland that catches the eye from across the room.
The Storybook Chain
Use pages from an old book or sheet music as your paper source. The aged, cream-colored paper printed with text or musical notation creates a romantic, vintage-inspired chain that pairs beautifully with neutral, rustic décor.
This variation is especially popular for weddings, anniversary parties, and literary-themed events. The text fragments visible on each ring invite closer inspection and create a sense of intimacy and history.
The Seasonal Chain
Adapt your paper choices to the season. For spring, use pastel papers in pink, lavender, mint, and butter yellow with floral pattern accents.
Summer chains call for bright, saturated colors — coral, turquoise, sunshine yellow, and lime green — perhaps with metallic gold rings interspersed.
Autumn chains shine with warm tones: deep orange, burgundy, mustard, and forest green, combined with rustic kraft paper rings.
Winter chains look beautiful in icy blues, silvers, and whites, with occasional glitter or metallic rings for sparkle.
The Minimalist Monochrome Chain
For a modern, design-forward look, use a single color throughout the entire chain, but vary the finish.
Combine matte paper rings with glossy, metallic, and textured rings in the same color family.
A monochrome white chain, for example, might include matte white cardstock, glossy white wrapping paper, textured linen-finish paper, and metallic silver rings.
The uniform color creates a cohesive look while the varied finishes add subtle depth that rewards close inspection.
Using Paper Chains in Your Home
A well-made paper chain garland is surprisingly versatile. Here are some of my favorite ways to use them in everyday home décor and for special occasions.
Mantel and shelf dressing. Drape a paper chain across a fireplace mantel, along a bookshelf, or over a window curtain rod.
The chain adds a festive touch without overwhelming the space and can be easily swapped out as seasons change.
For a mantel display, let the chain cascade down one side and pool slightly on the hearth for a relaxed, informal look.
Staircase garland. A long paper chain wound around a staircase banister creates a dramatic entrance that costs pennies to make.
For best effect, make the chain in two or three colors that coordinate with your existing décor and wrap it loosely, allowing some rings to hang lower than others for a cascading effect.
Party backdrop. String multiple paper chains vertically from a curtain rod or across a wall to create a colorful photo backdrop for birthday parties, bridal showers, or holiday gatherings. Hang them at staggered lengths for visual interest and mix in a few lengths of string lights for evening events.
Nursery or children's room decoration. A paper chain garland hung at the ceiling level around a nursery adds a soft, playful touch that can be customized to match any color scheme.
For a child's room, consider an interactive chain where each ring is a different color of the rainbow — a subtle way to reinforce color recognition.
Table centerpiece accent. Lay a short paper chain along the center of a dining table, weaving it between candles, flowers, and place settings. A monochrome chain in neutral tones adds texture without competing with the tableware, while a brightly colored chain creates a festive party atmosphere.
Wrapping and gift toppers. Attach a small section of paper chain to a gift box as an alternative to traditional ribbon.
The chain becomes part of the gift — a tiny decoration that the recipient can repurpose or add to their own holiday decorations.
This is a particularly thoughtful touch for handmade or homemade presents.
Paper Chains for Special Occasions
One of the most wonderful qualities of paper chain garlands is their adaptability to any celebration. The same basic technique yields decorations that are entirely appropriate for Christmas, birthdays, weddings, baby showers, Halloween, Easter, and everything in between. Only the colors and patterns change.
For Christmas, combine traditional red and green papers with metallic gold or silver accents. Add a few rings cut from wrapping paper with holiday motifs.
For a more modern look, use white, silver, and icy blue for a winter-wonderland theme, or go with rustic kraft paper and red plaid for a farmhouse-style Christmas.
For weddings, delicate paper chains in ivory, blush, and champagne create a romantic, budget-friendly alternative to expensive floral garlands.
Use them to decorate the ceremony arch, the reception tables, and the cake table. The bridal party can even make them together at a pre-wedding gathering — a bonding activity that produces beautiful, meaningful decorations.
For children's birthday parties, involve the birthday child in making the chain cutting, linking, and deciding on colors.
The chain becomes a countdown decoration leading up to the party day, with one ring removed each morning.
When the last ring is gone, it is party day — a simple, screen-free way to build anticipation.
For Halloween, use black and orange paper with occasional glow-in-the-dark rings. Hang chains from doorways and across windows to create a spooky but friendly atmosphere. For Easter, pastel chains with bunny and egg motif papers add a cheerful spring touch to any room.
Making Paper Chains with Children
Paper chain garlands are one of the few crafts that truly work for a wide range of ages.
Toddlers can help by holding strips while you apply glue. Preschoolers can manage the cutting and linking with some supervision.
School-age children can work independently, and teenagers can tackle more complex variations like the gradient chain or the mixed-media chain.
The craft naturally teaches several valuable skills. Measuring and cutting develops fine motor control and introduces basic geometry.
The repetitive linking motion builds hand strength and coordination. Following a pattern and making design choices encourages creative decision-making.
And the satisfaction of seeing a long chain take shape from individual rings is a powerful lesson in patience and persistence.
For a group activity, set up a paper chain station at a birthday party or family gathering.
Pre-cut strips in several colors and let guests add links as they arrive. By the end of the event, you have a collaborative decoration that everyone contributed to — and a wonderful conversation piece for future gatherings.
Caring for and Storing Paper Chains
Paper chains are surprisingly durable if handled with care. A well-made chain can be stored and reused for multiple seasons or occasions.
To store a chain, carefully coil it in a box or wrap it around a piece of cardboard tubing.
Avoid crushing or folding the rings, as creases are difficult to remove. Store in a cool, dry place away from direct sunlight, which can fade colored papers over time.
To clean a paper chain, gently dust it with a soft brush or use a hair dryer on the cool, low setting to blow away dust.
Do not use water or cleaning solutions, as most papers will stain or warp. If a ring becomes damaged, simply cut a new strip and replace the damaged link.
Because the chain is assembled from identical units, individual repairs are nearly invisible.
If you plan to reuse a chain for a different occasion, consider making it from neutral colors and adding seasonal accents with removable elements like washi tape, fabric flowers, or clip-on ornaments. This way, the base chain remains the same while the accents change with the season.
Conclusion
In a world of mass-produced decorations and disposable party supplies, the paper chain garland stands as a quiet testament to the value of making things by hand.
It asks for almost nothing — a few strips of paper, a bit of glue, a few minutes of your time — and gives back something that no store can provide: the satisfaction of creating beauty from simple materials, the connection to a craft tradition that spans generations, and the joy of seeing your work transform a space.
Whether you are making a single chain to brighten a bedroom, creating a dozen for a wedding celebration, or teaching a child to make their very first link, you are participating in a craft that has brought people together for nearly two hundred years.
That is a remarkable legacy for something so simple.
So pick up some paper and scissors. Cut a strip. Form a ring. Add another. Watch the chain grow. And remember that sometimes the simplest crafts are the ones that stay with us longest.
The paper is waiting. The scissors are ready. And there is no better time to start than today.