Introduction
I still remember the first print I ever pulled. I was seven, kneeling on my grandmother's kitchen floor with a fat green leaf, a sponge of poster paint, and a sheet of paper I was sure I'd ruin.
When I peeled that paper back and saw the leaf's veins, every single one, stamped there in emerald, I gasped out loud.
That same thrill comes back every time I use a gelli plate. Gel printing has a magic moment built into it: you roll, you lay, you press, and then you pull.
And what you pull is always a surprise — even when you try to copy a print exactly, the plate has other ideas.
Monoprinting is the most forgiving craft I know. There is no wrong side, no ruined page, no "mistake" that can't become the start of something lovely.
Every pull is one of a kind, which makes it perfect for beginners — and for busy moms who need a win in twenty minutes.
So pour yourself a cup of tea, send the kids outside or to the couch with a show, and meet me at the kitchen table. I'll show you how to make your first gel plate prints today — easily, messily, happily.
What Is a Gelli Plate?
A gelli plate — sometimes called a gel plate — is a soft, squishy slab that behaves like a gelatin printing surface.
Most are made from mineral oil and polymer, so they stay flexible for years. You don't need a printing press, special inks, or a studio.
Just the plate, some paint, and your own hands.
Here's the simple idea behind monoprinting: paint goes onto the plate, paper goes on top of the paint, and gentle pressure transfers the image. Because you paint the plate fresh each time, no two prints are ever the same. That's the whole trick — and the whole joy.
If you'd rather not buy a plate, you can make a homemade version with unflavored gelatin, water, and glycerin.
It works beautifully for beginners who want to test the waters first. Just know it lives in the fridge between sessions, while a store-bought gelli plate can live happily in a drawer.
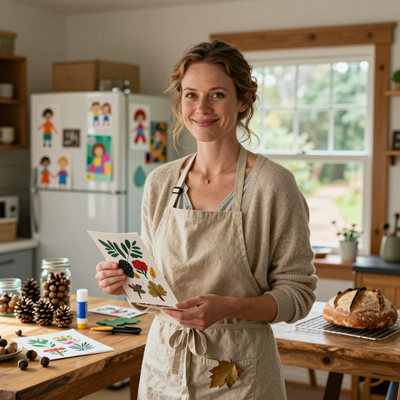
This is a craft for everyone, but I'll be honest about who I picture when I write: a mom with twenty free minutes and a toddler who just fell asleep.
This is for her. Easy to start, easy to clean up, and easy to love — gel printing fits into real life.
What You'll Need
The beauty of gel printing is that the supply list is short. Most of it is probably already in your house. Here's what to gather — no fancy art store haul required.
- A gelli plate (any size; a 6-by-6-inch or 8-by-10-inch plate is a lovely place to start)
- Acrylic paint in a few colors — craft-store basics work fine
- A brayer, which is a small rubber roller with a handle
- Paper: copy paper, card stock, or heavyweight art paper
- Stencils and masks (more on those in a bit)
- Found objects: leaves, bubble wrap, lace, cardboard, bottle caps
- Baby wipes and paper towels for cleanup — you will thank me
That's it. Everything else — an old shirt, a plastic tablecloth, a cup of water — you can improvise from the kitchen drawer.
One tip from a recovering hoarder of art supplies: start small. A little plate, three colors, one pack of paper. You can always add more later. Beginners who keep it simple actually make more prints — and more prints means more magic.
Setting Up a Printing Station
The kitchen table is the perfect studio. It's where the light is good, where the coffee lives, and where you can keep one eye on the kids while you roll paint. Cover the surface with newspaper or a vinyl tablecloth, and you're in business.
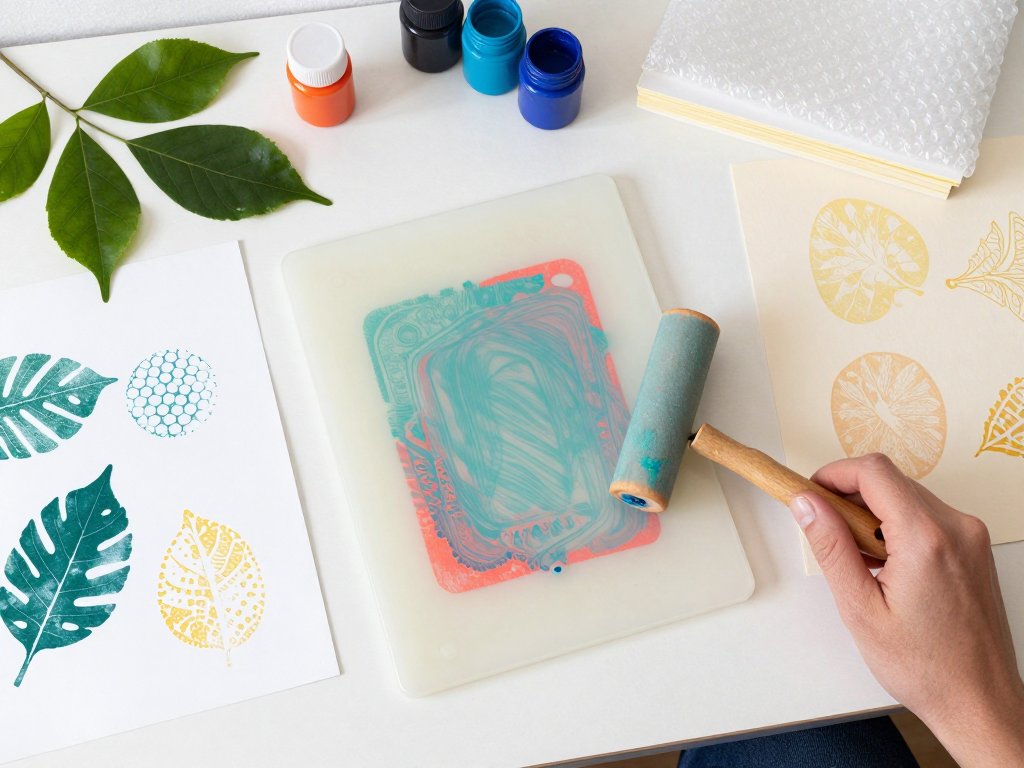
Keep your printing station simple: plate in the middle, paint bottles within reach on the left, brayer on the right, and a stack of paper in front of you. A dedicated tray or basket keeps everything together, so setup takes two minutes and cleanup takes five.
Wear an old shirt or apron. Pull long hair back. Open a window if the paint smell bothers you — most acrylics are gentle, but fresh air never hurt a crafter. And if you're printing with little ones, hand each child their own plate. Sharing is overrated in art.
Set up near a sink if you can, or keep a bowl of water and a roll of paper towels close by. Trust me: the less you have to walk, the more prints you'll pull. And the more prints you pull, the happier your afternoon.
The Basic Technique
Here's the how-to, step by step. Squeeze a small amount of acrylic paint onto the plate — about the size of a grape for a small plate, a walnut for a bigger one. Less paint is almost always better.
Roll the brayer over the paint, back and forth, until the plate is covered with a thin, even layer. You want to see the plate through the paint just a little — like jam spread thin on toast. If the paint sits in thick ridges, roll it more.
Lay a sheet of paper gently on top. Don't drop it — place it. Then press with the flat of your hand, a clean brayer, or the back of a spoon, working from the center outward. You'll feel the paper kiss the paint.
Now the best part: the pull. Hold one corner of the paper and peel it away slowly, like lifting a bandage. The moment the paper leaves the plate is pure magic — color that wasn't there a second ago, now yours to keep.
If some paint remains on the plate, lay another sheet of paper down and press again. That second, fainter print is called a ghost print, and it's often just as lovely as the first. Nothing is wasted in monoprinting.
Your first print may come out patchy. Your second will be better. By your fifth, you'll have found your rhythm — how much paint you like, how hard you press, when to pull. That's the beginner's journey, and it's a quick one.
Layering and Masking
One plate, one color is lovely. But layering is where gel printing turns into something you'll want to frame. The secret is patience: let each layer dry before the next.
Layering is also how you get those rich, painterly prints you see online. It's not talent — it's just one color patiently waiting for the next. You can do exactly the same at your kitchen table, beginning today.
First Layer, Then Dry
Print your first layer in a light color — pale yellow, soft pink, cream. Let it dry completely, which usually takes ten to fifteen minutes with a thin coat. A hairdryer on cool speeds things up nicely.
Add a Mask
A mask is anything that protects part of the plate from paint. Lay a leaf, lace, or a paper shape on the plate, roll your second color over everything, then remove it before printing. The covered shape stays clean, so it shows through as the first color.
Use a Stencil
A stencil works the opposite way: it sits on top of the plate, and you print through its openings. Roll color over the stencil, press your paper down, and pull. You'll get a crisp shape floating on top of your first layer — flowers, stars, letters, whatever you have.
Ghost Prints Between Layers
Between layers, pull a ghost print to catch leftover color. It's a free bonus print, and it keeps the plate clean for the next color. Some of my favorite pages ever were ghosts.
Found Objects and Stencils
This is the section where the craft drawer becomes an art supply store. Almost anything with texture can print: leaves, bubble wrap, lace, cardboard, corks, bottle caps, rubber bands, doilies. If it has a surface, it has a print in it.
Leaf printing was my grandmother's trick, and it's still my favorite. Press a fresh leaf, vein side down, onto the inked plate. Roll once more over the leaf so it picks up paint, then lay your paper and pull. The veins come out like tiny rivers.
For a leaf mask instead, lay the leaf on the plate and roll your color over the top of it. Pull the leaf away, then print. You'll get a ghostly leaf shape in the background color with paint all around it. Both ways are easy; both are beautiful.
Bubble wrap is the beginner's best friend. Roll paint over a sheet of it, press the painted side onto your plate — or straight onto paper — and pull.
That honeycomb of little circles looks like patterned paper from a fancy shop. Cardboard works too: roll paint on the wavy edge of a box for instant scallops.
Lace and doilies give the prettiest, most delicate prints — lovely for cards and journal pages. Corks make perfect little circles, and rubber bands stretched across the plate make stripes. Before you throw anything away, ask yourself: what would that print like?
Stencils take practice, and that's okay. The trick is a light touch: don't press the stencil into the paint, just lay it flat. Wipe it between prints with a baby wipe, and your shapes will stay crisp instead of muddy.
Keep a "texture box" going — a shoebox where interesting junk lives. Every time something prints beautifully, it earns a spot. Before long you'll have a whole library of textures, and your monoprinting will never run out of ideas.
Monoprinting on Fabric
Ready for a bonus? Gel printing works on fabric too, which means tote bags, tea towels, pillowcases, and kids' t-shirts. It's the same easy process, with two small swaps: fabric paint instead of acrylic, and a little more patience while it dries.
Wash and dry your fabric first, and iron out the wrinkles. Then tape it flat on your work surface so it doesn't shift. Roll your fabric paint onto the plate just as you would with paper — thin and even — lay the fabric on top, and press.
Fabric is thirstier than paper, so press a little firmer and a little longer. You may need a second coat once it's dry. Beginners often panic here — don't. Uneven coverage on fabric looks handmade and charming, not wrong.
Once the paint is fully dry, set it with an iron. Follow your paint bottle's instructions — usually a few minutes with a hot, dry iron over a pressing cloth. Then your tote or towel can go through the wash like normal. That's the whole secret.
A plain canvas tote is a wonderful first project: a single leaf print in the corner, or a strip of bubble wrap across the middle. You'll have a gift bag, a market bag, and a little piece of your afternoon — all in one.
Tea towels make lovely handmade gifts, and matching sets — three towels, one simple design — feel like something from a fancy shop. Just remember to write the care instructions on a tag so your gift survives its first wash.
Troubleshooting
Every beginner hits a few snags, and every snag has a fix. Here are the ones I see most, with the simplest solutions. If your print looks "wrong," congratulations — you're officially learning monoprinting.
Paint Too Thick
Thick paint makes blobby, gloppy prints that hide detail. Fix: roll longer and harder, and use less paint. If your brayer squeaks, you're doing it right — that's the sound of the paint spreading thin.
Paint Too Thin
If the paint is watery or you can see every roller line, add a tiny squirt of fresh paint and roll again. Some acrylics are runny straight from the bottle; a minute of rolling usually thickens them up.
The Plate Feels Sticky
A gelli plate gets tacky when paint dries on it or dust settles in. Wipe it gently with a baby wipe and let it rest a moment. If stickiness persists, wash it with a drop of mild soap and warm water, then pat it dry.
Print Lifting the Paper
If the paper pulls paint off in patches, the paint was too dry, or you pressed too hard and pulled too fast. Roll a fresh thin layer, press gently, and peel slowly. Patience fixes most printing problems.
Muddy Colors
Mud happens when you over-roll colors together or skip the drying step between layers. Keep colors separate on the plate, clean your brayer between colors, and let each layer dry. When in doubt, use fewer colors.
And if a print still looks like a mess? Put it aside. In an hour, or a week, you'll see something in it you didn't see before. Half my favorite pieces started life as "failed" prints.
Cleaning and Storing Your Plate
Cleanup is genuinely the easiest part of gel printing. Roll the leftover paint off the plate with the brayer onto a scrap of paper — that's a free extra print. Then wipe the plate with a baby wipe until it's smooth and clean.
If paint has dried in places, don't scrape. Add a thin layer of fresh paint, roll it over the dried bits — the fresh paint lifts the old — then wipe away. It's like magic, and it's very satisfying.
Store your gelli plate flat, in a cool, dark place, away from heat and direct sunlight. Keep it in its original sleeve or between sheets of parchment paper so dust doesn't settle on the surface. A plate that's looked after will print happily for years.
Clean your brayer too: roll it over a baby wipe or rinse it under warm water. Paint left to dry on a brayer makes it stiff and rough. Two minutes of care keeps every tool ready for the next quiet afternoon.
One last note: wash your hands and wipe the table before you walk away, and the kitchen table studio disappears without a trace. That's the deal I made with my family, and it's why I still get to print.
Conclusion
If you try nothing else this month, try one print. One plate, one color, one sheet of paper. I promise the pull will get you. It got me when I was seven, and it still gets me every single time.
Monoprinting asks very little of you: ten minutes, a few supplies, zero talent required. In return it gives you something no store can sell — your own one-of-a-kind papers, made by your own hands, at your own kitchen table.
When you're ready for more, try: greeting cards for birthdays and thank-yous, wrapping paper that makes gifts feel twice as special, journal covers, bookmark sets, or a seasonal print for each holiday. The plate will be waiting.
I'd love to tell you the leaf prints from my grandmother's kitchen survived. They didn't — they were practice, meant to be thrown away. But the feeling of pulling one stayed with me for thirty years. Now it's your turn to feel it.
So set up the table, roll some paint, and pull. Your first print might be imperfect. It will be beautiful anyway. Happy printing, friends.