Introduction
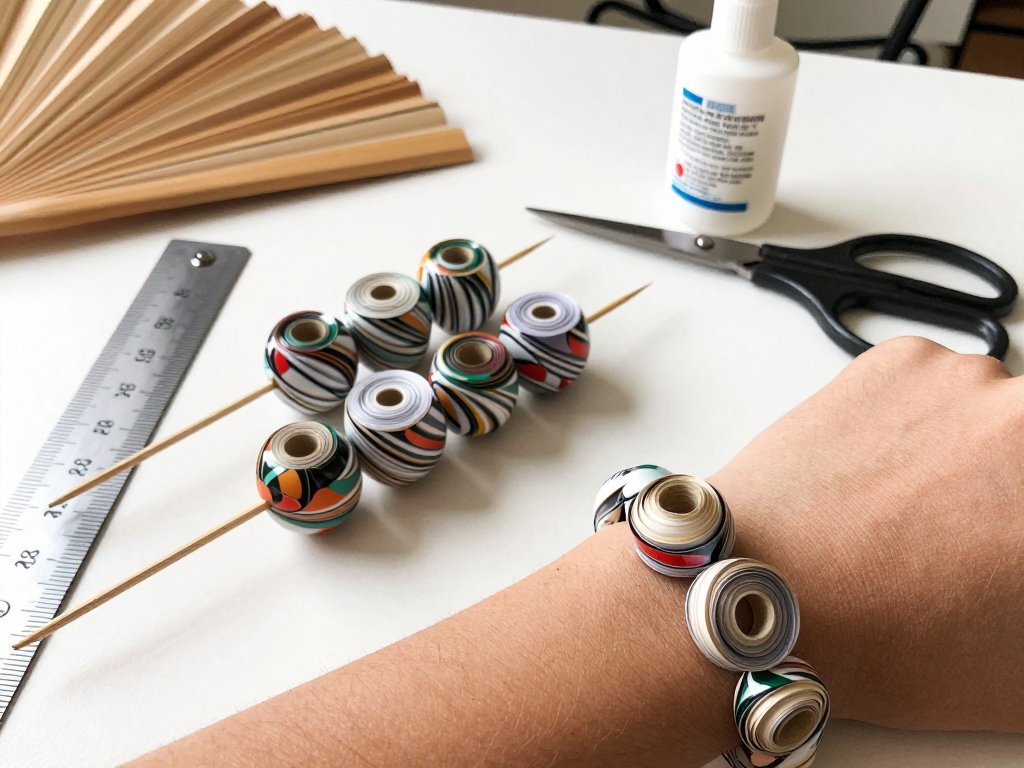
Most crafts ask you to buy a kit. Paper beads ask only for the magazine already sitting in your recycling bin. In an hour you can roll enough beads to finish a bracelet, and the project costs roughly nothing.
A single glossy magazine page yields ten to twelve tapered strips, and each strip becomes one bead. That means one page gives you enough for one or two bracelets, or a pair of earrings plus a handful of spares.
Rolled tightly and sealed properly, paper beads are surprisingly sturdy. They are also light, which is why a necklace strung from them sits comfortably all afternoon. If you enjoy rescuing throwaway material, these spoon rings from old silverware follow the same instinct.
What follows is the full method: which papers to choose, how to cut uniform strips, how to roll and seal them, and how to string the finished beads into jewelry you will genuinely wear.
Why Paper Beads Are Worth Your Afternoon
The material is free, or close enough. A magazine you already subscribe to, a catalogue that arrives uninvited, a leftover sheet of wrapping paper — all of it becomes raw material. Craft-store glass or stone beads often cost several dollars for a short strand.
Finished paper jewelry is unusually light. A full bracelet can weigh less than a set of keys, so it never tugs at your wrist or slides forward on your neck.
Better still, the pattern never repeats. Because you cut strips from different parts of a page, every bead carries its own fragment of ink — a strip of sky here, a printed petal there.
The barrier to entry is low. No kiln, no torch, no resin, no drying cabinet. A toothpick, a bottle of glue, and one magazine page will get you started tonight.
Choosing Paper That Rolls Well
Paper choice decides how a bead rolls and how it looks once finished. The weights below are a guide, not a rule, but they hold up across brands.
Glossy Magazine and Catalogue Pages
Magazine pages usually run 60 to 70 gsm, and their thin, clay-coated surface rolls very tight. Because the ink sits on top of the coating rather than soaking in, you get a variegated mosaic pattern instead of muddy colour.
Glossy pages resist a glue stick, so pair them with a tacky liquid glue. Test any heavily inked page on one bead before cutting a whole batch from it.
Laser Copy Paper
Plain 75 to 80 gsm copy paper is the most forgiving choice for beginners. It rolls evenly, accepts glue readily, and produces a consistent matte bead you can paint or stamp afterwards.
Photocopy a favourite fabric print or a vintage map onto copy paper if you want pattern without the flimsiness of newsprint.
Origami, Wrapping, and Vintage Papers
Origami paper at 70 to 85 gsm holds a crisp crease and comes in saturated solids. Wrapping paper works well unless it is foil-laminated, which cracks as it curves.
Sheet music and old maps give a muted, vintage look. They are thin, so roll them a little more slowly to avoid tearing the tip.
Papers to Avoid
Skip heavy cardstock. At 200 gsm and above it refuses to curve, cracks along the fold, and leaves you with a lumpy bead full of gaps.
Avoid thermal receipt paper entirely. Its coating is heat-sensitive, the ink fades quickly, and the finished bead goes blank within a season.
Newsprint is usable but acidic, so it yellows over time. If you love the look, seal it with two full coats to slow the change.
Tools and Materials
Gather everything before you begin. Rolling goes quickly once the strips are cut, and you will not want to stop mid-bead to hunt for a ruler.
The Mandrel Sets Your Hole Size
The mandrel is the rod you roll around, and it determines the finished hole. A wooden toothpick gives roughly a 2 mm hole — fine for beading wire and headpins.
A 3 mm bamboo skewer makes a larger opening that takes leather cord or 1 mm elastic comfortably. A thin knitting needle behaves the same way.
Choose your mandrel before you cut anything. A hole too small for the cord you intended is a wasted bead.
Cutting Tools and Adhesives
You want a self-healing cutting mat and a metal ruler. A craft knife or rotary cutter gives clean, straight tapers. Scissors work, but the edges wobble slightly.
Use PVA or white craft glue for matte papers. Switch to a pH-neutral tacky liquid glue for glossy pages, since a glue stick sits on the coating rather than bonding to it.
A small synthetic brush spreads glue thinly and reaches the tapered tip without soaking the paper. Keep a damp cloth nearby for sticky fingers.
Sealant Choices
Mod Podge Gloss and water-based polycrylic both give a hard, clear finish and are pleasant to brush. Clear nail polish works beautifully for small batches of a few dozen beads.
Nail polish goes tacky and slow once you are sealing hundreds of beads, so choose your sealant by batch size rather than by what is nearest.
Cutting the Strips
The classic paper bead strip is a long, tapered triangle. A blunt base rolls into the body of the bead, and the long taper wraps around the outside to close it neatly.
Start with a base width near 1.5 cm, tapering evenly to a point over 20 to 30 cm of length. Longer tapers give you a smoother, more tapered bead.
The Zigzag Marking Method
Mark base intervals along the bottom edge of the page, roughly every 1.5 to 2 cm. Then mark the top edge with the same intervals, offset so each mark sits midway between two bottom marks.
Connect each bottom mark diagonally to the nearest offset top mark. The result is a repeating zigzag that fills the sheet with uniform triangles — about ten to twelve strips per page.
Cut on the pencil lines, or just outside them if you plan to trim the bead ends later. Consistent triangles are the single biggest factor in consistent beads.
Strip Dimensions at a Glance
Three measurements cover most of what you will want to roll. Keep the base and the length in proportion and the finished bead behaves predictably.
- 1.2 cm base plus 15 cm length — a slim bead, about 4 to 5 mm across.
- 2 cm base plus 20 cm length — a medium bead, about 6 to 8 mm across.
- 2.5 cm base plus 25 cm length — a chunky bead, about 8 to 10 mm across.
Rolling a Bead, Step by Step
The technique is simple, but the details decide whether the bead looks handmade in a good way. Read through once, then work at the mat.
- Lay the strip with the printed side facing up and the wide base nearest you. Slide the mandrel along that base edge and fold the first centimetre over it.
- Roll the wide end first, keeping the colourful printed side facing outward. This first anchoring turn decides the finished shape.
- Keep the tension even and the strip centred as it feeds in. Drift toward one edge and the bead turns lopsided within a few turns.
- Glue only at the tip and again along the final seam. Glue down the whole length makes a brittle bead that cracks when strung.
- Press the seam for five to ten seconds with your fingertip or the back of a spoon.
- Slide the finished bead 2 to 3 mm along the mandrel to release tension before setting it down.
- Let the bead firm up on the mandrel for a moment, then slide it off and add it to your drying rack.
Roll a dozen before you judge your work. Tension is a muscle skill, and your tenth bead will be visibly tighter than your first.
Bead Shapes and Their Strip Dimensions
Once you can roll a basic bead, shape is only a matter of where you start and how sharply the strip tapers.
- Barrel or cylinder — a 2 cm base tapering gently over 20 cm, rolled straight. Gives a medium bead with softly rounded ends.
- Tapered bicone — a 2.5 cm base tapering firmly over 25 cm. Makes a bead that swells in the middle and narrows sharply at both ends.
- Chubby oval — a short, wide triangle with a 3 cm base tapering over only 12 cm. Rolls into a plump, round bead.
- Long tube — a 1.5 cm base running the full 30 cm of the page. Produces a slender tube that suits drop earrings and spacers.
Cut two or three of each and roll them in a batch. Seeing the four shapes together makes it much easier to plan a piece of jewelry before you commit to stringing it.
Sealing and Drying
Sealing is the step that turns a paper roll into jewelry. Without it, the bead softens the first time it meets humidity or a warm wrist.
String each wet bead onto a toothpick and stand the toothpicks in a block of foam, an egg carton, or a piece of corrugated cardboard. This lifts the beads clear so they cannot stick to the table.
Two or three thin coats beat one thick coat every time. A thick coat drips, dries slowly, and pools inside the hole where you cannot reach it.
Let each coat cure fully before brushing the next — roughly an hour for polycrylic, five to ten minutes for nail polish. Rushing leaves a gummy layer under a dry skin.
If a hole closes while the sealer is still slightly tacky, ream it out with a toothpick or a needle. Checking each bead a few minutes after coating saves a lot of frustration later.
Stringing and Assembly
Paper beads are light, so your stringing materials can be light too. What matters most is that the cord you choose fits the hole you rolled.
The Stretch Bracelet
Cut 23 to 25 cm of 0.7 to 1.0 mm elastic cord. Thread your beads on, then tie the ends with a surgeon's knot — two passes through the loop on the first throw.
Pull the knot snug and add a dab of glue to it. Tuck the knot inside one of the beads so it never rubs against your wrist. For a more tailored finish, use a crimp and a clasp instead.
The Necklace
String a necklace on 0.3 mm nylon-coated beading wire rather than thread. Finish each end with a crimp bead and attach a lobster clasp.
Plan about 45 to 50 cm for a choker-length piece, adding spacers generously. The wire is stiff enough to keep paper beads from grinding against each other.
Earrings
Slide a single bead onto a headpin and close a simple loop above it. Two or three graduated beads on a longer pin make a gentle drop earring.
Keep them light. One sealed bead on a 25 mm headpin is often plenty, especially in the longer tube shape.
Why Spacers Matter
Place a wood, glass seed, or metal spacer bead between every two or three paper beads. Spacers stop paper rubbing on paper, which is what wears the sealant down.
They also add rhythm. A repeat of two paper beads and one small metal bead around a bracelet reads as deliberate design rather than a random strand.
Troubleshooting Common Problems
Every one of these has a cause and a fix. None of them means the bead is ruined — most are solved in under a minute.
The Bead Is Stuck to the Mandrel
Too much glue has wicked onto the rod. A gentle twist will usually free it. Next time, slide the bead along the mandrel before the final glue layer sets.
The Hole Is Clogged With Sealant
Sealer pooled in the opening and hardened. Ream it with a needle while the coat is still tacky, or push a toothpick through gently once it is fully dry.
Uneven Glossy Patches
You overloaded the brush while sealing. Dip only the tip, wipe the excess on the jar rim, and brush in one direction along the bead.
The Bead Is Lopsided
The strip drifted to one side as you rolled. Practise keeping the taper centred — pinching the strip lightly between thumb and forefinger as it feeds in helps a great deal.
Air Gaps Between the Layers
You rolled too loosely. The bead feels soft and squashes when strung. Unroll it and start again, holding steady tension from the very first turn.
The Ink Bleeds Under the Sealer
Some low-quality inks bleed under solvent-based sealers. Test a single bead first, and switch to a water-based polycrylic if the colour smears.
Variations Once You Have Rolled a Few
After a dozen beads you will want to experiment. These four variations cost nothing extra and change the look completely.
Layer two contrasting papers before rolling. Roll them together as one strip and you get a crisp two-tone edge stripe running through every bead.
Dip the strip tips into diluted acrylic — one part paint to four parts water — before rolling. The colour graduates from deep at the base to pale at the point.
Run your strips through a brayer or an embossing folder before cutting. The texture survives rolling and leaves the finished bead with a subtle relief surface.
Hand-paint fine dots or chevrons onto the bead after sealing. A 10/0 liner brush and a little acrylic will hold crisp lines on top of the gloss.
A Craft the Kids Can Genuinely Help With
Paper beads are one of the few jewelry projects where a child's help produces something you would actually wear. Rolling a triangle around a toothpick is a real, useful task.
Set young helpers up with pre-cut strips, a shallow dish of glue, and a supply of toothpicks. Their beads will be chunky and a little uneven, which is fine — group them together in one bracelet as a feature.
Keep the craft knife and the rotary cutter for adults only. Cut the strips yourself, then hand over the rolling and the filling of the drying rack.
Writing the Story on the Gift Card
Paper carries its own history. A bead rolled from a travel brochure, a wedding invitation, or a map of a favourite coastline is quietly personal in a way store-bought beads are not.
Write the paper's source on the gift card — "made from the June 2023 travel brochure" — and the piece becomes a keepsake. The receiver can date it, place it, and remember the trip.
Keep a strip from each meaningful sheet in an envelope as you work. A few years of saved scraps make a wonderful graduation or anniversary strand.
Conclusion
Start with one magazine page and a toothpick. Cut ten tapered triangles, roll them snug, and seal them with two thin coats. By evening you will have a bracelet made from something headed for the bin.
Keep your first few beads, even the lumpy ones. They will show you how much your tension improved, and they make a useful reference for years to come.
The pleasure here is not speed but repetition. Each bead teaches your fingers a little more, and the strand grows quietly while you work.