Introduction
Have you ever walked past a sad little side table at a thrift store and thought, "That could be beautiful"? Decoupage is how you make that thought come true. It is the art of covering surfaces with paper cutouts and sealing them with glue until the paper looks painted on.
The name comes from the French word découper, which means "to cut out." The technique has been around since the seventeenth century, when ladies of the French court decorated furniture with paper cutouts to imitate expensive hand-painted lacquer.
What was once a pastime of aristocrats is now one of the most beginner-friendly crafts you can try.
Here is the honest pitch: decoupage is cheap, forgiving, and fast. You can finish a small project in an afternoon. The supplies fit in a shoebox. And the results genuinely impress people, because nobody believes a thrift-store find was transformed with paper and glue.
In this guide, I will give you the exact supply list, the step-by-step method, and the fixes for every beginner mistake — so your first project comes out looking like your tenth.
What You Need: The Complete Supply List
Let us start with exactly what to buy. This is the full list, and most items are under ten dollars.
Decoupage medium. Mod Podge is the classic choice and the easiest to find. It is a glue, sealer, and finish in one bottle. Get the matte or gloss finish — both work for beginners. You will use a lot of it, so buy the larger jar.
A foam brush. The flat foam brushes spread decoupage medium smoothly without leaving brush strokes. Buy a few; they are cheap and you will want a clean one for the final sealer coats.
Paper. Napkins, scrapbook paper, wrapping paper, rice paper, or printed images. More on choosing paper below.
A brayer or credit card. This smooths out air bubbles. A rubber brayer roller is ideal, but an old gift card works perfectly well.
Scissors and a craft knife. For cutting your paper shapes. Small, sharp scissors are best for intricate details.
Sandpaper. A medium grit (120) for preparing wood and a fine grit (400) for sanding between coats. A sanding block makes this easier.
A clean, dry cloth. For wiping dust and cleaning surfaces.
Your surface. Wood, glass, ceramic, or cardboard — anything smooth and clean. A wooden tray, a picture frame, or a small box are perfect first projects.
Optional but nice: a water-based varnish or wax for extra protection, and a ruler for precise placement.
Total cost for supplies: about twenty to thirty dollars, and the medium and brushes will last through many projects.
Choosing Your Paper
The paper you choose changes the look of the project completely. Here is how to pick.
Paper napkins are the beginner's secret weapon. They are printed on only one layer, so you peel off the back layers and use the thin printed top ply.
The paper is so thin that it almost disappears into the glue — no visible edges, no thick bumps.
Patterns on napkins are gorgeous, and they are perfect for your first project.
Scrapbook paper is thicker and comes in endless designs. Because it is thicker, you will need more coats of medium to hide the edges, and you may see a slight texture. It is excellent for covering whole surfaces like box lids.
Wrapping paper is a budget favorite. It is thinner than scrapbook paper and works well on larger surfaces like table tops. Just avoid heavily textured or glittered papers, which do not adhere as well.
Rice paper is a dream to work with. It is thin, strong, and tears beautifully, which makes it great for covering curved edges. It costs a little more, but many decoupagers swear by it for furniture.
Printed photos and images let you personalize projects. Print on a laser printer (inkjet ink can run), and cut close to the image. Vintage postcards, sheet music, and book pages are also lovely.
Whatever you choose, keep this rule in mind: thinner paper is easier for beginners. Start with napkins or wrapping paper, and save the heavy scrapbook paper for when you have a feel for the medium.
Choosing Your Surface
Almost anything smooth can be decoupaged. Let us talk about what works best.
Wood is the classic surface. Unfinished wood, thrift-store furniture, wooden trays, and craft boxes all take decoupage beautifully. The wood grain adds warmth, and the paper bonds well.
Glass and ceramic work too, and they give a lovely layered look. Try decoupaging the back of a glass picture frame so the paper shows through, or decorating a plain ceramic vase.
Cardboard and papier-mâché boxes are easy first projects. They are smooth, cheap, and forgiving. If you make a mess, you are out fifty cents.
What to avoid as a beginner: very rough surfaces, fabric, and anything with a heavy texture. Skip plastic unless it is smooth and primed. And avoid surfaces that will get wet regularly, like kitchen counters, until you are comfortable with sealing.
One more tip: your surface should be larger than your paper or covered with several overlapping pieces. Cutting paper to fit is fiddly; covering a surface in slightly overlapping scraps is easy and looks intentional.
Preparing Your Surface
Preparation is the difference between a project that lasts years and one that peels in weeks. It takes ten minutes. Do not skip it.
Step 1: Clean. Wipe the surface with a damp cloth to remove dust and grease. For thrift-store furniture, use a mild degreaser — old furniture carries decades of invisible grime that will stop glue from bonding.
Step 2: Sand. Lightly sand smooth surfaces with medium-grit sandpaper (120). This gives the glue something to grip. Do not sand heavily; you are roughening, not stripping.
Step 3: Dust. Wipe away every bit of sanding dust with a clean, dry cloth. Dust is the enemy of adhesion.
Step 4: Prime (optional). If you are covering dark wood with light paper, a coat of white acrylic paint or gesso will keep the wood from showing through. If your surface is already light, you can skip this.
Step 5: Dry. Make sure everything is completely dry before you start. Patience here saves frustration later.
Think of it this way: you are giving your paper the best possible handshake with the surface. A clean, slightly rough, dry surface grips paper far better than a shiny dusty one.
The Basic Technique: Step by Step
Here is the core method. Once you learn this, you can decoupage almost anything.
Step 1: Cut or tear your paper. Arrange your pieces on the surface first to plan the layout. Play with the design before any glue is involved.
Step 2: Apply a thin layer of medium to the surface. Use your foam brush to spread a smooth, even coat where the paper will sit. Do not flood it — thin is better.
Step 3: Lay down the paper. Place your paper on the wet medium. Starting from the center, gently smooth it outward with your fingers, then with the brayer or credit card. This pushes out air bubbles and wrinkles.
Step 4: Coat the top of the paper. Brush a thin layer of medium over the paper, from the center outward. This seals it. Do not overbrush — the paper can tear or shift if it gets too wet.
Step 5: Let it dry completely. This is the step everyone rushes. Drying takes twenty minutes to an hour depending on humidity. A hair dryer on low can speed it up, but let it cool before the next coat.
Step 6: Repeat. Add your remaining pieces the same way, then apply the final sealer coats (see the finishing section below).
That is the whole technique. Paper, medium, smooth, seal, dry, repeat. Simple — and completely transformative.
Napkin Decoupage: The Easiest Start
If you want a first project that is almost impossible to mess up, use a paper napkin. Here is why it is so beginner-friendly.
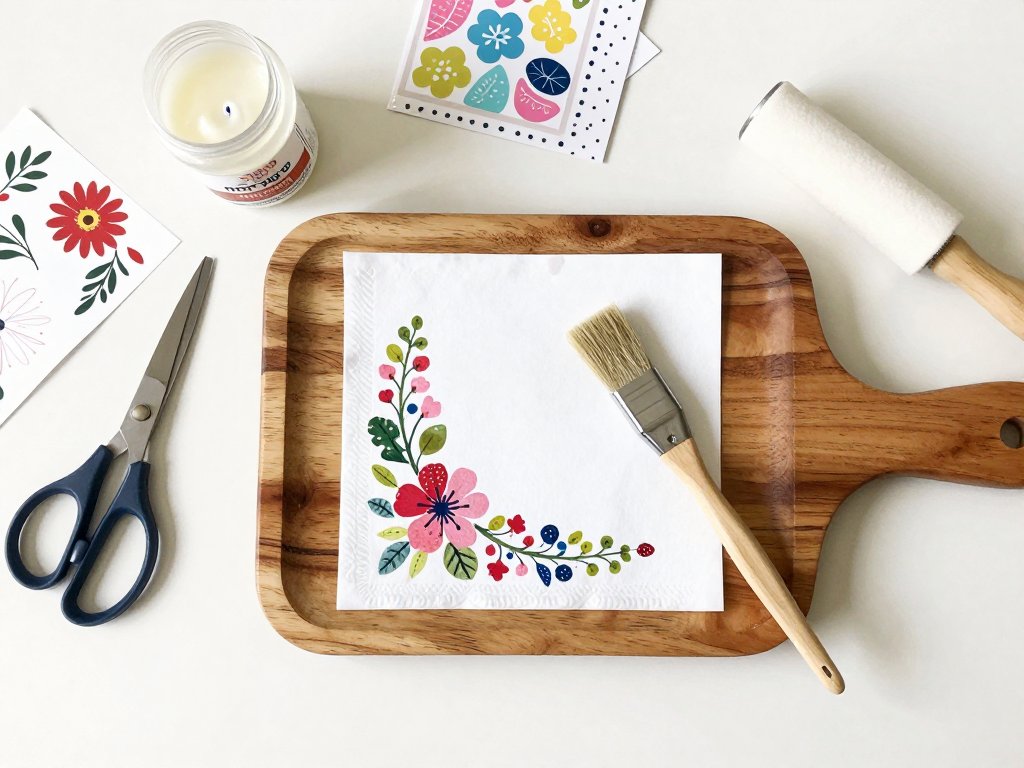
Peel the napkin. A dinner napkin has three layers. Gently separate them and keep only the top printed layer. It will be almost transparent — that is exactly what you want.
Cut or tear your design. For motifs like flowers, cut close to the design. For backgrounds, you can tear the napkin for a soft, blended edge that disappears into the medium.
Work quickly but gently. The thin paper becomes fragile when wet. Apply your medium, lay the napkin down, and smooth it carefully from the center. If it tears, do not panic — overlapping a small piece covers it perfectly.
Seal with light coats. Because the paper is so thin, one or two light top coats are usually enough. Heavy brushing can shred it.
Try this on a small wooden tray or a plain notebook cover. In one afternoon you will have a pretty, professional-looking piece — and the confidence to move up to bigger projects.
Furniture Makeover: Decoupaging a Dresser or Table
Ready to tackle furniture? This is where decoupage really shines. A thrift-store dresser or side table can become a stunning statement piece.
Step 1: Choose your furniture and paper. Flat surfaces are easier than curved ones. A table top, dresser drawers, or the front of a cabinet are perfect. Choose paper large enough to cover the area, or plan a pattern of overlapping pieces.
Step 2: Prepare thoroughly. Clean with a degreaser, sand lightly, dust, and wipe with a tack cloth. If the piece has a glossy finish, sanding is especially important — glue will not stick to a shiny sealed surface.
Step 3: Work in sections. Do not try to cover a whole dresser in one go. Apply medium and paper to one drawer or one section at a time, letting each dry before moving on. This keeps everything manageable and neat.
Step 4: Overlap edges deliberately. When covering a large surface with multiple pieces, overlap each piece slightly and blend the edges with your fingers. The final sealer coats will unify the look.
Step 5: Trim excess. Use a craft knife to trim paper at edges and corners while the medium is slightly damp. A sharp blade gives a clean line.
Step 6: Seal generously. Furniture gets handled, so it needs three to four coats of sealer. Sand lightly with fine grit between the final coats for a smooth, professional finish.
Furniture decoupage is a weekend project rather than an afternoon project, but the payoff is enormous. You will own a one-of-a-kind piece that cost you twenty dollars and your weekend.
Sealing and Finishing
The sealing coats are what turn a paper-covered surface into a durable, beautiful finish. Here is how to do them right.
Apply three to four thin coats. Thin coats dry faster, level better, and avoid brush marks. Each coat should dry completely before the next — about thirty minutes to an hour.
Sand lightly between the last coats. Once you have two coats down, sand very lightly with fine-grit sandpaper (400) to smooth any raised paper edges or dust specks. Wipe the dust off, then apply the next coat.
Choose your finish. Matte gives a soft, modern look. Gloss gives a shiny, lacquered look. Satin is the middle ground. For furniture, gloss or satin adds durability and is easy to wipe clean.
Protect heavy-use pieces with varnish or wax. For tabletops or tray bottoms that get handled, add a final coat of water-based varnish or rub in a furniture wax for extra protection.
Let the piece cure. The medium reaches full hardness after a few days. Do not stack things on your project or scrub it for at least a week.
Patience at the finishing stage is what separates a craft project from a heirloom-quality piece. Take your time, and the result will look store-bought.
Fixing Common Problems
Every decoupager wrinkles a napkin or traps a bubble now and then. Here is how to fix the classics.
Problem: air bubbles. Poke a small hole with a pin, press the air out with your finger, and brush a little medium over the spot. For larger bubbles, lift the edge of the paper, reapply medium, and smooth it down.
Problem: wrinkles. Wrinkles usually come from too much medium or brushing back and forth too much. To prevent: work from the center outward and do not overbrush. To fix: let it dry, then carefully lift the wrinkled area with a craft knife, smooth it, and reseal.
Problem: paper peeling at edges. This happens when edges were not sealed well. Brush medium along the edge, press it down, and add another top coat. For furniture, the extra sealer coats are your insurance.
Problem: the white napkin edge is visible. If you are using white napkins on a dark surface, the edges can show. Fix it by tearing instead of cutting (tears blend better), or paint the surface white before you start.
Problem: the finish looks cloudy. Cloudiness usually means you applied the next coat before the previous one dried, trapping moisture. Let it dry fully, then apply one more thin coat. In most cases the cloudiness clears.
Remember: almost every decoupage problem is fixable, and almost every fix is just "let it dry and add another coat." You have got this.
Design Ideas for Your Home
By now you have the skills. Here are five easy projects to put them to work around your home.
A decoupaged serving tray. Cover the bottom of a plain wooden tray with floral napkins, seal it well, and you have a beautiful piece for the coffee table or breakfast in bed.
Decoupaged drawer fronts. Give a plain dresser character by covering each drawer front with a different coordinating paper. It is a full weekend project with a huge visual payoff.
A keepsake memory box. Cover a plain cardboard box with scrapbook paper, sheet music, or printed photos. Perfect for storing letters, photos, and small treasures.
Decoupaged coasters. Tile coasters from the craft store take decoupage beautifully. Decorate with small napkin motifs and seal with several coats of gloss for a durable finish.
A picture frame makeover. Cover a plain frame with paper in a pattern that matches your room. It instantly makes your family photos feel intentional and gallery-like.
Start with the tray or the box. They are small, forgiving, and finished in one sitting — exactly what you need to build confidence.
Conclusion
Decoupage is one of those rare crafts that is genuinely easy to learn and genuinely impressive in its results. With paper, glue, and a foam brush, you can rescue furniture, personalize gifts, and make your home feel curated — all on a budget.
Start with a napkin project this week. A tray, a box, a picture frame. Follow the steps: prepare, apply, smooth, seal, and — importantly — let it dry. Your first piece will be lovely, and your third piece will be stunning.
Before you know it, you will be looking at every flat surface in your house differently. That is the decoupage eye, and once you have it, no thrift store is safe.