Introduction
The first Christmas trees to carry small handmade ornaments were Victorian, and many of those ornaments were paper. Scraps, chromolithographed cards, perforated card stock, a length of silk ribbon. Nothing expensive, because nothing expensive was the point.
Cross stitch joined them in the middle of the nineteenth century, when Berlin woolwork made counted stitching a parlour occupation.
Women worked mottoes and small floral cards on pierced paper, the holes already punched, a square of card standing in for woven cloth. Some of those pieces still hang in family collections, brittle and faded, with a name and a year inked on the back.
By the middle of the twentieth century the ornament had become a kit. Printed designs, a folded instruction sheet, a cellophane bag, sold in five-and-dime stores for the price of a few groceries.
A generation of children learned the two-legged X on those kits, and a good number of them still stitch today.
The appeal has not really changed. A stitched ornament is small enough to finish, sturdy enough to survive a decade in a box, and personal in a way a purchased bauble is not. Written on the back, a date turns it into a record.
What follows is the whole life of one such piece, three or four inches across, from the first length of floss to the ribbon at the top. Not a catalogue of designs, but the craft of making a single small thing properly.
How a Little Piece Differs From a Sampler
A sampler forgives. You have a wide field of cloth, a border to absorb miscounting, and a finished object that will live behind glass. An ornament forgives nothing, because its edges are visible from every side.
That asymmetry is worth understanding before you thread a needle. On a large piece, the stitching is the work and the finishing is an afterthought. Here they are equal partners, and the finishing is what people actually see when the ornament hangs.
The stitching is also shorter than you expect. A motif forty stitches wide takes an evening, not a month. Which means the thing you are really learning in this project is how to end it well.
Fabric: What the Count Actually Means
Aida is a cotton cloth woven in blocks. Each block is a small square of thread with a hole at each corner, and one cross stitch covers one block. The count is how many of those blocks fit in an inch.
So 14-count Aida gives you fourteen stitches to the inch, 16-count gives sixteen, and 18-count gives eighteen. The higher the number, the smaller the stitch and the finer the picture.
The arithmetic matters more here than anywhere else in embroidery. A motif that is forty stitches across measures nearly three inches on 14-count cloth and a little over two inches on 18-count. Same design, same floss, different object.
For an ornament, sixteen or eighteen count is usually right. Fine cloth gives you room for detail in a small space, and it holds a crisper edge once mounted. Fourteen count works for bold, simple shapes, and it is quicker to stitch.
Evenweave behaves differently. On 28-count Lugana or 32-count linen you work over two threads, which gives the equivalent of 14 or 16 count, but the holes are less obvious. Beginners do better on Aida, where the hole is a target you cannot miss.
Buy a piece at least two inches larger than your planned ornament on every side. The spare margin is what you will fold around the back, and there is no recovering if you cut it too close.
Finding the Centre, and Why You Start There
Fold the cloth in half, then in half again, and press the creases lightly with your fingers. Where they cross is the centre stitch. Mark it with a pin or a single loose stitch in a contrast colour.
Every chart is drawn from its centre outward, for a practical reason. Counting from an edge accumulates error, and by the far side you may be three stitches off with no way to correct it. Counting outward from the middle means any mistake stays local.
On a piece this small, being off by two stitches is not a small problem. It moves your motif off centre inside a four-inch frame, and no amount of careful finishing will hide it.
Floss: Strands, Length, and the Knot Problem
Stranded cotton comes as six loosely twisted strands. You separate what you need and put the rest back, and the number you use depends on the cloth.
On 14-count Aida, use two strands. On 16 and 18 count, two strands still work for most motifs, though a single strand gives finer lettering and a lighter, more delicate look. Three strands on fine cloth will clog the holes and make the surface lumpy.
Separate strands one at a time, peeling each from the top of the length and letting it hang. Pulling two at once creates the snarl that costs ten minutes and half your patience.
Cut working lengths of about eighteen inches, roughly from your fingers to your elbow. Longer thread abrades against the cloth with every stitch, goes fuzzy, and tangles more readily.
Inexpensive floss knots because it is loosely twisted and lightly finished. The strands separate as you stitch, catch on each other, and pill. If a bargain skein keeps snarling while a better one does not, the floss is the problem, not your technique.
Needle and Hoop
Use a tapestry needle, which has a blunt tip and a large eye. Size 24 suits 14-count cloth; size 26 is better on 18-count, where a larger needle widens the holes.
The blunt tip is not a compromise, it is the design. Aida blocks are woven so the hole sits between threads. A sharp needle slips into the block itself, splitting the fibres, and the stitch sits slightly off with a permanent small hole beside it.
A hoop is optional on a piece this size. Working in hand is comfortable when the cloth is small, provided you do not pull the stitches tight.
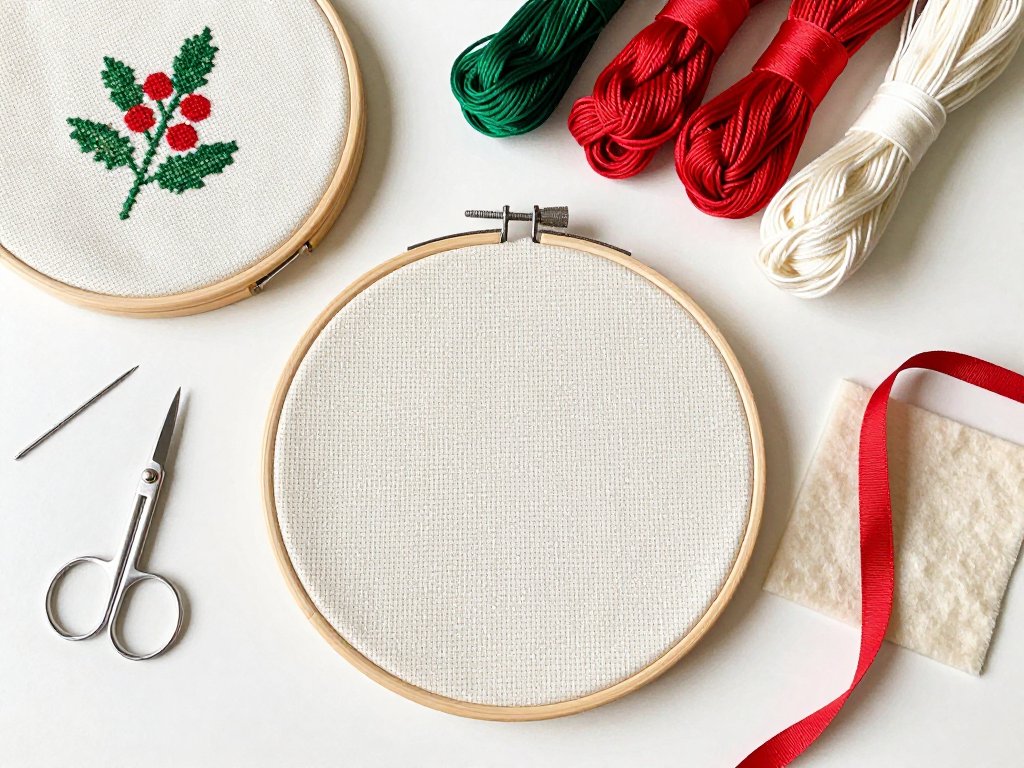
If you prefer a hoop, use a four-inch one and remove the work between sessions so the fabric does not take a permanent ring.
Beginning and Ending Without a Knot
Knots are the mark of a beginner, and on an ornament they are worse than untidy. A knot on the back sits under the mount and the felt, and it shows as a bump on the front of a piece that is meant to lie flat.
Start with a loop. Cut one length twice as long as you need, fold it in half, and thread both cut ends through the needle. Bring the needle up through the fabric, leaving the folded loop on the back, and take your first stitch down through that loop.
The thread is anchored without a knot.
To finish, run the tail under the backs of four or five completed stitches on the reverse, then trim close. The friction holds it. If the back will be visible, weave the tail in two directions so the wear is shared.
Start a new thread the same way, catching the tail under existing stitches as you work the first few crosses. Over an evening you will build a back that is flat, soft, and invisible from the front.
The Stitch Itself
A cross stitch is two diagonal legs. The first goes from lower left to upper right, the second crosses it from lower right to upper left. Every completed stitch on the piece should lean the same way, which means the top leg always runs in the same direction.
That consistency is what makes a stitched surface look calm rather than agitated. It is also the first thing an experienced eye notices, long before it judges the design.
For even coverage, railroad the strands. Bring the needle up, let the two strands lie side by side across your finger, and slide the needle between them before you go down. The legs then sit parallel instead of twisted around each other.
Work a block of one colour in one direction across the row — all the first legs, then all the second legs on the return. The stitches nest together, the tension evens out, and the surface is smoother than working each cross complete.
Backstitch is the outline, and on a small motif it does most of the work of making the shape read. One strand, worked after all the crosses are finished, following the chart line by line.
Without it, a berry can look like a red blob; with it, the shape snaps into focus.
French knots are optional. A single knot for an eye or a berry centre adds a small point of texture, but a motif covered in knots on an ornament this size looks busy. Use them where the design calls for one, not as decoration.
Sizing the Motif Inside Its Frame
Decide the finished ornament size first — say three and a half inches square — then work backward. That gives you the stitch count you can afford at your chosen count, and the mount you will cut later.
Leave a margin of plain cloth around the motif, at least half an inch on every side. This border is not wasted space. It is what folds around the mount, and it keeps the stitched area away from the edge where the trim runs.
A motif that runs to the very edge of the cloth looks cramped once finished, and the whip stitch crowds against the last row of crosses. Plain fabric is the breathing room that makes the stitching look deliberate.
Count outward from your marked centre, one arm of the design at a time, and check the total before you commit an evening to it. Four stitches of margin on each side is a different ornament from one.
Pressing Before You Finish
Wash your hands first, and wash the finished stitching if it has been handled a great deal. Lukewarm water, a drop of mild soap, no wringing. Roll it in a towel and press out the water.
Then press it face down on a folded bath towel, with a second towel over the back if you like. The pile cushions the stitches so the iron cannot flatten them into the cloth.
Never press the iron directly onto the front. Heat and weight crush the strands, the floss loses its sheen, and the crosses go flat and slightly shiny. On an ornament, that is visible at arm's length.
Dry heat is enough for cotton. Steam helps stubborn creases, but let the piece dry completely and flat afterwards, because damp cloth distorted by a mount will dry distorted.
Finishing, Part One: Cutting and Mounting
This is the part that turns a stitched square into an object, and it deserves more care than the stitching did.
Cut a template from mount board or from a clean, heavy cardboard — the kind used for shirt boxes, not corrugated packing card. It should be the finished size of the ornament front, three and a half inches or whatever you settled on.
Cut it square and true; a template slightly out of square will make every later step look wrong.
Lay the template on the back of your pressed stitching, centred on the motif. Check the margin on all four sides before you cut anything.
Trim the Aida to leave a seam allowance of about three quarters of an inch beyond the template on every side. More than an inch and the corners bulk up; less than half an inch and the cloth will not grip the board.
Now fold. Bring one edge to the back of the board and hold it, then the opposite edge, pulling gently so the cloth is taut but not stretched. Fold the corners in last, mitring them diagonally so the bulk sits flat rather than in a lump.
Lace or glue. Lacing means running strong thread from edge to edge across the back in a zigzag, pulling each pass snug — archival, reversible, and the better choice for anything meant to last.
Glue means a thin line of fabric adhesive on the board edge only, never on the stitching, pressed and left to cure.
Either way, check the front before the adhesive sets. Turn it over, look at it straight on, and confirm the motif sits centred with an even border.
Finishing, Part Two: Felt and the Edge
Cut a felt back the same size as the mount. Wool-blend felt is worth seeking out. Craft acrylic felt is shiny, pills quickly, and is often thin enough that the edge stitch tears through it.
Wool felt holds a clean cut edge, has a matte surface that sits quietly behind the stitching, and takes a firm stitch without stretching. A blend of wool and rayon behaves nearly as well and costs less.
Place the felt against the back of the mounted piece, wrong sides together, and pin or clip around the edge. Then choose your stitch.
Whip stitch is the simple option: bring the needle through both layers near the edge and over, evenly spaced, all the way around. It reads as a fine corded border and suits a small, delicate ornament.
Blanket stitch is more decorative. Work it with a straight leg along the edge and a loop over the top, spacing the legs evenly. It gives a firmer, more graphic border that holds its shape on thicker felt.
Keep the spacing consistent. On a four-inch edge you will work perhaps sixty stitches, and a variation of two or three millimetres will show as a wobble.
Stuff lightly or keep it flat. A hanging ornament is better flat, or with the faintest pinch of wool fleece in the middle to give the surface a little life. Overstuffing makes the piece pillow outward and exposes the hard line of the mount board beneath.
Hide the start of the finishing thread by running it under the felt and the turned allowance before your first stitch, and finish the same way. A knot at the edge of a felt backing is a small permanent lump on the silhouette.
The Hanger
Ribbon is quick and forgiving: a narrow grosgrain or velvet ribbon, a quarter inch wide, folded into a loop. Twisted cord is more traditional and looks handworked, which it is.
To make cord, cut six strands of floss about three times the length you want. Knot the ends together and hook one end over a drawer knob or a stationary object. Twist the strands tightly in one direction until they begin to kink.
Then fold the length in half, hold the two ends together, and let it ply back on itself. It twists into a firm cord on its own. Knot the ends and trim them evenly.
Attach the loop at the top centre, behind the felt, stitched through the mount and the allowance — not through the felt alone, which will pull out under the weight. Test by hanging it: the ornament should sit square, not tilt.
Finish the join with a small bow in matching ribbon, or a single bead sewn over the stitching. It hides the attachment point and gives the top of the ornament a deliberate finish.
A Date, or a Pair of Initials
Adding the year is the difference between a decoration and a keepsake. Twenty years from now, the stitching will be anonymous; the date will not.
Chart letters on graph paper first, one square per stitch, and keep the height consistent — five stitches tall for small lettering, seven for a bolder line. Mixed letter heights are the most common fault, and they are obvious once the piece is framed.
On 18-count cloth, work lettering in a single strand. Two strands on fine cloth fill the gaps and the letters close up into a dark smear at arm's length.
Place initials and year in the lower margin, in the plain border, or on the back of the felt in a small running stitch. All three read well. What matters is that the year goes on before the ornament is closed up.
Making Six Instead of One
Ornaments are gifts, and gifts come in numbers. Once you have finished one, the second takes half the time, because every decision is already made.
Cut all your mounts at once. Cut all the felt at the same time, from the same template. Cut every piece of Aida to the same allowance. Repetition is faster than sequence, and identical parts make identical objects.
Then work in an assembly line. Stitch everything first. Press everything. Mount everything. Edge everything. Attach hangers last, in one sitting, with the ribbon already cut to length.
Store finished pieces flat, between sheets of tissue or card, in a shallow box. Not folded into a bag, and not hung, where the weight of the cord will pull the top edge out of shape over a season.
Once the finishing is second nature, you can raid a drawer of cross stitch patterns for beginners and keep the line moving.
When Something Goes Wrong
Puckered fabric. Usually too many strands for the count, or stitches pulled tight. It can sometimes be eased by dampening and re-pressing face down, but the reliable fix is fewer strands and a lighter hand.
Uneven tension. Often the thread twisting as you work. Let the needle hang and spin out every few stitches, and railroad the strands on the front.
Fraying edges before you finish. Run a thin line of fray check along the cut edge, or overcast it loosely by hand. A strip of masking tape on the back works as a temporary stop and peels away cleanly.
Thread showing through the front. You carried a colour across the back. End the thread and restart instead, or weave the carry under existing stitches only, never across open cloth.
A motif that came out off-centre. Almost always a counting error from an edge rather than the middle. If it is only a stitch or two, cut the mount slightly to follow the motif rather than the cloth.
Felt edges that will not lie flat. Blunt scissors, or a cut made in several snips. Cut felt in one clean pass with sharp blades, and press it lightly under a cloth with a warm iron before attaching.
Conclusion
An ornament is a modest thing to make. An evening or two, a skein of floss, a square of cloth, a scrap of mount board. Nothing about it is difficult once you know the order of the steps.
What it gives back is out of proportion. It hangs on a tree for a few weeks each year and then goes back in the box, and each time it comes out it carries the year it was made. Children's ornaments become the ones adults argue over.
Start with one. Choose a small motif, count from the centre, and give the finishing the time you would normally give the stitching. Then make a second one in a different colour, and a third with a name on it.
The first will teach you more than any instruction sheet can, and by the sixth you will have a set worth keeping.