Introduction
My grandmother kept a squat tin in the bottom drawer of her sewing cabinet, wedged between a pincushion and a roll of bias tape. It held a pale, buttery paste that smelled faintly of beeswax and something sharper underneath.
She used it on winter afternoons, scraping paint across small boards at the kitchen table while the kettle ticked as it cooled.
I thought, for years, that she was doing something difficult. It looked like frosting a cake with a butter knife, and then ruining the cake, and then deciding the ruin was better.
It turned out to be one of the kindest ways into oil painting I have ever found. The paint stays soft for hours. You can scrape a mistake off and find something underneath. Nothing has to be finished today.
If you have wanted to try oils but felt intimidated by the equipment, the waiting, or the cost of getting it wrong, cold wax medium may be the gentlest doorway.
Shall we open the tin?
What Cold Wax Medium Actually Is
Cold wax medium is a paste made from beeswax, or a blend of beeswax and microcrystalline wax, softened with a small amount of solvent. Some makers add a touch of oil or resin to adjust the feel.
It looks like soft shortening and smells like a hardware shop. You stir it into ordinary oil paint on your palette, and the paint changes character.
It becomes matte, thicker, and slightly translucent. It stops behaving like a liquid and starts behaving like frosting. It holds a ridge if you push it, and it flattens if you drag something across it.
Most importantly, it dries quickly by oil-painting standards. A thin layer will skin over within a day, and often within hours. That means you can build layer upon layer in a week rather than a season.
How It Differs From Encaustic
This is the point where beginners most often get confused, so let us be clear.
Encaustic painting also uses wax, but it requires heat at every stage. The wax is melted on a hotplate, applied while molten, and then fused with a heat gun or a torch so the layers bond.
Cold wax does none of that. It is used at room temperature, straight from the tin. There is no melting, no fusing, no torch, no hotplate.
Instead, the solvent slowly evaporates while the oil in the paint oxidises and hardens. The panel air-dries and cures over days and weeks, the way an oil painting always has.
You do not need a heat source. You need a window, a hard board, and a little patience.
Why the Surface Has to Be Rigid
Cold wax painting is a scraping craft. A palette knife dragged across a soft layer meets real resistance, and that resistance has to be answered by something solid.
A stretched canvas will flex under the blade. The paint skips, the weave shows through in ridges you did not ask for, and the canvas can dent permanently.
Choose a cradled birch panel, a rigid painting board, or a sealed piece of medium-density fibreboard. A gesso-primed panel intended for oils or acrylics works beautifully.
Small is your friend at the start. A panel around twenty by twenty centimetres, or eight inches square, gives you room to learn without overwhelming you.
One caution: some thin hardboards warp when they absorb solvent. A cradled panel with a wooden frame behind it stays flat, which matters once you start pressing down with a scraper.
What You Will Need
You do not need a studio. A table you can wipe down, a window you can open, and a short list will carry you through your first several paintings.
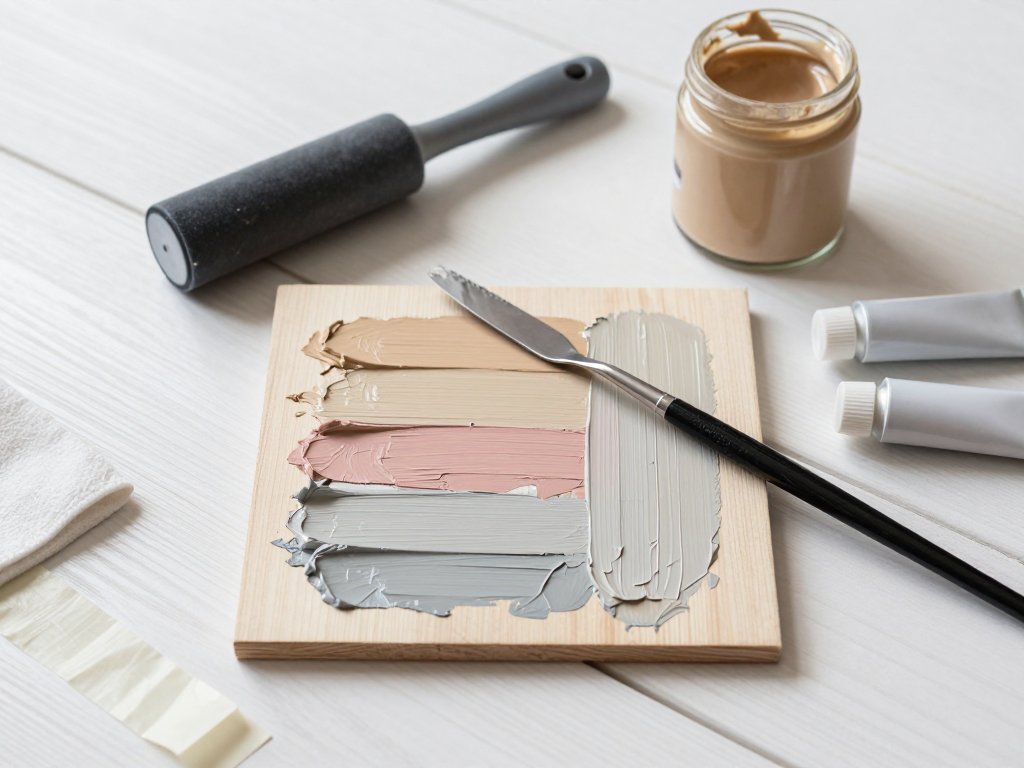
- Cold wax medium in a jar or tin. Any reputable brand will do; the differences are mostly in hardness and how much solvent they carry.
- Oil paints, even a modest set. Student-grade is fine for learning, though the pigment load in artist-grade paint gives richer layers.
- Odourless mineral spirits for thinning washes and cleaning tools. A lidded jar keeps the smell contained.
- Two or three palette knives: one wide and flexible for scraping, one small and firm for detail and mixing.
- A brayer, or a rubber squeegee, for pulling flat bands of texture.
- Silicone or rubber scrapers, the kind used for clay, which glide without gouging.
- Rigid supports, as above, plus masking tape to protect the edges.
- Wax paper or a silicone mat to work on, and to lay over a wet panel between sessions.
- Rags or paper towel, and a lidded bin for the ones soaked in solvent.
- A well-ventilated room, and ideally a window that actually opens.
Notice what is not on the list: no brushes are strictly required, though a soft one is useful for thin glazes and for pushing paint into corners.
Cold wax is forgiving of tools. A knife, a scraper and your fingers will teach you more in an afternoon than a full set of brushes.
Safety, Gently but Firmly
Cold wax is not dangerous in the way that, say, a blowtorch is. But it does involve solvent, and solvent deserves respect.
Work with moving air. An open window and a door to the hallway is enough for a small panel; a kitchen extractor fan helps. If you can smell the spirits strongly, you need more air.
Never work near a pilot light, a gas hob, a candle, or a space heater with an open element. Solvent vapour is flammable, and this matters far more here than with plain oil painting, because you are likely to have an open jar on the table for a long session.
Keep the jar lidded when you are not dipping into it. Decant a small amount into a shallow dish and refill as needed, rather than working from the whole bottle.
Solvent-soaked rags should go into a metal tin with a tight lid, then out to the bin outdoors. Do not ball them up in a kitchen bin and leave them indoors.
If you are painting in a room shared with children, choose a time when they are asleep or elsewhere, and put everything away before they return. This is not fussiness; it is simply easier to relax when the hazard is gone.
Preparing the Panel
Seal the surface before you begin. This gives the paint something stable to grip and keeps the board from drinking the oil out of your first layer.
Sand the panel lightly with fine paper, then wipe off the dust. A tack cloth or a barely damp cloth works well.
Apply a thin coat of acrylic gesso, an acrylic polymer sealer, or a shellac-based sealer. Two thin coats are better than one thick one, and each should dry fully.
If you are using an oil-primed panel, you can begin almost immediately. If you sealed it yourself, give it several hours, or overnight, before painting.
Run a strip of masking tape around the edges if you want a clean border. The tape will also catch stray scrapes, which saves the sides of a cradled panel.
Finally, wipe the surface with a dry cloth. Wax picks up every speck of dust, and a clean start buys you a cleaner finish.
Mixing: Your First Ratios
The ratio of paint to medium is the dial you will turn most often. Start around one part paint to one part medium.
At that ratio the paint stays workable, holds a soft peak, and dries to a matte sheen. It is a good all-purpose mix for blocking in shapes.
For translucent layers, increase the medium. Two parts medium to one part paint, or even three to one, gives a veil of colour that lets the layer beneath whisper through.
For opaque passages, go the other way. Two parts paint to one part medium keeps the colour solid while still taking a scrape.
Mix on a flat palette with a knife, folding rather than stirring, until the paste is even. Lumps of unmixed wax will show up later as pale flecks.
Keep a small note of your ratios for the first few paintings. When a layer behaves beautifully, you will want to know what you did.
Your First Painting, Layer by Layer
Set aside an hour for the first session and do not expect a finished picture. The goal is to feel the material.
Step One: A Thin Opaque Base
Mix a warm neutral or a soft colour you like, at roughly equal parts paint and medium. Spread it thinly across the whole panel with a knife or a scraper.
Thin is the word that matters. A base layer the thickness of a coat of paint will dry overnight; a thick one may stay soft for days and make everything above it slide.
Scrape the surface flat, then stop. Let it dry to the touch, which may take a few hours.
Step Two: Translucent Colour
Once the base is dry, mix a colour with more medium than paint and lay it over part of the panel.
Do not cover everything. Leave some of the base showing, the way you would leave sky showing through branches.
Work in patches rather than across the whole surface. Small decisions are easier to live with than one grand one.
Step Three: Scrape Back
Here is the moment cold wax becomes itself. Take a flexible knife or a rubber scraper and drag it across the wet layer at a shallow angle.
The blade removes the top colour and exposes the layer beneath, sometimes in a soft gradient, sometimes in a hard edge.
Vary the pressure. A light pass leaves a veil; a firm pass reveals the base and piles the removed paint at the end of the stroke.
Wipe the blade on a rag between passes. A loaded knife smears instead of cutting.
Step Four: Pull Flat Texture
For long, even bands of texture, use a brayer. Roll it through a thin film of paint on your palette, then roll it across the panel.
The result is a soft, fabric-like grain rather than a brush mark. It is especially good for skies, water, and the flat planes of a wall.
Clean the brayer with a rag and a little spirits between colours, or keep one roller for lights and one for darks.
Step Five: Decide Whether to Wait
You can work wet into wet, and often should. Two soft colours pushed together blend into a gentle transition that would be hard to paint any other way.
But if a layer is still wet underneath, the new paint will slide and the knife will pull up mud. Test a corner with your fingertip; if paint comes away, wait.
A layer needs to be dry to the touch, not bone dry. Slightly tacky is perfect: it grips the next layer without dissolving it.
Step Six: Keep Going
A small panel usually wants somewhere between four and eight layers. Fewer than four and the surface looks thin; more than ten and it can start to feel heavy and overworked.
Alternate opaque and translucent layers. Scrape something back every few passes, even if you only remove a little.
This is the rhythm of the craft: lay, wait, scrape, look, lay again. It is slow in the way that folding laundry is slow, which is to say it leaves room for thinking.
Texture Techniques Worth Learning
Scrape and Reveal
This is the signature move, and it rewards nerve. Lay a dark or saturated colour over a dry lighter layer, then pull it away with a scraper.
Thin, angled strokes read as weather or grass. Broad, flat passes read as architecture. A single firm sweep down the middle of a panel can become a horizon.
Impasto Ridges
For raised texture, load a palette knife with a stiff mix, roughly two parts paint to one part medium, and press it onto the surface.
Lift the knife with a small twist rather than pulling straight up. The ridge keeps a sharp crest that catches light.
Build ridges near the end of a painting. Thick paint laid early will be flattened by every scrape that follows.
Incising and Sgraffito
While a layer is still soft, draw into it with the tip of a knife, a skewer, or the wrong end of a brush.
The line reveals the colour underneath, which is a quiet way to add drawing to a painted surface. Try a few loose marks first; incised lines are difficult to hide, though easy to paint over once dry.
Embedding and Marks
Soft wax will hold things. A thread, a pressed leaf, a scrap of paper, a sprinkling of sand can be pressed in with a fingertip and sealed with a thin coat of medium.
Keep additions thin and flat. Anything bulky will crack as the wax cures and shrinks slightly around it.
Troubleshooting the Common Snags
Muddy Colour
Mud usually comes from over-blending. When you work two wet colours together for too long, they average out into a dull third colour.
Mix on the palette, place the colour once, and leave it alone. If it goes wrong, scrape back to the dry layer and start that passage again.
Layers That Slide
If the knife skids and lifts the layer beneath, the lower layer was too wet. Stop, step away, and give it a few hours.
Thin layers dry fastest. If you are in a hurry, keep your layers thin rather than reaching for heat, which can blister wax.
A Greasy, Shiny Surface
Too much medium makes paint slick and slow to cure. The surface can stay soft and slightly waxy for weeks.
Bring the ratio back toward equal parts, or add a touch more paint. A finished painting should feel dry and matte under the palm, not slippery.
Dust and Lint
Wax stays tacky for hours, which makes it a magnet for cat hair and kitchen fluff. Cover the panel with a wax paper tent between sessions.
Specks that land in a wet layer can often be picked out with the tip of a knife. Ones that have dried in are best left; digging at them does more harm than good.
Washes Versus Opaque Passages
A wash of paint thinned with odourless mineral spirits gives a stained, watercolour-like effect. It is lovely for skies and shadows.
But too much solvent leaves the pigment underbound and chalky. Add a little medium to the wash, and keep solvent-heavy passages thin.
Opaque passages do the opposite work: they sit on top, cover, and catch the light. Most paintings need both, alternating like breathing.
How to Know When It Is Done
Cold wax paintings rarely announce their finish. There is no varnish stage to signal the end, and the surface looks much the same wet as dry, only softer.
Stand back. If your eye moves through the picture without snagging, the composition is probably resolved.
Look for passages that are busy but saying nothing. A scrape usually helps; removal is the great editor of this medium.
Check the edges and corners. Unfinished corners are the most common tell of a painting that stopped early.
And notice whether you are still enjoying it. When your only remaining impulse is to fiddle, it is time to stop.
Finishing, Buffing, and Curing
Let the painting dry flat, somewhere dust-free, for at least a week. Thin layers will feel dry much sooner, but the whole film is still curing.
Once it is firm, buff the surface with a soft, dry cloth in small circles. This brings up a subtle sheen and evens out the matte patches.
Buff gently. Hard pressure on a thick ridge can smear it.
Allow roughly three to four weeks before framing, longer for thick impasto. The wax continues to harden and shrink very slightly during that time.
Many painters frame cold wax work without glass, since glass traps the textured surface and can scuff the high points. If you do frame under glass, use spacers so the glass never touches the paint.
Traditional resin varnish is best avoided on a wax surface; it can bead and lift. A final thin coat of medium, buffed back, is the gentler alternative, and many painters simply leave the panel bare.
A Word About First Results
Your first cold wax panel will probably be brown. Or grey. Or a colour you cannot quite name and would not choose again.
Mine was all three at once, with a scrape through the middle that looked less like a horizon and more like a scratch on a car door.
This is normal, and it is not a sign that you have misunderstood the medium. Cold wax asks you to make decisions before you can see the outcome, and that is a skill that arrives with repetition.
The second panel will be better. The fifth will surprise you. Somewhere around the eighth, you will scrape back a layer and find an accident worth keeping, and you will understand why my grandmother kept that tin in her sewing drawer.
Keep the failed ones. Lean them against a shelf where you can see them. They are honest records of a hand learning a new material, and they cost you almost nothing but an afternoon.
One Small Place to Begin
Cold wax medium rewards the sort of attention that fits into a nap time or a quiet hour after bedtime. Lay a layer, scrape it back, cover the panel, walk away.
Nothing spoils while you are gone. There is no fusing to time, no heat to manage, no window of workability to chase.
Start with one small panel and one colour you love. Give yourself four layers and no expectations.
The wax will do some of the work for you, and the rest will come with your hands.