Introduction
I spent forty dollars on my first chip carving attempt and got a ruined board for it.
The wood was a red oak offcut from the home center, the knife was from a bargain "carving set," and the pattern was a simple row of triangles I'd drawn in five minutes.
The knife skated across the surface. When it did bite, it tore a ragged hole and lifted a splinter the length of my thumb. I assumed I was bad at it. I was mostly working against the material.
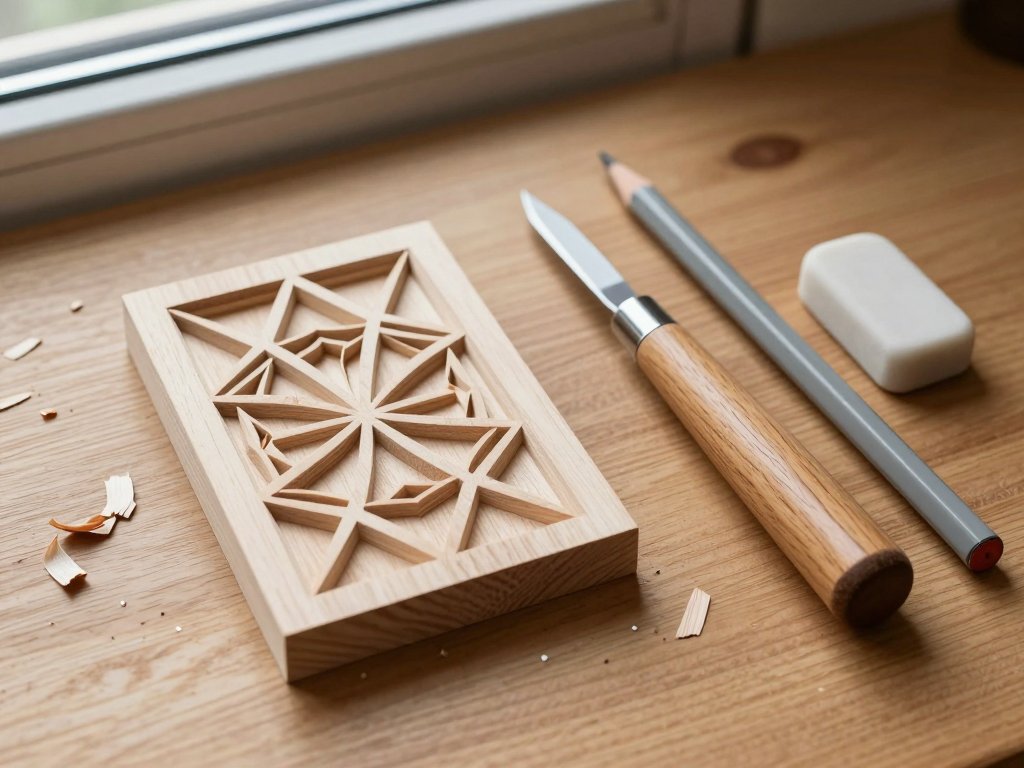
Chip carving is not a force problem. It's a geometry problem. Three cuts meet at a point, the wedge between them lifts free, and the board is left with a clean facet where a flat plane used to be.
Once that clicked, the whole craft got cheap and quiet. One knife, one plank, a pencil, and a winter evening. The small panels you finish are genuinely gift-worthy, which is the other reason I keep coming back to it in November.
What Chip Carving Actually Is
You cut shallow facets out of a flat board. Each facet is a chip, and each chip leaves a small stepped plane behind it. Stack enough of those planes and you get a surface that shifts in the light as you walk past it.
The pattern stays flat. Nothing is raised, nothing is modelled, nothing is removed to leave a subject standing proud. The design lives in the arrangement of cuts and the shadows inside them.
That's the difference in one sentence: relief carving lowers the background around a raised image, and whittling shapes a three-dimensional object out of a block, while chip carving only removes small wedges from a surface that stays a surface.
Practically, that means you can learn the entire craft on a board half an inch thick and never worry about proportion, armature, or grain direction in three dimensions.
Why the Wood Decides Everything
Basswood is the beginner standard for a reason. It's soft enough to cut with a knife held like a pencil, the grain is fine and even, and there are no strong dark grain lines to drag the blade off course.
Butternut is the next step up. Slightly harder, warmer in color, with a coarser texture that shows tool marks more honestly. Jelutong is the carver's standby when basswood is unavailable — soft, pale, and uniformly boring in the best way.
Then there are the woods that will make you quit. Oak has hard latewood bands that deflect a thin blade. Maple is dense enough that a shallow bevel struggles to enter cleanly.
Ash splits along its rings. Pine is the worst of them: the soft earlywood crushes while the hard bands resist, and the resin gums your edge.
None of those are bad woods. They're just wrong for a knife that removes a chip in one pass.
Buying a Basswood Plank That Won't Fight You
Look for a plank around half an inch thick and four to six inches wide. That thickness is your safety margin, and you'll understand why once we get to depth control.
Check flatness before you pay. Sight down the length of the board, then lay a ruler across it in both directions. Any rocking means a cup or a twist, and a twisted board makes your cut depth wander without you changing anything.
Skip knots, skip sap streaks, skip anything with a visible color change running through it. You want pale, uniform, almost featureless wood. Featureless is the goal here.
Craft stores sell small basswood blanks in two-packs for a few dollars, and that's a fine way to start. Buy two. You'll want scrap for the practice rows, and the second blank keeps you from hoarding the first one.
The Two Knives That Matter, and How to Keep Them Sharp
You need two, and only two.
The chip carving knife has a short blade with the point centered on the axis of the handle. That centering matters. It lets you roll the blade through a curve by rotating your wrist, the way you'd steer a pencil, instead of swinging the tip around like a compass.
The second is a stab knife, which has a thin blade that comes to a symmetric point. You press it straight down to leave a small decorative mark — a leaf shape or a diamond — at the end of a line or along a border.
Blade geometry does most of the work. A shallow bevel — somewhere around fifteen to twenty degrees — enters the wood at a low angle, so the knife slices instead of wedging. A steep bevel needs pressure, and pressure is what makes a blade jump.
Skip the folding pocketknife. The blade is too long, the bevel too steep, and the handle too thick to choke up on.
Keeping that edge sharp isn't optional. A dull knife doesn't cut a chip — it crushes one and tears it out sideways, and the tear follows the grain instead of your pencil line.
Dull edges also slip. A sharp edge bites and holds its line; a dull one skates across the surface until it finds a soft spot and dives. That's how people cut themselves — not from carelessness so much as from a blade that refuses to start where it was aimed.
Sharpen on a stone, keeping the bevel flat against the surface. A thousand grit is enough to restore the edge, and a finer stone after that polishes it. Ten or fifteen passes per side is usually plenty.
Then strop. A strip of leather glued to a flat board, charged with polishing compound, realigns the edge in about thirty seconds. Do it every twenty minutes of carving. It's faster than re-sharpening and it keeps the knife cutting like it did on the first chip.
The Three-Corner Chip: Two Cuts, Then the Third
This is the workhorse cut. Three cuts meet at a point and remove a triangular wedge, and the order you make them in decides whether the chip comes out clean or crumbles.
- Mark the triangle. Pick a corner as your point and draw the two sides that meet there.
- Cut the first side. Start at the far corner and draw the blade toward the point, with the bevel riding the waste side. Stop exactly at the point.
- Cut the second side the same way, from its far corner into the same point. Two clean walls now meet in a V.
- Make the third cut along the base, from one corner to the other, and the chip lifts free as one piece.
Two things make that work. The bevel always faces the waste, so the blade rides the wall you're creating instead of digging under it. And the cut edges always point away from your body, with both hands behind the blade.
If the chip pops out in one clean triangle, your depth was even and your stops met. If it shatters into fuzz, one of the three cuts was shallow and the wedge had nowhere to go.
The Two-Corner Cut and the Stab Cut
The two-corner cut makes a line. Two cuts meet at a point and form a narrow trench, and it's what you use for borders, stems, and the outlines that frame a rosette.
Draw the blade from the open end toward the meeting point, not the other way. Cutting toward a point lets the walls meet cleanly. Cutting away from it leaves a ragged junction where the knife exits the wood.
The stab cut is different in kind. Hold the knife vertically, point down, and press straight into the surface — no slicing motion, no sideways travel. The blade leaves a small faceted mark, and a row of them makes a dotted border that catches light like a row of beads.
Use it to terminate a line. A stab mark at the end of a two-corner cut hides the exit point and stops the trench from running past where you wanted it.
Laying Out the Pattern: Grid, Rosette, Border
Layout is where a carving either looks intentional or looks like a mistake repeated forty times. Work in pencil, and work light.
Start with a grid. Measure the board and find the true center by drawing both diagonals; where they cross is your center point. Then rule parallel lines at whatever spacing your pattern needs — half inch or three-quarter inch is comfortable for a first panel.
For a six-petal rosette, set a compass to your chosen radius and draw a circle from the center point. Without changing the setting, step the compass around the circumference; it lands six times.
Connect those six points to the center and you have six petals to carve.
Frame it with a hexagon by connecting the same six points around the outside. A repeating border of triangles or diamonds goes between the hexagon and the board edge, laid out with the ruler against the grid lines.
Draw lightly. A 2H pencil leaves a line you can see and erase; a soft pencil leaves graphite that works into the wood and shows up under any finish. Erase the lines before you oil the piece, not after.
Depth Control: A Third at a Time
Never try to take the whole chip in one pass. Cut roughly a third of the way to your target depth, then come back and take another third, then a final pass.
Two reasons. A shallow first pass tells you where the grain wants to push the blade, and it costs you almost nothing if the line is off. And a thick chip fights the knife the whole way, which is where snapping happens.
Board thickness sets your margin. On a half-inch board you have room to be wrong — a chip that runs deep still leaves material behind. On a quarter-inch board, one overconfident cut goes through the back, and the piece is firewood.
If you can feel the blade starting to lift the chip rather than slice the wall, stop and reset. That lift is the sound of a chip about to break through.
The Practice Sequence
Spend your first session on scrap, not on the piece you plan to give away. The sequence matters more than the hours.
- A row of triangles, spaced evenly, cut with the three-corner method. Ten of them.
- A row of three-corner chips in a line, sharing walls, so you practice meeting a previous cut cleanly.
- One six-petal rosette, drawn with the compass and carved slowly, even if the petals come out uneven.
Expect the first rosette to look rough. The petals will be different sizes, one wall will be ragged, and the center won't quite meet. That's normal, and it's the single most useful piece of wood you'll carve, because it shows you exactly which cut you're rushing.
For a realistic estimate: a six-by-nine-inch plaque with a rosette and a border runs three to five hours for a beginner, split across two evenings. The cutting is not the slow part. The layout is.
Finishing Without Rounding the Facets
Sand lightly, by hand, with worn 320 or 400 grit. You're knocking off fuzz and pencil lines, not smoothing the carving.
This is the step where beginners destroy good work. Sanding across a facet rounds the crisp edge where two planes meet, and those edges are the entire visual effect. Once they're soft, the piece looks store-bought and slightly melted.
Sand with the flat of the paper, in the direction of the grain, and stop as soon as the surface feels smooth to a fingertip.
Finish in this order: sanding sealer only if you plan to paint, because it stops paint from soaking in unevenly. Otherwise go straight to a wipe-on oil — tung or a thin Danish oil.
Apply it sparingly, leave it ten minutes, then wipe it dry. A thin wax over cured oil adds a little protection without building a film.
Stay matte. Gloss reflects a single bright sheet of light across the whole panel and flattens every facet into one surface. Matte scatters light, so each cut plane reads as its own distinct shape, which is the point of the whole exercise.
Four Mistakes and the Causes Behind Them
Almost every problem in chip carving traces back to a specific, fixable cause.
- Tear-out on end grain. Either you're cutting against the grain direction or the knife is dull. Reverse the cut and strop.
- A chip snapping through the bottom. Too deep, too fast. Take a third, check, take another third.
- Edges that look ragged. The cuts were made in the wrong order, or there was no clean stop at the meeting point. Two walls must meet at a point, not pass each other.
- Slipping and slicing the board. The knife was pointed toward your body, so a skate had somewhere to go. Rotate the work, not the blade.
None of these are talent problems. Each one has a mechanical cause, and each cause has a fix you can apply on the next chip.
Small Gifts for a Winter Evening
A coaster set is the easiest win. Four squares of half-inch basswood, a simple border and one rosette each, a cork or felt backing glued on. They take an evening and a half and they get used, which is more than most handmade gifts can claim.
A bookmark wants a thinner blank — a quarter inch at most — so keep your depth shallow and your pattern simple: a column of diamonds and a stab-marked border. Round the top corner so it doesn't dig into a page.
A small box lid is a step up. Carve the top face before you glue anything up, while it's still a flat board you can clamp to the bench. A single centered rosette with a triangle border looks deliberate and takes about two hours.
A decorative plaque is the piece people hang. Six by nine inches, rosette in the middle, repeating border, oil finish, a sawtooth hanger on the back. That's a gift that reads as an heirloom even when the petals are a little uneven.
Conclusion
The forty dollars I wasted on oak taught me more than a class would have. Chip carving rewards a cheap knife, a plain board, and a pattern you drew yourself — not equipment.
The blade-shape and control lessons carry over to other small-scale carving too; the same short, thin blades and the same away-from-yourself rule apply to pumpkin carving, which is a good way to spend an afternoon in October with skills you already built.
Start with scrap. Cut ten triangles, then a rosette, then decide whether you like the way the facets catch the window light. Most people do.
By the time the evenings get long, you'll have a stack of small panels and a knife that's sharper than when you bought it. That's a good trade for one board and a few hours.