Introduction
Summer has a particular kind of light, and it seems to beg for color at the ears. Beaded earrings catch that light beautifully, each bead a tiny prism, each dangle a small celebration. Handmade pairs carry something store-bought jewelry never quite has: your own quiet intention, your own two hands.
If you have never picked up a head pin or a pair of pliers, welcome. This guide will walk you through everything you need to know, from choosing beads to finishing your first pair of statement earrings. The how-to is simpler than you think, and the results are genuinely lovely.
Earrings are a wonderful first project because they are small, forgiving, and finished quickly. A pair asks for only a handful of beads and an hour of your afternoon, yet it frames your face and changes how you feel the moment you put it on.
There is also something quietly rebellious about handmade jewelry in a world of mass production. Your earrings will not appear on anyone else's dresser. That alone is worth the small effort of making them.
The best part? Perfection is not required. Lopsided beads, a slightly crooked crimp, an earring that does not match its twin exactly — these are not failures. They are the fingerprints of handmade work, and they deserve to be worn with pride.
Think of this as a creative afternoon rather than a lesson. Put on music, pour something cold, and let the beads do the talking. By the time you finish, you will have summer accessories no one else owns — and the confidence to make many more.
Choosing Beads for Statement Earrings
Statement jewelry begins with beads that refuse to be ignored. For summer ears, think big, bright, and textural. The bead aisle can feel overwhelming, so let us sort through the options together, from the tiniest seed bead to chunky wooden rounds.
Seed beads are the quiet workhorses of beading. These tiny glass cylinders, no larger than a grain of rice, string into delicate cascades and fringe. They come in every shade imaginable, including luminous finishes that shimmer like the surface of summer water.
Glass beads offer weight and brilliance, catching light in a way that reads as grown-up luxury. Acrylic beads keep things light on the ear and easy on the budget, while wooden rounds and discs bring organic warmth. Pearl-look beads add a soft, vintage glow.
Size matters as much as material. A statement earring needs beads with presence — think eight millimeters and up for focal beads, with smaller accents for contrast. Mixing two or three sizes gives your design depth and a handmade, collected feel.
For summer palettes, trust the season: coral and turquoise, lemon yellow and sky blue, seafoam green with creamy white. Terracotta and sand tones feel effortlessly chic. When in doubt, choose one bright hue and pair it with a neutral — that is a recipe that rarely misses.
Quick summer palettes to try:
- Coral and turquoise for a coastal, breezy vibe.
- Lemon yellow and white for a bright daytime look.
- Terracotta and cream for warm summer evenings.
You need only small quantities for earrings, so buy beads by the strand or in tiny mixed packs. Craft stores sell individual beads by weight, which is perfect for testing a palette before you commit to a full strand.
A final note on quality: hold beads up to the light and check for smooth holes and even color. Cheap beads often have rough edges that fray thread over time. A little care at the bead shop saves a great deal of frustration at the bench.
Essential Tools and Supplies
You do not need a studio full of equipment to make beaded earrings. A handful of good tools and a small collection of findings will carry you through dozens of projects. Most supplies cost a few dollars each and last for years.
The essential toolkit is compact: round-nose pliers for forming wire loops, chain-nose pliers for gripping and bending, and flush cutters for snipping wire cleanly. A beading mat keeps tiny beads from rolling off the table, and a good lamp saves your eyes.
Findings are the metal bits that turn beads into earrings. You will want ear wires, also called hooks; head pins with a flat stopper at one end; eye pins for linking components; and jump rings for connecting everything. Crimp beads secure wire ends.
For stringing, choose beading wire for structure or strong thread for flexibility. Beading wire, like soft flex-style cord, holds its shape and suits dangle earrings beautifully. Thick cotton or waxed thread works for tassels and wrapped designs.
Set up a small work area before you begin. A tray with raised edges corrals loose beads, and a piece of felt makes a soft landing pad for tiny parts. Keep your pliers within reach and your coffee safely on the other side of the table.
If you are starting from scratch, buy a beginner jewelry kit rather than loose pieces. Kits bundle pliers, cutters, wire, and a generous mix of beads and findings, often for about twenty dollars. It is the easiest way to begin, and you will use every part of it.
A basic kit should include:
- Round-nose and chain-nose pliers plus flush cutters.
- Beading wire, waxed thread, and a beading needle.
- Ear wires, head pins, eye pins, jump rings, and crimp beads.
- A starter assortment of glass, wood, and seed beads.
Basic Techniques to Know
Every pair of beaded earrings begins with stringing. Slide beads onto wire or thread in your chosen order, then finish the end with a crimp bead, a knot, or a loop. The technique is simple; the artistry lives in your color choices.
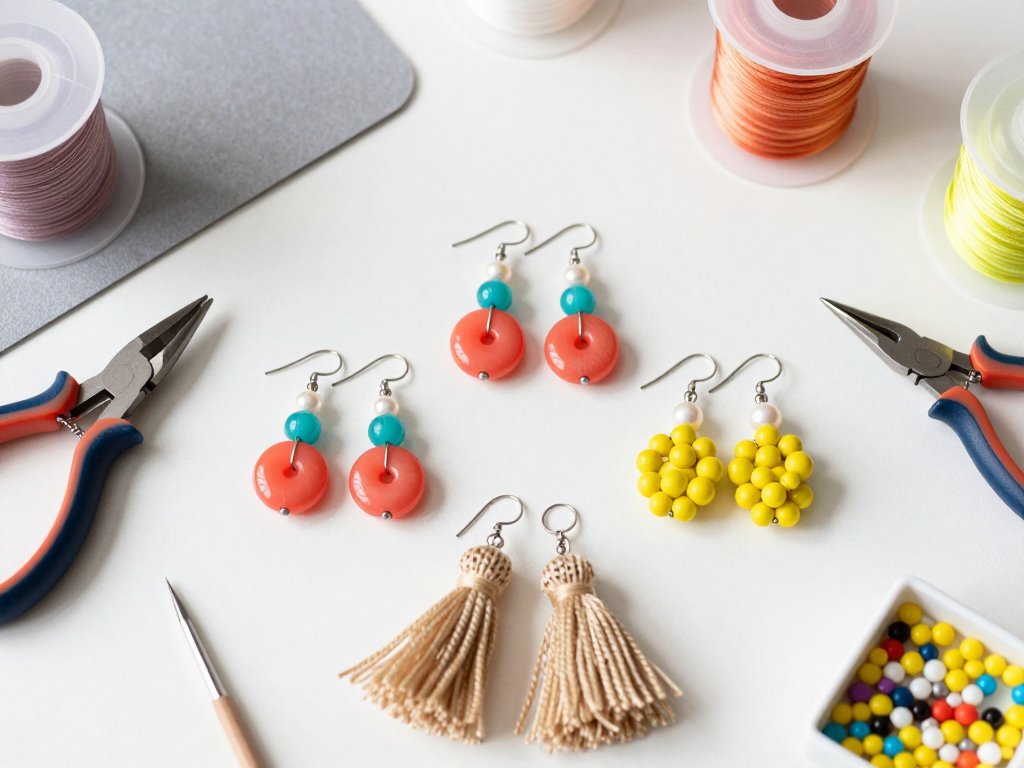
The simple dangle is the perfect first project. String beads onto a head pin, form a loop at the top with round-nose pliers, and hook the loop onto an ear wire. In ten minutes you will have a wearable, swaying pair.
Bead clusters gather several strands or loops into one lush arrangement. Make three or four small loops on separate head pins, then join them all onto a single jump ring. The result is a full, garden-like shape that reads clearly as statement jewelry.
Tassel earrings are surprisingly easy. Cut several equal lengths of thread, fold them in half, and bind the top with a crimp cover or wrapped wire. Attach the bundle to a head pin, add a bead cap for polish, and hang it from an ear wire.
Hoop earrings get a bohemian upgrade when you thread beads along the curve. Choose a plain metal hoop, slide beads around half or all of its circumference, and secure the ends. The movement as you walk is pure summer delight.
If your ears are sensitive, choose hypoallergenic findings from the start — surgical steel and gold-filled wires are gentle and still inexpensive. A comfortable earring is one you will actually wear all summer long.
Practice each technique once on scrap materials before you commit to your good beads. Ten minutes of warm-up makes your fingers remember the motions, and the second attempt is always neater than the first.
Three Beginner Projects to Try
Now for the fun part. Each project below builds on the techniques above, uses the same basic toolkit, and takes under an hour. Start with the first and work your way through, or skip straight to your favorite.
Project One: Simple Dangle Earrings
For your first pair, gather eight to ten medium glass beads in two complementary colors, two head pins, two ear wires, and your pliers. Choose beads with generous holes so they slide easily onto the pin.
- Slide the beads onto a head pin in a pleasing order, alternating your two colors. Leave about a quarter inch of bare pin above the top bead.
- Using round-nose pliers, bend the bare wire at a right angle, then wrap it around the pliers' jaw to form a neat loop. Trim any excess with flush cutters.
- Open the loop on an ear wire with a gentle twist — never pull — and slip your dangle into place. Close the loop, then repeat the whole process for the second earring.
Try varying the bead sizes along the pin, with a larger bead at the bottom for a gentle swing. The same steps make a necklace charm, a bracelet dangle, or a key ring gift.
Project Two: Beachy Tassel Earrings
Tassels conjure golden-hour walks and linen dresses. You will need waxed cotton thread in a sandy or ocean tone, a bead cap, two head pins, two ear wires, and scissors.
- Cut twelve strands of thread about six inches long. Fold them in half so the ends meet evenly, creating a loop at the top.
- Thread the loop end through the hole of a bead cap, then slide the folded bundle onto a head pin. Add a single accent bead above the cap for a polished crown.
- Form a loop at the top of the head pin and attach it to an ear wire. Trim the thread ends so they fall in a clean, even line. Repeat for the second earring.
For a richer tassel, double the strands or mix two thread colors. A tiny seed bead at each thread tip adds movement and a playful rattle of color as you walk.
Project Three: Bead Cluster Earrings
This project delivers maximum statement with minimum fuss. Gather small seed beads in three harmonious colors, three head pins per earring, jump rings, and ear wires.
- Create three short dangles, each on its own head pin: one strand of each color, ending each with a loop at the top.
- Open a jump ring and thread all three loops onto it, then close the ring securely with pliers.
- Attach the jump ring to an ear wire. Fluff the strands gently so they fan into a cluster, and admire your handiwork. Repeat for the second earring.
Vary the strand lengths slightly so the cluster feels organic rather than stiff. Adding a single larger focal bead to one strand gives the cluster a center of gravity and a designer touch.
Design Tips: Color, Scale, and Symmetry
Great design often comes down to three colors: one bold, one soft, one neutral. Coral, blush, and cream. Turquoise, pale blue, and white. Limit your palette and your earrings will look intentional rather than busy.
Statement jewelry thrives on scale. A single tiny bead reads as a whisper; a chunky round or a long cascade reads as a declaration. For summer statement earrings, embrace bigger beads, longer drops, and layered strands.
Symmetry feels polished and calm; asymmetry feels modern and playful. Matching pairs are classic, but a deliberately mismatched pair — one long, one short — can be the more interesting choice. Decide on purpose, not by accident.
Consider the wearer's face shape and hairstyle. Longer drops elongate round faces; petite studs flatter narrow features. When in doubt, medium-length dangles suit nearly everyone and photograph beautifully.
Texture matters as much as color. Mix glossy glass with matte wood, or pair shiny seed beads with soft tassel fringe. The contrast catches the eye from across the room, exactly what statement jewelry is supposed to do.
Weight is part of the design, too. Wood and acrylic keep long earrings comfortable for a full day at the park, while glass and metal add a satisfying sway. Test the heft in your hand before you commit to a length.
Troubleshooting Common Frustrations
Tight knots in thread happen to everyone. Resist the urge to yank. Insert a needle or pin into the knot and gently work it loose, or use the tip of your chain-nose pliers to tease the fibers apart.
If your crimp beads slip, they are either too large for the wire or not fully flattened. Squeeze once firmly with the flat jaws of your pliers, not the round ones, and test the grip. When in doubt, use a slightly smaller crimp.
Ear wires that tarnish quickly are usually inexpensive base metal. Choose surgical steel, sterling silver, or gold-filled findings instead; they cost a little more and save your earlobes and your patience. Store pairs in a dry, airtight container.
Getting both earrings to match is the classic beginner worry. Count your beads as you string, and lay both earrings side by side before finishing the second. Compare length against a ruler or a flat surface, and adjust before you attach the ear wires.
Thread that snaps mid-project usually means a rough bead hole. Run the end of a needle through each bead to feel for sharp edges, and replace any offender. Waxed thread and flexible beading wire also resist fraying far longer than plain cotton.
And when a pair simply refuses to cooperate, set it aside. Walk away, make tea, return later. Most beading mistakes unravel in minutes once your hands are calm.
Caring for Your Handmade Earrings
Handmade jewelry rewards a little tenderness. Keep your earrings away from water, perfume, and hairspray, all of which dull finishes and loosen knots. Put them on last, after your morning routine is complete.
For storage, a small compartment box or a hanging organizer keeps pairs together and tangle-free. Better yet, display your favorites on a corkboard or jewelry stand where they double as decoration between wearings.
Clean beads gently with a soft, dry cloth. If a strand dulls, a barely damp cloth and immediate drying works for glass and acrylic. Skip polishes and dips, which can strip color from wooden and pearl-look beads.
Check findings now and then. A loose ear wire or a bent jump ring is a five-minute fix, not a tragedy. A little maintenance keeps your favorite summer accessories bright for many seasons to come.
Traveling with handmade earrings? Thread each pair through a button or a piece of felt, or tuck them into a pill organizer. Your carefully crafted dangles will arrive exactly as you made them.
Conclusion: Wear Them Proudly
There is a quiet pride in wearing something you made with your own hands. Every time you catch your reflection, you will remember the afternoon, the music, the beads scattered across the mat. That memory is part of the jewelry now.
Once you finish these three projects, the possibilities multiply. Try a necklace to match your dangles, or a beaded bracelet for a friend. Gift a pair to someone who needs a little color — handmade gifts carry twice the warmth.
Keep your beginner's heart. Every master beader once made a lopsided first pair, and most of them wore it anyway. Make something imperfect, make something bright, and let your ears do the celebrating.
Summer is short; wear the good earrings. Gather your beads, clear the table, and begin. Your first pair of beaded statement earrings is only a few happy minutes away.