Why Yarn Tassel Keychains Are the Perfect Kid-Friendly Craft
There is something incredibly satisfying about turning a simple skein of yarn into something you can hold in your hand, attach to your backpack, and show off to your friends. Yarn tassel keychains are exactly that kind of project — quick enough to hold a child's attention, versatile enough to spark endless creativity, and practical enough that you'll actually use the finished product. Whether you are a parent looking for a rainy-day activity, a teacher searching for a classroom craft that won't turn into a mess, or a crafter who just wants a low-stakes project to unwind with, making yarn tassel keychains checks every box.
This guide walks you through every single step, from choosing your yarn to adding the final bead. I have tested these instructions with actual kids (my niece's third-grade class, to be exact), so I know which parts trip people up and which shortcuts actually work. By the end of this tutorial, you will have a beautiful, handmade keychain and the confidence to make a dozen more.
What You Will Need: The Full Materials List
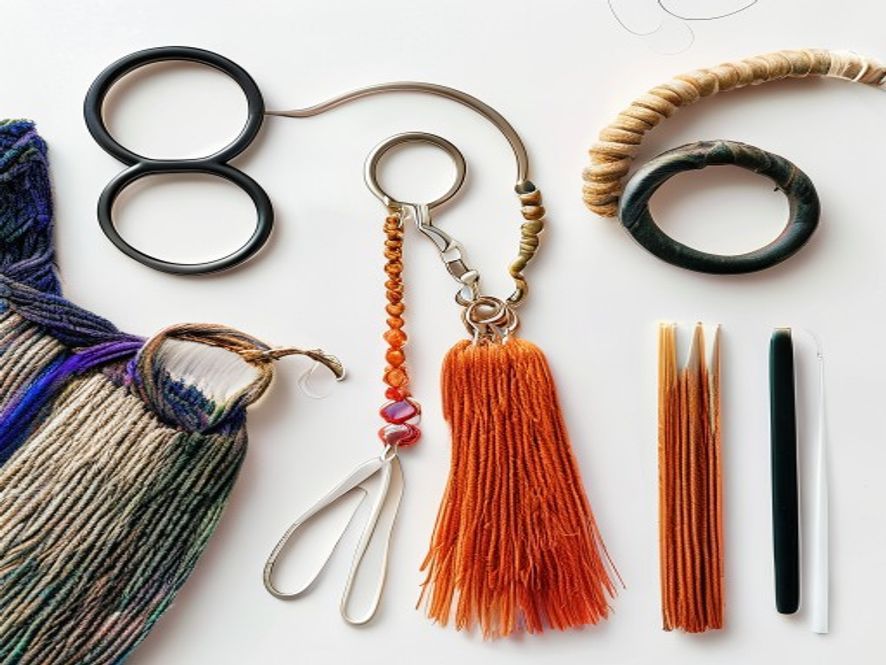
One of the best things about this craft is how minimal the supplies are. You probably already own most of these items. Here is exactly what you need to make a basic yarn tassel keychain, plus a few optional extras that take your project to the next level.
Essential Supplies
- Yarn in your choice of colors — Worsted-weight (medium/4) yarn works best for beginners. You can use acrylic, cotton, wool, or blends. More on choosing below.
- A keychain ring — Split rings (the kind you find on any keychain) are ideal. You can find them at craft stores, hardware stores, or online in packs of fifty for a few dollars. Lobster claw clasps also work well if you prefer a more polished look.
- Cardboard or a tassel maker — A small rectangle of cardboard (roughly 3 by 4 inches) is all you really need. You can also buy a plastic tassel-making tool from any craft store, but cardboard is free and works just as well.
- Scissors — Sharp scissors make clean cuts. For kids, blunt-tip scissors are safer, though an adult will need to handle the final trimming.
- A piece of matching or contrasting yarn — This is for tying off the top of the tassel. Use the same color for a seamless look, or a contrasting color for a deliberate accent.
Optional but Fun Extras
- Pony beads or seed beads — Slide these onto the tie before securing the tassel. They add color, texture, and a little bit of weight that helps the tassel hang nicely.
- Small charms — Tiny metal charms (stars, hearts, animals, letters) can be attached to the tassel tie or dangled from the keychain ring.
- A darning needle — Useful for threading beads onto the tie or for weaving in stray ends.
- Fabric glue or clear-drying craft glue — A dot of glue on the knot keeps everything secure, especially if kids will be using the keychains roughly.
- Embroidery floss — For wrapping the top of the tassel in a decorative band. This adds a polished, professional touch.
Step-by-Step Tutorial: Making Your First Yarn Tassel Keychain
Follow these instructions carefully the first time, and you will have a perfect tassel. The process is simple, but a few small details make a big difference in the final result.
Step 1: Wrap the Yarn
Cut a piece of cardboard into a rectangle about 3 inches wide and 4 inches tall. The width of the cardboard determines the length of your tassel. A 3-inch-wide card gives you a tassel that is roughly 3 inches long, which is a nice size for a keychain. If you want a shorter, chunkier tassel, use a 2-inch-wide card. For a long, dramatic tassel, go up to 4 or 5 inches.
Hold the end of your yarn against the top edge of the cardboard and start wrapping the yarn around the card lengthwise. Do not wrap too tightly — you want the yarn to sit snugly but not so tight that it digs into the cardboard or becomes difficult to remove later. For a full, fluffy tassel, wrap the yarn about 40 to 50 times. For a thinner, more delicate tassel, 20 to 30 wraps will do. If you are making multiple tassels for a cluster, aim for 30 wraps each so they stay uniform.
Pro tip: If you are using multiple colors for a striped or ombre effect, switch yarns partway through your wraps. For a rainbow tassel, wrap ten times in red, then ten in orange, then ten in yellow, and so on. The color transitions will show beautifully in the finished tassel.
Step 2: Cut and Tie the Top
Once you are happy with the number of wraps, cut the yarn, leaving a tail of about 6 inches. Carefully slide the wrapped yarn off the cardboard, keeping the loops together. Do not let them tangle. Lay the bundle flat on your work surface.
Take a separate piece of yarn about 10 inches long. Slide it under the bundle at the top edge — this is the piece that will hold the tassel together and attach to your keychain ring. Tie a tight double knot. Pull firmly; this knot is what keeps your tassel from falling apart. If you are using beads or charms, thread them onto the two tails of this tie now, before you go any further. Slide a bead up to the knot, then tie another knot above it to lock it in place.
Step 3: Cut the Loops
Now for the satisfying part. Pick up the bundle and hold it by the top tie. Take your scissors and cut straight across the bottom loops. All the loops will spring open into individual strands. Give the bundle a firm shake to separate the strands and fluff them out. If some strands are uneven, do not worry — we fix that in step five.
Step 4: Attach the Keychain Ring
Thread the two tails of your top tie through the keychain ring. Pull them through until the ring sits snugly against the top of the tassel. Tie the tails together in a tight double knot around the ring, then trim the ends short. If you want extra security, add a tiny dab of glue to the knot and let it dry for a few minutes.
Alternatively, you can thread the ring onto the tie before tying the knot in step two. Some people find this easier. Try both methods and see which one you prefer.
Step 5: Wrap the Tassel Neck
This step is optional but it makes your tassel look infinitely more polished. Take a length of matching or contrasting yarn (about 12 inches) and wrap it tightly around the top of the tassel, just below the keychain ring. Wrap five to eight times, then tuck the tail under the wraps using your darning needle or the tip of your scissors. This creates a neat "neck" or "collar" that hides the tie and gives the tassel a finished appearance. You can also use embroidery floss or thin ribbon here for a different texture.
Step 6: Trim for Perfection
Lay the tassel flat on a cutting mat or a piece of scrap cardboard. Use sharp scissors to trim the bottom edges evenly. A common rookie mistake is trimming at an angle, so hold your scissors parallel to the work surface and cut in one smooth motion. If you want a rounded bottom instead of a flat one, gently curve your scissors as you cut. Give the tassel another shake and a light finger-comb to fluff it back up. Congratulations — you just made your first yarn tassel keychain.
Choosing the Right Yarn: Acrylic, Cotton, Wool, and Blends Compared
Not all yarns are created equal when it comes to tassel-making. The fiber you choose affects how the tassel looks, feels, and holds up over time. Here is a breakdown of the most common options.
Acrylic Yarn is the most popular choice for kid-friendly crafts, and for good reason. It is inexpensive, widely available in every color imaginable, and machine-washable. Acrylic tassels hold their shape well and do not shrink. The downside is that acrylic can look a bit shiny or synthetic in bright light, and it does not have the same soft, natural hand-feel as animal fibers. For a children's craft where cost matters and the keychain will see rough use, acrylic is your best bet.
Cotton Yarn has a matte finish and a soft, slightly textured surface. It is hypoallergenic, so it is a great choice for kids with sensitive skin. Cotton tassels have a clean, modern look that works beautifully for market bags, keychains, and home decor. However, cotton does not have the same springiness as wool or acrylic, so the tassel may look a little flatter and less fluffy. Mercerized cotton (like the kind used for dishcloths) has a subtle sheen that adds a nice touch.
Wool Yarn creates the fluffiest, most luxurious tassels. The natural crimp of wool fibers means the strands bloom and fill out beautifully. Wool also felts slightly with friction and moisture, which can make the tassel even denser over time. The downsides are cost and care — wool is more expensive, and it must be hand-washed or dry-cleaned. For a special gift or a high-end keychain, wool is wonderful. For a classroom of twenty kids, maybe skip it.
Blends (acrylic-wool, cotton-acrylic, etc.) offer the best of both worlds. A 50/50 acrylic-wool blend gives you the softness and fluff of wool with the durability and washability of acrylic. Cotton-acrylic blends are soft, breathable, and less prone to pilling. If you are unsure what to buy, a medium-weight acrylic-wool blend is a safe, beginner-friendly choice that produces great results.
Adding Beads and Charms: Level Up Your Design
A plain yarn tassel is lovely, but adding beads or charms turns it into a statement piece. Here are the best techniques for incorporating extra elements into your keychain.
Beads on the Tie: The simplest method. Before you knot the top tie around the keychain ring, thread one or more beads onto the tails and slide them up to the knot. A single large wooden or acrylic bead in a contrasting color makes a bold statement. A stack of three smaller beads in graduated sizes creates a elegant, tiered look. Pony beads (the classic plastic kind with large holes) are perfect for kids because they are easy to thread and come in neon, metallic, and translucent varieties.
Beads Dangling from the Ring: Instead of placing beads on the tassel tie, thread them onto a separate short length of yarn or thin cord and attach that to the keychain ring. This creates a mini-dangle that swings below the ring and above the tassel. It adds movement and visual interest.
Charms: Tiny metal or enamel charms can be attached in several ways. The easiest is to use a small jump ring to connect the charm to the keychain ring itself. You can also tie a charm onto the wrapped neck of the tassel using a bit of embroidery floss. For a personalized touch, use letter charms to spell out initials or short words.
Embedded Beads: For a truly unique look, you can thread a few seed beads onto individual strands of yarn before wrapping them around the cardboard. When you cut the loops and fluff the tassel, the beads stay nestled within the strands, peeking out like hidden treasures. This technique takes patience, but the result is stunning.
Color Combination Ideas That Always Work
Choosing colors can be the hardest part of any craft project. Here are some tried-and-true combinations that look amazing on yarn tassel keychains.
Ocean Vibes: Teal, seafoam green, and sandy beige. Add a tiny starfish charm for the full beachy effect. Perfect for summer or coastal-themed gifts.
Sunset Gradient: Coral, peach, warm yellow, and a touch of lavender. This ombre-style combination is gorgeous when you gradually shift colors during the wrapping step.
Bold and Bright: Fuchsia, electric blue, and lime green. This is the go-to combo for kids who want their keychain to pop. Use neon acrylic yarn for maximum intensity.
Earthy Neutrals: Cream, tan, terracotta, and olive green. These colors work beautifully with wooden beads and natural cotton yarn. They look grown-up enough to carry on a work bag.
Monochromatic: Three shades of the same color — for example, light pink, rose, and magenta. Monochromatic tassels always look intentional and sophisticated. Add a silver or gold bead for a touch of elegance.
Rainbow: Red, orange, yellow, green, blue, purple, in equal amounts. Rainbow tassels are cheerful, nostalgic, and impossible to lose in the bottom of a backpack. They are also a fantastic way to use up small amounts of leftover yarn from other projects.
Safety Tips for Crafting with Kids
Crafting with children is fun and rewarding, but it requires a little extra planning to keep everyone safe and happy. Here are my top safety tips for the yarn tassel keychain project.
Use Blunt-Tip Scissors: Invest in a pair of good-quality blunt-tip scissors for your young crafters. They cut yarn just fine but are much less dangerous than pointed scissors. For the final trimming step, an adult should take over with sharp scissors to get that clean, even edge.
Supervise Small Parts: Beads, small charms, and jump rings are choking hazards for children under three. If you are crafting with toddlers or preschoolers, stick to large pony beads (at least 10mm in diameter) and skip the tiny metal charms. Always keep an eye on what goes into little mouths.
Choose Non-Toxic Materials: Look for yarn labeled non-toxic and washable. Most commercial acrylic and cotton yarns sold in craft stores meet safety standards, but it is worth checking the label if you are buying from a dollar store or discount bin. If you use glue, choose a non-toxic, water-based craft glue that washes out of clothes and off skin easily.
Set Up a Low-Mess Workspace: Yarn is one of the least messy craft materials, which is one reason I love it for kids. But loose fibers and tiny bits of cut yarn can still end up on the floor. Lay down a large sheet of newspaper or a vinyl tablecloth for easy cleanup. Have a small bowl or tray where kids can place their cut ends instead of dropping them on the floor.
Take Breaks: Kids have short attention spans, and wrapping yarn forty times can feel tedious after a while. Break the project into stages: wrap the yarn one day, cut and tie the next. This keeps the activity feeling fresh and prevents frustration. It also gives the glue extra drying time if you used any.
Creative Variations to Try
Once you have mastered the basic tassel, the fun really begins. Here are six variations that use the same fundamental technique but produce wildly different results.
Multi-Color Striped Tassel
Instead of wrapping the entire bundle with one color, switch between two or three colors at regular intervals. For example, wrap ten times in white, ten times in pastel pink, ten times in white again. The result is a tassel with clean horizontal stripes. This works best with colors that have strong contrast, like black and yellow or navy and white.
Ombre Tassel
An ombre tassel fades gradually from one color to another. To achieve this, start wrapping with color A for about thirty wraps, then lay color B alongside it and wrap both together for ten wraps (this creates the transition zone), then continue with color B alone for another thirty wraps. The overlapping section blends the two colors together softly. Ombre tassels look incredibly professional and make great gifts.
Pom-Pom Combo Keychain
Attach a small pom-pom to the bottom of your tassel for a playful, fluffy accent. You can make a pom-pom using the same cardboard method (wrap yarn around a fork or a small cardboard U-shape, tie in the middle, cut the loops, and trim into a sphere). Use a darning needle to sew the pom-pom onto the bottom center of the tassel, or just tie it on with a bit of yarn. The texture contrast between the sleek tassel strands and the fuzzy pom-pom is delightful.
Mini Tassel Cluster
Instead of one large tassel, make three to five mini tassels and attach them all to the same keychain ring. Mini tassels use fewer wraps (about fifteen to twenty) and a narrower piece of cardboard (1.5 inches wide). Vary the colors and lengths slightly for a boho, carefree look. A cluster of mini tassels in pastel rainbow colors is absolutely adorable and sells like hotcakes at craft fairs.
Fringed Tassel with Wrapped Band
After you wrap the neck of your tassel, let the tails hang down as part of the fringe instead of tucking them in. This creates a contrasting stripe near the top of the tassel that echoes the colors or textures of your wrapped band. Use metallic thread or embroidery floss for the band, and let the tails blend into the main tassel body for a subtle, designer touch.
Beaded Cascade Tassel
Before wrapping the yarn around your cardboard, thread a needle with a long piece of thread and string a sequence of beads onto individual strands. When you wrap, these beaded strands will be interspersed throughout the tassel. After cutting and trimming, the beads will dangle at slightly different heights, creating a cascade effect. This is the most advanced variation, but the result is a wearable piece of art.
How to Care for Your Yarn Tassel Keychain
Your handmade keychain will last for years with minimal care. If it gets dusty or dirty, hand-wash it gently in cool water with a drop of mild detergent. Squeeze out the excess water (do not wring or twist), then lay it flat on a towel to air dry. Once dry, give it a gentle shake and finger-comb the strands back into place. If the tassel looks a bit flattened after washing, you can steam it lightly with a garment steamer or hold it over a kettle spout for a few seconds — the steam will help the fibers relax and fluff back up.
Avoid getting the keychain wet repeatedly if you used wool, as wool can felt and shrink with repeated washing. Acrylic and cotton tassels are much more resilient and will hold up fine even with occasional exposure to rain or hand sanitizer (which, let us be honest, is everywhere these days).
Why This Craft Belongs in Your Rotation
Yarn tassel keychains hit a sweet spot that few crafts manage. They are quick enough to finish in a single afternoon — no waiting for paint to dry or clay to cure. They are inexpensive enough that you can make a batch of ten without breaking the bank. They are customizable enough that no two ever have to look the same. And they are genuinely useful: everyone needs a keychain, whether it is for house keys, a backpack zipper pull, a lunch bag, or a gym locker.
I have seen these keychains become party favors at a child's birthday party, handmade gifts for teachers at the end of the school year, and even best-selling items at a middle school craft fair. There is something about a fluffy, colorful tassel that makes people smile. Maybe it is the texture, maybe it is the colors, or maybe it is just knowing that someone made it by hand.
So grab your yarn, find a piece of cardboard, and make a tassel. Then make another one in a different color. Then make one for your mom, your best friend, and the barista who always draws a heart in your latte foam. By then, you will be hooked — and honestly, that is the whole point.
Frequently Asked Questions
How long does it take to make one tassel keychain? About 15 to 20 minutes once you have done it once. Your first one might take 30 minutes as you learn the technique.
Can I use this method to make earrings? Absolutely. Just use a smaller piece of cardboard (1.5 by 2 inches), fewer wraps (15 to 20), and attach an earring finding instead of a keychain ring. Mini tassel earrings are very trendy right now.
My tassel looks lumpy and uneven. What went wrong? Most likely, you did not wrap the yarn evenly on the cardboard, or you pulled the top tie too loosely. Try again with more attention to even tension. A good trim at the end hides a multitude of sins.
What is the best yarn for a beginner? A medium-weight acrylic yarn in a solid color. It is forgiving, inexpensive, and easy to work with. Save the boucle, eyelash, or novelty yarns for after you have the basic technique down.
How do I keep my tassel from fraying at the cut ends? Yarn ends naturally fray a tiny bit with use, but this usually gives the tassel a soft, lived-in look rather than a damaged one. If you want a very clean finish, dip the bottom edge of the tassel in a shallow dish of fabric stiffener or diluted white glue and let it dry completely before trimming. This seals the ends and prevents fraying.
Share Your Creations
I would love to see what you make. Snap a photo of your yarn tassel keychain and tag it with #ArtToolsCrafts on Instagram or Pinterest. Whether you went with a bold rainbow stripe, a subtle earth-tone ombre, or a beaded cascade masterpiece, your creation deserves to be seen. And if you invent a variation I haven't covered here, definitely share that too — the best craft ideas come from people like you who take a basic technique and make it their own.
Happy crafting, and remember: there is no such thing as too many tassels.