Introduction
There's something about the beach that begs to be captured on paper. The way the waves curl onto the sand, the soft curve of a distant dune, the line where the ocean meets the sky in a blur of pale blue and gold — these are the kinds of scenes that make you wish you could press pause and hold onto that quiet moment just a little longer.
The wonderful news is that you can. Drawing beach landscapes is one of the most rewarding subjects for beginners because the beach is naturally forgiving. Sand doesn't need to be perfectly smooth. Waves don't have to be symmetrical. Clouds drift and change before your eyes anyway. There's a freedom in drawing the shore that other subjects don't quite offer — permission to be loose, to suggest rather than define, to capture a feeling instead of a photograph.
And the best part? You don't need a studio full of supplies. A pencil, some paper, and a quiet twenty minutes are enough to start creating beach scenes that feel like little vacations you can hold in your hands.
What You'll Need
One of the most encouraging things about learning to draw landscapes is how little you truly need to get started. Here's a simple kit that will carry you through every beach scene you can imagine:
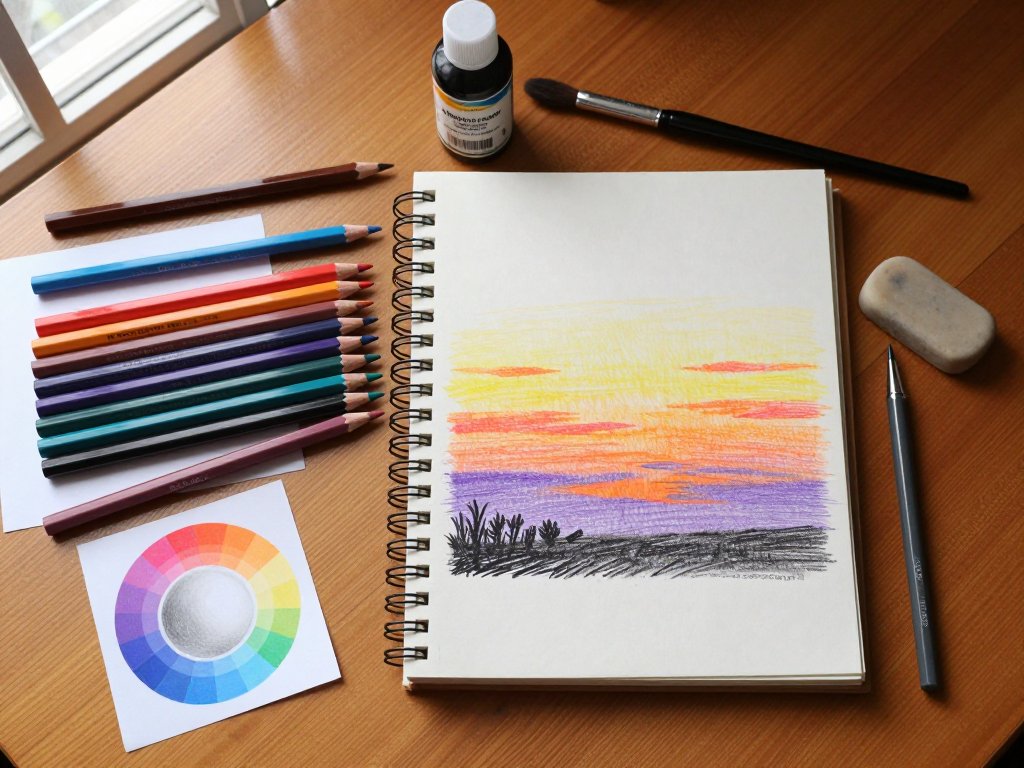
- A graphite pencil set — an HB for light sketching and a 4B or 6B for darker shadows and depth. A basic set of three pencils costs about $5.
- Sketch paper — any smooth drawing paper will do. A spiral-bound sketchbook around 9x12 inches is perfect for practice.
- A soft eraser — a kneaded eraser is ideal because it lifts graphite without damaging the paper, but any clean eraser works.
- A blending stump or tortillon — for softening lines and creating smooth gradients in the sky and water. A cotton swab works as a substitute in a pinch.
That's truly it. Beach drawing is not about having the fanciest tools — it's about learning to see the subtle shapes and lines that make the shore so beautiful.
Start with the Horizon Line
Every beach landscape begins with one simple decision: where does the sky meet the sea? Your horizon line is the foundation of the entire drawing, so take a quiet moment to decide where it falls on your page.
A lower horizon line (about a third of the way from the bottom) gives you more room for a dramatic sky full of clouds. A higher horizon line (two-thirds of the way up) lets you focus on the beach itself — the sand, the surf, the details at your feet. A centered horizon line feels balanced and calm, perfect for serene, minimalist scenes.
Lightly sketch your horizon line with an HB pencil using gentle, barely-there strokes. This is your anchor. Everything else — waves, sand, clouds, dunes — will relate to this single line.
A gentle reminder: your horizon line should be perfectly straight. If you're worried about wobbling, try resting the side of your hand on the paper as you draw or use the edge of a ruler as a guide. There's no shame in a little help — this is about enjoying the process, not proving anything.
Creating the Sky
The beach sky is rarely flat. Even on the clearest days, there's a gentle gradient from pale blue at the top to nearly white at the horizon. Capturing this transition is what gives your drawing depth and atmosphere.
Using the side of your HB pencil, shade the top third of your sky area with light, even strokes. As you move down toward the horizon, press more lightly so the paper begins to show through. Use your blending stump or a tissue to soften the graphite into a smooth, cloud-like gradient.
For clouds, keep them simple and soft. Draw the basic shapes with light circular motions, then use your eraser to lift out highlights where the sun would hit. Beach clouds tend to be low and horizontal, stretched thin by ocean breezes. A few soft, elongated shapes are more convincing than a dozen puffy cotton balls.
If the sun is in your scene, leave a small patch of paper completely white around it. The contrast between the shaded sky and the bright sun will make your drawing feel warm and alive.
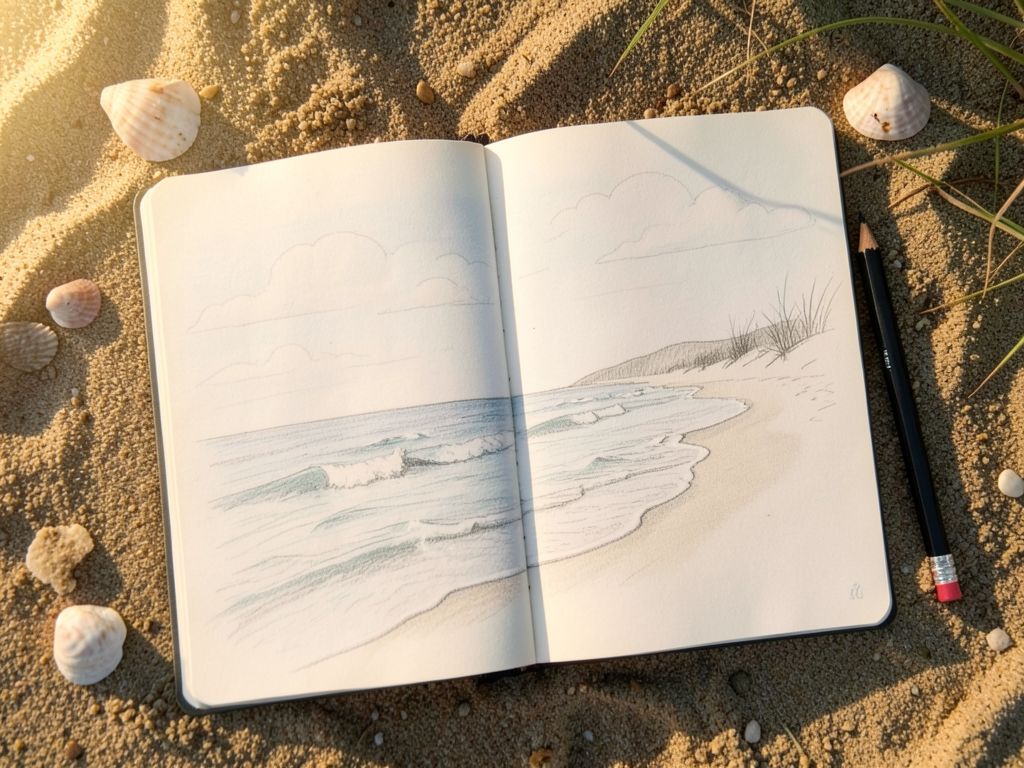
Drawing the Water
The ocean is the heart of any beach landscape, and it's easier to draw than you might think. The secret is to remember that the sea is made of horizontal lines — some dark, some light, some broken — that flow across your page.
Start by shading the water area with a light, even layer of graphite, slightly darker near the horizon and lighter near the shore. Then use your 4B pencil to add a few horizontal bands of darker shading that represent distant waves. These don't need to be perfectly straight or evenly spaced — in fact, irregular spacing looks more natural.
Near the shoreline, add breaking waves. A simple white curl at the top of a darker band of water is enough to suggest a wave without needing to draw every drop of foam. Use your eraser to lift out white lines where the foam would be — this negative-space approach is much more effective than trying to draw white on top of grey.
For reflections on the water's surface, add very light horizontal dashes using the side of your HB pencil. These tiny highlights suggest the shimmer of sunlight on moving water and add an incredible amount of realism for almost no effort.
Adding the Beach and Sand
Sand is wonderfully forgiving to draw because it's inherently soft and uneven. The key is to avoid overworking it. A few subtle marks go a long way.
Shade the sand area with light horizontal strokes using the side of your pencil. Beach sand is usually lighter near the water (where it's wet and reflects more light) and darker higher up the shore (where it's dry and catches shadows).
Add a gentle curve to the shoreline where the water meets the sand. This line should echo the natural shape of a beach — softly arcing in and out rather than running perfectly parallel to your horizon. This curve is what makes your drawing feel like a real place rather than a diagram.
If you want to add texture, lightly dot the sand area with small marks using the point of your pencil. A few scattered suggestions of shells, pebbles, or footprints in the foreground can add wonderful depth and invite the viewer's eye into the scene.
Including Beach Elements
Once your basic sky, water, and sand are in place, you can add elements that make your beach scene feel personal and lived-in. A few well-placed details can transform a generic shoreline into a place someone would want to visit.
Dunes and grasses: Lightly sketch rolling shapes behind the beach using soft, curved lines. Add a few tall blades of beach grass by drawing quick, upward strokes from the dune line. Don't draw every blade — a cluster of a dozen or so is enough to suggest a whole dune covered in grass.
Seashells: A few simple shell shapes in the foreground add charm without much effort. Draw a small oval for a clam shell, add radiating lines from the base, and shade one side darker for depth. Three or four shells scattered naturally are plenty.
A distant pier or boat: A simple silhouette of a pier stretching into the water or a small sailboat on the horizon gives scale to your scene. Keep these details simple and light — they should recede into the background, not compete with the foreground.
Beach umbrella or chair: If you want a pop of human presence, a simple striped umbrella or the suggestion of a beach chair in the midground adds warmth and story without requiring detailed figure drawing.
The key with all of these: less is more. A suggested shell is more charming than an overworked one. A hinted dune is more inviting than one drawn with hard, heavy lines. Trust the viewer's imagination to fill in the gaps.
Mastering Light and Shadow
Light is what makes a beach landscape come alive. The beach is one of the brightest natural environments, and capturing that brightness in a pencil drawing requires a counterintuitive approach: you have to leave lots of white space.
Don't be afraid of leaving large areas of your paper untouched. The white of the paper becomes the brightest highlights — the foam on a wave, the sparkle on the water, the hot sand at midday. By keeping your shading light and your highlights clean, your drawing will feel sunny even without any color.
Think about where your light source is coming from. If the sun is on the left, shadows should fall to the right. The dunes will be lighter on their left side and darker on their right. This consistency is what makes a drawing feel realistic and grounded.
A simple exercise: before you start any beach drawing, take thirty seconds to decide where the sun is. Mark it with a tiny dot in the margin of your paper. Every shadow you draw will relate to that single point of light, and your scene will feel cohesive and natural.
Common Beginner Mistakes to Avoid
Every artist makes these when they start drawing landscapes. Knowing about them ahead of time can save you a little frustration:
- Over-shading the sky. Beach skies are pale and soft. Keep your graphite light and build up slowly. You can always add more, but it's hard to take away.
- Making the horizon line too dark. The horizon should be the softest line in your drawing. A hard, dark horizon line flattens the depth and makes the scene feel like a cutout.
- Forgetting the foreground. A beach drawing with no detail in the foreground feels empty. Even a few light suggestions of shells or sand ripples give the eye a place to rest and enter the scene.
- Rushing the waves. Waves are worth practicing on a separate sheet of paper first. A few minutes of wave sketches will save you an afternoon of frustration.
- Using hard, outline-style lines. Nature doesn't have outlines. Let your pencil suggest shapes through shading and contrast rather than drawing borders around everything.
Making It a Practice
The beautiful thing about drawing beach landscapes is that you can practice them anywhere — not just at the beach. A photograph from your phone, a memory of a family vacation, or even a scene from a favorite movie can be your reference. The more you draw shores, the more you'll develop your own style and shortcuts.
Try keeping a small sketchbook dedicated to beach scenes. Even one quick ten-minute sketch a week will build your confidence faster than trying to create a masterpiece every time. Date your sketches and don't judge them. Some will feel flat. Others will surprise you. That's exactly how improvement works.
You might even find that drawing the beach becomes its own kind of escape — a few minutes of peace in a busy day, a mini-vacation taken with nothing more than a pencil and a piece of paper. And honestly? That's a beautiful thing.
Conclusion
Drawing beach landscapes is one of the most accessible and rewarding ways to start your artistic journey. The shore forgives loose lines, rewards soft touches, and offers endless variety — every beach, every tide, every season brings something new to capture.
You don't need to be an experienced artist to create something beautiful. You just need a pencil, some paper, and a willingness to try. The horizon line is waiting. All you have to do is draw it.
So find a quiet moment, set up your sketchbook, and let the beach come to life through your pencil. The waves will be there whenever you're ready.