Introduction
Terra sigillata gives clay a shine that looks almost like glaze. Yet it contains no glaze, no glass, and no kiln in the traditional sense. It is only clay and water, handled with patience.
The name comes from the Latin for "sealed earth." Greek and Roman potters used this slip two thousand years ago to finish their finest tables. Their red bowls still hold a soft, honeyed satin sheen today.
What makes it remarkable is how little it demands. You do not need a wheel, a glaze recipe, or expensive materials. You need fine clay, a jar, time, and something smooth to rub with.
The work is slow and repetitive in the best way. Burnishing asks for many light passes with a spoon, a stone, or a piece of plastic. It is meditation with a purpose.
This guide covers what terra sigillata is, why the finest particles gloss, how to make your own slip, and how to burnish a small vessel to a quiet glow.
What Terra Sigillata Is and Why It Shines
The Ancient Slip
Terra sigillata is not a glaze. It is a slip, which means it is simply clay suspended in water. Ordinary slip contains every particle size in the clay body, from coarse to fine.
Terra sigillata keeps only the finest of those particles. The coarsest grains are allowed to settle out and are discarded, leaving a milky liquid of almost pure ultrafine clay.
That refinement is the whole point. When you brush this slip onto a pot and burnish it, those tiny flat particles lie down in smooth overlapping alignment. The surface feels polished long before it is fired.
Potters call the finished slip a sigillata and the pot it decorates a terra sigillata piece. The term covers both the material and the burnished look it creates.
A Roman Gloss
Historically, the technique reached its height in Roman red-gloss ware, made across the empire from the first century onward. Those workshops turned out thousands of moulded bowls with a gloss quite unlike modern glaze.
Ancient Greek and Chinese potters used comparable burnished slips. The idea appears wherever fine clay and patient hands happened to meet.
Sintering and the Science of Sheen
Two things create the gloss: particle size and heat. Both work together in a way that is easy to picture.
Clay is made of microscopic plate-like particles. The smallest ones in a settled slip measure in the nano range, far thinner than a grain of silt or sand.
These nano-sized particles pack tightly as the water dries. Because they are so small and so close together, they sinter at low temperatures.
Sintering means the particles soften slightly and fuse at their touching edges. They do not melt into a flowing glass. They partly merge into a continuous skin.
Heat, Colour, and Low Temperatures
That partial fusion is enough to reflect light evenly. The result is a soft satin sheen, warmer than glaze but clearly polished.
Firing temperature matters less than most potters expect. Terra sigillata can gloss from roughly 900 degrees Celsius upward, and it needs no glaze chemistry at all.
Oddly, the gloss survives fairly low heat because most of the work is already done by hand. Burnishing compacts the surface, and the kiln simply sets it.
Fine particles of iron give the classic red-orange, while a white body produces a pale ivory sigillata. The clay you choose colours the shine.
The Materials You Will Need
You can buy terra sigillata ready-made, or make your own from clay you already own. Either way, the kit is small and inexpensive.
- A fine red or white stoneware clay body, soft or powdered, for making the slip. Smooth bodies settle out best.
- Water, ideally soft or distilled, to keep the suspension clean and even.
- Sodium silicate or soda ash, a pinch or two, to deflocculate the clay so the fine particles stay suspended.
- A tall clear jar or bucket with a lid, for settling the slip over a day or two.
- Soft tubing, or a turkey baster, for siphoning the milky top layer without disturbing the rest.
- A hydrometer, optional, for reading specific gravity if you like numbers.
- Soft brushes in a few widths, plus a wide flat brush for even coats.
- A burnishing tool: the back of a silver spoon, a smooth river stone, an agate, or a plastic bag over your finger.
- A soft cloth and a small sponge, for wiping, cleaning rims, and catching dust.
None of this needs to be new or fancy. A spoon from the kitchen drawer and a jam jar are honest tools for this technique.
Making Your Own Terra Sigillata
There are three routes to a jar of sigillata. The first gives the finest slip, the second needs almost no effort, and the third is simply buying it.
The Deflocculated Settling Method
This is the classic method. A small amount of deflocculant keeps the fine particles in suspension while the coarse ones sink.
- Put roughly one part soft or powdered clay into five to ten parts water in a jar, and stir it into a smooth, thin slurry.
- Add a very small amount of sodium silicate or soda ash, a quarter teaspoon at most, and stir again gently.
- Let the mixture settle for twelve to twenty-four hours, undisturbed, until clear layers appear in the jar.
- Look for a milky layer on top, cloudy water in the middle, and coarse sediment at the bottom.
- Siphon the top milky layer off with tubing or a baster, leaving the sediment behind.
- Let the collected slip evaporate slowly until it thickens to the body of evaporated milk.
- Stir occasionally to keep it even, and sieve it through a fine mesh if you want it silky.
The consistency you want is roughly 1.15 to 1.18 specific gravity, a little thicker than skim milk. A hydrometer tells you exactly, but your fingertip works too.
Dip a finger, lift it out, and watch how the slip coats the skin. If it clings thinly and drips slowly, you are close.
The Simple Two-Day Jar Method
If you would rather skip the deflocculant, gravity alone will eventually sort the particles. It simply takes longer.
Stir clay and water in a tall jar, then leave it completely still for two or three days. Coarse grains fall first, and the finest clay stays near the top.
Siphon or pour off the upper layer, let it settle once more, and repeat. Each pass gives you a finer fraction.
Ready-Made Options
Potters who would rather skip the chemistry can buy liquid terra sigillata from a ceramic supplier. It arrives already settled and sieved.
That is a perfectly good way to start. Try the homemade version later, once you know what the finished slip should feel like on the fingertip.
Applying the Slip: Thin Coats, Patient Layers
Application is where beginners lose the shine. The temptation is to brush on a generous coat so the surface looks glossy quickly. Resist it.
Thin is always better. Each coat should be so light that the pot's texture still shows through faintly.
Brush or dip, and apply three to five coats in total. A soft wide brush loaded lightly gives the most even result.
Between coats, let the slip dry to a matte, no-longer-tacky surface. That drying can take twenty minutes or half a day, depending on your room.
If you dip, hold the piece briefly, let the excess run off, and wipe the base clean. One dip counts as roughly one coat.
Aim for an even film rather than full opacity. Some of the clay body's colour glowing through the sigillata is a mark of skill, not a fault.
Once the final coat is dry to the touch, the surface is ready for burnishing. Wait until it is only slightly damp, never wet and never bone dry.
Burnishing: Where the Shine Is Born
Burnishing is the heart of terra sigillata. It is the physical act of pressing the fine particles flat against the clay beneath them.
The Right Stage of Clay
Timing matters more than strength. Burnish when the piece is leather-hard but still slightly damp, when the surface feels cool and firm rather than tacky.
At the wet stage the slip smears under your tool and the shape can deform. At bone dry, when all moisture has left the pot, the surface is brittle and burnishing leaves pale streaks.
Most potters find the sweet spot a few hours after the last coat, once the fine sheen of surface moisture has just gone.
Tools That Work Quietly
Almost any smooth, hard object burnishes clay. The back of a silver spoon is the classic beginner tool, and it fits the hand naturally.
A smooth river stone or a polished agate gives a firmer, glassier finish. A plastic bag slipped over one finger works nicely on curved areas.
Wrap your tool in a little soft cloth if the surface sticks. A drop of oil on the tool helps on very fine slip.
Pressure, Passes, Patience
Use light pressure, far lighter than you think you need. Heavy rubbing flattens detail and can crack a thin wall.
Make many passes, and change direction as you go. Circles, then straight strokes, then diagonals, so no single line of pressure dominates.
Watch the surface turn from matte to faintly reflective under the light. That change is your signal to keep going, gently, until the whole piece matches.
Firing and Finishing Your Piece
Terra sigillata stays soft until it is heated. Firing sets the surface and locks the burnished sheen in place.
Pit Firing
Pit firing suits terra sigillata beautifully. Flames and smoke add soft tonal shifts to the polished slip, and the low heat is enough to sinter it.
Pieces come out with smoky greys and warm orange flashes. No two are ever alike, which is much of the appeal.
Raku and the Low-Fire Kiln
Raku offers a fast, dramatic route. The piece is pulled glowing from the kiln, and the sudden cooling can crackle the sigillata surface in interesting ways.
A low-fire electric kiln, fired in the cone 06 to 04 range, is the calmest option. The gloss comes through cleanly and predictably.
The Kiln-Free Oven Option
You can cure terra sigillata in a domestic oven, and it will harden and shine. Be honest with yourself about what that means.
Oven curing is not firing. It does not vitrify the clay, so an oven-cured piece stays porous and is best kept as a decorative object.
Use it for display pieces, beads, or medallions, not for anything that will hold water or food.
Common Mistakes and How to Fix Them
Almost every problem with terra sigillata comes from thickness, moisture, or impatience. All three are easy to correct.
- Slip too thick. Thick coats flake, crack, and dry cloudy. Fix: thin the slip and apply more, lighter coats instead.
- Burnishing too dry. The tool drags and leaves pale streaks. Fix: dampen the surface slightly, or burnish the next piece sooner.
- Burnishing too wet. The slip smears, deforms, and sometimes cracks. Fix: let the piece rest until it is leather-hard.
- Over-working a thin rim. Rims distort first because they dry fastest. Fix: support the rim from inside and use the lightest pressure.
- Too many coats. Excess layers bury the texture and dry unevenly. Fix: stop at five, and sooner if the slip looks dense.
- Uneven finish. One area gleams while another stays dull. Fix: turn the pot slowly and burnish against a consistent light.
None of these ruin a piece. You can usually re-wet the surface, add one thin coat, and burnish it again.
What Terra Sigillata Is Best For, and a Related Technique
Terra sigillata rewards small, handled objects. Its fine sheen reads best where the eye can come close and where fingers can feel the polish.
Small decorative vessels are the natural first project. A bud vase, a tiny cup, or a lidded box shows the gloss without needing much clay.
Beads and medallions are ideal for beginners. They are quick to form, easy to burnish on every side, and forgiving of a stray streak.
Larger pots also work, but they demand more burnishing time and more even drying across the whole surface.
For care, treat a terra sigillata piece gently. Wipe it with a soft dry cloth rather than scrubbing it, and keep it out of the dishwasher.
Display it away from harsh sunlight if you would like the colour to stay even. The finish is hardy, but it is not armour.
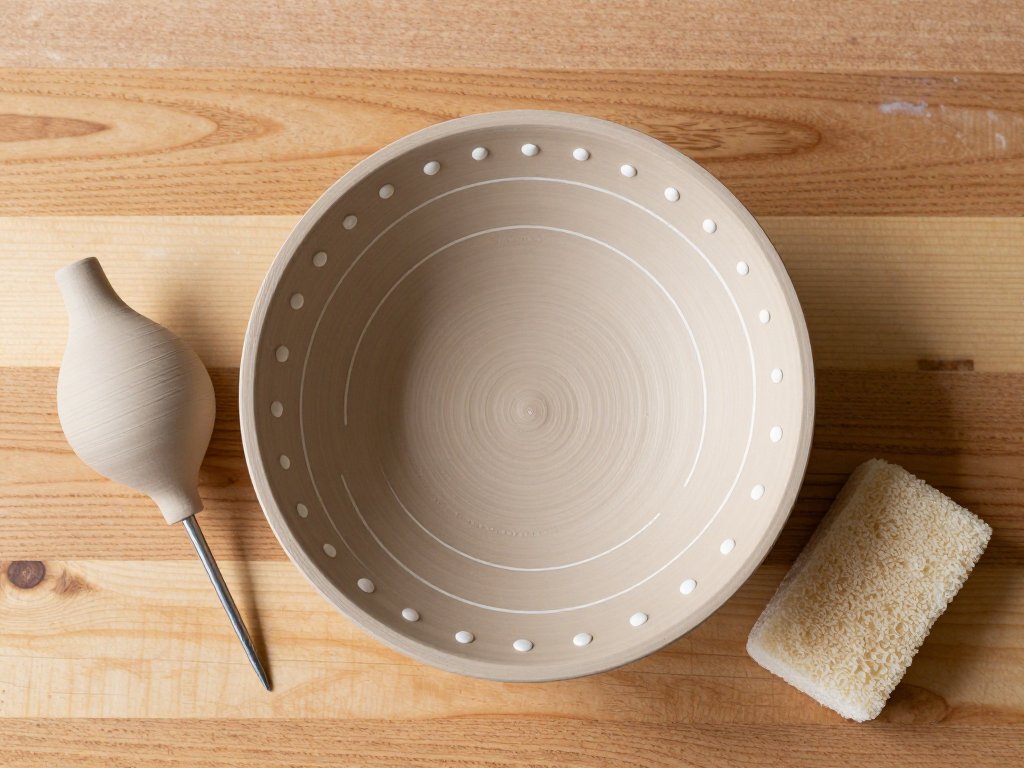
Once you are comfortable burnishing, the technique pairs naturally with slip trailing decoration, which adds raised lines and dots to the same soft surface.
Trailing lays wet slip in relief, and the sigillata beneath gives those raised lines a quiet, glowing field to sit on.
Your First Burnished Pot
Your first terra sigillata piece will probably be uneven. One side will gleam, another will stay matte, and the rim may be a little soft.
Keep it anyway. That first pot teaches you what "slightly damp" feels like in your own hands, and no book can hand that over.
Start small, use a clay you trust, keep the coats thin, and burnish with light passes in many directions. The rest is repetition.
Make a second pot the following weekend. Notice how much sooner your fingers find the right moment to begin.
There is a particular quiet in burnishing that busy hands come to love. Set a small bowl on the table, pick up your spoon, and let the shine arrive slowly.