Introduction
If you have scrolled through TikTok or Instagram in the past year, you have probably seen it: someone holding a tool that looks like a cross between a heavy-duty stapler and a science fiction gadget, punching colorful yarn into a stretched piece of fabric at impressive speed.
Within minutes, a fluffy, textured design emerges — a rainbow, a pet portrait, a geometric pattern — and you cannot help but want to try it yourself.
That craft is rug tufting, and it has become one of the most popular DIY trends of the decade.
What many people do not realize is that this "new" viral craft is actually a modern evolution of traditional rug-making techniques that date back centuries.
The tools have changed, but the fundamental satisfaction of creating a soft, functional textile with your own hands is timeless.
In this guide, I will walk you through everything you need to know to start rug tufting as a beginner.
I will cover the essential tools and materials, how to set up your workspace, the basic technique, common beginner mistakes, and how to finish your rugs so they last for years.
By the end, you will have a clear, actionable plan for making your first tufted rug — without the overwhelm that often comes with starting a new craft.
What Exactly Is Rug Tufting?
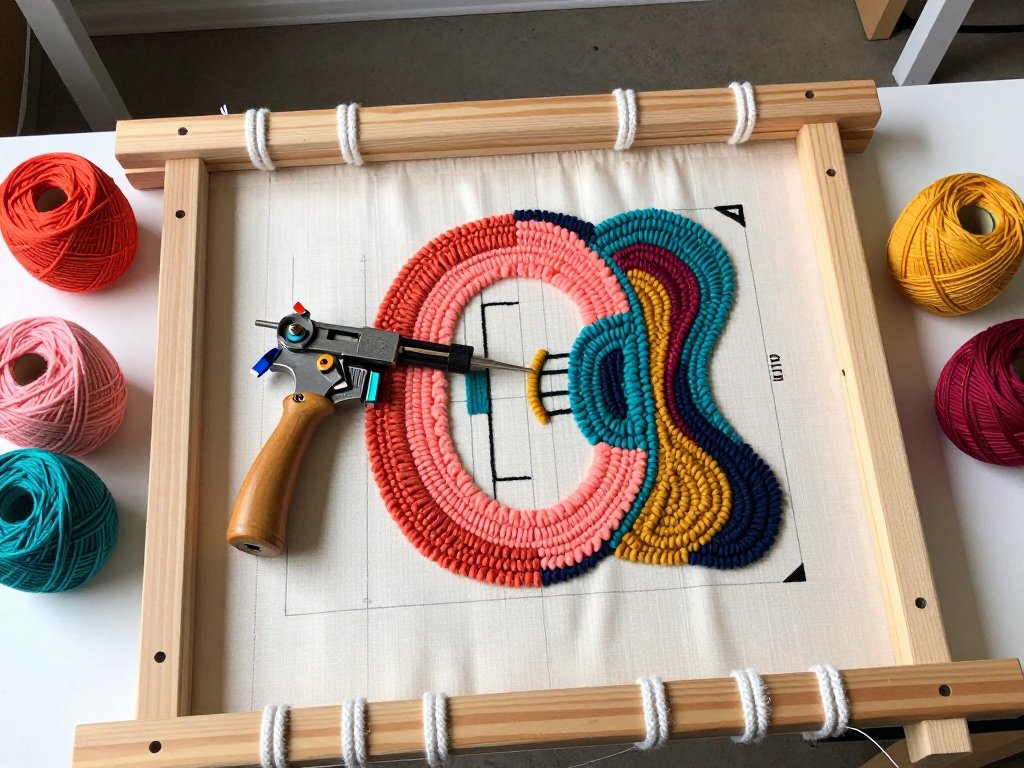
Rug tufting uses a hand-held tool called a tufting gun (or tufting machine) to punch yarn through a stretched fabric backing.
The yarn forms loops on the opposite side of the fabric, and those loops create the pile of the rug.
By guiding the gun along a pattern drawn on the backing, you can "color in" your design with different yarns, creating a dense, plush surface.
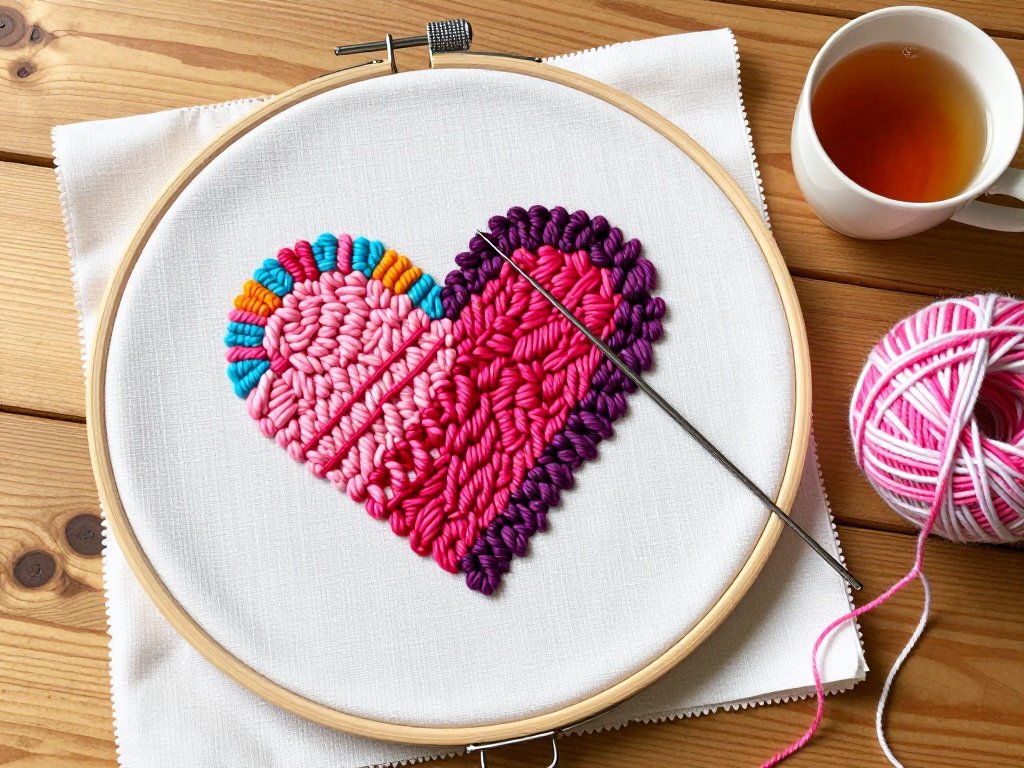
The technique is closely related to punch needle embroidery, which uses a similar (but smaller and manual) tool.
The difference is scale and speed: a tufting gun is electric or pneumatic and can produce hundreds of loops per minute, making it practical for large projects like area rugs, wall hangings, and even upholstered furniture accents.
Rug tufting as a commercial technique has been around since the early twentieth century, but it was primarily used in industrial carpet manufacturing.
The consumer-friendly tufting guns we use today — handheld, relatively quiet, and affordable — are a relatively recent innovation that has opened the craft to hobbyists.
When combined with social media's love of satisfying, fast-result content, it is not hard to see why the trend exploded.
What You Will Need: The Complete Starter Kit
One of the best things about rug tufting is that the equipment list is finite and predictable. Unlike some crafts where you keep discovering you need "just one more thing," tufting has a clear set of essentials. Here is exactly what you need to get started.
Essential Tools
- Tufting gun. This is your primary tool. For beginners, a cut-pile tufting gun is the best choice. Cut-pile guns create individual cut strands of yarn, which gives the rug a soft, velvety texture similar to a store-bought rug. Loop-pile guns create uncut loops for a more textured, Berber-style finish. Most beginners start with a cut-pile gun because the results look more polished. Expect to pay between $100 and $200 for a reliable entry-level model from brands like AK-1 or Tuft Love.
- Monk's cloth or tufting fabric. This is the backing fabric you punch the yarn into. Monk's cloth is the standard choice — a loosely woven cotton fabric that holds the yarn securely without tearing. Do not substitute with regular fabric or needlepoint canvas; they will not hold the yarn properly. You will need about one and a half times the size of your finished rug to allow for the frame.
- A tufting frame. The fabric must be stretched taut while you work. A wooden frame — either a purchased tufting frame or a simple DIY frame made from 2x4 lumber — holds the fabric tight using carpet tacks or a staple gun. The frame should be at least six inches larger than your rug on each side so you have room to work near the edges. A basic frame costs about $30 to $50 if purchased, or about $15 in lumber if you build it yourself.
- Yarn. Acrylic yarn is the most common choice for beginner rugs. It is affordable, widely available, machine-washable (a major consideration for rugs that will be walked on), and comes in an enormous range of colors. Worsted weight (#4) is the standard thickness for tufting. You will need roughly one pound of yarn per square foot of rug, but this varies by pile height and density. Start with a small project — a 2-by-3-foot rug is a manageable first size.
- Fabric scissors and a lint roller. You will use these constantly to trim loose yarn fibers and keep your work area clean.
- A projector (optional but recommended). Many tufters project their design onto the monk's cloth and trace it with a marker. This allows you to create detailed designs without freehand drawing. A basic mini projector costs about $50.
Supplies for Finishing
- Latex rug backing adhesive. This is what locks the yarn loops in place so they do not pull out. Roberts 6700 or similar carpet adhesive is the industry standard. It is applied to the back of the finished rug and left to cure for 24 to 48 hours.
- Secondary backing fabric. After the adhesive dries, a layer of felt or non-shelf liner is glued to the back to protect the adhesive and give the rug a finished look.
- Non-slip rug pad. Especially important for rugs placed on hardwood or tile floors. A thin rubber pad prevents slipping.
- A sharp utility knife or carpet shears. For trimming the pile to an even height and carving details into the rug surface.
Optional but Nice to Have
- A rug gripper or anti-fatigue mat. You will be standing while you tuft. A cushioned mat makes hours of tufting much more comfortable.
- A yarn rack or dispenser. Keeps your yarn balls from tangling as you work. Even a simple dowel rod mounted above your frame helps enormously.
- A vacuum cleaner. Yarn fibers get everywhere. A small handheld vacuum is invaluable for keeping your workspace tidy.
Setting Up Your Workspace
Before you make a single tuft, set up your workspace properly. Good setup prevents most beginner frustrations.
Choose a dedicated space. Rug tufting creates yarn dust and loose fibers. An area with a hard floor (not carpet) is ideal. A spare room, garage corner, or basement workshop works well. Good ventilation is important because the latex adhesive has strong fumes.
Assemble your frame. If you bought a pre-made frame, follow the assembly instructions. If you are making your own, build a rectangle from 2x4 lumber with outside dimensions about 4 by 5 feet for a medium-sized rug.
The frame should be sturdy enough that it does not wobble when you lean into the tufting motion.
Stretch the monk's cloth. Cut your fabric about six inches larger than the frame on each side.
Center it over the frame and start tacking or stapling from the center of each side, working outward to the corners.
The fabric should be drum-tight — you should be able to tap it and hear a sound like a drum.
Loose fabric causes uneven tufts and makes the gun skip.
Transfer your design. Draw or project your design onto the monk's cloth using a washable marker or a fine-tipped permanent marker.
Keep the lines bold and clear — you will be following them with the tufting gun, and faint lines are easy to lose track of.
Start with simple shapes and large color blocks. Fine details are difficult for beginners and can wait until you have more experience.
Set up your yarn. Place your yarn balls on the floor or a yarn rack behind your frame so they unwind freely.
Thread the yarn through the tufting gun according to the manufacturer's instructions. Most cut-pile guns have a tension dial that controls how easily the yarn feeds.
Start with the tension on the looser side; tighter tension gives shorter pile but is harder on the gun motor.
The Basic Tufting Technique
Here is the step-by-step process for making your first tufts. Practice on a scrap piece of monk's cloth before starting your actual project.
Step 1: Hold the gun correctly. Grip the tufting gun firmly with both hands — one on the handle and one supporting the barrel near the needle.
The gun should feel balanced, not like you are struggling to hold it steady. Position yourself so you can see the needle tip entering the fabric.
Step 2: Start the gun and approach the fabric. Squeeze the trigger to start the gun.
The needle will begin moving back and forth rapidly. Gently press the needle tip against the monk's cloth at a 90-degree angle (straight in).
The gun will punch through the fabric and create a loop on the opposite side.
Do not push hard — let the gun's motion do the work. If you have to force it, the tension is wrong or the fabric is not tight enough.
Step 3: Move along your design line. Once the needle is through the fabric, guide the gun along your drawn line at a steady pace.
Move at about one to two inches per second. Moving too slowly creates dense, uneven piles.
Moving too fast creates sparse, gappy areas. You will develop a feel for the right speed after a few minutes of practice.
Step 4: Maintain consistent pressure. Keep the gun pressed flat against the fabric at all times. If you tilt the gun, the needle will enter at an angle and create uneven loops. The base of the gun should glide along the fabric surface like an iron across a shirt.
Step 5: Change colors. When you finish one color section, cut the yarn at the gun's yarn feeder, unthread the old color, and thread the new one.
Leave a small tail of the old color on the back of the rug — it will be secured by the adhesive later.
Do not pull the old yarn out, as this can loosen adjacent tufts.
Step 6: Fill in your design. Work from the outlines inward. First, trace the outline of each shape to define the border, then fill the interior with parallel lines of tufting spaced about one-eighth to one-quarter inch apart.
The tufts will compress against each other and feel solid once the area is filled.
Practice on a scrap piece until you can produce consistent, even tufts. Your first few lines will be wobbly and uneven. That is normal. After about fifteen minutes of practice, your hand will find the rhythm, and the tufts will start coming out cleanly.
Choosing Your First Project
The secret to sticking with rug tufting is choosing a first project that is ambitious enough to be exciting but simple enough to finish. Here are my recommendations, based on what works for beginners.
The perfect first rug: A 2-by-3-foot geometric design with three to four colors. Choose a pattern with large, simple shapes — circles, triangles, sweeping curves — and clear boundaries between color areas.
Avoid fine details, text, and portraits for your first project. A sunset landscape with a circle sun, bands of color for the sky, and a triangular mountain silhouette is a classic beginner design that always looks good.
Avoid these for your first project: Pet portraits (too much subtle shading), intricate mandalas (too many tight curves), designs with more than six colors (too many yarn changes), and very large rugs over 4 feet in any dimension (too much physical strain and material cost for a first attempt).
Time expectation: A 2-by-3-foot rug with three colors will take approximately four to six hours of tufting time, spread over two to three sessions. The finishing process (gluing, backing, drying, trimming) adds another two days, mostly waiting for adhesive to cure.
Common Beginner Mistakes (And How to Avoid Them)
Here are the most frequent issues new tufters encounter and exactly how to handle each one.
Uneven pile height. If some areas of your rug are taller than others, you are either using inconsistent gun pressure or moving at varying speeds.
Fix this by practicing on scrap until your hand develops a consistent rhythm. After the rug is finished, you can trim the pile to an even height with sharp shears or an electric fabric trimmer.
Gaps between tufts. If you can see the monk's cloth between your tuft lines, you are spacing your rows too far apart.
Fill in the gaps with additional tufts — the yarn will compress together and hide the cloth completely.
A dense rug is a durable rug. Do not be afraid to add more tufts.
Yarn jams. The tufting gun needle can jam if the yarn is too thick, the tension is too tight, or the fabric is not stretched properly.
Clear the jam by cutting the yarn at the needle, removing the tangled piece, and re-threading.
To prevent jams, always use worsted weight (#4) acrylic yarn and keep your monk's cloth drum-tight.
The fabric tears. If the monk's cloth tears while you are tufting, stop immediately. A small tear can be patched by gluing a piece of fabric over the hole on the back side.
A large tear means the fabric tension was too high or the fabric quality was poor.
Replace the fabric and re-stretch it with slightly less tension.
The rug curls at the edges. This happens when the pile is too dense near the edge, causing the fabric to contract. Leave a one-inch border of untufted monk's cloth around your design. The border will be folded under and glued during finishing, which also prevents edge curling.
Colors bleeding during adhesive application. Some yarns, particularly inexpensive acrylics, can bleed dye when wet adhesive is applied. Test a small corner of each yarn color with a drop of water before committing to the full rug. If the color bleeds, switch to a better-quality yarn.
Finishing Your Rug: The Complete Process
A tufted rug is not truly finished until it has been glued, backed, and trimmed. This is the most labor-intensive part of the process, but it is what turns a pile of loose tufts into a durable, functional rug.
Step 1: Inspect the front. Before applying adhesive, flip the frame over and inspect the front of the rug (the side you have been tufting into).
Check for any gaps, thin spots, or uneven areas and touch them up before proceeding.
Once the adhesive is on, you cannot add more tufts.
Step 2: Apply the adhesive. Working in a well-ventilated area, apply a generous layer of latex carpet adhesive to the back of the rug (the side where the yarn loops are visible).
Use a putty knife or a notched trowel to spread the adhesive evenly, making sure it penetrates between the tufts and reaches the monk's cloth.
Pay special attention to the edges. The adhesive layer should be about one-eighth inch thick.
Step 3: Let it cure. Leave the adhesive to cure for 24 to 48 hours in a warm, dry space. Do not rush this step. The adhesive must be fully dry before you cut the rug off the frame. If you cut it too early, the tufts will pull loose.
Step 4: Cut the rug off the frame. Once the adhesive is fully dry, use a utility knife to cut the monk's cloth around the perimeter of your design, leaving about one inch of cloth beyond the tufted area. This border will become part of the backing.
Step 5: Attach the secondary backing. Apply another thin layer of adhesive to the back of the rug, then press a piece of felt or non-slip liner onto it. Smooth out any wrinkles or bubbles. Let this cure for another 24 hours.
Step 6: Trim the pile. Using sharp fabric shears or an electric carpet trimmer, carefully trim the pile to an even height.
Start with a longer trim and work shorter gradually — you can always remove more, but you cannot add it back.
For a standard plush finish, trim to about one-half inch. For a shorter, more durable surface, trim to about one-quarter inch.
Step 7: Carve details (optional). For designs with distinct shapes (like letters or geometric patterns), you can carve shallow trenches between color areas using the trimmer or scissors. This creates a crisp, professional look where each color block stands out clearly.
Step 8: Vacuum and enjoy. Vacuum the rug thoroughly to remove loose fibers and dust. Place it on a non-slip pad, and your handmade rug is ready for its new home.
Where Rug Tufting Can Take You
Once you have mastered the basics, rug tufting opens up a world of creative possibilities. Many tufters start with simple geometric rugs and gradually work their way up to more complex projects.
Custom pet portraits are one of the most popular categories in the tufting community. They require careful shading and a good eye for color, but the results are incredibly rewarding — and they make unforgettable gifts.
Wall hangings are a natural next step. Without the durability requirements of floor rugs, you can experiment with loop pile, mixed textures, and even three-dimensional elements. A tufted wall hanging adds warmth and texture to any room in a way that flat art cannot match.
Functional home items like placemats, coasters, chair cushions, and bench pads are practical projects that use less yarn and can be completed in a single weekend. They are great for building skills without the commitment of a large rug.
Custom lettering and signage — tufted words and phrases have become popular as decor pieces and wedding gifts. They require precise carving to make the letters legible, which is a skill worth developing.
Selling your rugs. The tufting community on Etsy and Instagram is thriving. Custom pet portrait rugs can sell for $200 to $500 depending on size and detail.
If you enjoy the craft and want to turn it into a side business, the market is there.
Just make sure you price your work to account for materials, time, and the cost of finishing supplies.
Budget Breakdown: What It Really Costs to Start
Let me give you an honest look at the startup costs so there are no surprises.
- Tufting gun: $100 to $200 (one-time purchase; a good gun lasts for years)
- Frame: $30 to $50 purchased, or about $15 in lumber if DIY
- Monk's cloth: $10 to $20 per yard (one yard is enough for a 2-by-3-foot rug)
- Yarn: $15 to $25 for a starter set of colors (acrylic worsted weight)
- Adhesive: $25 for a gallon (enough for several rugs)
- Backing fabric and non-slip pad: $10 to $20
- Projector (optional): $50
Total starter investment: approximately $200 to $350, depending on what you already have and whether you build your own frame.
That may sound like a lot, but compared to many other crafts (think of a sewing machine, a kiln for pottery, or a full set of woodworking tools), the entry cost is quite reasonable.
And once you own the equipment, the cost per rug drops dramatically — each additional rug costs roughly $30 to $60 in materials.
Conclusion
Rug tufting sits at a wonderful intersection of tradition and innovation. The technique has roots in carpet manufacturing and handcraft traditions that go back generations, but the modern tufting gun and social media have turned it into one of the most accessible and addictive crafts of our time.
There is something deeply satisfying about watching a design come to life under your hands, row by row, color by color, until a flat piece of fabric becomes a soft, textured rug that you can stand on, sit on, and live with.
The barrier to entry is lower than you might think. A weekend of practice with a borrowed or rented tufting gun will tell you whether the craft clicks with you.
If it does, the investment in your own equipment pays for itself in the satisfaction of creating something beautiful and functional with your own hands.
Start with a small project. Choose simple shapes and a limited color palette. Give yourself permission to make imperfect tufts — every mistake teaches your hands something that a tutorial cannot.
And when you finish your first rug, even if it is lopsided and patchy in places, you will have made something that did not exist before.
That feeling never gets old.
Ready to give it a try? Pick your design, set up your frame, and make that first tuft. The rest is just practice.