Tips and tricks for learning the art of henna—without the pressure
You don’t need a special occasion—or even skin—to start learning henna.
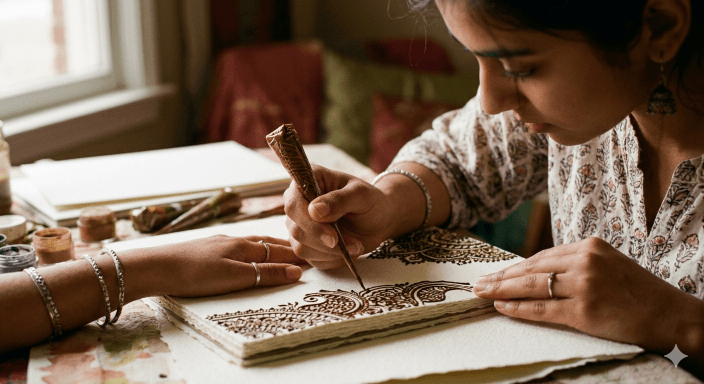
Henna is one of the most beautiful and meditative art forms you can learn, but it can feel intimidating at first. The good news? You can build real skill and confidence simply by practicing on paper. No pressure, no permanence—just creativity and a little quiet time for yourself.
Whether you're sneaking in a few minutes during nap time or unwinding after a long day, henna practice can become a calming, creative ritual.
Why Start on Paper?
Practicing on paper allows you to focus on technique without worrying about mistakes. Henna requires control, rhythm, and muscle memory—things that develop naturally over time.
On paper, you can slow down, repeat patterns, and experiment freely. Think of it as learning handwriting all over again—but much prettier.
Beginner Tips That Make a Big Difference
- Start with simple drills: Practice lines, dots, teardrops, and swirls before attempting full designs.
- Focus on pressure control: Light pressure creates thin lines, while steady pressure creates bold shapes.
- Work in rows: Fill a page with repeated shapes to build muscle memory.
- Slow down: Henna isn’t about speed—it’s about flow and consistency.
- Use reference designs: Floral patterns and vines are beginner-friendly and forgiving.
The key is repetition. The more you practice basic elements, the more natural complex designs will feel.
Common Beginner Mistakes
- Holding the cone too tightly (this causes shaky lines)
- Rushing designs instead of building them step-by-step
- Skipping basic drills and jumping straight to full patterns
- Using low-quality henna that clogs or flows unevenly
Give yourself permission to be a beginner. Even experienced henna artists started with wobbly lines.
Beginner Supplies for Practicing on Paper
You don’t need much to get started, but the right tools can make learning smoother and more enjoyable.
A simple starter kit with henna cones, practice paper, and basic tools gives you everything you need in one place, while stencil kits can help you understand structure and spacing. If you want something reusable, an acrylic practice hand is a fun step up from paper.
Even basic printer paper works fine—but slightly thicker paper can help prevent bleed-through as you practice.
When You're Ready for Skin
Once your lines feel more controlled and your designs flow naturally, you may feel ready to try henna on skin. This is where quality matters even more.
Start with high-quality options like organic henna powder or professional-grade henna cones, which are smoother and easier to control. Transfer paper can help you apply designs cleanly, especially if you're still building confidence.
Always choose natural henna and avoid anything labeled “black henna,” which may contain harmful additives.
Make It a Ritual, Not a Task
One of the most beautiful parts of learning henna is how calming it can be. Put on music, make a cup of tea, and let yourself enjoy the process.
You don’t need hours. Even 10–15 minutes of focused practice can make a noticeable difference over time.
Henna doesn’t require perfection—it rewards patience. And by starting on paper, you give yourself the freedom to learn, grow, and enjoy every step along the way.