Introduction
There is something quietly magical about needle felting. You start with what looks like a cloud of loose wool — soft, unruly, and completely formless — and with the gentle, repetitive motion of a barbed needle, that cloud begins to take shape.
A tiny ear appears. A rounded belly. A pair of button-like eyes that somehow hold a personality all their own.
If you have never tried needle felting before, you are in for a wonderful discovery.
It is one of the most forgiving crafts I have ever encountered. There is no right or wrong way to shape the wool, no pattern you must follow to the letter, and no complex stitch to master before you can begin.
You simply poke the wool until it becomes the thing you imagine. That simplicity, paired with the deeply satisfying feeling of sculpting something from nothing, makes needle felting an ideal craft for anyone who wants to create something beautiful without a long learning curve.
For those of us who love crafts but have limited time, needle felting is a particular gift.
A small animal can be completed in a single evening. The supplies are minimal and affordable.
And the results — those sweet, slightly imperfect creatures that only you could have made — bring a joy that store-bought decorations simply cannot match.
A Brief History of Felting
Before we dive into the how-to, let us pause and appreciate the craft's long history.
Felting is one of the oldest textile techniques known to humanity, predating both weaving and knitting by thousands of years.
The earliest archaeological evidence of felt — fibers matted together through heat, moisture, and pressure — dates back to the Neolithic period, around 6500 BCE, in what is now Turkey.
Ancient nomadic peoples of Central Asia, particularly the Scythians and Mongols, used felt extensively for their yurts, clothing, saddle blankets, and boots.
The process was practical, durable, and required nothing more than wool, water, and effort.
Needle felting as we know it today is a much more recent innovation. The barbed felting needle — a thin steel tool with tiny notches cut along its shaft — was originally developed for industrial felt manufacturing in the mid-19th century.
Factories used banks of these needles mounted on machines to mechanically mat wool fibers together, producing felt for everything from piano hammers to insulation.
It was not until the late 20th century that crafters discovered they could use a single felting needle by hand to sculpt wool into detailed three-dimensional shapes.
The technique spread through fiber-art communities in the 1980s and 1990s and has since grown into a beloved global craft.
What I find so charming about needle felting is how it connects this ancient tradition of working with wool to a quiet, meditative practice you can do at your kitchen table.
The wool itself is the same material our ancestors relied upon for warmth and shelter.
The tool is a humble industrial artifact. Together they create something utterly tender.
What You Will Need
The beauty of needle felting is that a beginner can start with just four items, all of which are inexpensive and widely available at craft stores or online.
Core Supplies
Wool roving. This is the raw, unspun wool fiber that has been cleaned and carded into a soft, fluffy ribbon.
It comes in every color imaginable. For your first project, buy a small starter pack with several colors, including white or cream (the most versatile base color), plus brown, grey, pink, and black for details like ears, noses, and eyes.
A little goes a very long way — a single ounce of roving can make several small animals.
Felting needles. These are not ordinary sewing needles. They are sharp steel shafts with tiny barbs carved along the lower portion.
When you push the needle into the wool, the barbs catch individual fibers and drag them downward, tangling them with the fibers below.
Each poke compresses and shapes the wool a little more. Beginners should start with a medium-gauge needle (usually labeled 36 or 38 gauge).
A finer needle (40 gauge) is useful for smoothing surfaces and adding delicate details. Buy a set of three to five needles in different gauges; they cost only a few dollars.
A foam or wool pad. You will be poking the needle through your project and into the surface beneath it.
A dense foam pad (about an inch thick) protects both your table and your needle.
Some felters prefer a pad made of compressed wool fibers, which does not dull the needle as quickly.
Either option is fine for a beginner.
Finger protectors or leather thimble. I mention this because I learned the hard way. Felting needles are extremely sharp, and it is remarkably easy to poke yourself while holding a small wool shape.
A leather thimble or a set of rubber finger guards costs very little and will save you from several small but memorable injuries.
Optional but Helpful
Wire armature. If you want your animals to have poseable legs or tails, thin floral wire or pipe cleaners can be inserted into the wool core before felting. This is more advanced but opens up wonderful possibilities for dynamic poses.
Glass eyes. Tiny glass or plastic animal eyes with safety backs give your creatures a more polished, realistic look. They are available at doll-making supply stores and online. For a softer, more rustic appearance, you can simply felt small balls of black wool for eyes—a technique many experienced felters prefer.
A multi-needle tool. Once you catch the felting bug, you may want a wooden handle that holds three to five needles at once. This speeds up the initial shaping of large pieces considerably. But for your first project, a single needle is perfect.
Choosing Your First Animal
The best first project is one that makes you smile. I suggest starting with something small and round — a bird, a mouse, a sleeping cat, or a tiny bear.
Animals with simple shapes and few appendages are easiest to manage while you are learning how the wool responds to the needle.
A sleeping kitten makes an excellent first project. Its body is essentially an oval, the head is a slightly smaller oval, and the ears are two small triangles.
There are no legs to worry about (they are tucked under), and the tail can be a simple curved cylinder.
The finished piece fits in the palm of your hand and takes about two hours from start to finish.
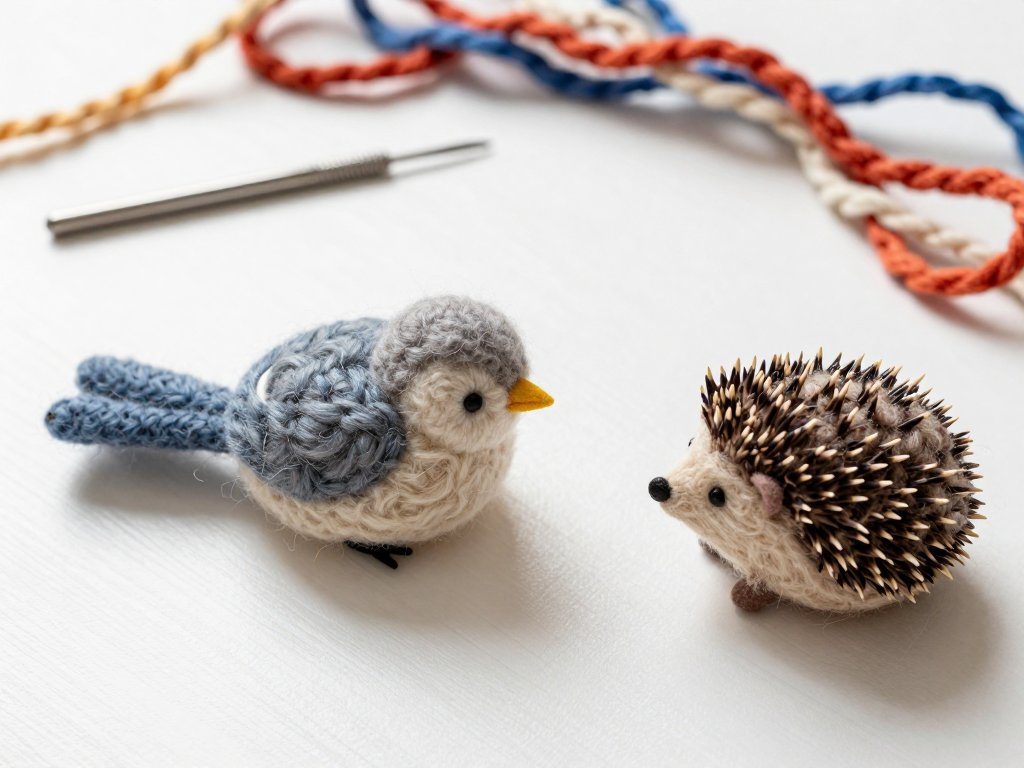
If birds are more your style, try a robin or a chickadee. A bird's body is naturally egg-shaped, which is one of the easiest forms to felt.
Add a small round head, a tiny triangular beak, and a pair of wings shaped like flattened ovals.
Birds are wonderfully forgiving because their shape in nature is already soft and round.
For those who prefer something whimsical, a mini hedgehog is practically designed for needle felting beginners.
The body is a teardrop shape, the spines can be suggested with a darker, coarser wool lightly teased on the surface, and the little face needs only a nose and two eyes.
A hedgehog requires almost no precise detailing to look adorable.
Basic Techniques: Your First Animal
Let me walk you through making a simple sleeping bird. This will teach you the fundamental movements you will use for every needle felting project afterward.
Step 1: Form the Body Core
Take a small handful of light-colored wool roving — about the size of a golf ball. Gently roll it between your palms into a loose ball. Do not compress it too much; you want the fibers to remain airy so the needle can work through them easily.
Place the wool on your foam pad and begin poking it with the felting needle.
Hold the needle vertically and push it straight into the wool, then pull it back out along the same path.
Do not angle the needle — straight in and straight out. If you wiggle or angle the needle, it can break inside the wool.
Work your way around the ball, turning it frequently so you poke evenly from all sides.
At first, the wool will feel soft and loosely held together. After a few dozen pokes, you will notice it beginning to firm up.
The fibers are tangling and compressing. Continue poking until the ball holds its shape without collapsing when you squeeze it gently.
This is your bird's body.
Step 2: Shape the Body into an Oval
Once you have a firm ball, you can begin shaping it into an oval bird body.
Poke more on the two sides that will become the top and bottom, and less on the ends that will be the head and tail.
The needle compresses the fibers where you poke, so the wool will naturally elongate in the direction you poke less.
Turn the piece often and check your progress from multiple angles. This process is very intuitive — you will see the shape emerge as you work.
Step 3: Add the Head
Roll a small piece of wool — about the size of a marble — into a loose ball.
Hold it against the front of the body where you want the head to be.
Begin poking through the head wool into the body wool. The barbs on the needle will pull fibers from the head down into the body, fusing the two pieces together.
This is called "attaching." It is one of the most satisfying parts of needle felting because you are literally sewing the pieces together without any thread.
Poke around the join line in a circle, working your way from the front to the sides to the back. The head will become firmly attached after about a minute of steady poking. If you see the head wobbling, keep poking — it needs more fiber entanglement.
Step 4: Form the Wings
Take two small, flat pieces of wool (about the size of a quarter each) and shape them into ovals on your foam pad. Poke them until they hold their shape but remain slightly softer than the body. You want the wings to feel distinct, not fused into the body.
Place one wing on each side of the body and attach them the same way you attached the head. Poke around the edges of each wing, leaving the center looser. This gives the wings a raised, dimensional look.
Step 5: Add the Beak and Tail
Roll a tiny cone of orange or yellow wool for the beak. Attach it to the front of the head with a few precise pokes. For the tail, take a small tuft of wool, shape it into a teardrop, and attach it to the back of the body.
Step 6: The Eyes
For your first project, the simplest eye is a tiny ball of black wool, no bigger than a peppercorn, felted gently into place on each side of the head.
Use a fine needle (40 gauge) for this step so you do not disturb the surrounding wool.
Poke very lightly and check the eye position frequently. You can also use tiny glass beads or pre-made safety eyes if you prefer.
Step 7: Finishing Touches
Once your bird is assembled, go over the entire surface with a fine felting needle. This smooths out uneven areas and gives the wool a polished, cohesive look. Pay special attention to the seams where parts join — a few extra pokes there will make the attachments invisible.
If any area feels too loose, poke it a few more times. If any area feels too compressed or misshapen, you can stab it at an angle (very carefully) to fluff the fibers slightly, or add a thin layer of new wool on top and felt it down.
Needle felting is wonderfully forgiving: you can always add more wool and reshape.
Common Beginner Mistakes and How to Avoid Them
Every needle felter makes these mistakes at first. I certainly did. Knowing about them ahead of time will save you frustration.
Poking too deeply. You only need to push the needle about half an inch into the wool.
Going deeper does not speed things up and risks breaking the needle against the foam pad.
A broken needle is a nuisance (tiny fragments of steel are hard to find in wool), and a broken needle tip left inside your project can be sharp.
Poke to a consistent, moderate depth.
Not turning the piece enough. If you poke only one side of your wool shape, it will become flat on that side and bulge on the opposite side.
Turn your project constantly — every ten to fifteen pokes — so it compresses evenly.
This habit alone will dramatically improve your results.
Using too much wool. Beginners almost always start with too much roving. You can always add more wool, but removing wool that has been fully felted is difficult.
Start with less than you think you need and build up gradually. A finished bird smaller than a walnut can be more charming than one the size of an apple.
Comparing your work to photos online. The needle felting projects you see on social media are often made by experienced artists who have been felting for years.
Your first bird will look different — lumpier, softer, more rustic. That is exactly how it should look.
Handmade things carry the mark of their maker, and that imperfection is part of their beauty.
Your children or grandchildren will treasure that lumpy little bird far more than a factory-perfect one.
Caring for Your Felted Animals
Wool is a durable and resilient fiber, but felted creations do need a little care.
Keep your animals out of direct sunlight for extended periods, as UV light can fade the colors over months and years.
Dust them occasionally with a soft, dry brush or a gentle puff of compressed air.
If a piece becomes slightly misshapen, you can often restore its form by gently poking the flattened area a few times with a felting needle.
Do not wash felted wool animals. Water will undo all your careful work — the fibers will relax and the shape will be lost. If the surface gets dirty, spot-clean with a barely damp cloth and let it air dry away from heat sources.
For larger pieces or ones with thin appendages (long tails, slender legs), handle them with care.
The join between an attached leg and the body is the weakest point on many felted animals.
If a leg becomes detached, you can simply reattach it by holding it in place and poking through the leg into the body with a medium-gauge needle.
Beyond Your First Bird
Once you have completed your first animal, you will probably find yourself looking for the next project before the first one is even finished. The needle felting community is wonderfully supportive, and there are patterns and tutorials for every skill level and interest.
Some natural next steps include:
Increasing the size. Try making a larger animal, such as a fox or a rabbit about four inches tall. Larger projects require more wool and more time but allow for greater detail. You can experiment with wire armatures inside the legs so your fox can stand on its own.
Adding surface details. Learn to create patterns on the surface of your animals by applying thin layers of different-colored wool and felting them down.
This technique, called "needle painting" or "painting with wool," allows you to add spots, stripes, or even floral motifs to your creatures.
A calico cat or a spotted fawn makes a lovely intermediate project.
Making a set. A family of mice or a flock of birds arranged together tells a story and makes a wonderful gift. Matching animals in graduated sizes — a mama bird and two babies, for instance — are consistently the most popular items at craft fairs and holiday bazaars.
Gift animals. Felted animals make deeply personal gifts. A friend's beloved pet, a child's favorite stuffed animal, or a woodland creature that matches the recipient's nursery theme — these bespoke creations are treasured in a way that store-bought gifts rarely are.
They say, "I made this for you with my own hands," which is one of the most meaningful messages a handmade gift can carry.
The Gentle Rhythm of Felting
There is a reason needle felting has become so popular among busy mothers, grandmothers, and anyone who needs a quiet creative outlet.
The repetitive poking motion is almost meditative. It does not require intense concentration once you have learned the basic technique.
You can felt while listening to an audiobook, watching a show with your children, or sitting in the garden on a sunny afternoon.
The rhythm of the needle — poke, lift, turn, poke — slows your breathing and quiets your mind.
In a world that constantly asks us to do more, faster, needle felting invites us to do the opposite.
One poke at a time, a small creature emerges from a handful of wool. It takes as long as it takes.
There is no rushing the process, and there is no need to. The time you spend with your hands on the wool is the point, not just the finished animal.
Conclusion
Needle felting is one of those rare crafts that feels both ancient and new. The wool you hold in your hands connects you to felt-makers stretching back thousands of years, while the barbed needle in your other hand is a tool born of the Industrial Revolution.
Together, they produce something that has no practical purpose save one: to make you smile.
Your first animal will not be perfect. It might be lopsided. One ear might sit higher than the other.
The tail might look more like a stub than a graceful curve. That is perfectly fine — in fact, that is wonderful.
That lopsidedness is the mark of a handmade object, and it carries a warmth that no machine can replicate.
My first bird looked like a potato with wings, and I loved it exactly because of that.
So gather your wool and your needle. Find a comfortable chair. Choose a simple animal that makes you happy. And remember: every poke brings you closer to bringing that little creature to life. You have everything you need to begin.