Introduction
A reusable silicone mold changes how you make resin jewelry. You build the mold once, then cast the same pendant, earring, or charm as many times as you like. The mold holds the shape; you keep the time.
Here is the difference it makes in practice. Without a mold, ten matching pendants means ten separate pieces of work, each one slightly different. With a mold, ten pendants take ten pours from a cavity you already made.
Buying ten ready-made molds would cost far more than making one, and you would still be limited to someone else's shapes. A handmade mold can copy a charm you already own or a shape you modelled yourself in clay.
Silicone is the right material for the job. It releases cured resin cleanly, flexes without cracking, and holds fine detail down to a fingerprint. It also tolerates the mild warmth of curing resin without softening.
This guide covers both routes: a hand-pressed putty mold for a first try, and a poured block mold for flatter pieces and multiple cavities. You do not need a pressure pot, a vacuum chamber, or a dedicated studio.
A kitchen table, a washable mat, and about an hour of hands-on time will get you started.
Two Kinds of Silicone: Choose Your Route
Both products are two-part platinum-cure silicone. Both need part A and part B mixed together before they set. They behave very differently in the hand, and the right one depends on the shape you want to copy.
Silicone Putty
Putty is thick, like soft cookie dough. You knead equal parts A and B together, then press the master into it. No mold box, no pouring, no weighing.
It is the cheapest way to start and the fastest way to a finished mold. A small kit costs about fifteen to twenty-five dollars and makes several molds.
The trade-off is shape. Putty suits pieces with a flat back and a simple outline: cabochons, small charms, buttons, flat pendants. It cannot capture an undercut or a fully three-dimensional form.
Working time is short. Some putties stiffen in three to five minutes; slower ones give you fifteen to thirty. Read the label before you open the packet, because you cannot pause halfway through a mix.
Pourable Silicone
Pourable silicone is a liquid you mix and pour over a master fixed inside a mold box. It flows into every crevice and copies surface detail beautifully.
It handles flat-back cabochons, multi-cavity molds, and shapes with a little side draft. One box can hold four to six identical cavities, which is exactly how you make matching earring pairs.
It takes longer. Expect six to twenty-four hours of cure, depending on the product and the room temperature. You also need a mold box and a small scale.
Pourable silicone costs more per mold but gives more casts per mold. For anything you plan to produce repeatedly, it earns back the difference quickly.
Which to buy first
- Choose putty if you want one mold tonight and your master is flat-backed.
- Choose pourable if you want several cavities or fine surface detail.
- Choose pourable if the piece has any undercut or variation in thickness.
- Buy platinum-cure for resin, not tin-cure. Tin-cure is cheaper, smells stronger, and can leave a surface that interferes with resin.
What You Actually Need
Everything on this list earns its place. Skip an item only when the substitute is genuinely equivalent.
- Two-part platinum-cure silicone in putty or pourable form. Platinum cure releases resin reliably and resists cure inhibition.
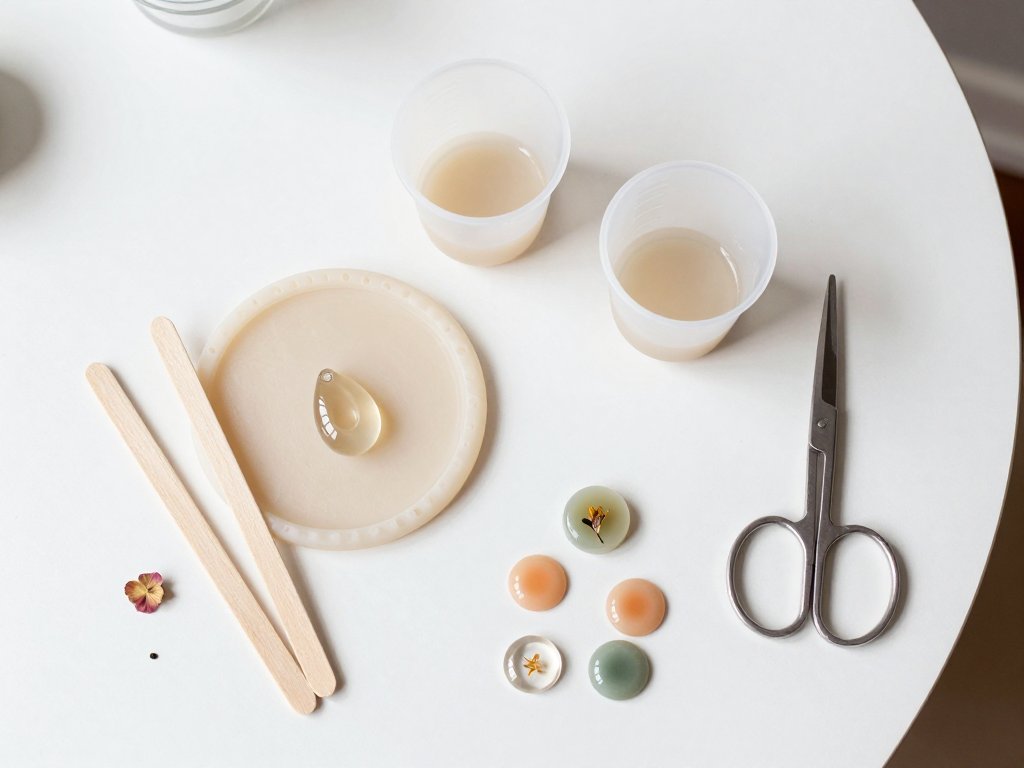
- Two mixing cups, one for each part. Separate cups keep part A and part B apart until you mean them to meet.
- Wooden stir sticks, flat and unpainted. Flat sticks scrape the cup walls; round ones leave unmixed silicone behind.
- A scale that reads in grams for pourable silicone. Weight is the only accurate way to hit a ratio like ten to one.
- Master pieces: metal charms, resin blanks, polymer clay originals, buttons, or a carved wax shape.
- A mold box: interlocking bricks, foam board and hot glue, or a clean plastic tub.
- Mold release or dish soap water for porous masters. One drop of dish soap in water, brushed on and dried, stops silicone gripping clay or wood.
- Nitrile gloves. Latex can interfere with platinum cure, and uncured silicone is unpleasant on skin.
- A level surface. A mold poured on a slope ends up with one thin wall and one thick one.
- A dust cover: an upside-down tub or a sheet of cardboard. Dust settling into tacky silicone becomes permanent grit in the cavity.
Add scissors for trimming flash, a roll of tape, and paper towels. Those three cover most of what goes wrong on a first mold.
None of this is specialist equipment. The cups and sticks come from a hardware shop, and the mold box is usually something already in the recycling bin.
Make Your First Press Mold with Silicone Putty
This is the twenty-minute version, and it is where most people should start. Work on a surface you can wipe clean, with everything within reach before you open the tubs.
- Put on gloves. Take equal small scoops of part A and part B. Equal means equal in volume, roughly two walnut-sized portions for a pendant.
- Knead the two parts together until the colour is completely uniform. Fold, press, and twist for a full two minutes. Any streak of unmixed colour is a soft spot that will never cure.
- Roll the putty into a smooth ball with no creases. Creases become ridges on the mold face, and ridges become ridges on your resin.
- Press the master halfway into the ball, flat side down if it has one. Press evenly with your thumb until the putty rises around the edges.
- Flatten the back against the table so the mold sits level. A domed back rocks during pouring and gives uneven thickness.
- Wait the full cure time on the packet, usually twenty to thirty minutes. Do not test it early. Putty that feels firm can still be tacky underneath.
- Demold slowly. Bend the mold away from the master at the edges, then lift the master straight out. Never pull the master sideways.
- Trim the flash with scissors. Cut flush with the mold face, not into it. A raised lip leaves a thin fin on every single cast.
Inspect the cavity under good light. You are looking for bubbles, torn edges, and any spot where the surface looks greasy or uncured. A small bubble at the rim is harmless; a bubble on the face will show on every piece.
If the first attempt fails, remix. Putty is cheap, and a failed mold teaches you the exact pressure the material wants.
One useful trick: press a second master into the leftover putty. You will often get a usable second cavity for a smaller charm from the same mix.
Make a Pourable Silicone Mold
A pourable mold takes longer but produces a cleaner, longer-lasting cavity. Setup matters as much as the pour itself.
- Build a mold box at least ten millimetres larger than the master on every side. Foam board sealed with hot glue is ideal; interlocking bricks work if the seams are tight.
- Glue the master flat to the floor of the box. Use hot glue or double-sided tape. The flat face goes down, so the mold captures the domed top and the side walls.
- Check the clearance. You want six to ten millimetres of silicone on the sides and at least ten on top. Thin walls tear when you demold.
- Seal any porous master. Brush on mold release or soapy water and let it dry completely. Polymer clay and bare wood both need this step.
- Weigh part A and part B separately, then combine. Follow the ratio on the label by weight, not volume. A ten-to-one mix judged by eye will stay tacky.
- Stir slowly and steadily for the full time stated. Slow stirring keeps bubbles out; fast stirring whips air in. Scrape the bottom and corners of the cup.
- Pour in a thin, steady stream from one corner. Let the silicone run across the master rather than dropping onto it. A high pour traps air against the surface.
- Tap the box firmly on the table a dozen times. Bubbles rise to the top and pop. Some makers also drag a stick through the surface to break the foam.
- Cover the box and leave it level for the full cure. Six hours is a minimum for most products; twenty-four is safer in a cool room.
- Demold slowly. Peel the box walls away, then ease the silicone off the master by rolling the edges back. Pulling straight up stretches the cavity.
A good pourable mold comes off the master with a soft sucking sound and a clean, glossy cavity. If the surface looks dull or feels tacky, the mix ratio was off.
For a two-cavity earring mold, glue both masters down with a ten-millimetre gap and build the box around both. Measure the gap with a scrap of foam board rather than guessing.
Label the outside of the mold with a marker and the date. Silicone molds all look alike after a few months in a drawer.
Casting Resin in Your New Mold
Now the mold earns its keep. Small pours are less forgiving than large ones, so measure carefully and mix longer than feels necessary.
Use two cups and measure by volume for a two-part epoxy. Tiny batches are hard to weigh accurately; volume marks are easier to trust at ten millilitres.
Pour part A first, then part B, and scrape both cups clean. A few drops left behind change the ratio more than you would expect in a small batch.
Stir slowly for the full mixing time, scraping the sides and bottom. Then pour into a second cup and stir again. This double-cup method catches the unmixed film that clings to the first cup.
Let the mixed resin sit for a minute so bubbles can rise. Then pass a heat gun over the surface in quick sweeps, or breathe gently through a straw. Both pop surface bubbles without whipping new ones.
Pour slightly over the top of the cavity. Surface tension pulls the resin into a gentle dome, which saves sanding later. Underfilling leaves a shallow dish that needs a second pour.
Leave the mold level and covered while it cures. Dust ruins a glossy surface, and a draft can drag bubbles across the face.
Demold only after a full cure. Small pieces feel hard in three or four hours but are still soft inside. Twenty-four hours gives epoxy its final hardness and stops fingerprints pressing into the back.
If you are using UV resin, remember that it cures only where light reaches. A thick, opaque silicone mold blocks UV, so pour thin layers or use a clear mold.
Work in the order that suits your mold: deepest cavity first, then the shallow ones. By the time you finish the last pour, the first is already settling.
Keeping Molds Reusable
A platinum silicone mold will give you dozens of casts if you treat it gently. Cleaning takes a minute and doubles its working life.
Wash with warm water and a drop of dish soap. Rub the cavity with a fingertip, not a brush. Abrasion clouds the surface, and a cloudy surface transfers to every cast.
Rinse well and dry completely. Water trapped in a deep cavity leaves a dull patch and can interfere with the next pour. Stand the mold on edge to drain, then pat it dry with a lint-free cloth.
Store molds flat, cavity up, under a dust cover. A stack of molds left loose in a drawer collects grit, and grit becomes part of your resin surface.
Between uses, a whisper of talc helps release and absorbs surface tack. Brush out the excess with a soft brush. Too much talc leaves a chalky film on the finished piece.
Retire a mold when the edges tear, the cavity turns cloudy, or castings start coming out tacky. Torn edges leave fins, and cloudiness means the surface has broken down. Neither can be repaired.
Keep molds away from heat and direct sun. A mold stored on a windowsill will warp, and a warped mold casts a warped pendant.
Troubleshooting
Bubbles in the silicone
Bubbles come from fast stirring, a high pour, or a master with deep recesses. Stir slowly, pour from one corner in a thin stream, and tap the box. For a master full of fine detail, brush a thin coat of silicone onto it before pouring the rest.
The mold sticks to the master
Porous masters grab silicone. Seal polymer clay, wood, and 3D prints with release or soapy water and let them dry fully. A shiny metal charm usually needs nothing at all.
The mold tears on demold
Walls that are too thin tear. Keep at least six millimetres of silicone around the master and ten on top. Demold by peeling and rolling, never by pulling the master out sideways.
Resin stays tacky in the mold
This is cure inhibition, and the cause is usually the mold. Sulfur in plasticine or modelling clay blocks platinum cure, and so do some tin-cure silicones. Use sulfur-free clay, seal clay masters, and buy platinum-cure silicone meant for resin.
Inhibition from a 3D-printed master
Uncured resin and some print residues inhibit platinum silicone. Wash the print, cure it fully in sunlight or under a UV lamp, then seal it with primer or lacquer. Let the sealer dry for a full day.
The cavity seems to shrink
Silicone itself barely shrinks, but a stretched mold casts small. If pieces come out progressively smaller, the mold is being distorted during demold. Measure a casting with calipers before blaming the resin.
Design Ideas
Once one mold works, the shapes multiply quickly. These are the ones worth making first.
- Flat-back cabochons in oval, round, and cushion shapes. The most useful mold you will own, and the easiest to cast.
- Teardrop pendants with a domed face. A classic shape that suits dried flowers and pigment swirls.
- Earring pairs from one two-cavity mold. Two identical cavities give you a matched pair without guesswork.
- Dried flower inclusions. A shallow cavity lets you pour a clear base, set the flower, then cap it with a second layer.
- Bezel frames. Cast a thin ring and set a cabochon inside, or cast the frame and stone together in a two-part mold.
Keep a notebook of which cavity produced which piece. After ten molds the shapes blur together, and a label on the mold saves you a hunt.
Small shapes are the best teachers. A twenty-millimetre cabochon uses little resin, cures fast, and shows you every mistake cheaply.
Safety and Setup
Silicone and resin are both mild chemistry, and a few habits keep them that way.
Work in a ventilated room. An open window and a fan moving air across the workspace is enough for small pours; a garage or utility room is better for larger batches.
Wear nitrile gloves whenever you handle uncured silicone or resin. Latex gloves can interfere with platinum cure, so keep a box of nitrile on the shelf instead.
Wear eye protection when pouring and when using a heat gun. A stray drip of mixed resin stings, and a bubble popping near the surface can send a fleck.
Keep uncured silicone off your skin. If it touches you, wash with warm soapy water before it sets. Do not reach for solvent; soap and time work better.
Cure at room temperature, roughly twenty to twenty-four degrees Celsius. A cold room doubles cure time, and a hot room shortens working time and traps bubbles.
Keep all of this away from food surfaces. Use a dedicated cup, stick, and mat, and store them apart from kitchen equipment. Never use a food container for resin or silicone, even one you plan to wash afterwards.
Set up before you mix. Gloves on, mold box level, cover within reach, and nothing you need to fetch mid-pour.
Budget and Time Notes
The entry cost is smaller than most people expect. A starter putty kit runs about fifteen to twenty-five dollars and makes three to six small molds.
Pourable silicone costs more: a small kit is often thirty to fifty dollars, plus a scale if you do not already own one. That kit usually makes several molds.
A well-kept platinum mold gives twenty to fifty casts. Putty molds are softer and usually give ten to twenty before the edges soften.
Do the arithmetic once: a twenty-dollar putty kit that makes four molds, at fifteen casts each, is sixty pendants. That works out to about thirty-three cents of mold per piece.
Time is modest. A press mold is a twenty-minute job plus cure. A pourable mold is an hour of setup and pouring, then a day of waiting.
Budget for resin separately. Most beginners spend more on resin and pigment in the first month than on silicone all year.
Conclusion
Start with putty and one flat-backed charm. You will have a working mold before the kettle cools, and a cast pendant the next morning.
Then make the same shape three more times. That repetition is the real lesson: you learn how the resin flows, where bubbles collect, and how full to pour.
When the putty mold starts to fray, move to pourable silicone and a two-cavity box. Two cavities turn a single pendant into a pair of earrings, which is a satisfying next step.
Keep the first mold, even the lumpy one. It is a useful record of how much your hands have learned.