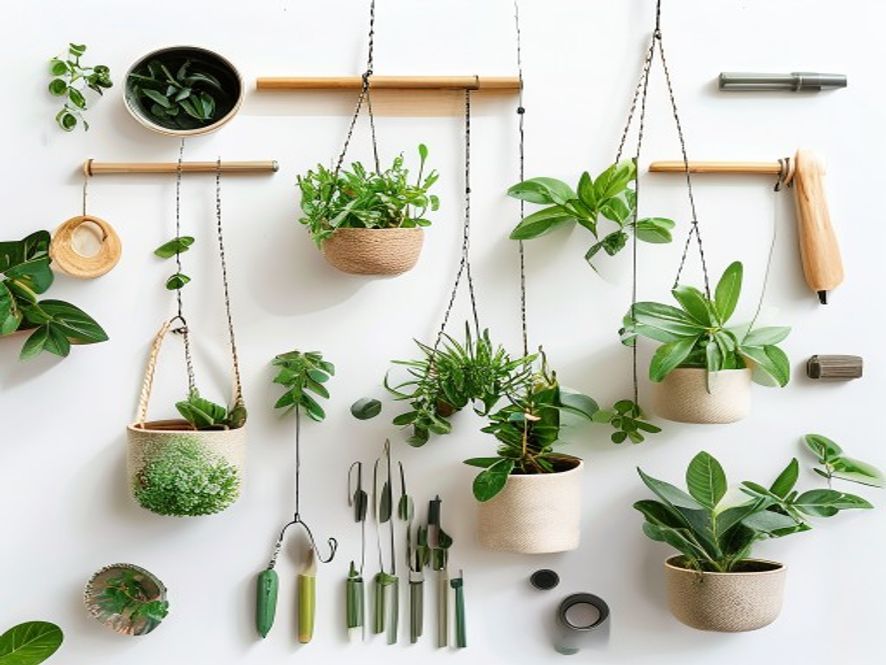
There is something utterly magical about plants that float. They catch the light differently, sway with the gentlest breeze, and transform empty air into a living garden. Whether you live in a tiny studio apartment or a sprawling house with vaulted ceilings, hanging planters offer the single most effective way to bring greenery into your life without sacrificing precious floor space. I have spent years experimenting with every imaginable hanging planter concept, and today I am sharing all twenty-one of my absolute favorites with you.
Each of these projects is designed to be approachable for beginners while still offering something fresh for seasoned makers. I have grouped them into five categories: macrame hangers for that timeless boho vibe, recycled containers that turn trash into treasure, wall-mounted designs that save even more space, shelf displays that create layered green scenes, and window gardens that quite literally frame your view in living color. Grab your scissors and your sense of adventure, because we are about to turn your home into a vertical paradise.
Group 1: Macrame Hangers
Macrame plant hangers are the gateway drug to hanging planter obsession. They are forgiving, customizable, and age beautifully. Once you learn the basic knots, the possibilities stretch out before you like an endless string of cotton cord.
1. Classic Macrame Plant Hanger
Materials: 4 strands of 3mm cotton macrame cord (each 3 metres long), a wooden ring (about 4 cm diameter), a small pot (10–15 cm), scissors, and a measuring tape.
This is the project that started it all for me. Cut your four strands and fold them in half through the wooden ring to create eight working cords. Using the gathering knot technique, wrap a short piece of cord around all eight strands just below the ring to create a neat top. Then separate the cords into four pairs and tie a simple square knot in each pair about 25 cm down. Bring the cords together from adjacent pairs and tie another row of square knots another 25 cm below. This creates the characteristic diamond webbing. Finish with a wrapping knot at the bottom, slide your pot into the cradle, and hang from a ceiling hook. The cotton softens with time and ages into a beautiful cream patina that only gets better as your plants grow.
2. Felt Planter Pouch
Materials: A sheet of stiff craft felt (about 25 cm by 30 cm, in any colour), a sewing needle and heavy-duty thread, a wooden dowel (30 cm), 2 grommets and a grommet tool, scissors, a small plastic pot with drainage holes, potting soil, a small plant like a fern or peperomia.
Felt is one of the most forgiving materials for a beginner sewer to work with, and a felt planter pouch can be customized to any size or shape you desire. Fold your felt sheet in half to create a rectangle about 25 cm tall and 15 cm wide. Sew along the bottom and one side, leaving the top open. Turn the pouch inside out so the seams are hidden, and fold the top edge over to create a neat hem. Install two grommets near the top corners, thread the wooden dowel through them, and mount the dowel on the wall. Insert a small plastic pot with drainage holes into the felt pouch. The felt itself acts as a decorative sleeve that softens the hard lines of the plastic pot and adds a cozy, textile warmth to your wall. Choose felt in jewel tones like deep emerald, mustard yellow, or rust orange to complement your plant's foliage. Felt is also thick enough to provide a small amount of insulation for the roots, buffering them against temperature swings near a window. Make multiple pouches in different colours and mount them in a row for a cheerful, modular living wall that you can rearrange whenever the mood strikes.
3. Feather-and-Bead Macrame Hanger
Materials: 4 strands of 3mm macrame cord (3 metres each), assorted wooden beads (6–8 mm hole), a wooden ring, a small pot, scissors.
Thread wooden beads onto the outer cords before tying your knots, and let several strands hang loose below the pot to create feather-like fringe. The contrast between the structured knots above the pot and the loose, flowing fringe below is pure poetry. This is the hanger that my friends always ask about when they visit: the one that looks like it came from a boutique but actually costs about three dollars in materials. Add a drop of cinnamon essential oil to the wooden beads to naturally deter gnats.
Group 2: Recycled Containers
Some of the most stunning hanging planters begin their lives as something entirely mundane. The thrill of transformation is what makes recycled container planters so addictive. You will never look at a soup can the same way again.
4. Tin Can Planter Trio
Materials: 3 clean tin cans (same size or graduated), spray paint in your choice of colours, 3 small eye hooks, 3 lengths of chain or twine (about 60 cm each), a hammer and nail, potting soil, small succulents or herbs.
Remove the labels from your cans and wash them thoroughly. Hammer a nail through the bottom of each can to create drainage holes. Spray paint the exteriors in colours that complement each other: muted sage, ochre, and terracotta work beautifully together. Screw an eye hook into the rim of each can, thread your chain or twine through it, and hang at staggered heights from a single ceiling hook or horizontal wooden dowel. Plant with trailing herbs like creeping thyme or small succulents such as graptopetalum. The metallic sheen peeking through the paint gives these a subtle industrial edge that pairs perfectly with the softness of the plants.
5. Mason Jar Herb Garden
Materials: 4 wide-mouth mason jars, thin rope or jute twine (about 1 metre per jar), leather cord or ribbon for wrapping, small pebbles, activated charcoal, potting soil, herb seedlings (basil, mint, chives).
Mason jars are the little black dress of the crafting world: they work for everything. For hanging planters, the key is drainage. Layer small pebbles at the bottom of each jar, followed by a thin sprinkle of activated charcoal to keep water from stagnating. Add potting soil and your herb seedling, then tie a secure rope handle around the neck of the jar. Use a simple cow hitch knot to attach the rope, and wrap the neck with leather cord or ribbon for a polished finish. Hang these in your kitchen window and snip fresh herbs into your cooking all year round. The roots growing against the glass create a fascinating underground landscape that children especially love to watch.
6. Vintage Teacup Hanging Planter
Materials: A vintage teacup and saucer (thrift stores are perfect for this), a porcelain drill bit, thin chain or sturdy wire, 3 small screw eyes, a hook for hanging, potting soil, a small succulent or air plant.
This is the project that makes you feel like you live in a fairy tale. Drill a small hole in the bottom of your teacup using a porcelain drill bit and plenty of water to keep the ceramic cool. Attach three small screw eyes to the rim of the saucer (or to the teacup handle and two opposite points on the rim). Thread chains through the screw eyes and join them at the top with a single ring. Place a small succulent or air plant in the teacup. The contrast between delicate porcelain and living green is nothing short of enchanting. Use teacups with floral patterns for an extra layer of whimsy, or stark white for a minimalist look.
7. Wine Bottle Self-Watering Planter
Materials: An empty wine bottle (green glass works best), a glass cutter or diamond-tipped drill bit, sandpaper, cotton wick or thick wool yarn, a leather strap or wire hanger, potting soil, a small trailing plant like pothos or philodendron.
Cut your wine bottle in half using a glass cutter: score a line about a third of the way up from the bottom, then alternate hot and cold water to separate the halves. Sand the cut edges thoroughly. Fill the bottom half with water. Thread a cotton wick through the neck of the top half so one end rests in the soil of the inverted bottle top and the other dangles into the water below. Attach a leather strap around the neck to hang it. The self-watering mechanism means your pothos stays hydrated for up to two weeks, making this ideal for frequent travellers or serial plant neglecters like myself before I learned better habits.
8. Woven Basket Wall Pocket
Materials: A small woven basket (15–20 cm diameter), a length of sturdy jute rope, a wooden dowel or branch, a hot glue gun, a plastic liner or coco coir, potting soil, a fern or spider plant.
Line your basket with plastic sheeting or a coco coir mat, then add potting soil. Attach the basket to a wooden dowel or branch using jute rope wrapped around the handle and secured with hot glue. Hang the dowel from two hooks on the wall so the basket sits flush against the surface. The woven texture of the basket echoes the natural fibres of the rope, creating a cohesive earthy look. Ferns absolutely thrive in baskets because of the excellent air circulation around their roots. Mist the fronds daily if your home has dry air, and watch your fern unfurl new growth in that perfect spiral that never gets old.
Group 3: Wall-Mounted Planters
When floor space is at a premium and you still crave a lush interior landscape, the walls themselves become your garden beds. These designs turn vertical surfaces into living art.
9. Leather Pocket Planter Holder
Materials: A piece of vegetable-tanned leather (about 20 cm by 25 cm), a leather punch or sharp awl, waxed thread and a leather needle, a brass rivet kit, a wooden dowel (30 cm), two brass screws and wall anchors, potting soil, succulents or a small fern.
This DIY leather holder ages like fine wine, and a leather pocket planter holder is one of the most beautiful and durable wall-mounted options you can make. Cut your leather into a rectangle and fold the bottom up about 8 cm to form a pocket. Punch holes along the sides and stitch them together with waxed thread using a simple saddle stitch. Add brass rivets at stress points for extra stability. Fold the top edge over your wooden dowel and punch two holes for the dowel to pass through, then mount the dowel on your wall using brass screws. The warm brown tones of the leather complement nearly any plant, but I especially love the contrast with the silvery-green of echeveria or the deep burgundy of oxalis. Over time, the leather develops a rich patina that tells the story of every splash of water and every ray of sun.
10. Rope Shelf Planter
Materials: 2 wooden boards (about 30 cm by 12 cm each), 2 lengths of thick cotton rope (about 3 metres each), 4 large wooden beads, a drill with a 12 mm bit, potting soil, small pots or directly planted succulents.
Drill two holes through each wooden board about 5 cm from each end. Thread each rope length through both holes in one board, then tie a large knot beneath it to secure. Thread wooden beads onto the ropes above the first board, then slide the second board down the ropes and tie knots beneath it as well. Adjust the spacing so the two shelves sit about 40 cm apart. Hang the rope ends over a sturdy ceiling hook or beam. Arrange small pots on each shelf: a cascading ivy on the top shelf, a compact snake plant on the bottom. The visual lightness of the rope contrasts beautifully with the solidity of the wood, creating a design that feels both rustic and refined.
11. Wooden Crate Wall Garden
Materials: 2–3 small wooden crates or fruit boxes, sandpaper, wood stain or paint, L-brackets and screws, a drill, potting soil, a mix of trailing and upright plants.
Sand your crates well to prevent splinters, then stain or paint them in a colour that complements your wall. Mount each crate to the wall using heavy-duty L-brackets: stagger them vertically or arrange them in a cluster for a more organic look. Line the crates with plastic sheeting if you want to protect your walls, then add potting soil and your chosen plants. The shallow depth of crates makes them perfect for plants with compact root systems like peperomia, pilea, and small philodendrons. Leave one trail of string of hearts to spill over the front edge of the lowest crate. The layered effect of wood grain and green foliage is deeply satisfying and surprisingly easy to achieve.
12. Glass Terrarium Orb
Materials: A glass orb or large glass bauble with an opening (available at craft stores), activated charcoal, small pebbles, sphagnum moss, potting soil, miniature ferns, mosses, and fittonia, a macrame cradle or metal stand for hanging.
Terrariums are entire ecosystems sealed within glass, and hanging terrariums take that magic and suspend it in mid-air. Layer pebbles at the base, add a thin layer of charcoal for filtration, then a layer of sphagnum moss to prevent soil from sinking into the pebbles. Add potting soil and arrange your miniature plants with tweezers, leaving space between each one for growth. Mist the interior lightly and place the orb in bright indirect light. The glass amplifies the light and creates a greenhouse effect that tropical ferns adore. Watching condensation form and evaporate inside the orb is meditative and addictive. I keep one hanging in my bathroom window and it thrives on the humidity from my showers.
13. Fabric Sleeve Hanging Planter
Materials: A piece of sturdy fabric (cotton canvas or linen, about 30 cm by 40 cm), sewing thread, a sewing machine or needle, a wooden dowel (35 cm), grommets and a grommet tool, two wall hooks, potting soil, a small potted plant that fits inside the sleeve.
Fold your fabric in half widthwise and sew along the sides to create a pouch. Hem the top edge and install two grommets near the top corners. Slide the wooden dowel through the hem or through the grommets. Mount the dowel on the wall with two hooks. Insert a small potted plant into the fabric pouch; the pot catches the water while the fabric sleeve adds a soft, textile warmth to your wall. Choose fabrics with geometric patterns or botanical prints to echo the plant itself. The sleeve is removable and washable, which makes it one of the most practical options in this list. Swap out fabric sleeves seasonally for an instant decor update.
14. Plastic Bottle Vertical Garden
Materials: 2-litre plastic soda bottles (2–3 bottles), a utility knife, acrylic paint or spray paint, twine or wire, a hot glue gun, potting soil, small herbs or succulents.
Cut an oval opening in the side of each bottle, leaving the cap end intact. Paint the bottles in cheerful colours or leave them clear for a more industrial look. Punch two holes near the top and two near the bottom of each bottle. String twine or wire through the holes to connect the bottles vertically, spaced about 15 cm apart. Fill each bottle with potting soil through the oval opening and plant a small herb or succulent in each. Hang from a hook in a sunny window. The transparency of clear bottles lets you monitor root growth and soil moisture at a glance. This is the budget champion of the list: total cost is essentially zero if you drink soda, and the result is genuinely charming.
15. Copper Pipe Geometric Planter
Materials: 6 lengths of 1.2 cm copper pipe (cut to equal lengths, about 15 cm each), 8 elbow joints, 4 T-joints, pipe cutter, epoxy glue or soldering kit, thin chain (4 pieces, about 40 cm each), a small pot or glass cup, a plant.
Copper brings an undeniable sophistication to any plant display. Assemble the pipes into a cube or tetrahedron shape using the elbow and T-joints. Glue or solder all connections for stability. Attach four chains to the top corners of the geometric shape and join them at a single hanging ring. Place a small pot or a glass cup inside the centre of the copper frame. The warm metallic glow of the copper contrasts beautifully with the cool green of a cascading plant like string of hearts or a compact aloe. Over time, the copper will patina to a soft verdigris, adding even more character. This planter takes about an hour to assemble but looks like it came from a high-end design studio.
Group 4: Shelf Displays
Shelf displays bridge the gap between floor plants and wall-mounted designs. They create opportunities for layering plants at different heights and mixing planters of different styles in one cohesive composition.
16. Embroidery Hoop Plant Hanger
Materials: A wooden embroidery hoop (15–20 cm diameter), cotton string or thin macrame cord, scissors, a small pot, a trailing plant like pothos or ivy.
The embroidery hoop is one of my favourite secret weapons in the hanging planter world. Remove the inner ring and tie three lengths of string to the outer hoop at equidistant points. Join the strings at the top with a knot. Replace the inner ring to lock the strings in place. Place a small pot inside the hoop so the rim of the pot sits on the wood, and let the trailing plant spill over the edges. The simplicity of this design is its strength: the circular frame draws attention to the plant's natural form without competing for it. Use stained wooden hoops for warmth or paint them bright colours for a playful pop. Multiple hoops at different heights create a beautiful floating garden effect.
17. Over-the-Door Shoe Organizer Planter
Materials: A fabric over-the-door shoe organizer with clear or mesh pockets, scissors (to cut drainage holes), potting soil, small plants (succulents, small ferns, air plants, herbs), a sturdy over-the-door hook.
This is the ultimate space-maximizing hack. Use scissors to cut a small drainage slit at the bottom of each pocket. Fill each pocket with potting soil and plant a different small plant in each. Hang the organizer over a door that gets good indirect light — a southern-facing door is ideal. The vertical array of pockets creates a living tapestry that changes and grows over time. Mix trailing plants at the top so they cascade downward, upright plants in the middle, and compact rosette succulents at the bottom. Spray the entire thing with a misting bottle once a week. An over-the-door planter can hold twenty or more small plants in the space of a single square foot of floor area.
18. Ladder Shelf Plant Display
Materials: An old wooden ladder (or a new unfinished one from a hardware store), sandpaper, wood stain or paint, small pots or a mix of hanging planters, S-hooks, a ceiling hook or wall brackets.
A ladder is a shelf, a trellis, and a statement piece all in one. Sand the ladder thoroughly and apply stain or paint. Lean the ladder against a wall or mount it securely to the ceiling with brackets. Drape hanging planters from the rungs using S-hooks, and place potted plants directly on the wider steps. The triangular silhouette of a ladder draws the eye upward and makes ceilings feel taller. Arrange plants by light preference: sun-lovers like succulents on upper rungs, shade-tolerant ferns and pothos on lower rungs. The ladder itself becomes a vertical timeline of your growing collection, each rung a chapter in your plant journey.
19. Pegboard Living Wall
Materials: A pegboard panel (any size), pegboard hooks and shelves, spray paint (optional), small pots with drainage holes, a variety of small indoor plants, wall anchors and screws.
Pegboards are not just for tools. Paint your pegboard a dark colour like charcoal or forest green to make the plants pop. Mount it on the wall using wall anchors. Arrange pegboard hooks and small shelves in a pattern that suits your plants: hooks for hanging pots, shelves for compact plants that prefer to sit level. The beauty of this system is its flexibility: you can rearrange the entire configuration in minutes as your plants grow or as your aesthetic preferences evolve. Group plants with similar watering needs together to simplify your care routine. A pegboard living wall is endlessly customizable and surprisingly forgiving of mistakes — just move the hooks and try again.
Group 5: Window Gardens
Windows are nature's picture frames. Hanging planters in and around windows turn the everyday act of looking outside into a layered experience of interior and exterior beauty.
20. Picture Frame Shadowbox Planter
Materials: A deep wooden picture frame (at least 5 cm deep), a piece of plywood cut to fit the back, a staple gun, landscape fabric or plastic sheeting, potting soil, a small drill, S-hooks or chain, small succulents or air plants.
Remove the glass from your picture frame and attach the plywood back with hinges or screws so you can open it for planting. Staple landscape fabric across the interior to create a soil pocket. Fill with potting soil and plant small succulents through slits cut in the fabric. Allow the plants to establish for two weeks before hanging the frame on the wall. The frame acts as a living painting: from a distance it looks like a piece of art, but up close it reveals the intricate textures and colours of living plants. Use a frame with an ornate gold finish for a dramatic Victorian aesthetic, or a sleek black frame for a modern gallery feel.
21. Coconut Shell Planter
Materials: A coconut, a hacksaw, a drill, sandpaper, thin rope or macrame cord, potting soil, a small succulent or orchid, activated charcoal.
Cut a coconut in half with a hacksaw and drain the milk. Scrape out the meat (make coconut chips with it!). Sand the edges of the shell until smooth. Drill three small holes near the cut edge of one half, spaced evenly apart. Thread rope through the holes and knot them securely. Fill the bottom of the shell with a thin layer of activated charcoal for drainage, then add orchid bark or well-draining potting soil. Plant a small orchid or succulent in the shell. The rough, organic texture of the coconut contrasts wonderfully with the refined beauty of an orchid bloom. This planter embodies the principle that the most beautiful containers are often the ones nature provides.
Care Tips for Your Hanging Indoor Plants
A beautiful planter is only as successful as the plant it holds, and keeping hanging plants thriving requires a slightly different approach than their floor-dwelling cousins. Here is everything I have learned about caring for plants that live in the air.
Watering. Hanging planters dry out faster than pots on the ground because warm air rises and circulates around them more freely. Check soil moisture every two to three days by sticking your finger about two centimetres into the soil. If it feels dry, water thoroughly until water runs out of the drainage holes. For planters without drainage holes (like mason jars and wine bottles), water sparingly: about a quarter of the volume of the container every week, and watch for signs of overwatering like yellowing leaves.
Light. Most hanging plants thrive in bright, indirect light — the kind you get from an east-facing window or a few feet back from a south-facing one. Rotate your hanging planters a quarter turn every week so all sides receive equal light. Plants that lean dramatically toward the window are telling you they need more light. Trailing plants like pothos and philodendron are more forgiving of low light than succulents, so match your plant choices to the light levels in each specific hanging location.
Humidity. Hanging plants often sit higher in the room where air is drier. Group multiple hanging planters together to create a microclimate with higher humidity. Mist your plants daily with a fine spray bottle, especially during winter when indoor heating dries the air. For tropical plants like ferns and fittonia, place a small tray of water with pebbles beneath the hanging planter to increase ambient humidity. If your home has particularly dry air, consider adding a small humidifier to the room where you keep most of your hanging plants.
Fertilising. Because hanging planters are watered more frequently (and water carries nutrients out of the soil), they benefit from more regular feeding. Use a balanced liquid fertiliser diluted to half strength every two weeks during the growing season (spring through early autumn). Reduce to once a month in winter when most plants are resting. For succulents and cacti, use a specialised succulent fertiliser and feed only during the growing season. Watch for signs of over-fertilisation: leaf tip burn, slowed growth, or white salt deposits on the soil surface.
Grooming. Prune your hanging plants regularly to keep them full and bushy. Trim back leggy growth to just above a leaf node, and the plant will respond by branching out from that point. Remove yellow or dead leaves promptly to prevent disease and keep the plant looking its best. For trailing plants, periodically untangle the vines and guide them over the edge of the pot in the direction you want them to grow. A well-groomed hanging plant is a joy to behold; a neglected one becomes a sad tangle of bare stems.
Pest Management. Hanging plants are slightly less prone to pests than ground plants, but they are not immune. Inspect the undersides of leaves every time you water. If you spot spider mites (tiny webs and stippled leaves), isolate the plant and wipe down each leaf with neem oil solution. For mealybugs (cottony white clusters), dab them with a cotton swab dipped in rubbing alcohol. Fungus gnats are the most common pest for hanging planters: let the soil dry more between waterings and add a layer of sand or small pebbles on top of the soil to prevent the gnats from laying eggs.
Seasonal Adjustments. As seasons change, so should your care routine. In winter, reduce watering frequency and move plants away from cold draughty windows at night. In summer, you may need to water every other day and protect plants from harsh midday sun that can scorch leaves through a window. Spring is the perfect time to repot plants that have outgrown their hanging containers: trim the roots slightly, refresh the soil, and give them a slightly larger pot to grow into. Autumn is the time to bring in any hanging plants that spent the summer outdoors and to clean leaves with a damp cloth before indoor heating dries them out.
Final Thoughts: Your Vertical Garden Awaits
Hanging planters are more than a trend. They are a fundamental shift in how we think about indoor gardening. By lifting plants off the floor and into the air, we create breathing room in our homes, we draw the eye upward to appreciate the full volume of a room, and we invite greenery into spaces that previously felt empty and sterile. Each of the twenty-one projects in this guide offers a different way to achieve that transformation, from the simplest macrame knot to the most intricate copper pipe geometry.
Start with the project that speaks to you most. Maybe it is the teacup planter that reminds you of your grandmother's china cabinet, or the coconut shell that brings a tropical whisper into your living room, or the pegboard wall that promises endless reconfigurability. Whatever you choose, do not aim for perfection. The beauty of handmade hanging planters lies in their imperfections: the knot that is slightly off-centre, the paint drip that caught the light just right, the plant that grew in an unexpected direction. These are the marks of your hands at work.
I have been making hanging planters for years, and I still learn something new with every project. A new knot. A clever watering hack. A plant combination I had never considered. The hanging planter community is generous with its knowledge, and every maker brings their own twist to these foundational ideas. Take these twenty-one concepts and make them your own. Swap materials. Mix categories. Invent something that has never been made before.
Your plants will thank you for the elevation. And every time you walk into a room and catch sight of your green creations suspended in the air, you will feel that quiet thrill of having made something beautiful with your own two hands.
Now go find something to hang. The sky is the limit.